The Uspacy integration with Monobank helps streamline payment processing and reduce the number of manual tasks in daily client operations. With this integration, you can create payments directly in Uspacy, generate payment links, and quickly send them to clients for payment.
Once a payment is completed, the status is automatically updated in the Space, so your team no longer needs to manually verify incoming payments or follow up to confirm whether a client has already paid. If the payment link expires before the payment is completed, the system will also record this with the appropriate status.
This solution is especially useful for teams that want to issue payments faster, maintain better control over transactions, and keep all payment statuses visible in a single workspace.
To start working with payments via monobank, you first need to connect the integration and complete the basic setup. Below, we’ll walk you through the process and highlight important details to keep in mind.
So, let’s go step by step ⬇️
Connection
Preparation steps
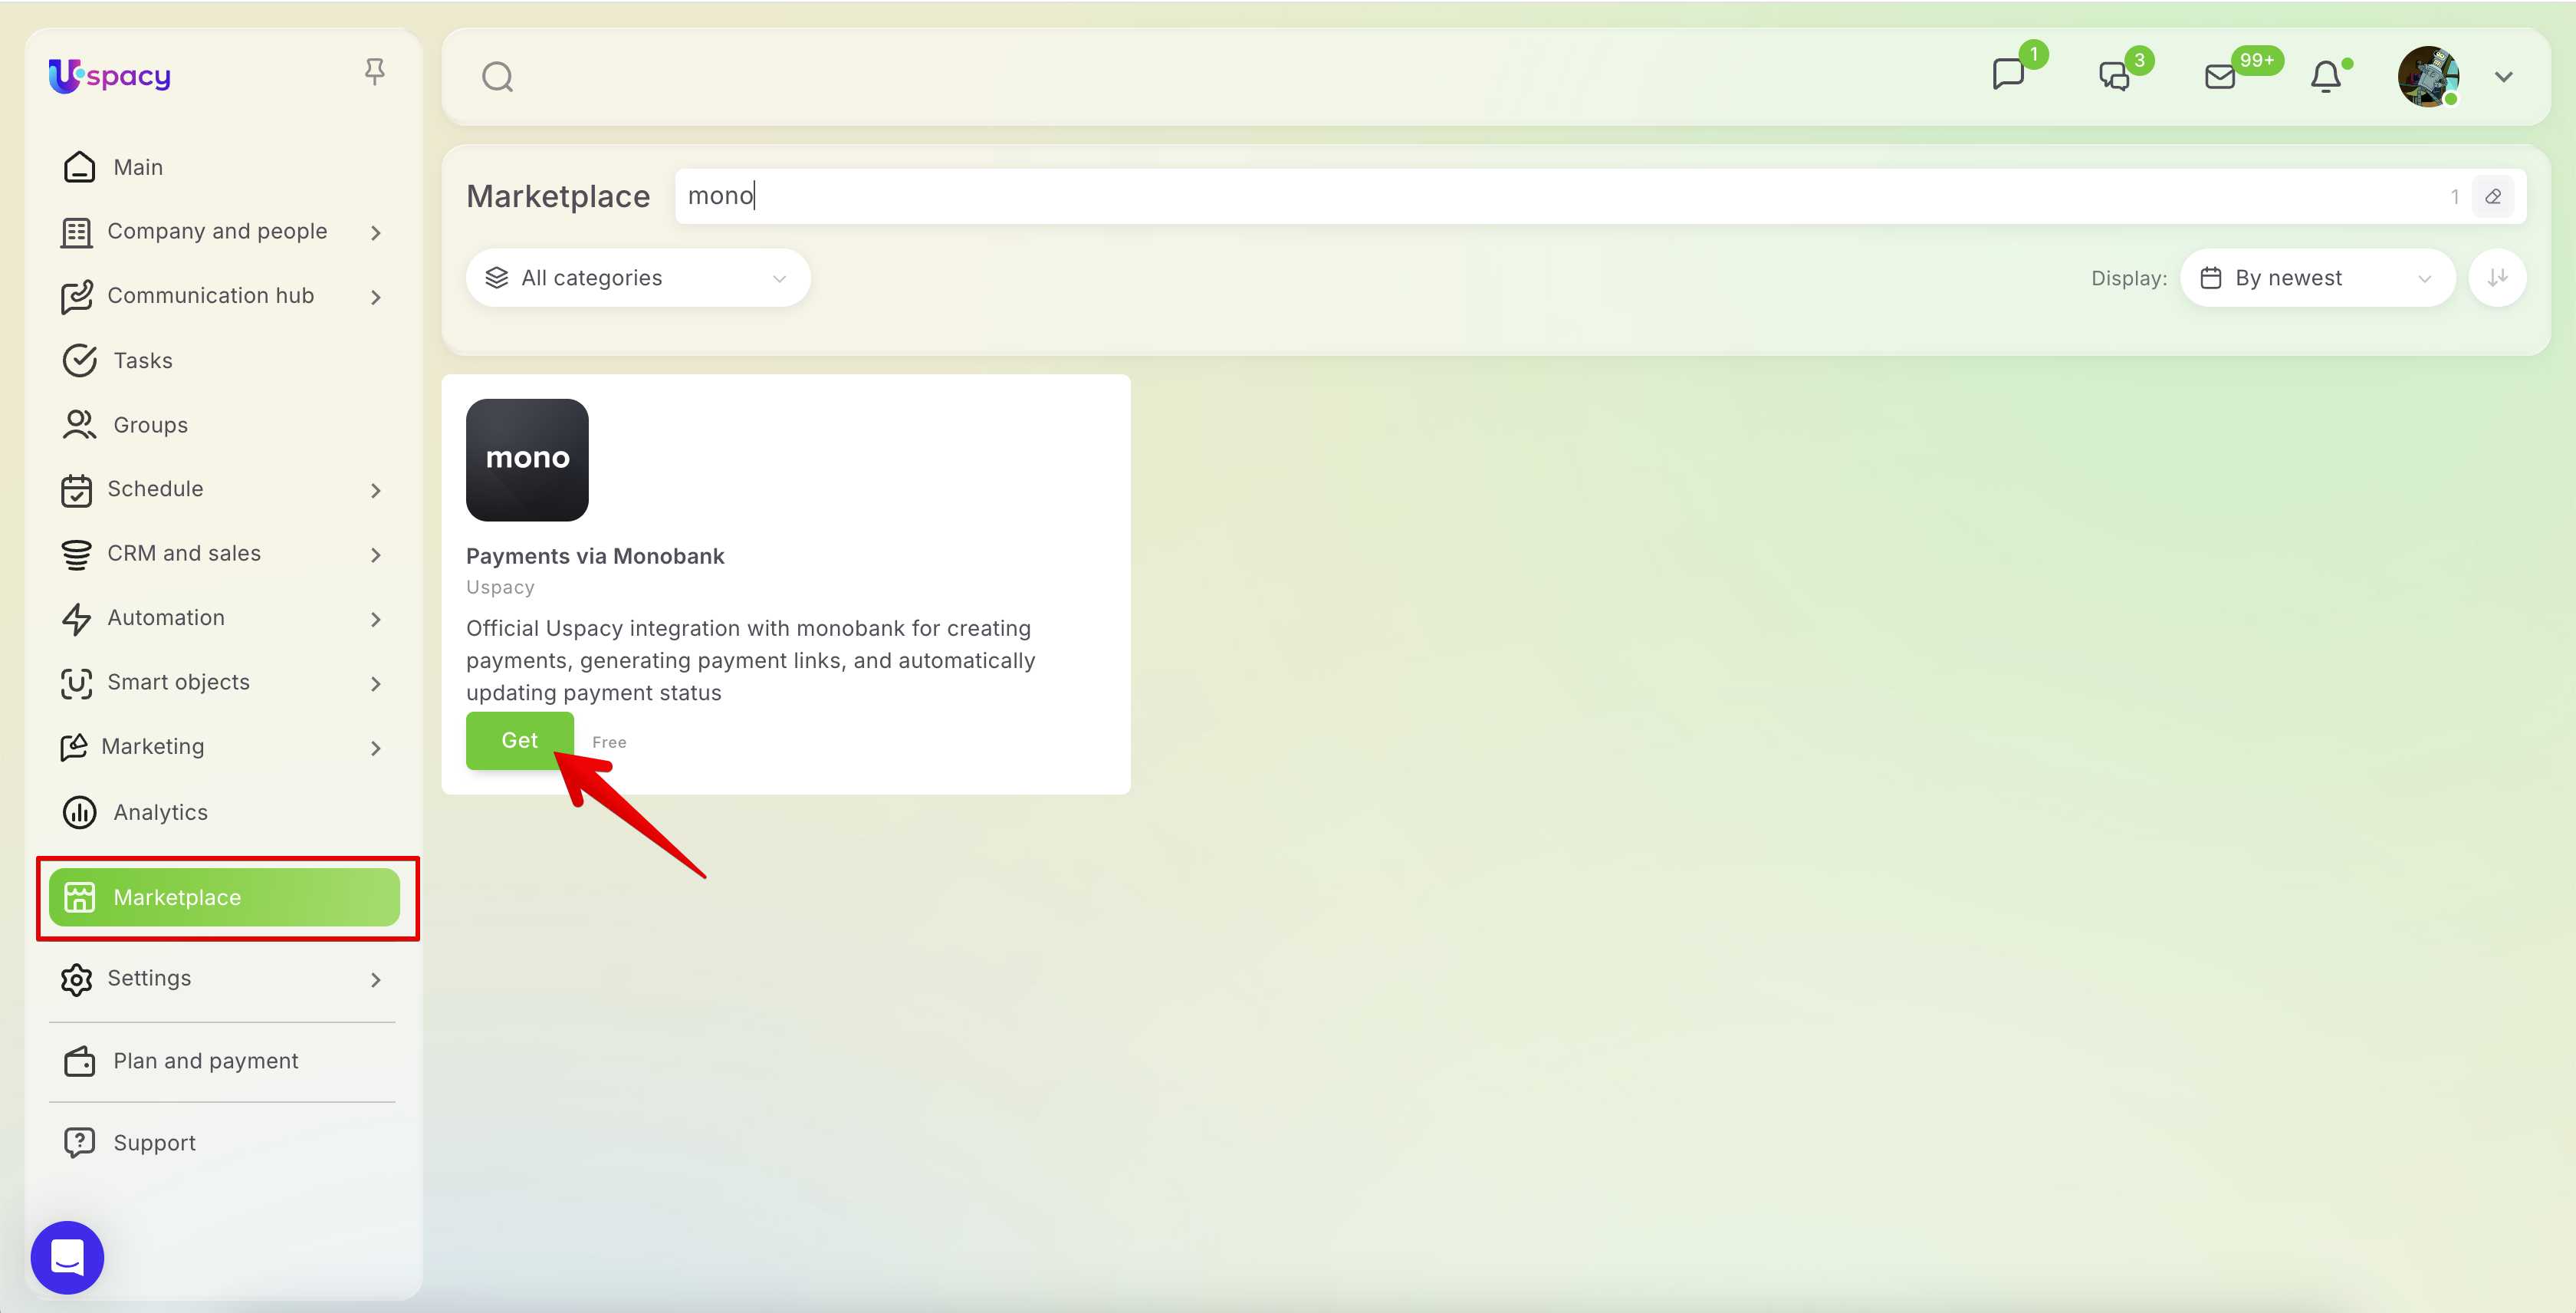
First, you need to install the free monobank integration app in your Space. To do this, go to the Marketplace section and click the Get button.
🌟 Please note that only users on commercial subscription plans can install the app. This feature is not available on the free plan.
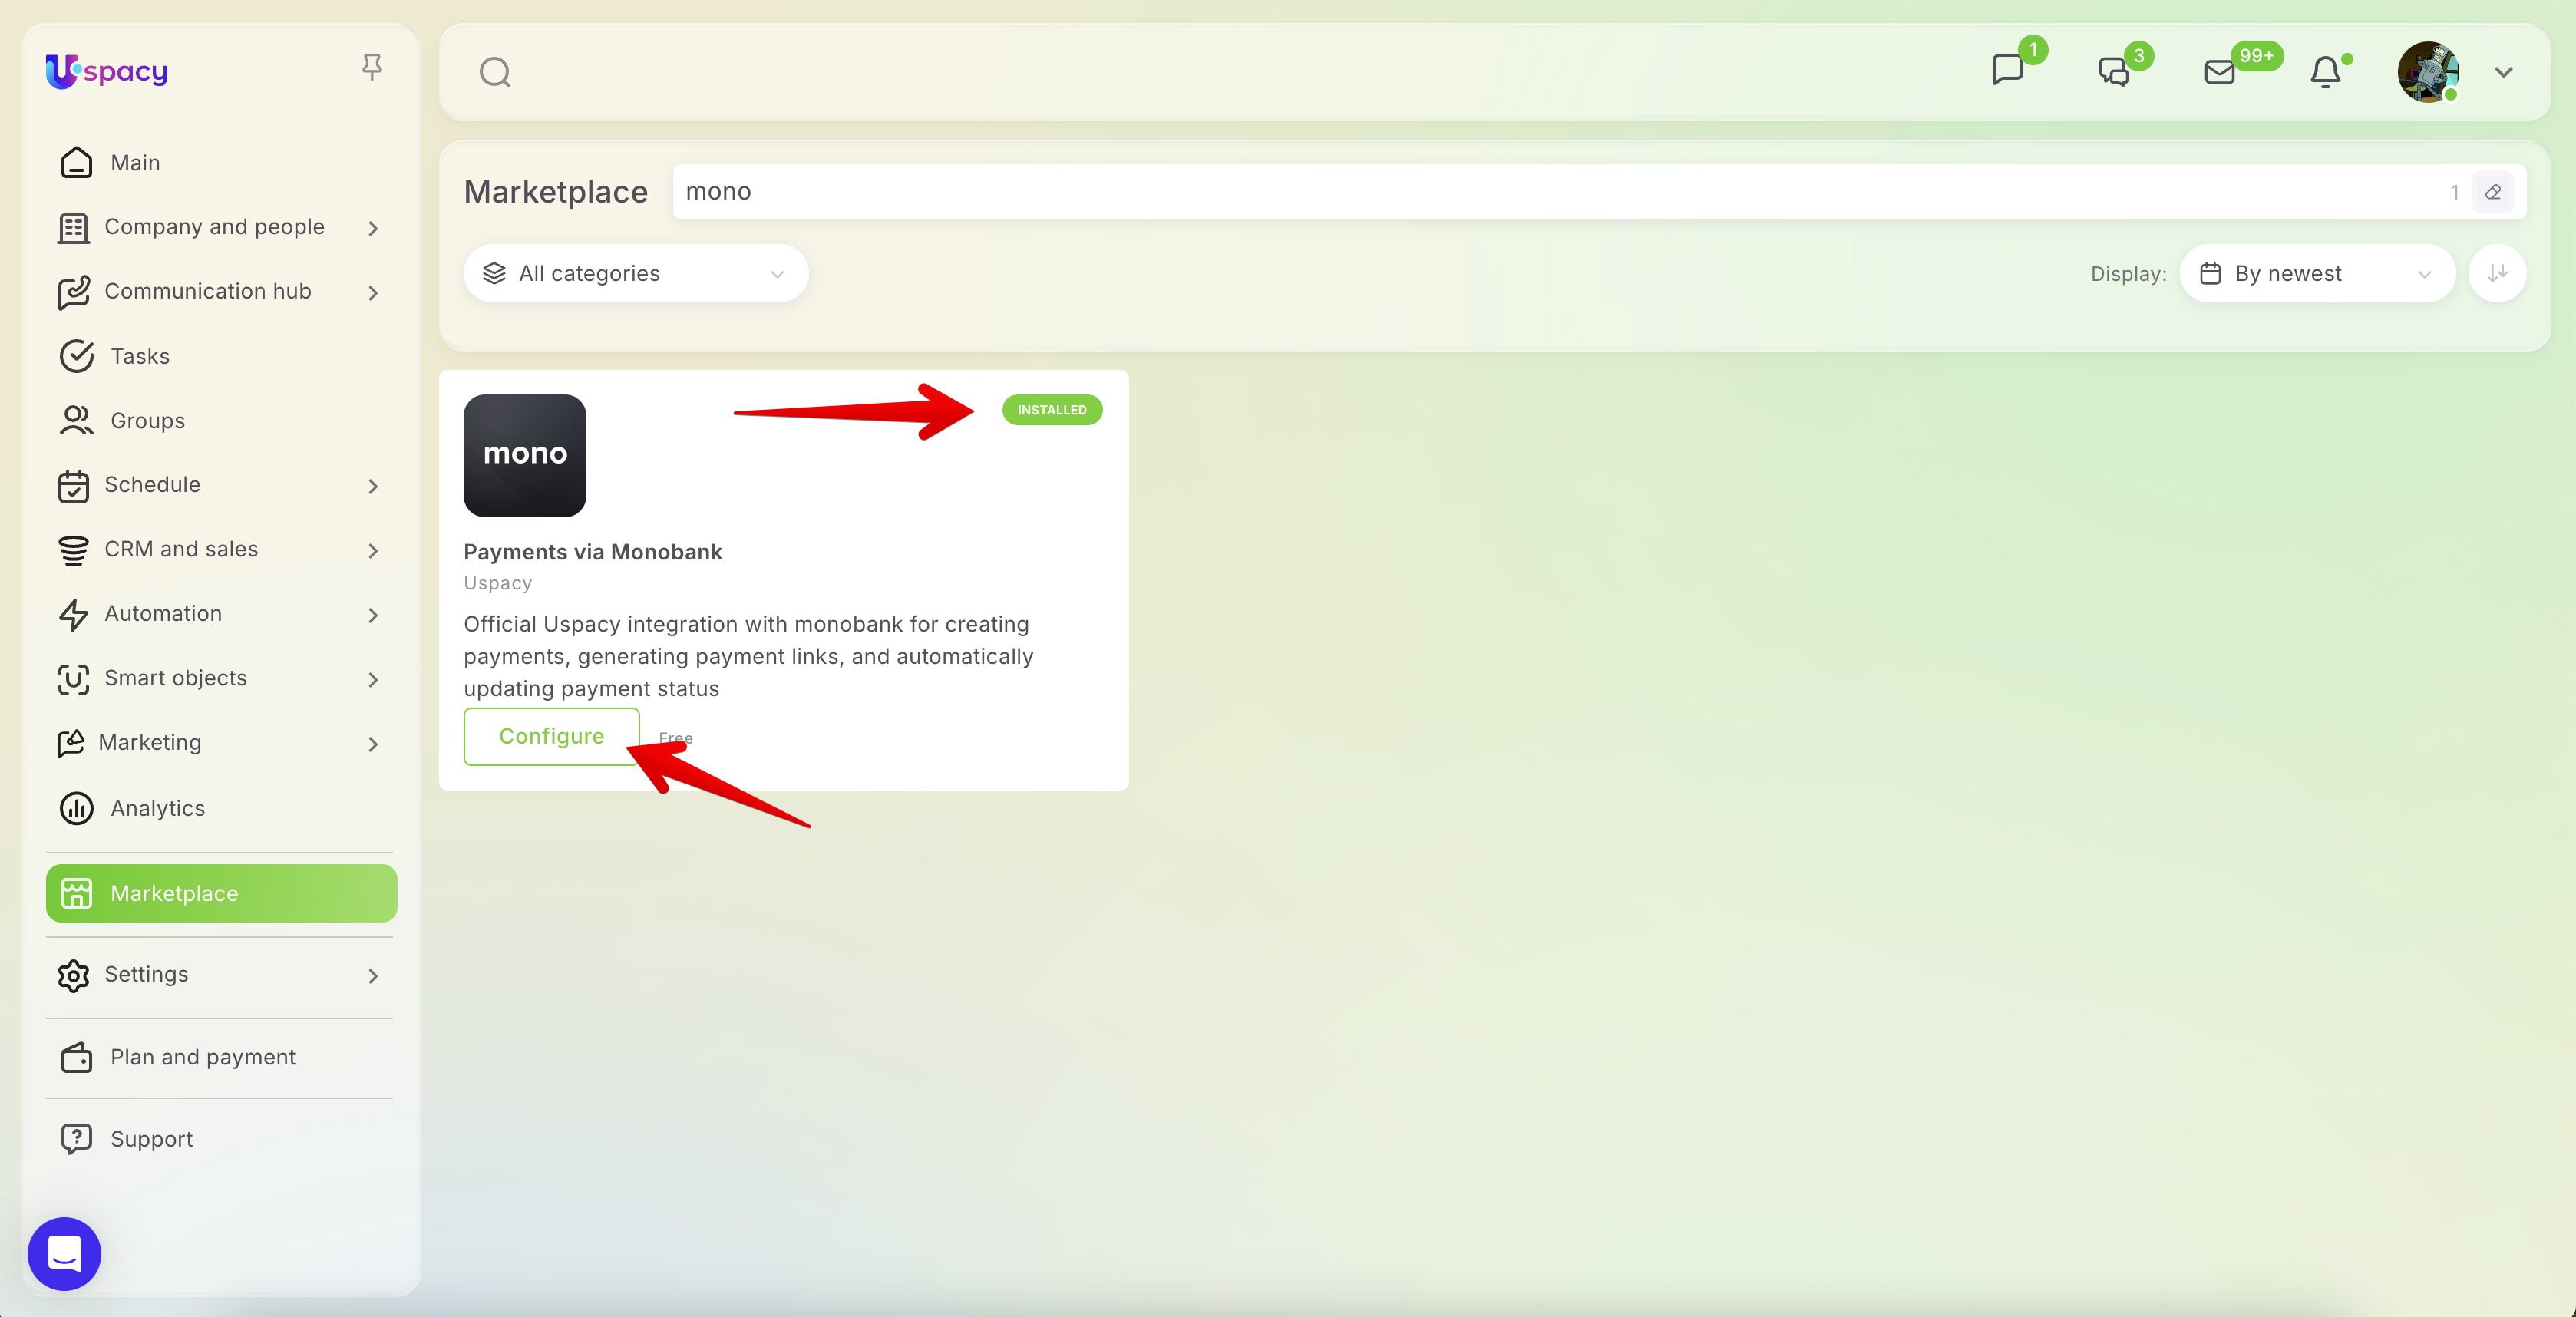
Once the app is installed, open its settings.
Monobank settings
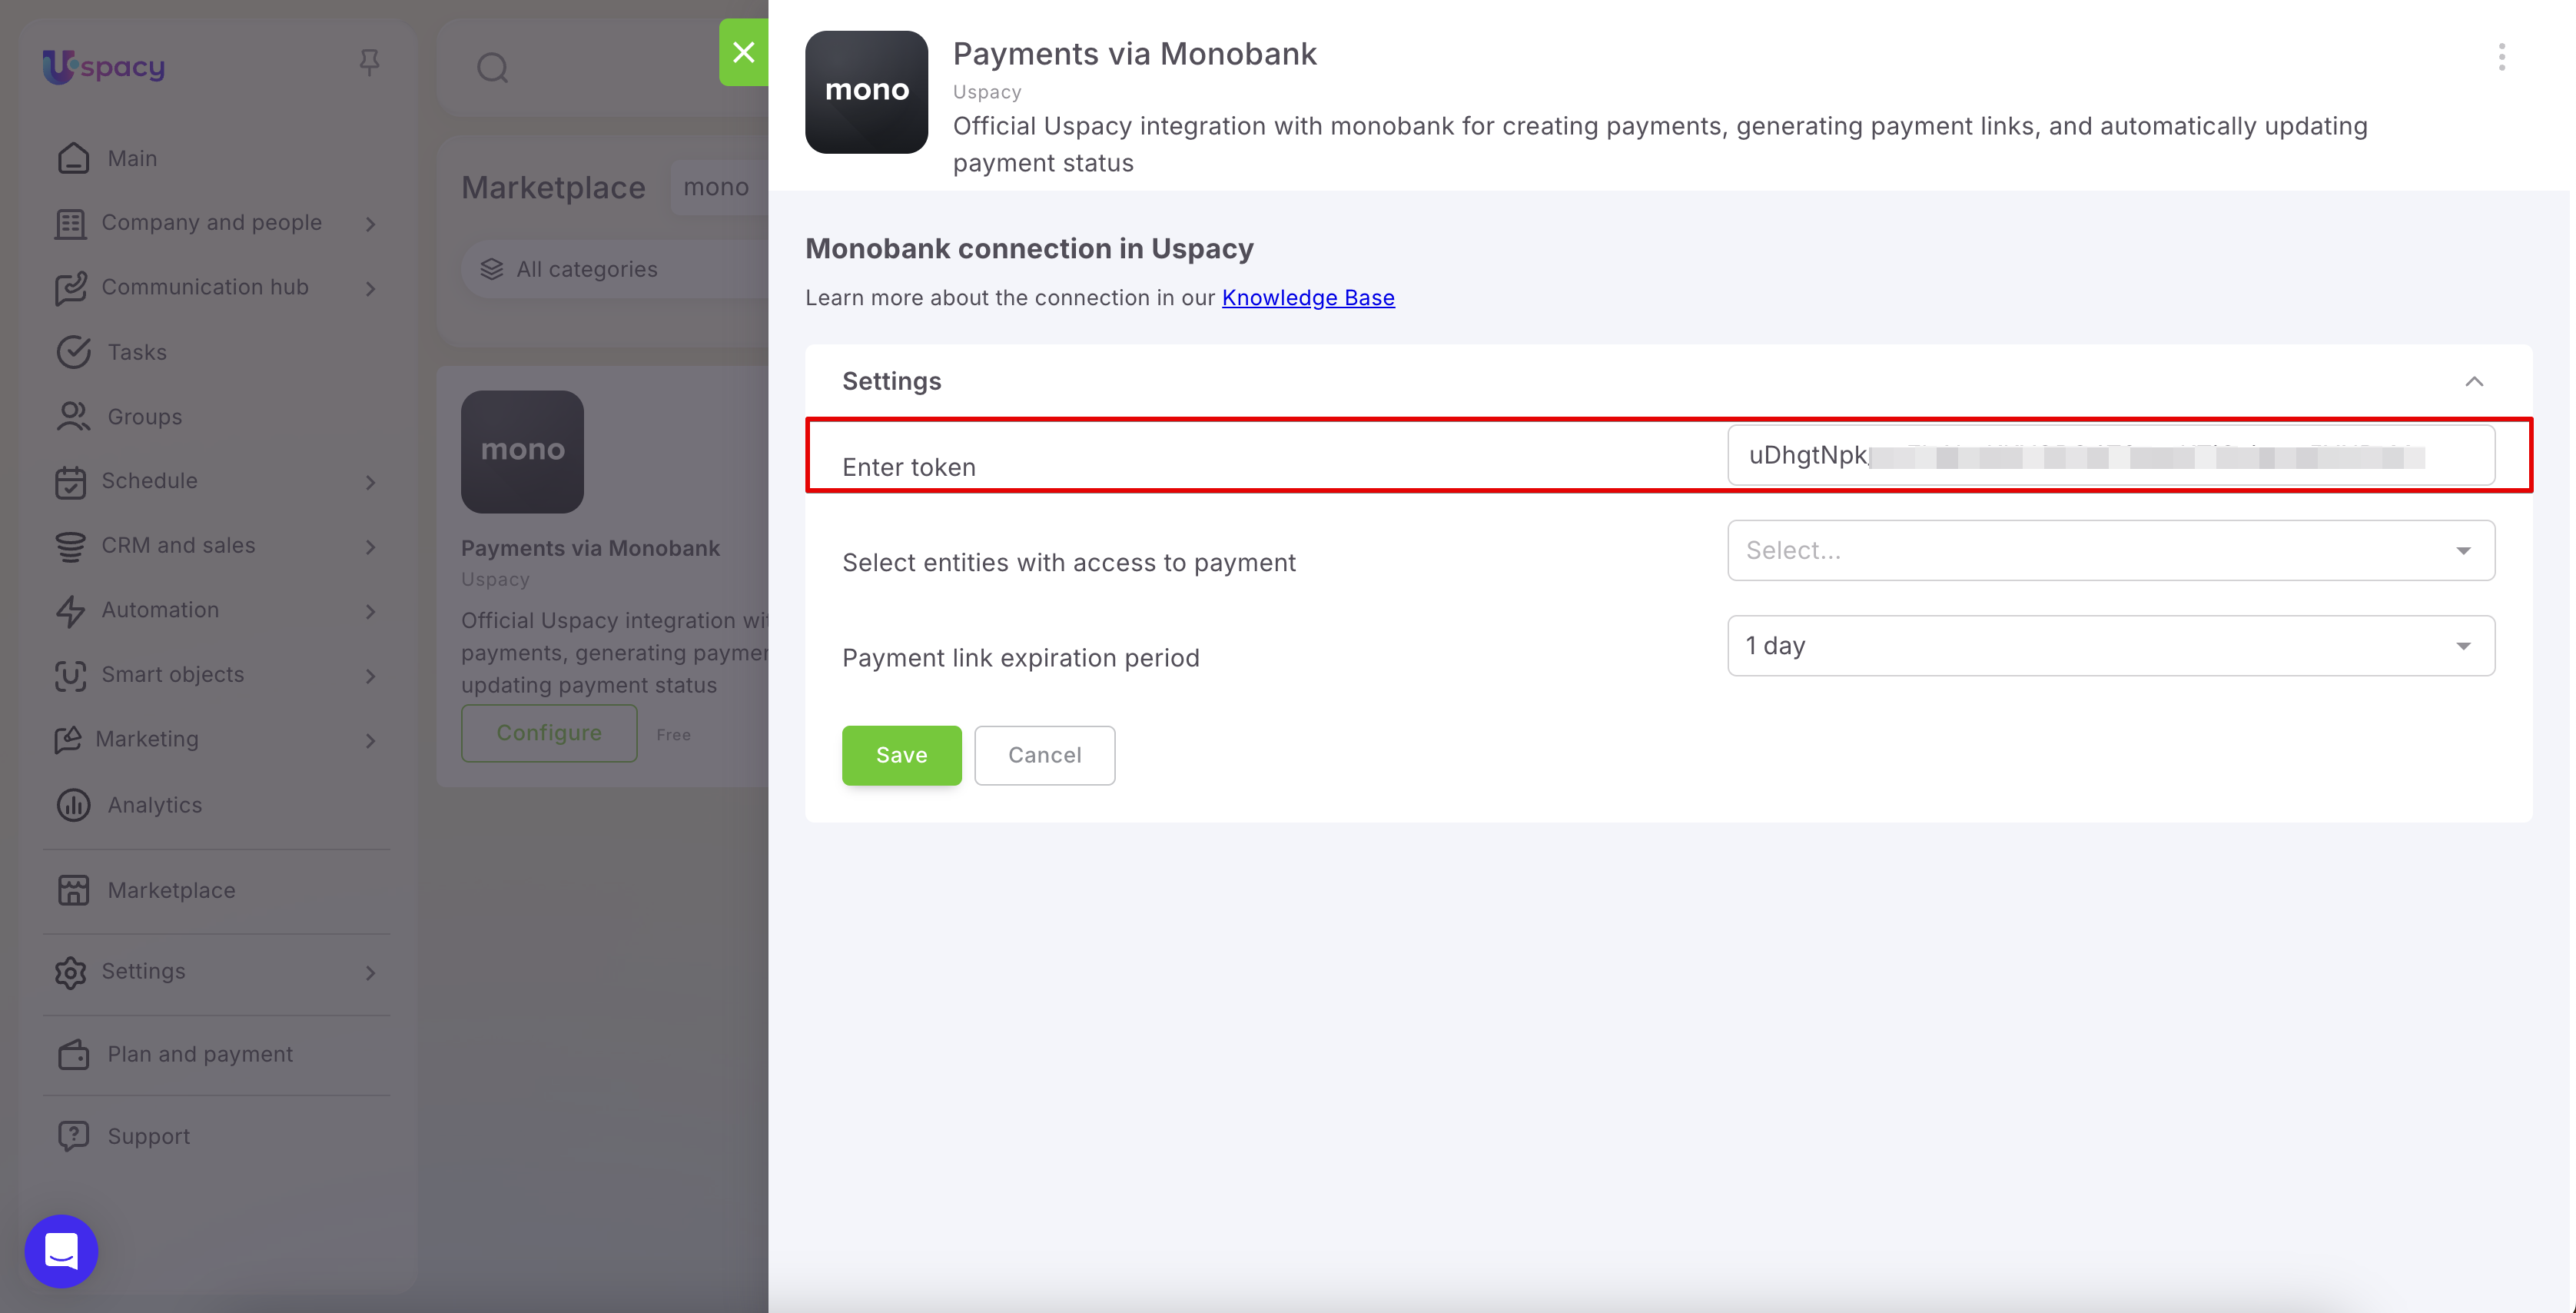
To set up the integration, you’ll need to use a monobank token. This token allows you to connect your monobank account to Uspacy and securely transfer payment data.
You can generate the token in your monobank personal account using the following link: https://web.monobank.ua/
After obtaining the token, return to the app settings window in Uspacy.
Uspacy settings
Next, complete a few steps to ensure the integration works properly.
In the Enter token field, paste the token you generated in your monobank account.
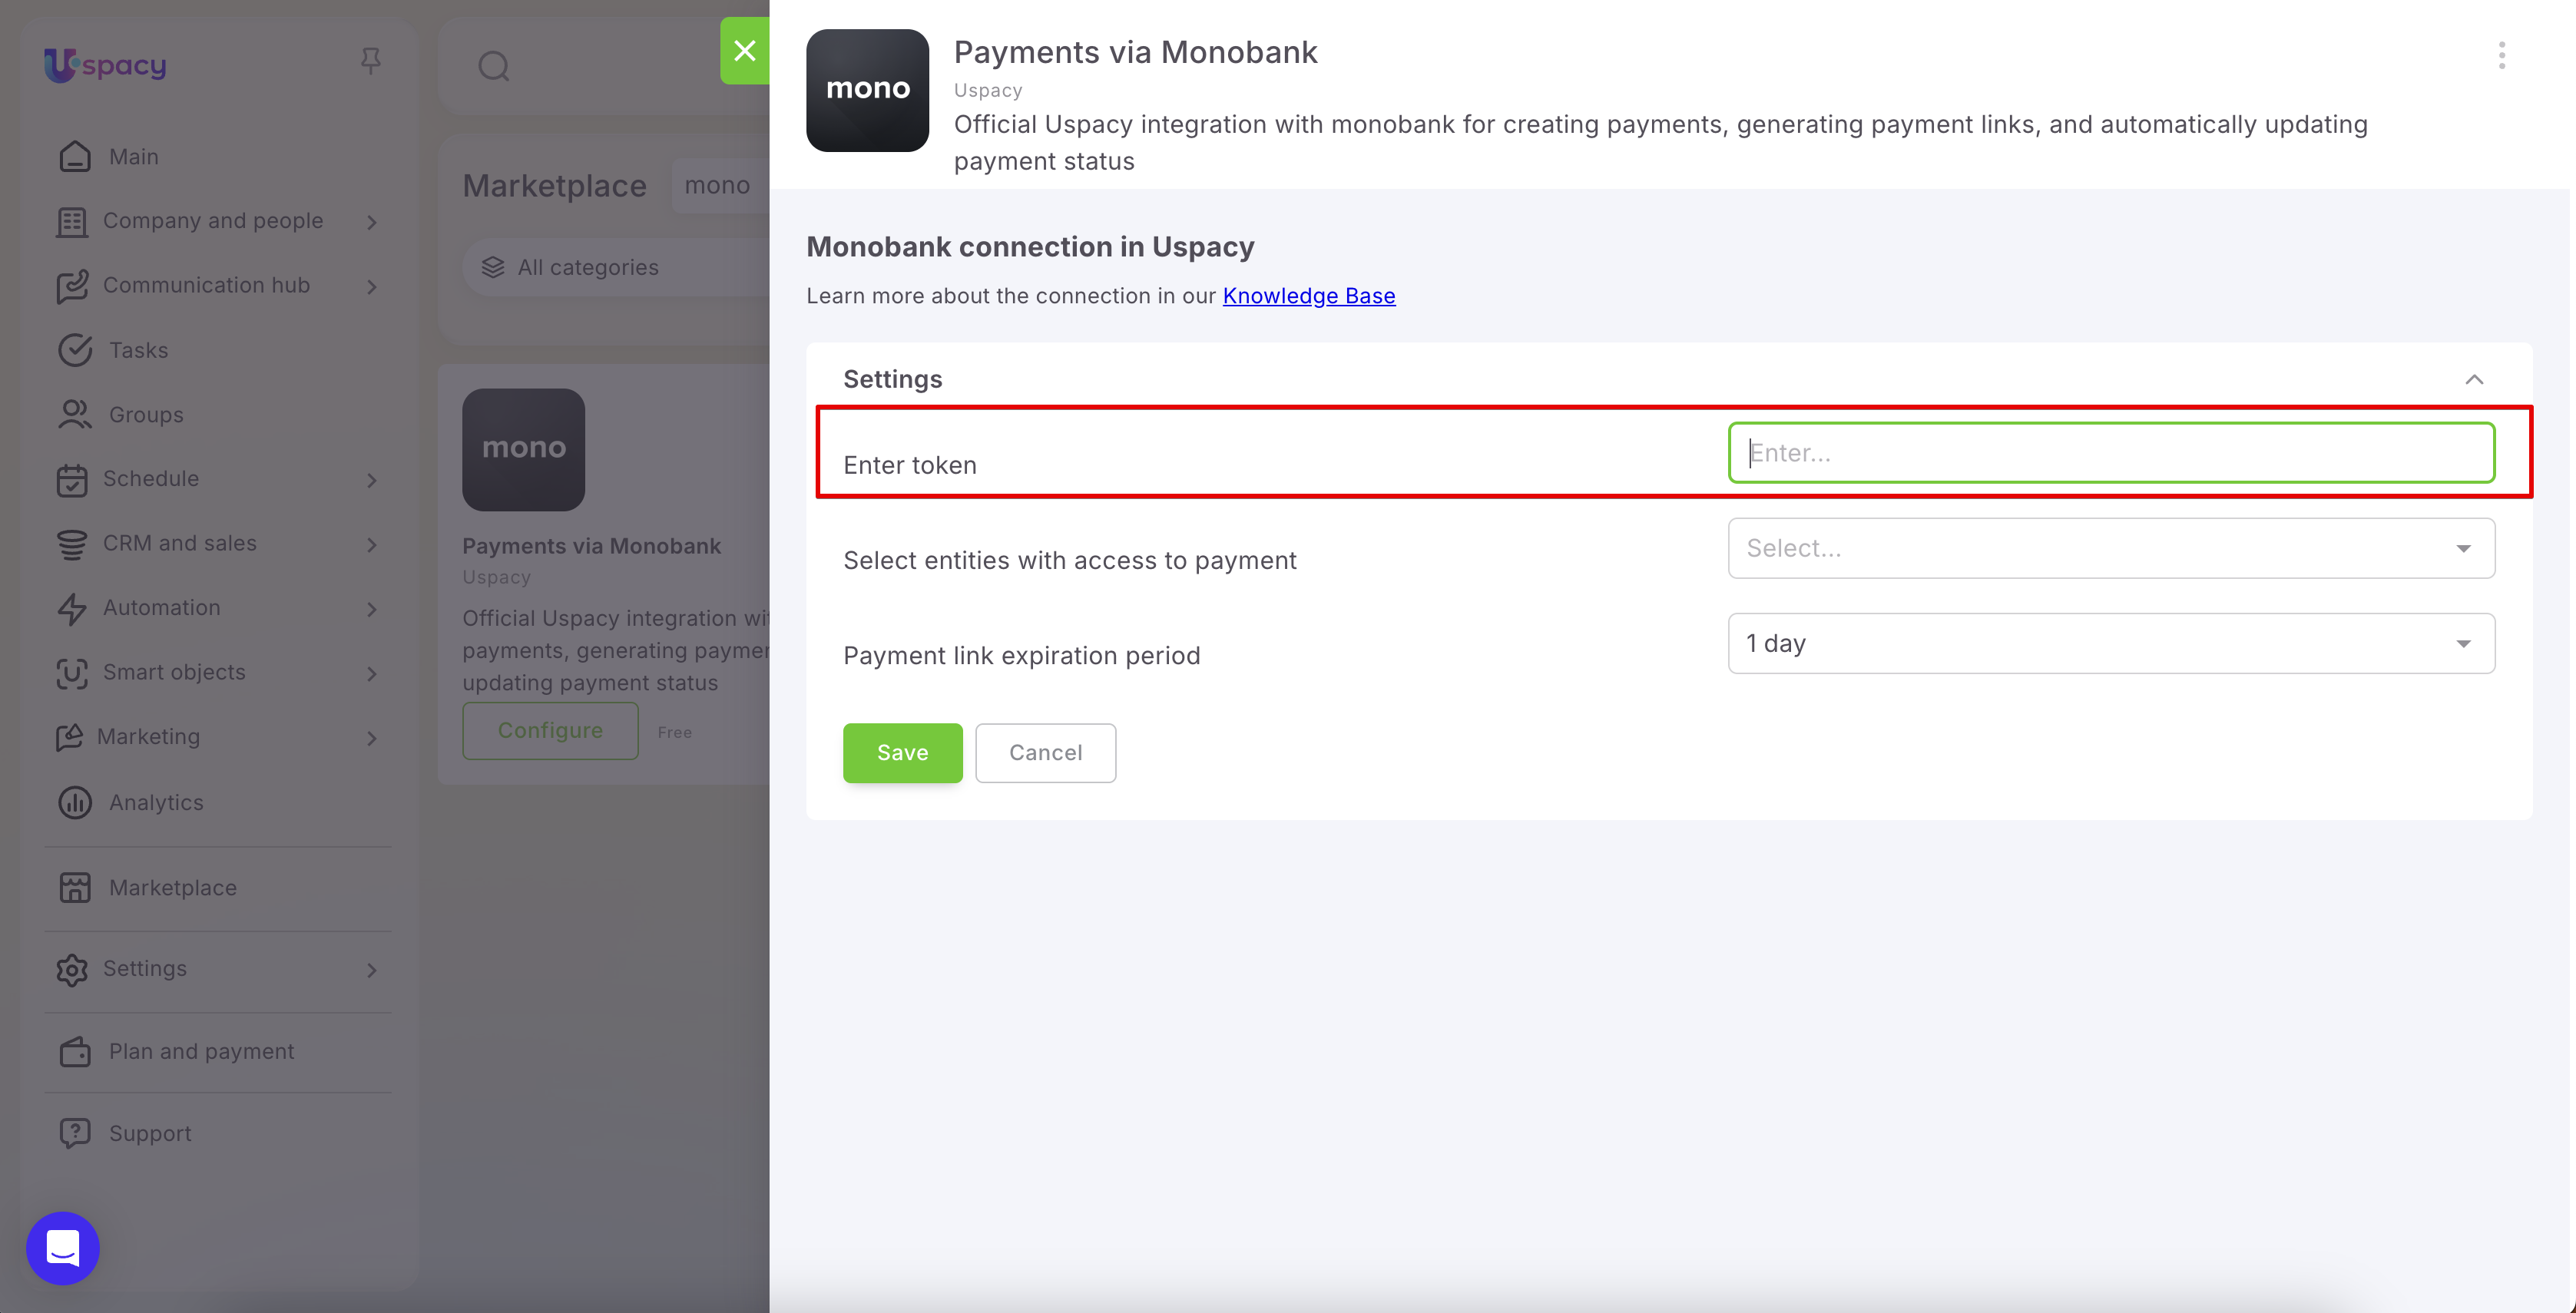
Then, in the Select entities with access to payment field, specify which entities will be allowed to create payments via monobank. Available options include CRM entities and Smart Objects that support products (or have product functionality enabled).
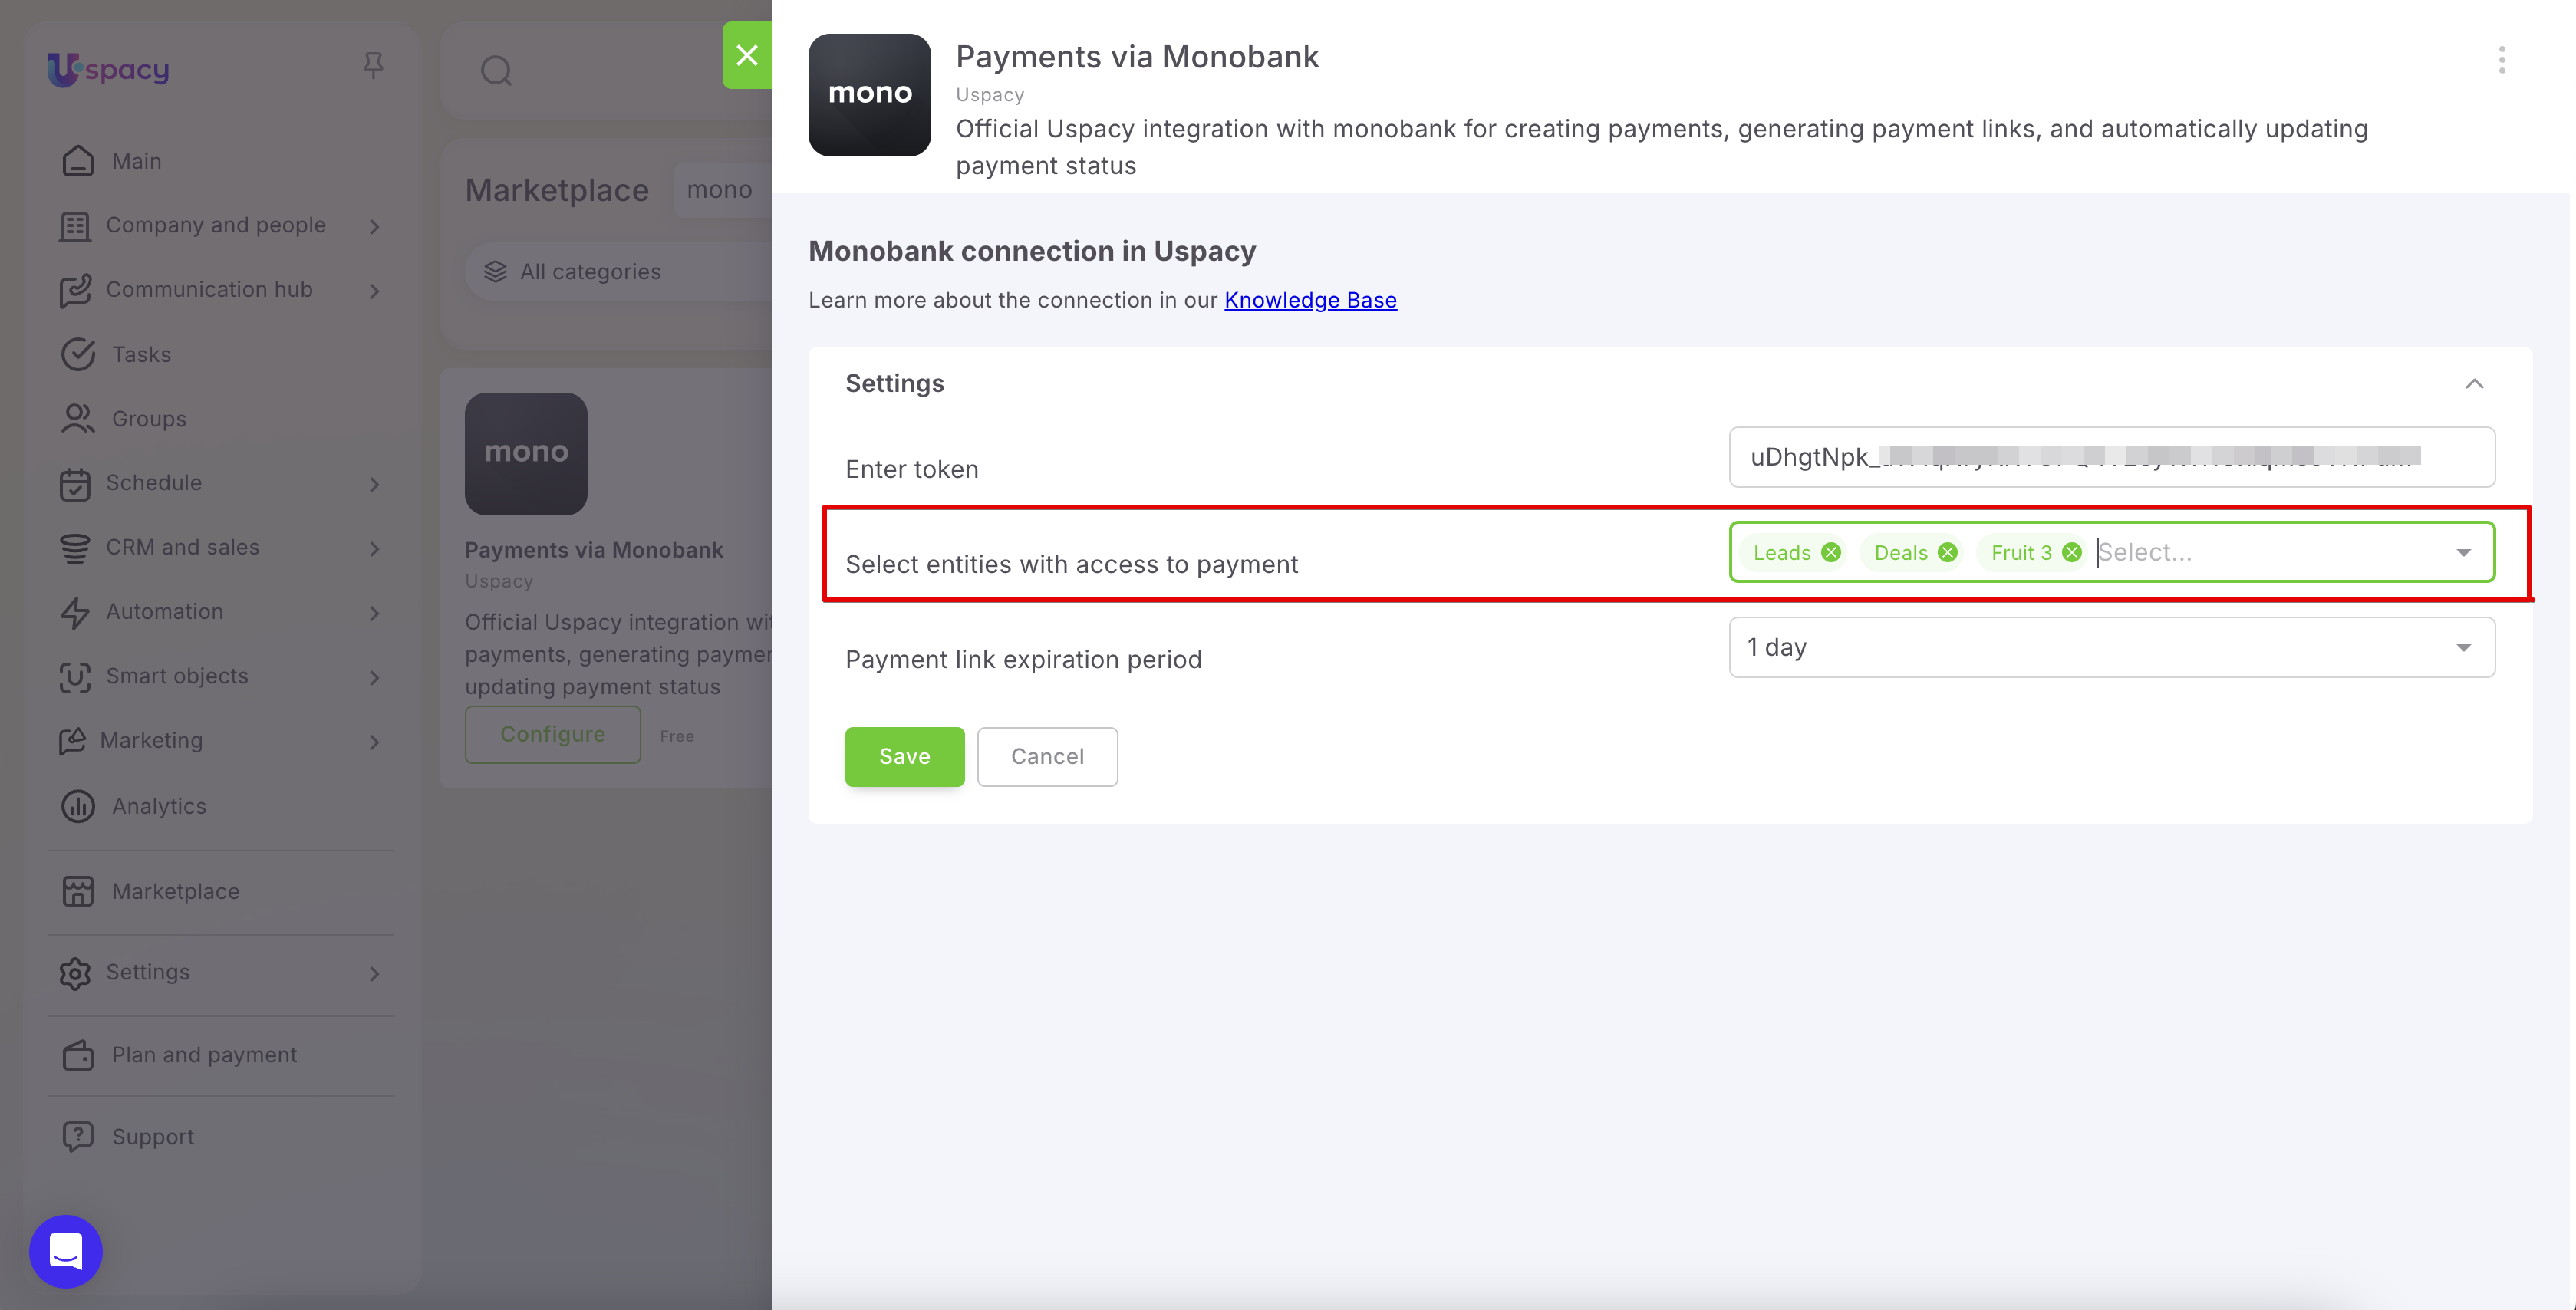
After that, set the Payment link expiration period. This determines how many days the client will be able to use the payment link to complete the payment. If the link expires before the payment is made, the payment status will automatically change to Canceled.
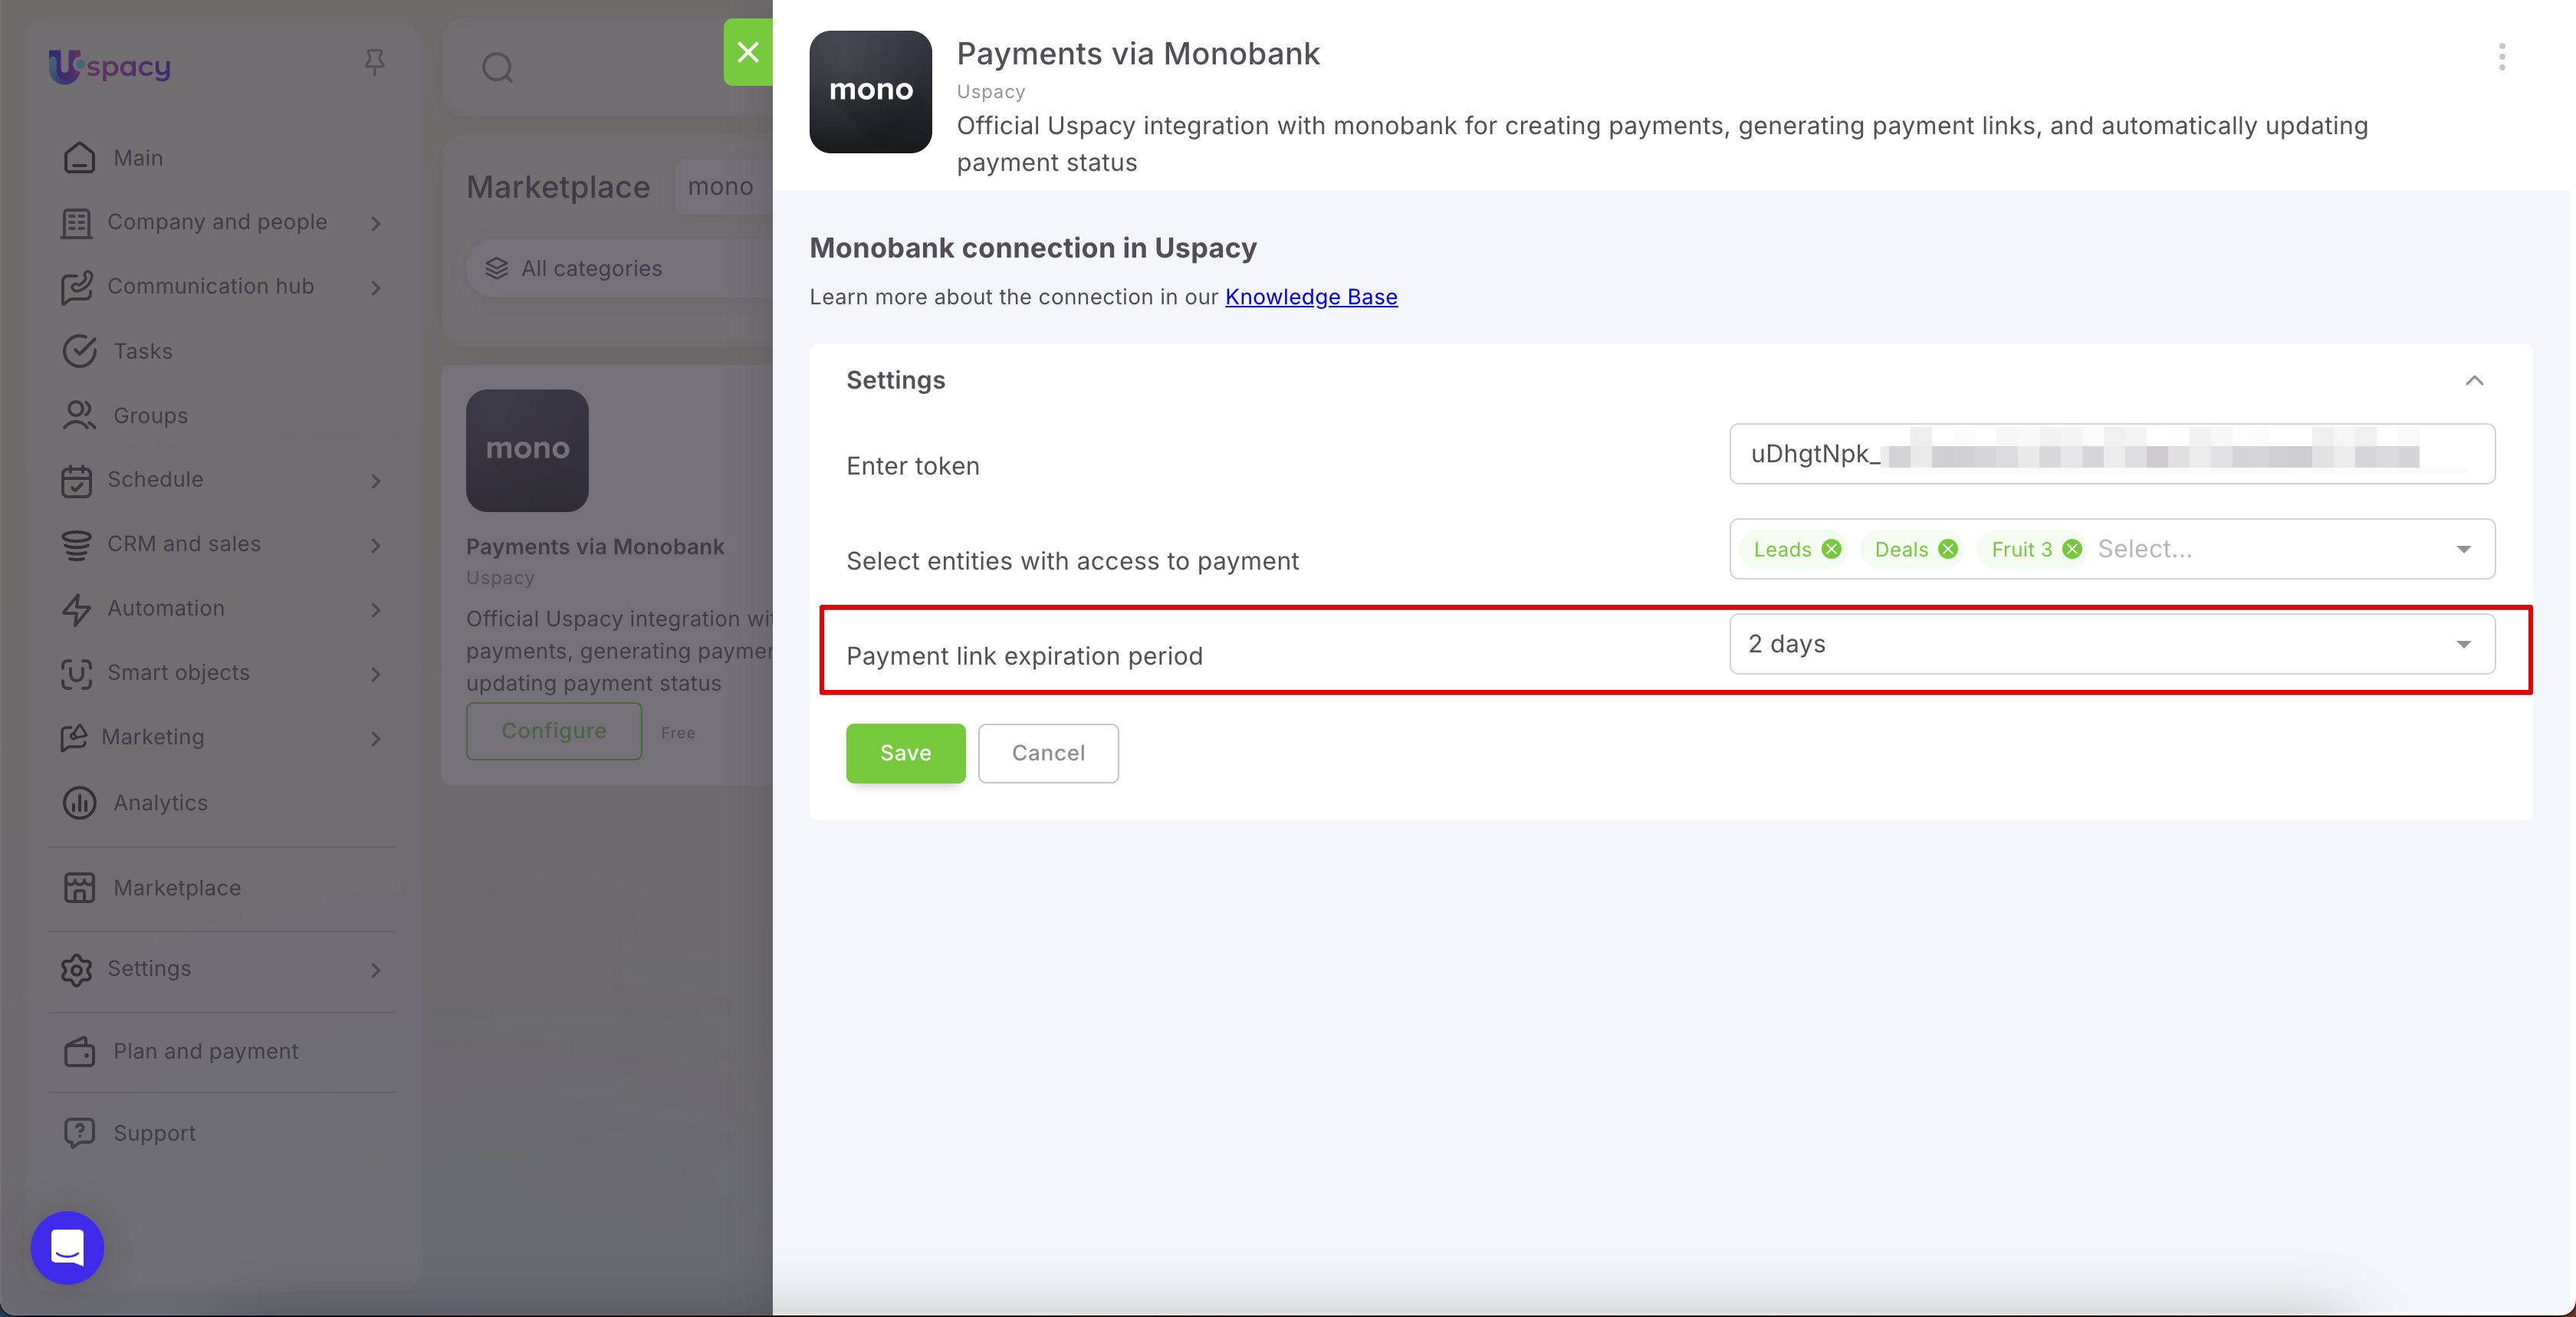
To apply the settings, click the Save button.
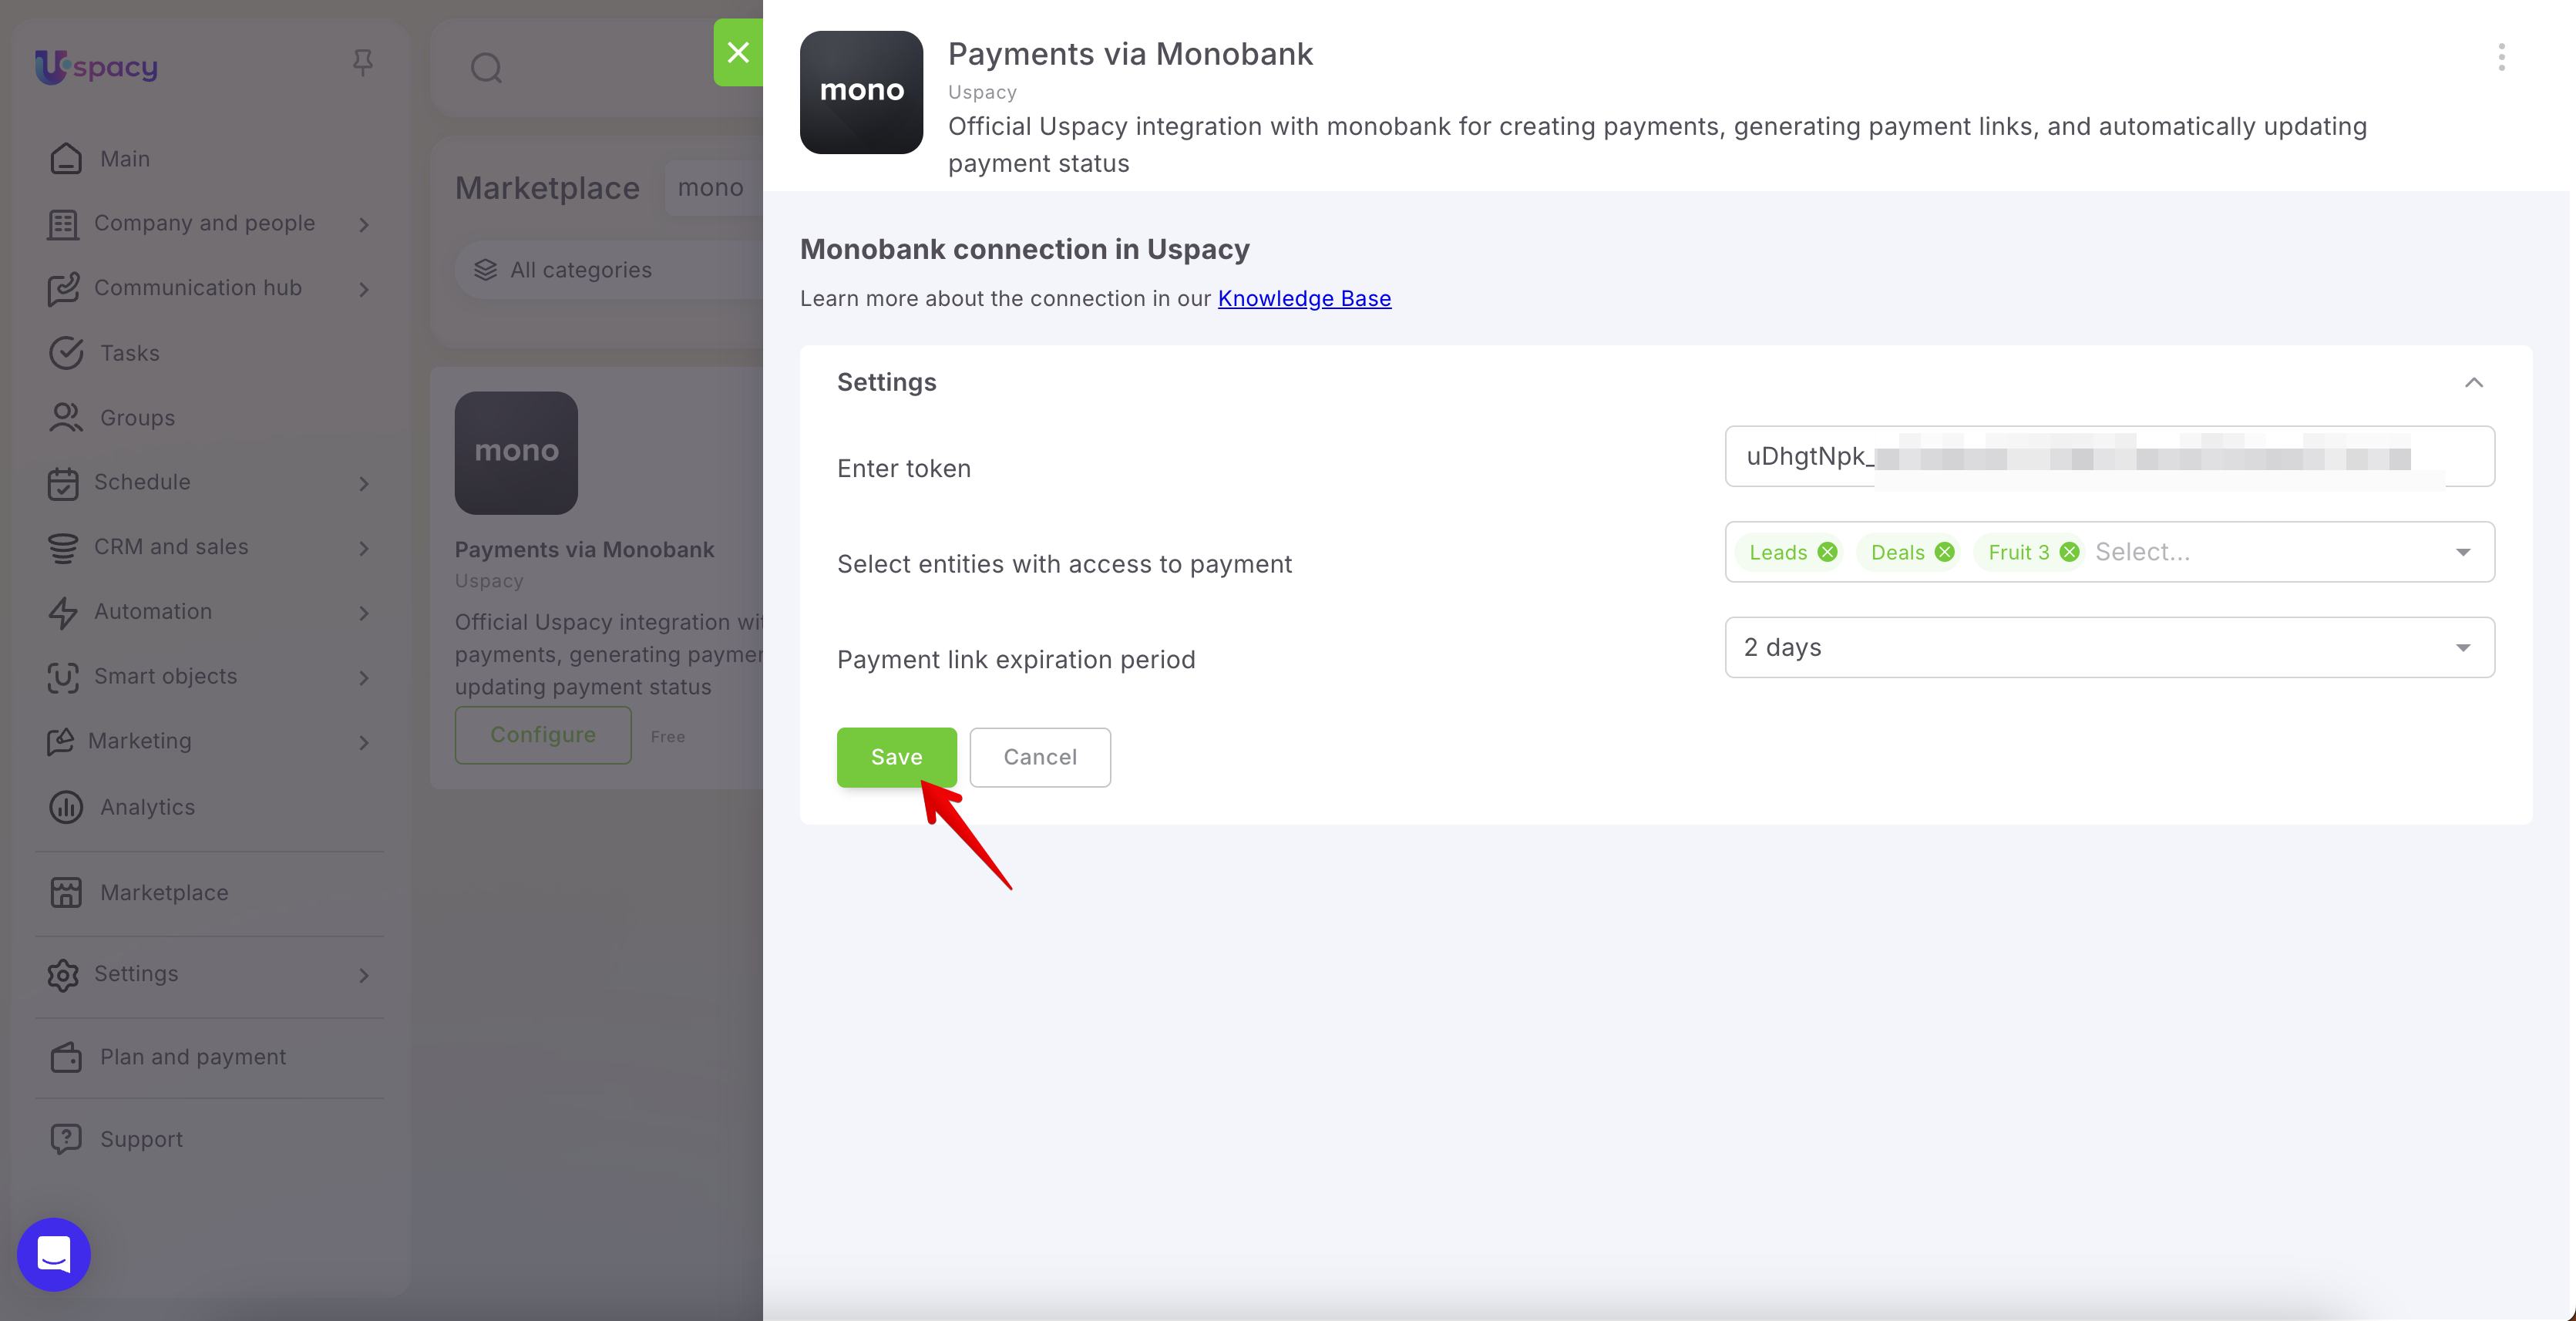
Once completed, the integration will be connected, and monobank payments will become available for the selected entities.
Working with payments
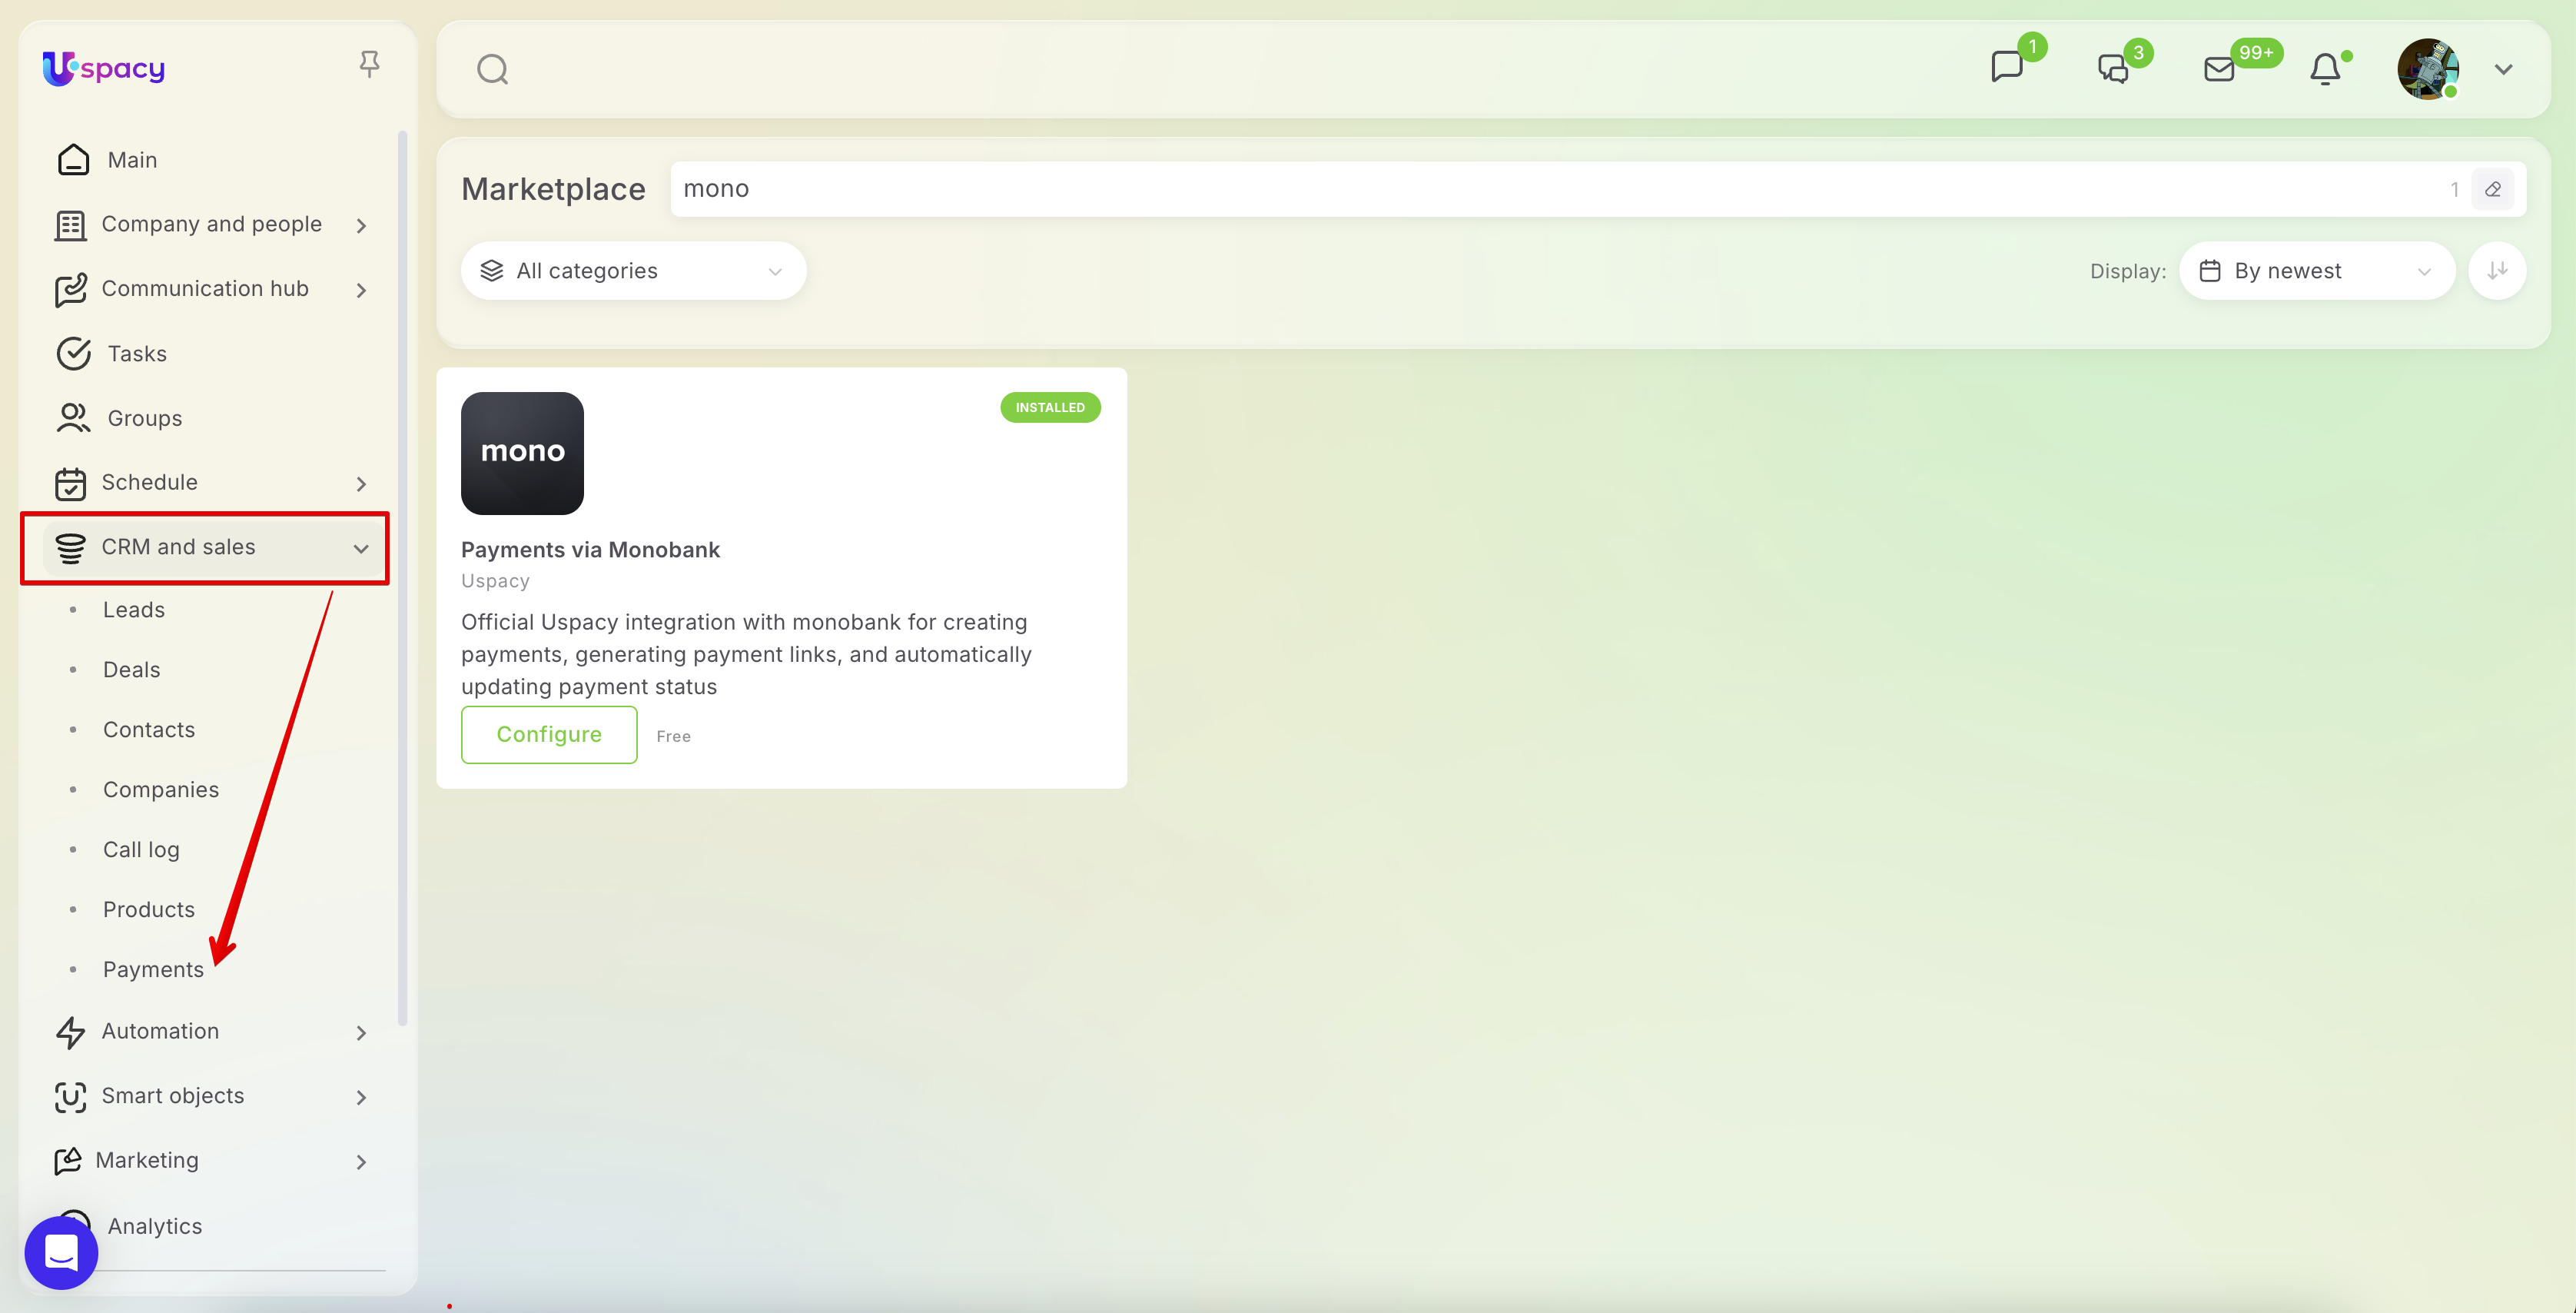
As a result, a separate Payments subsection will appear in the left-side menu under CRM & sales. The Payments section itself may also be available in CRM without the integration installed; however, creating payments via Monobank is only possible when the corresponding app is installed.
In this section, you can view all created payments, monitor their statuses, and quickly find the necessary records using search and filters.
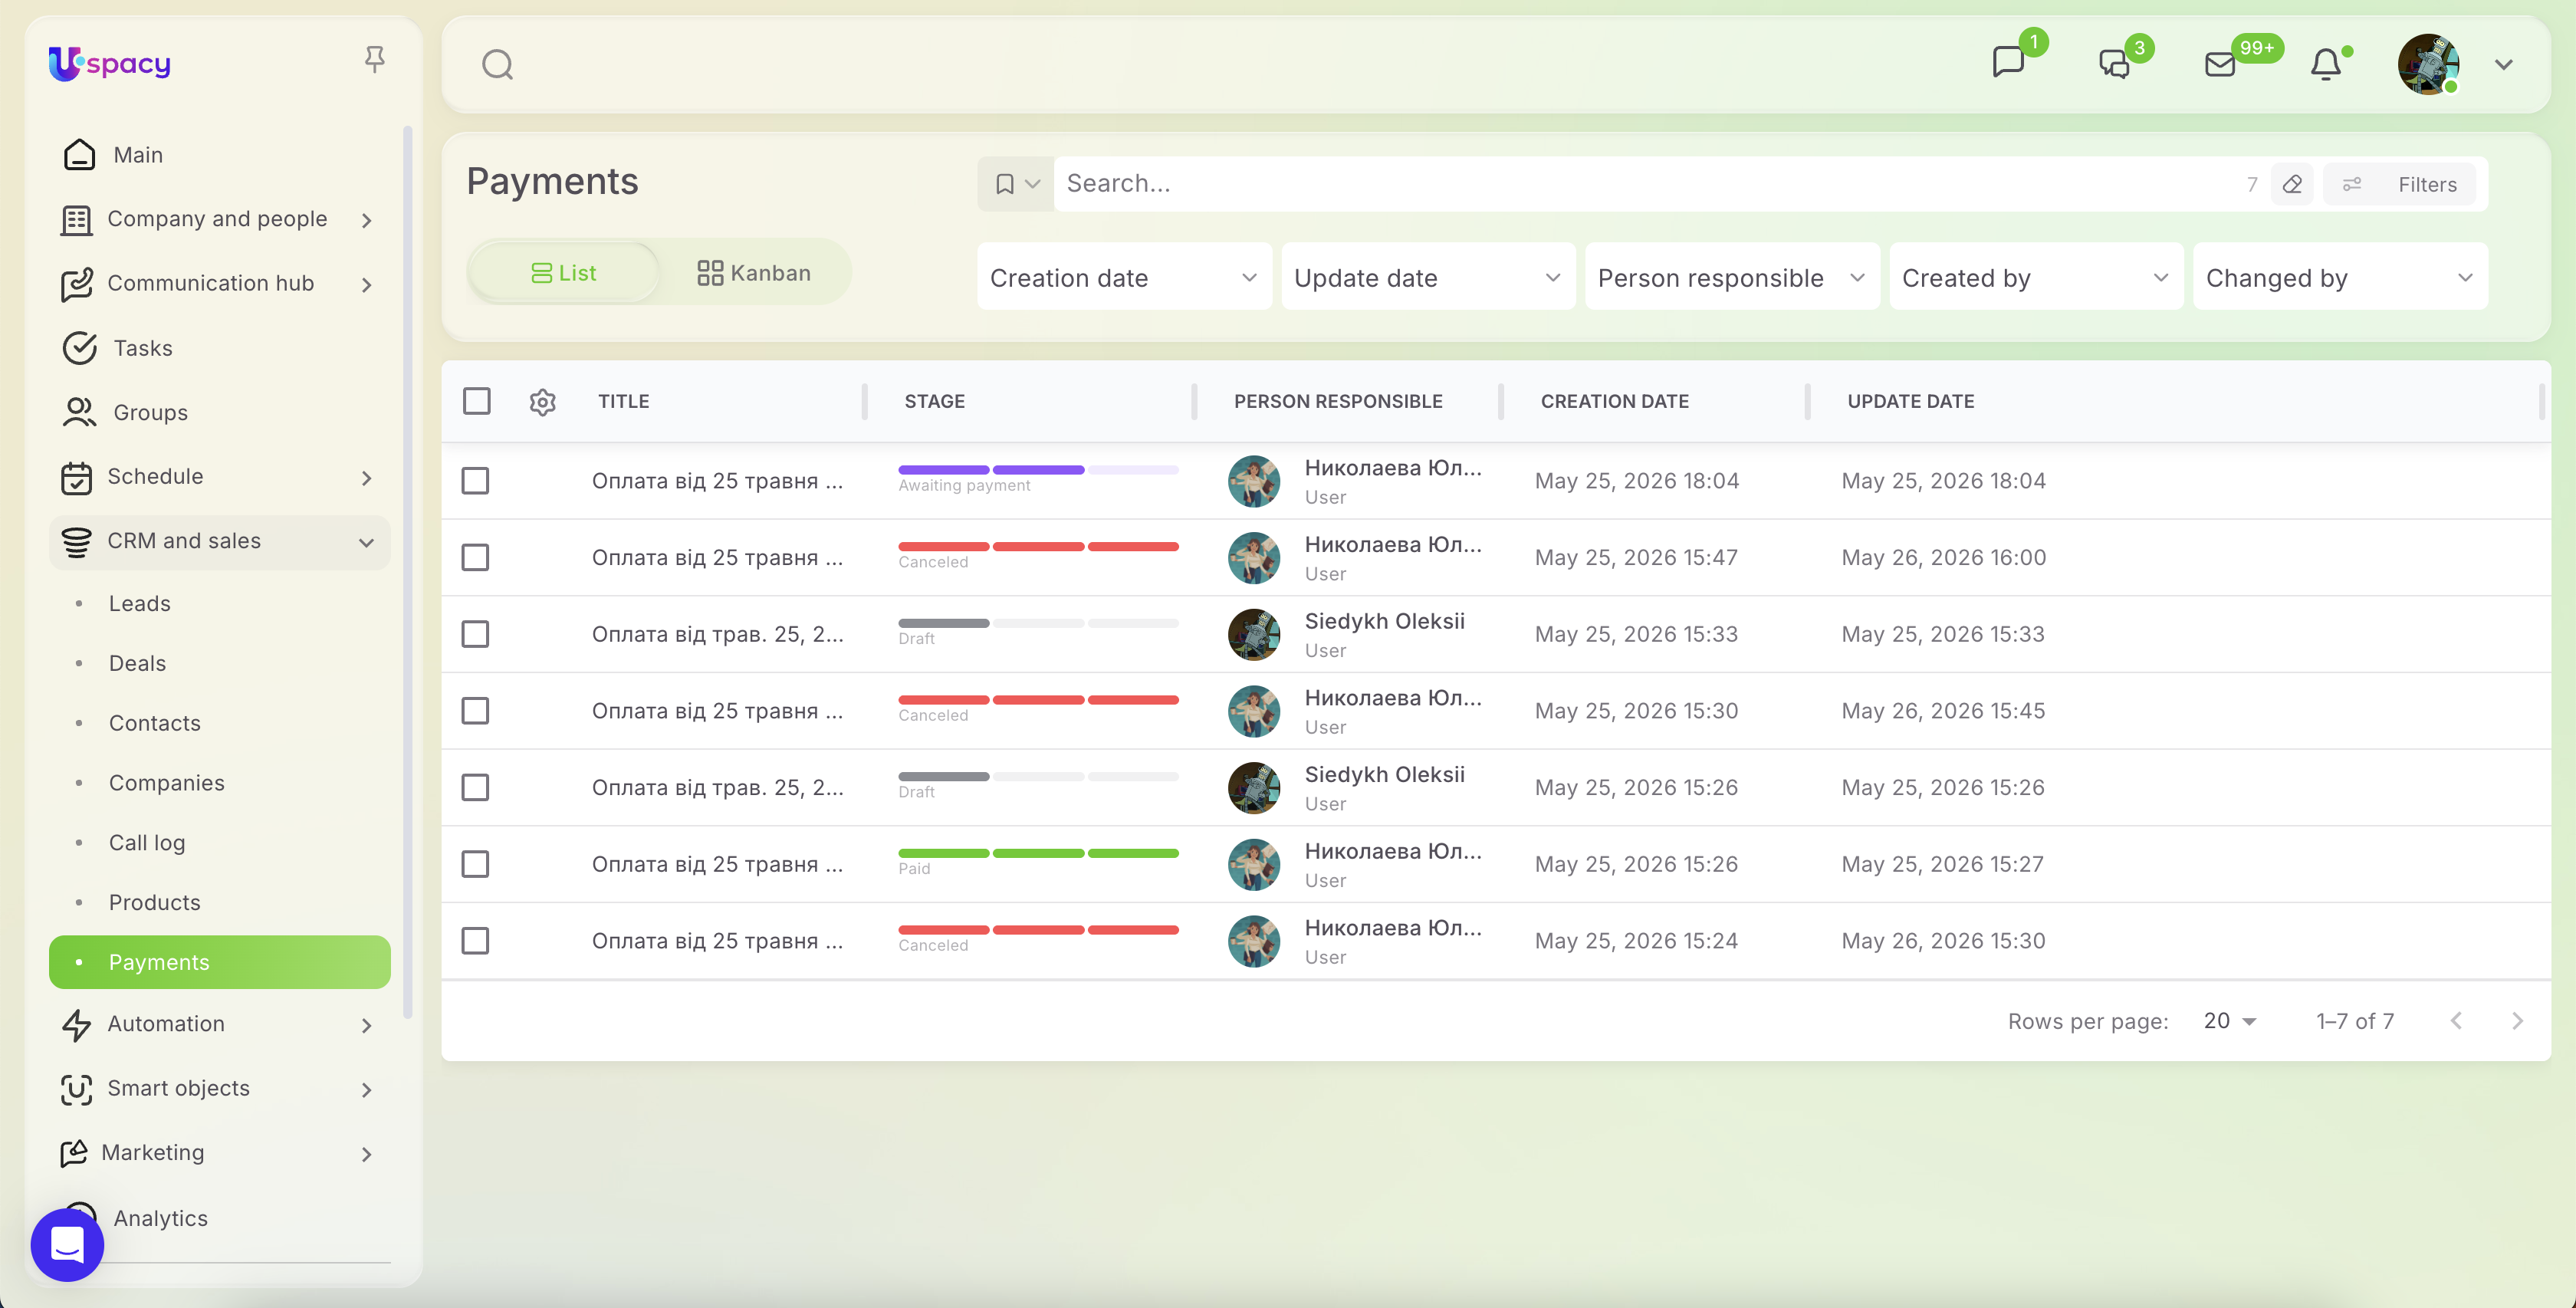
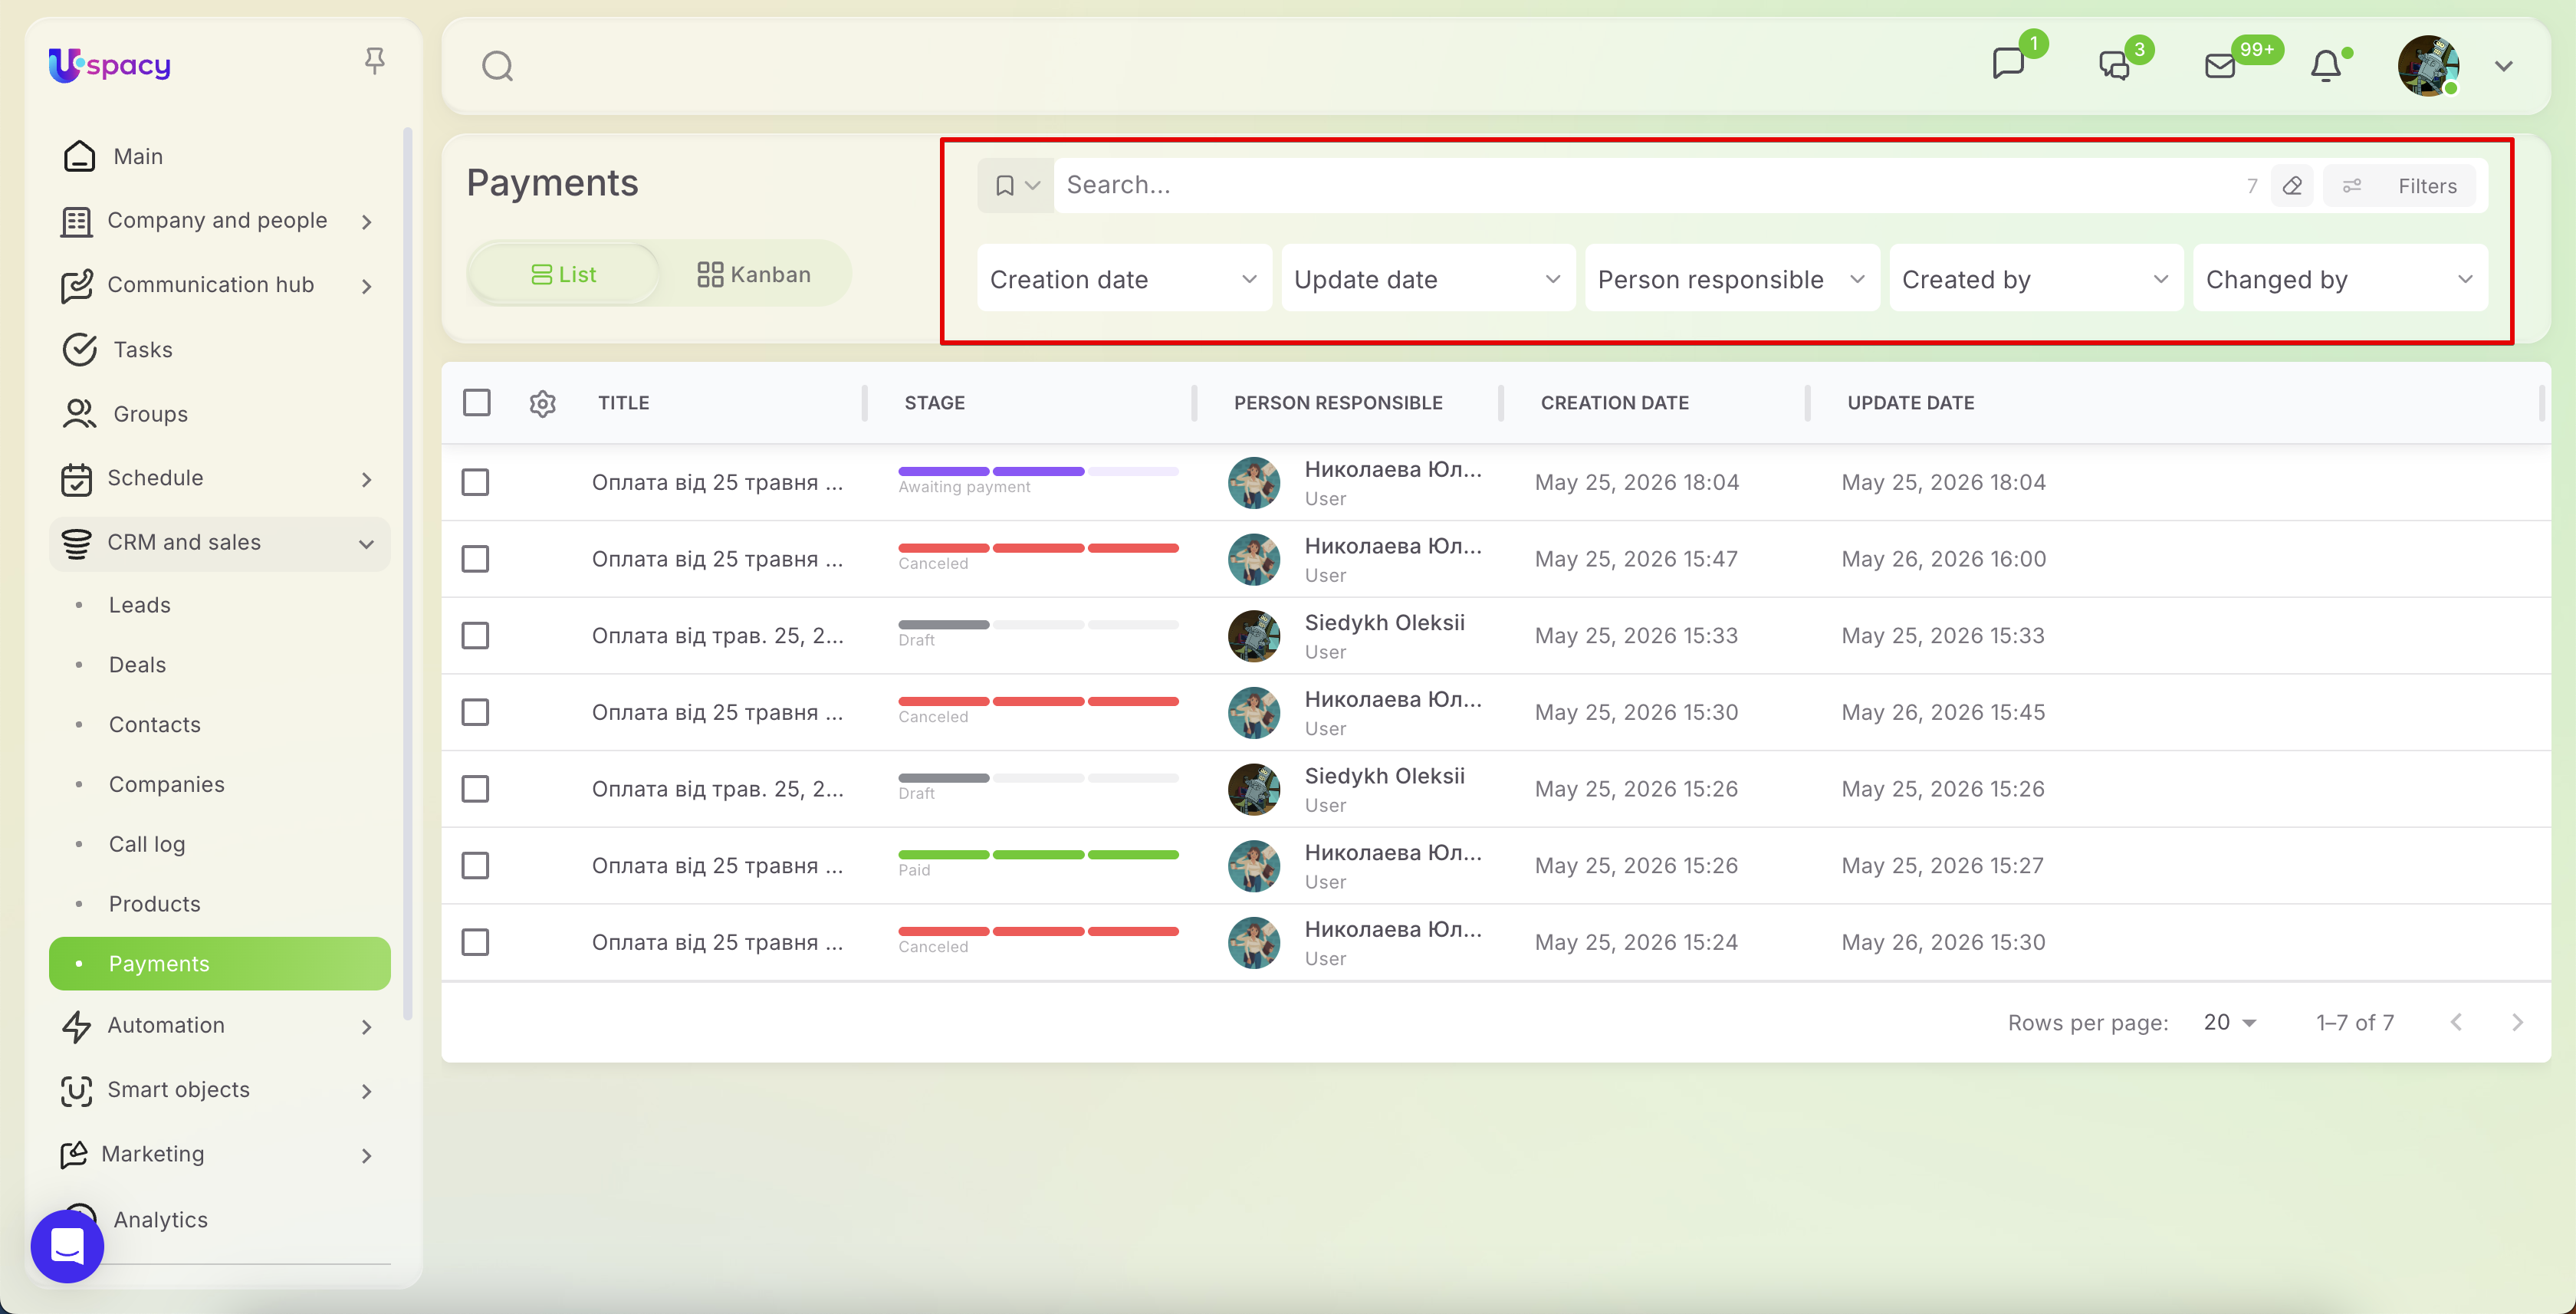
For added convenience, in addition to the List view, a Kanban view is also available.
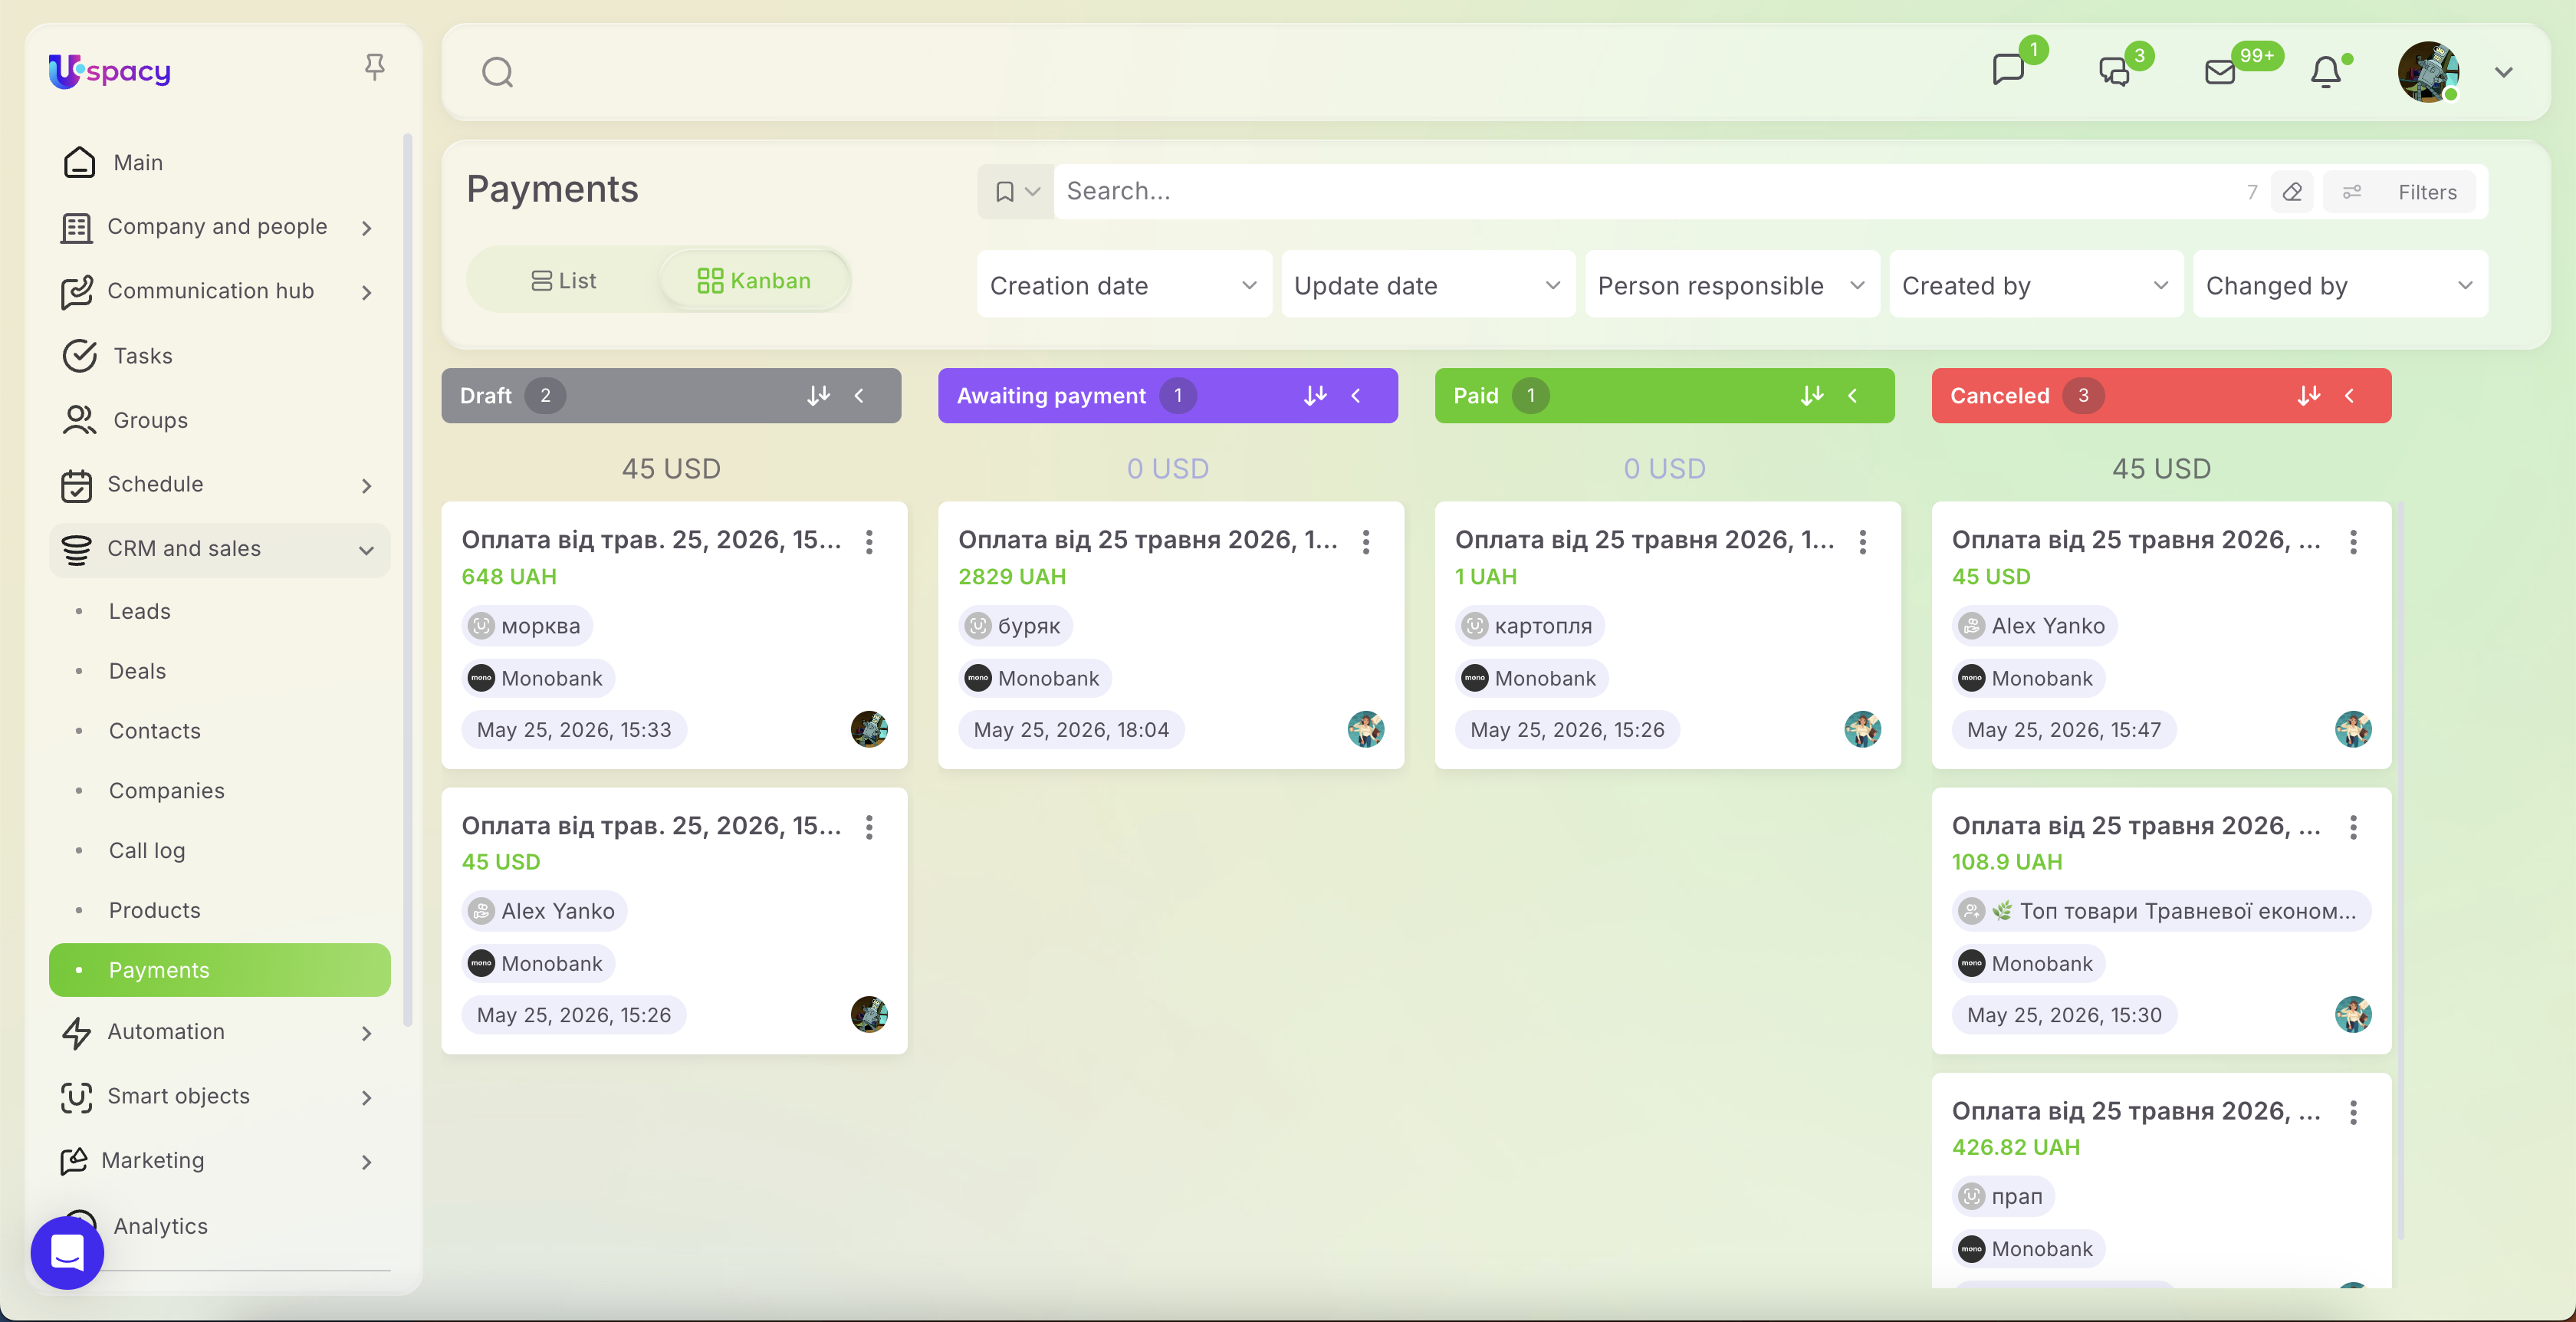
On the board, payments are organized by stages:
- Draft — the payment has been created, but the payment link has not yet been generated or sent to the client.
- Awaiting payment — the payment link has already been generated, and the system is waiting for the client to complete the payment.
- Paid — the client has successfully completed the payment.
- Canceled — the payment link has expired and no payment was received.
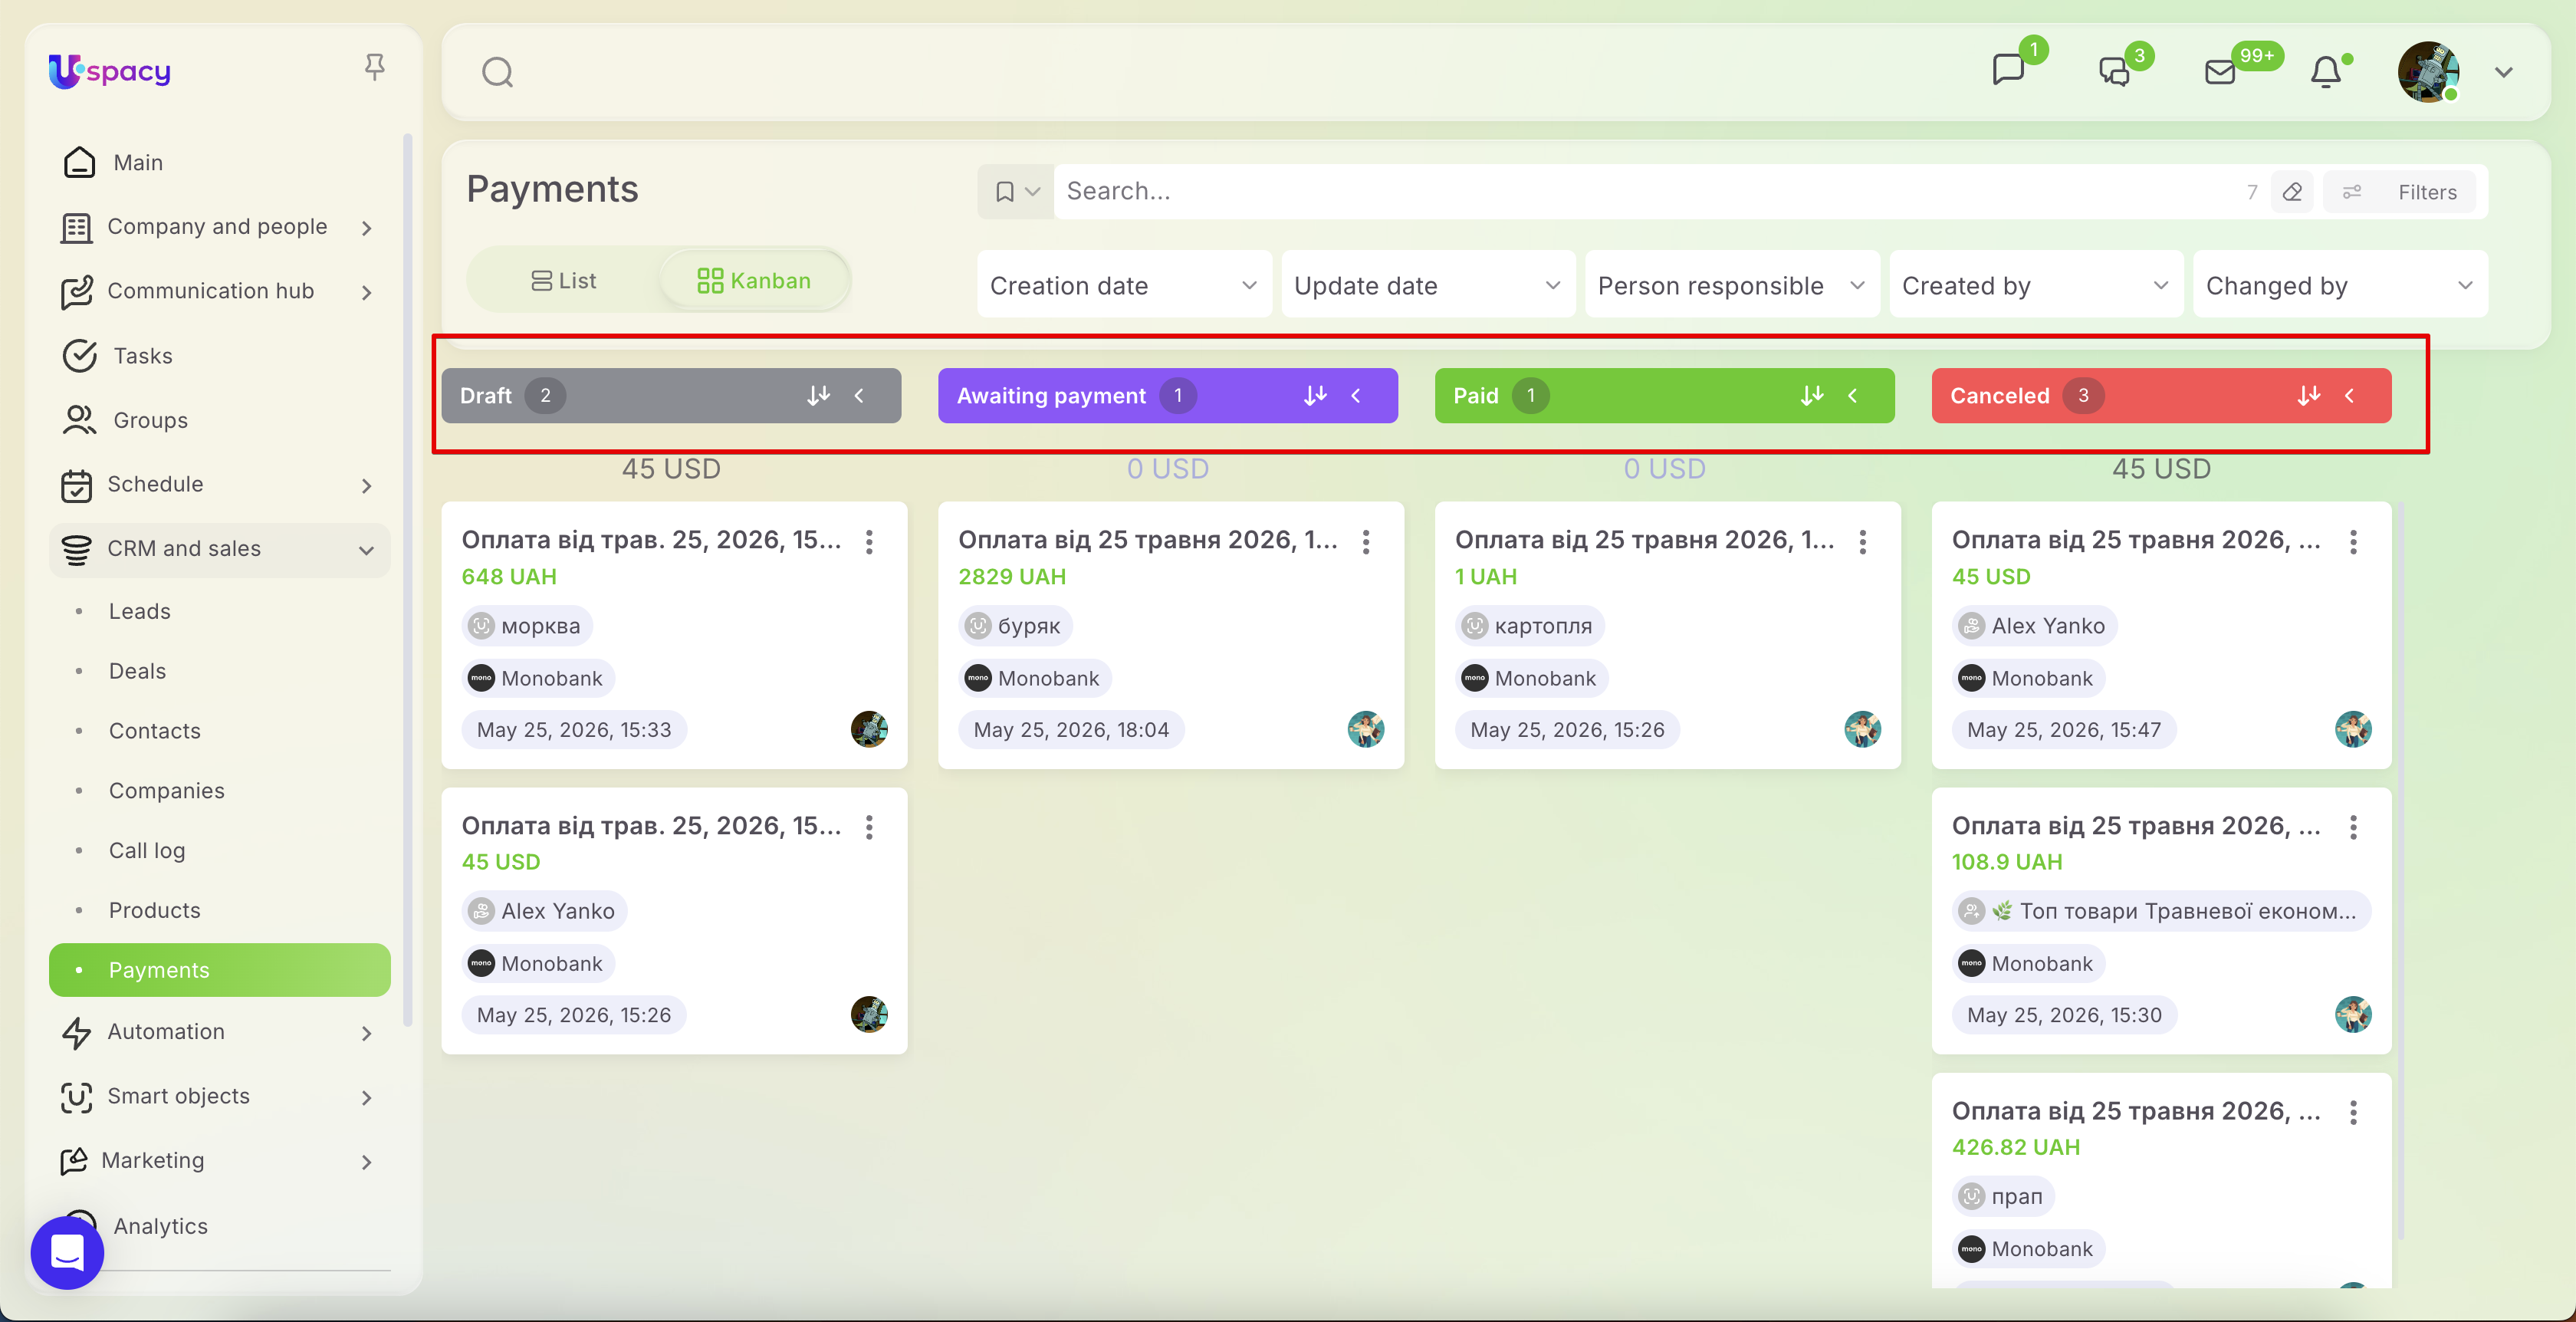
💡 Please note that payments move between stages automatically based on their current status. For example, once a payment link is generated, the payment moves to Awaiting payment; after a successful payment, it moves to Paid; and if the payment link expires before funds are received, the status changes to Canceled.
Payments cannot be moved between stages manually. In addition, the Payments section does not support custom stages, since the statuses are tied to the payment integration logic and are updated automatically by the system.
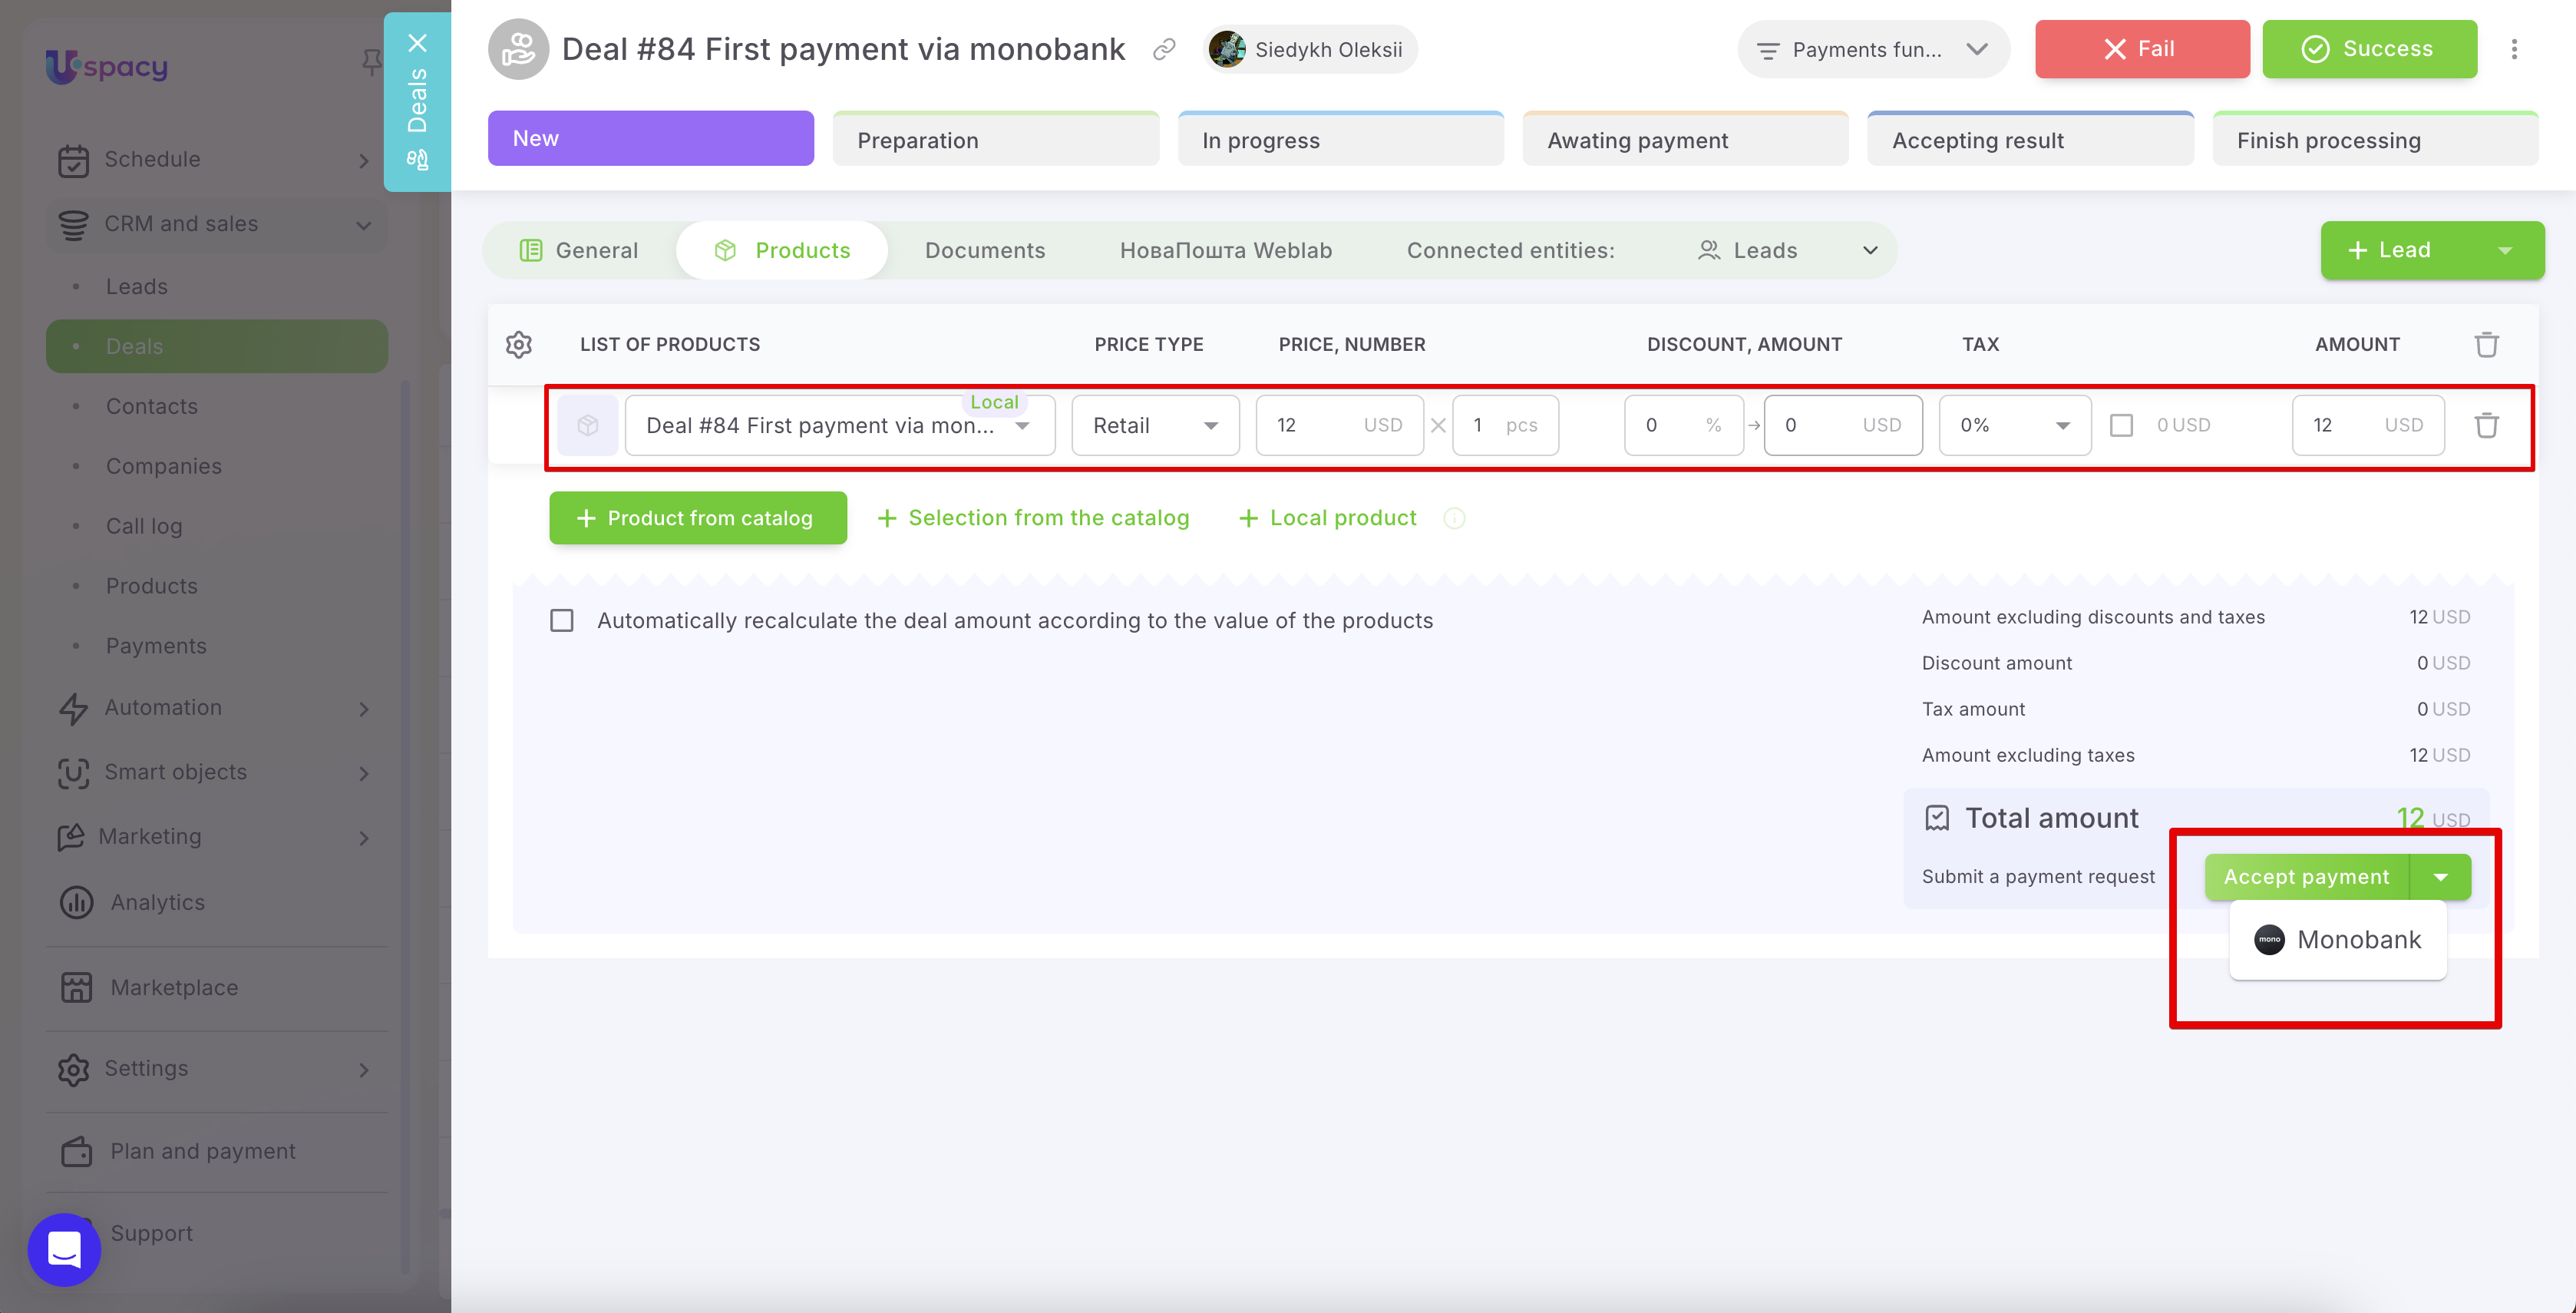
You can create a payment from the card of any entity that was granted access in the integration settings. For example, if payments are enabled for deals, open the required deal. The Accept payment button with the Monobank option will appear once the deal amount has been filled in. However, the deal amount itself is not used directly to create the payment.
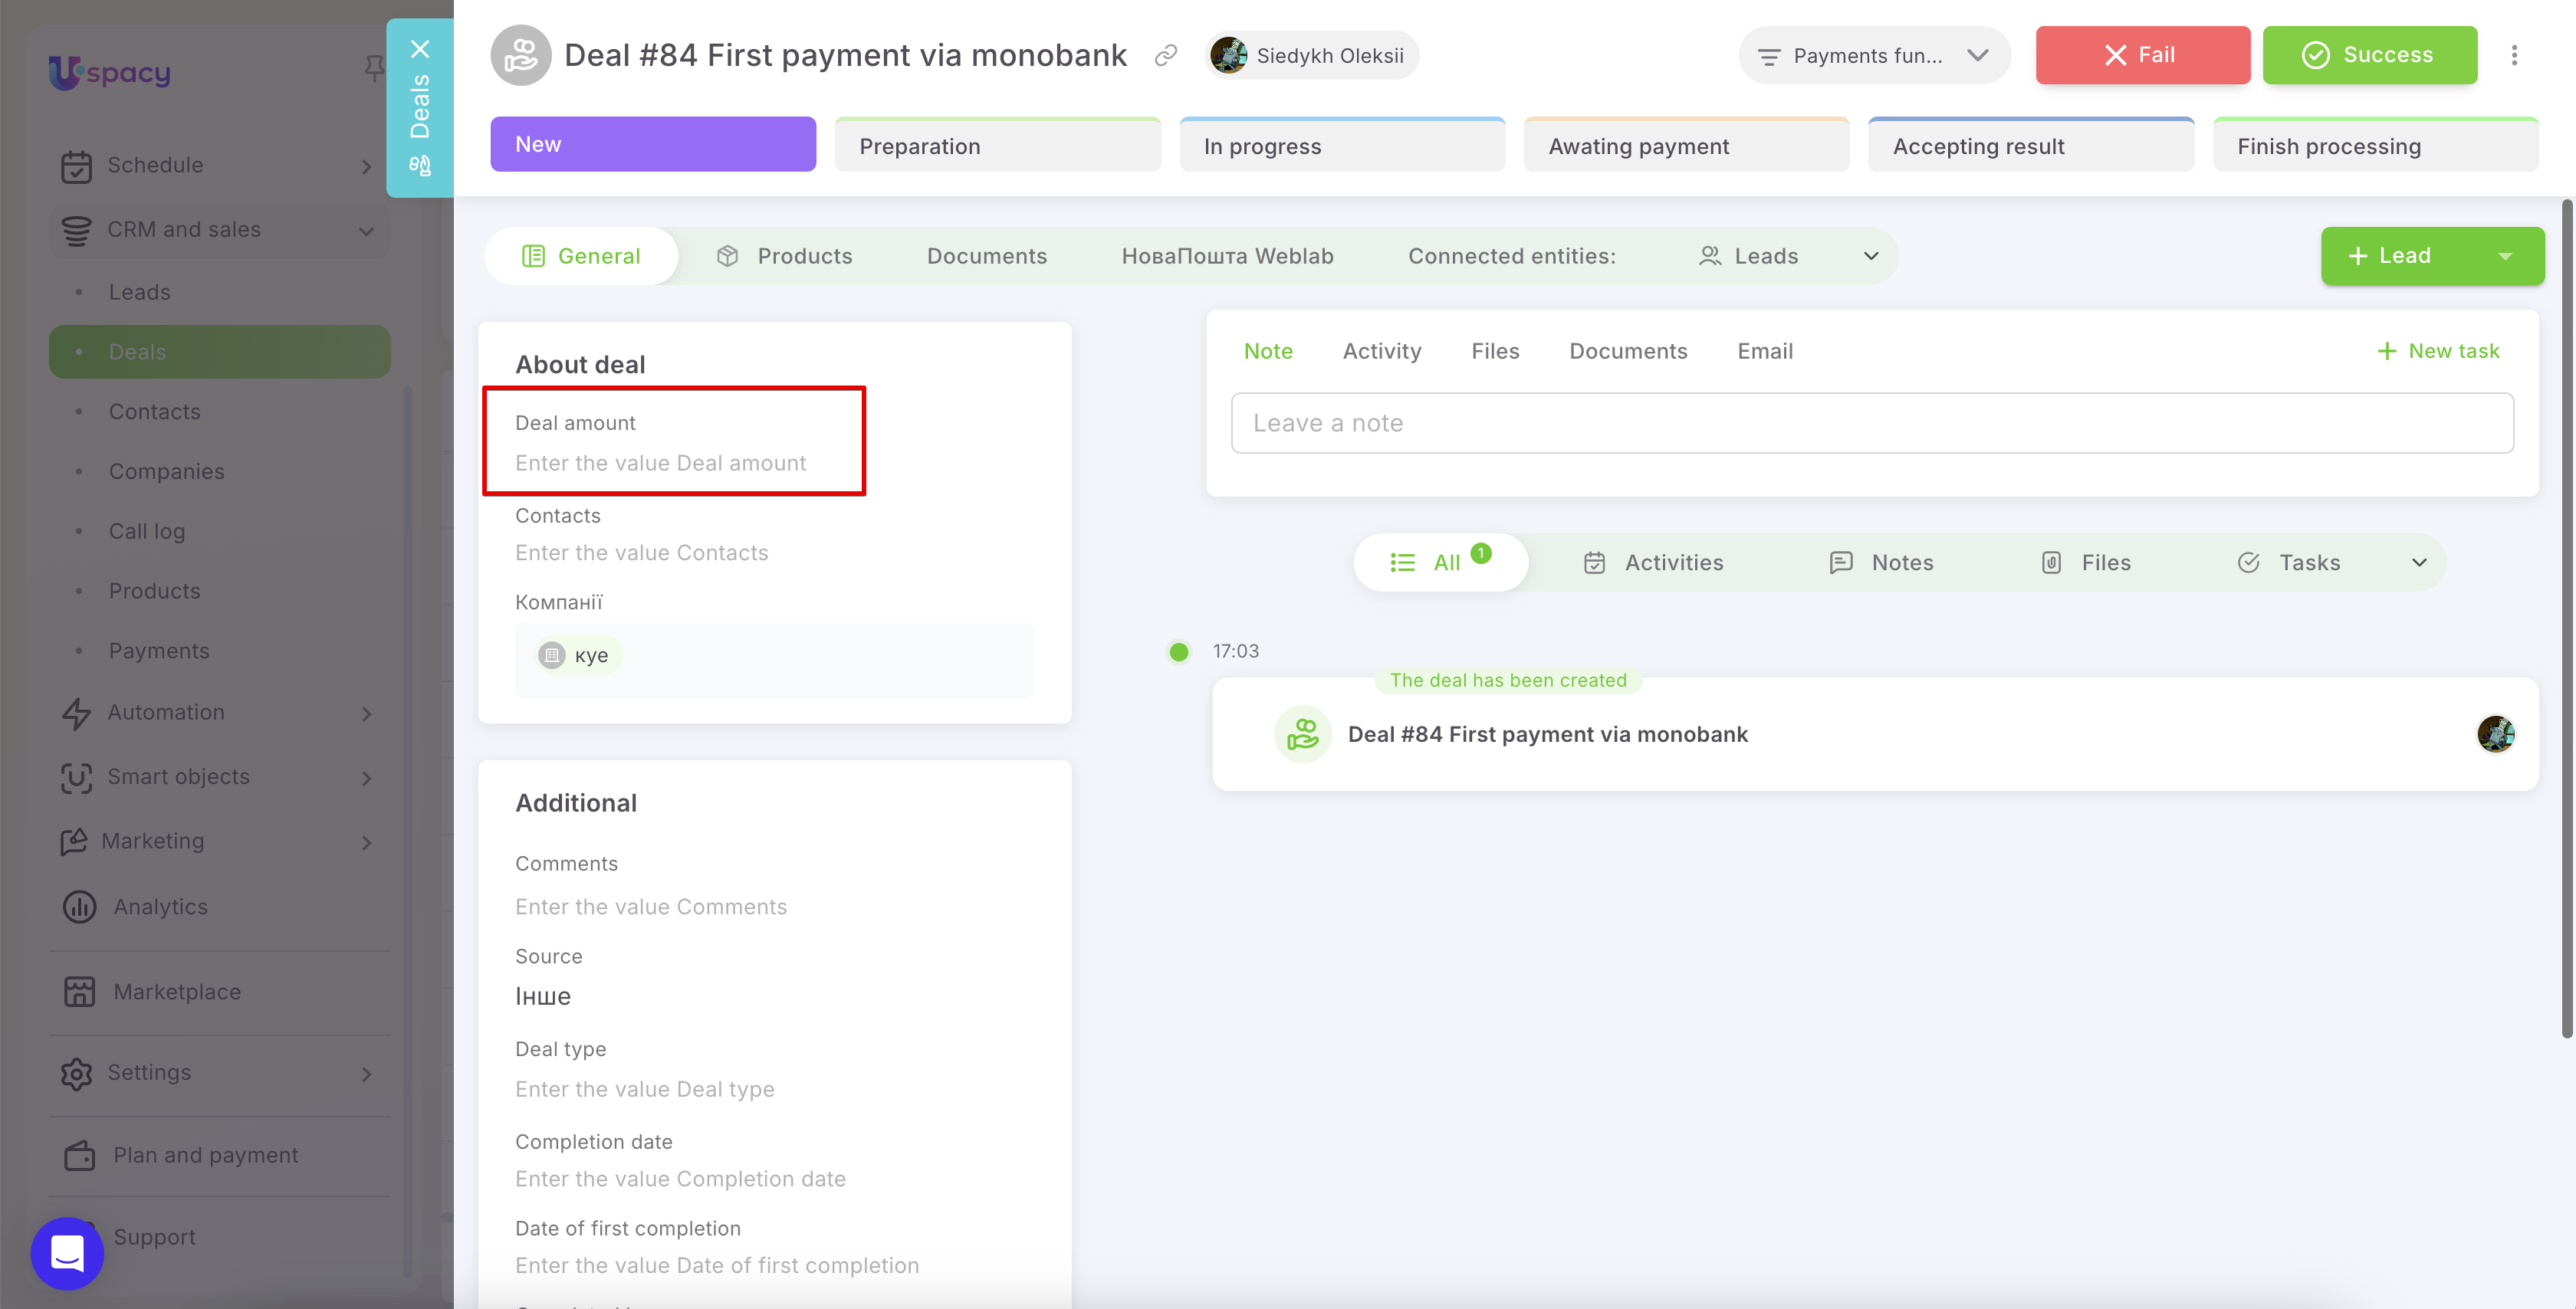
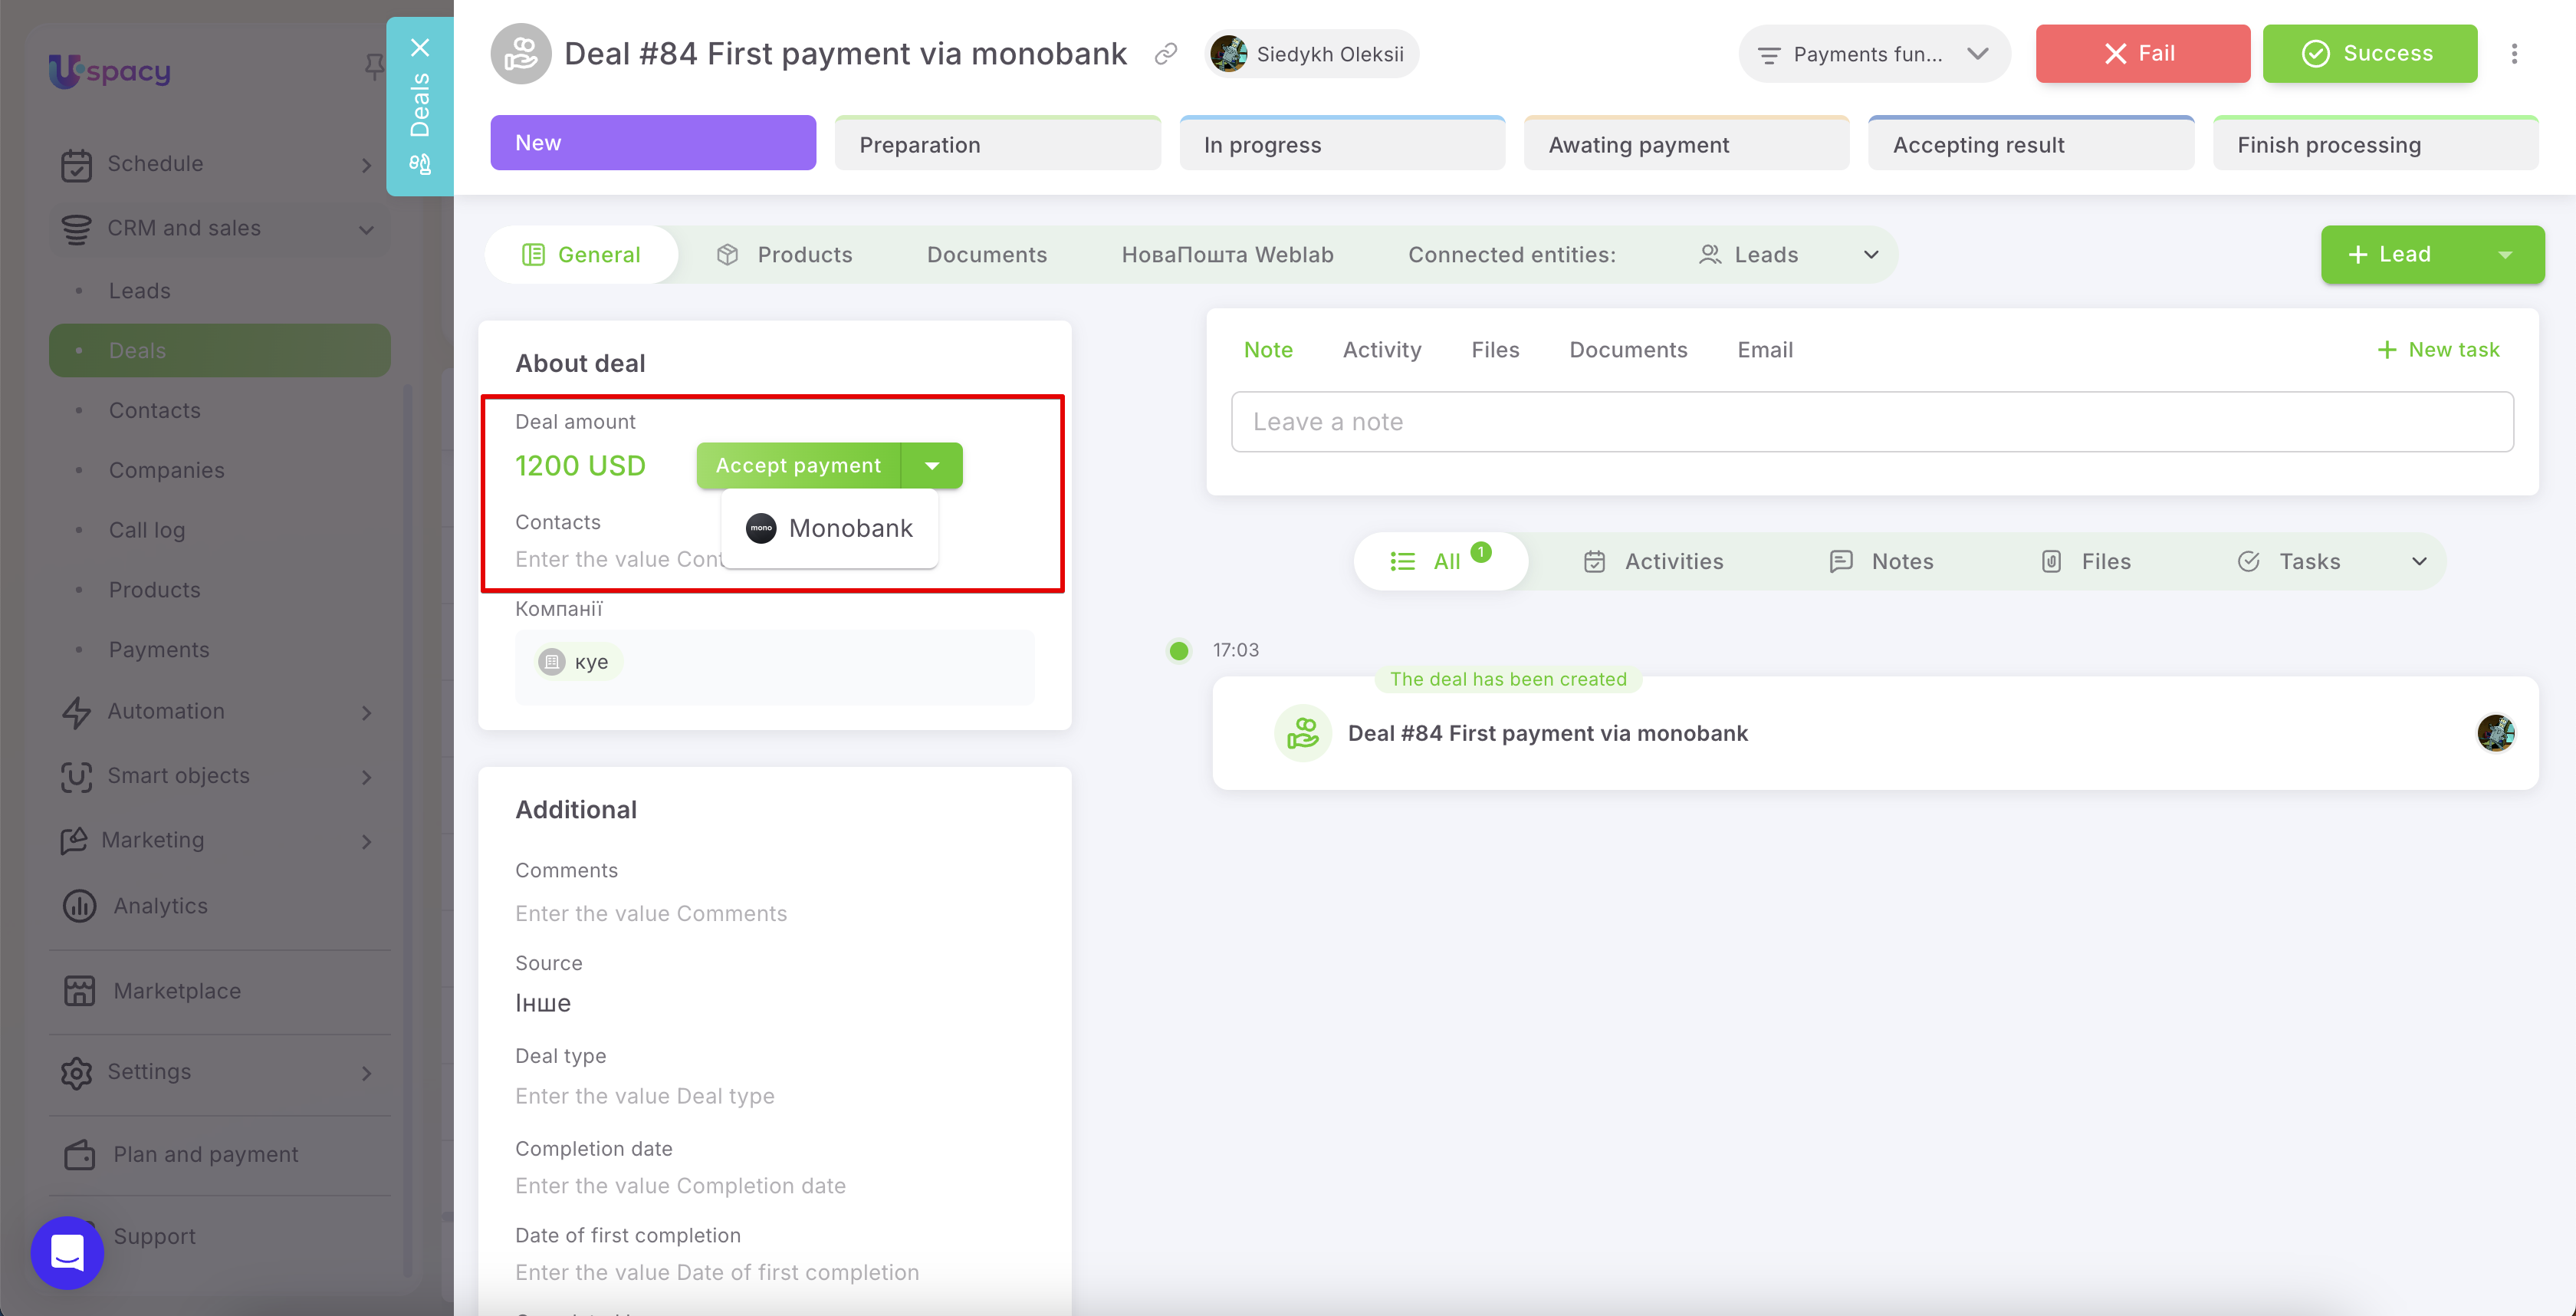
Payments in Uspacy work through products. Therefore, even if the deal amount is specified and the Accept payment button is already available, you still won’t be able to create a payment without products. To do this, add at least one product to the entity you are working with — in this case, the deal — either from the catalog or as a local product.
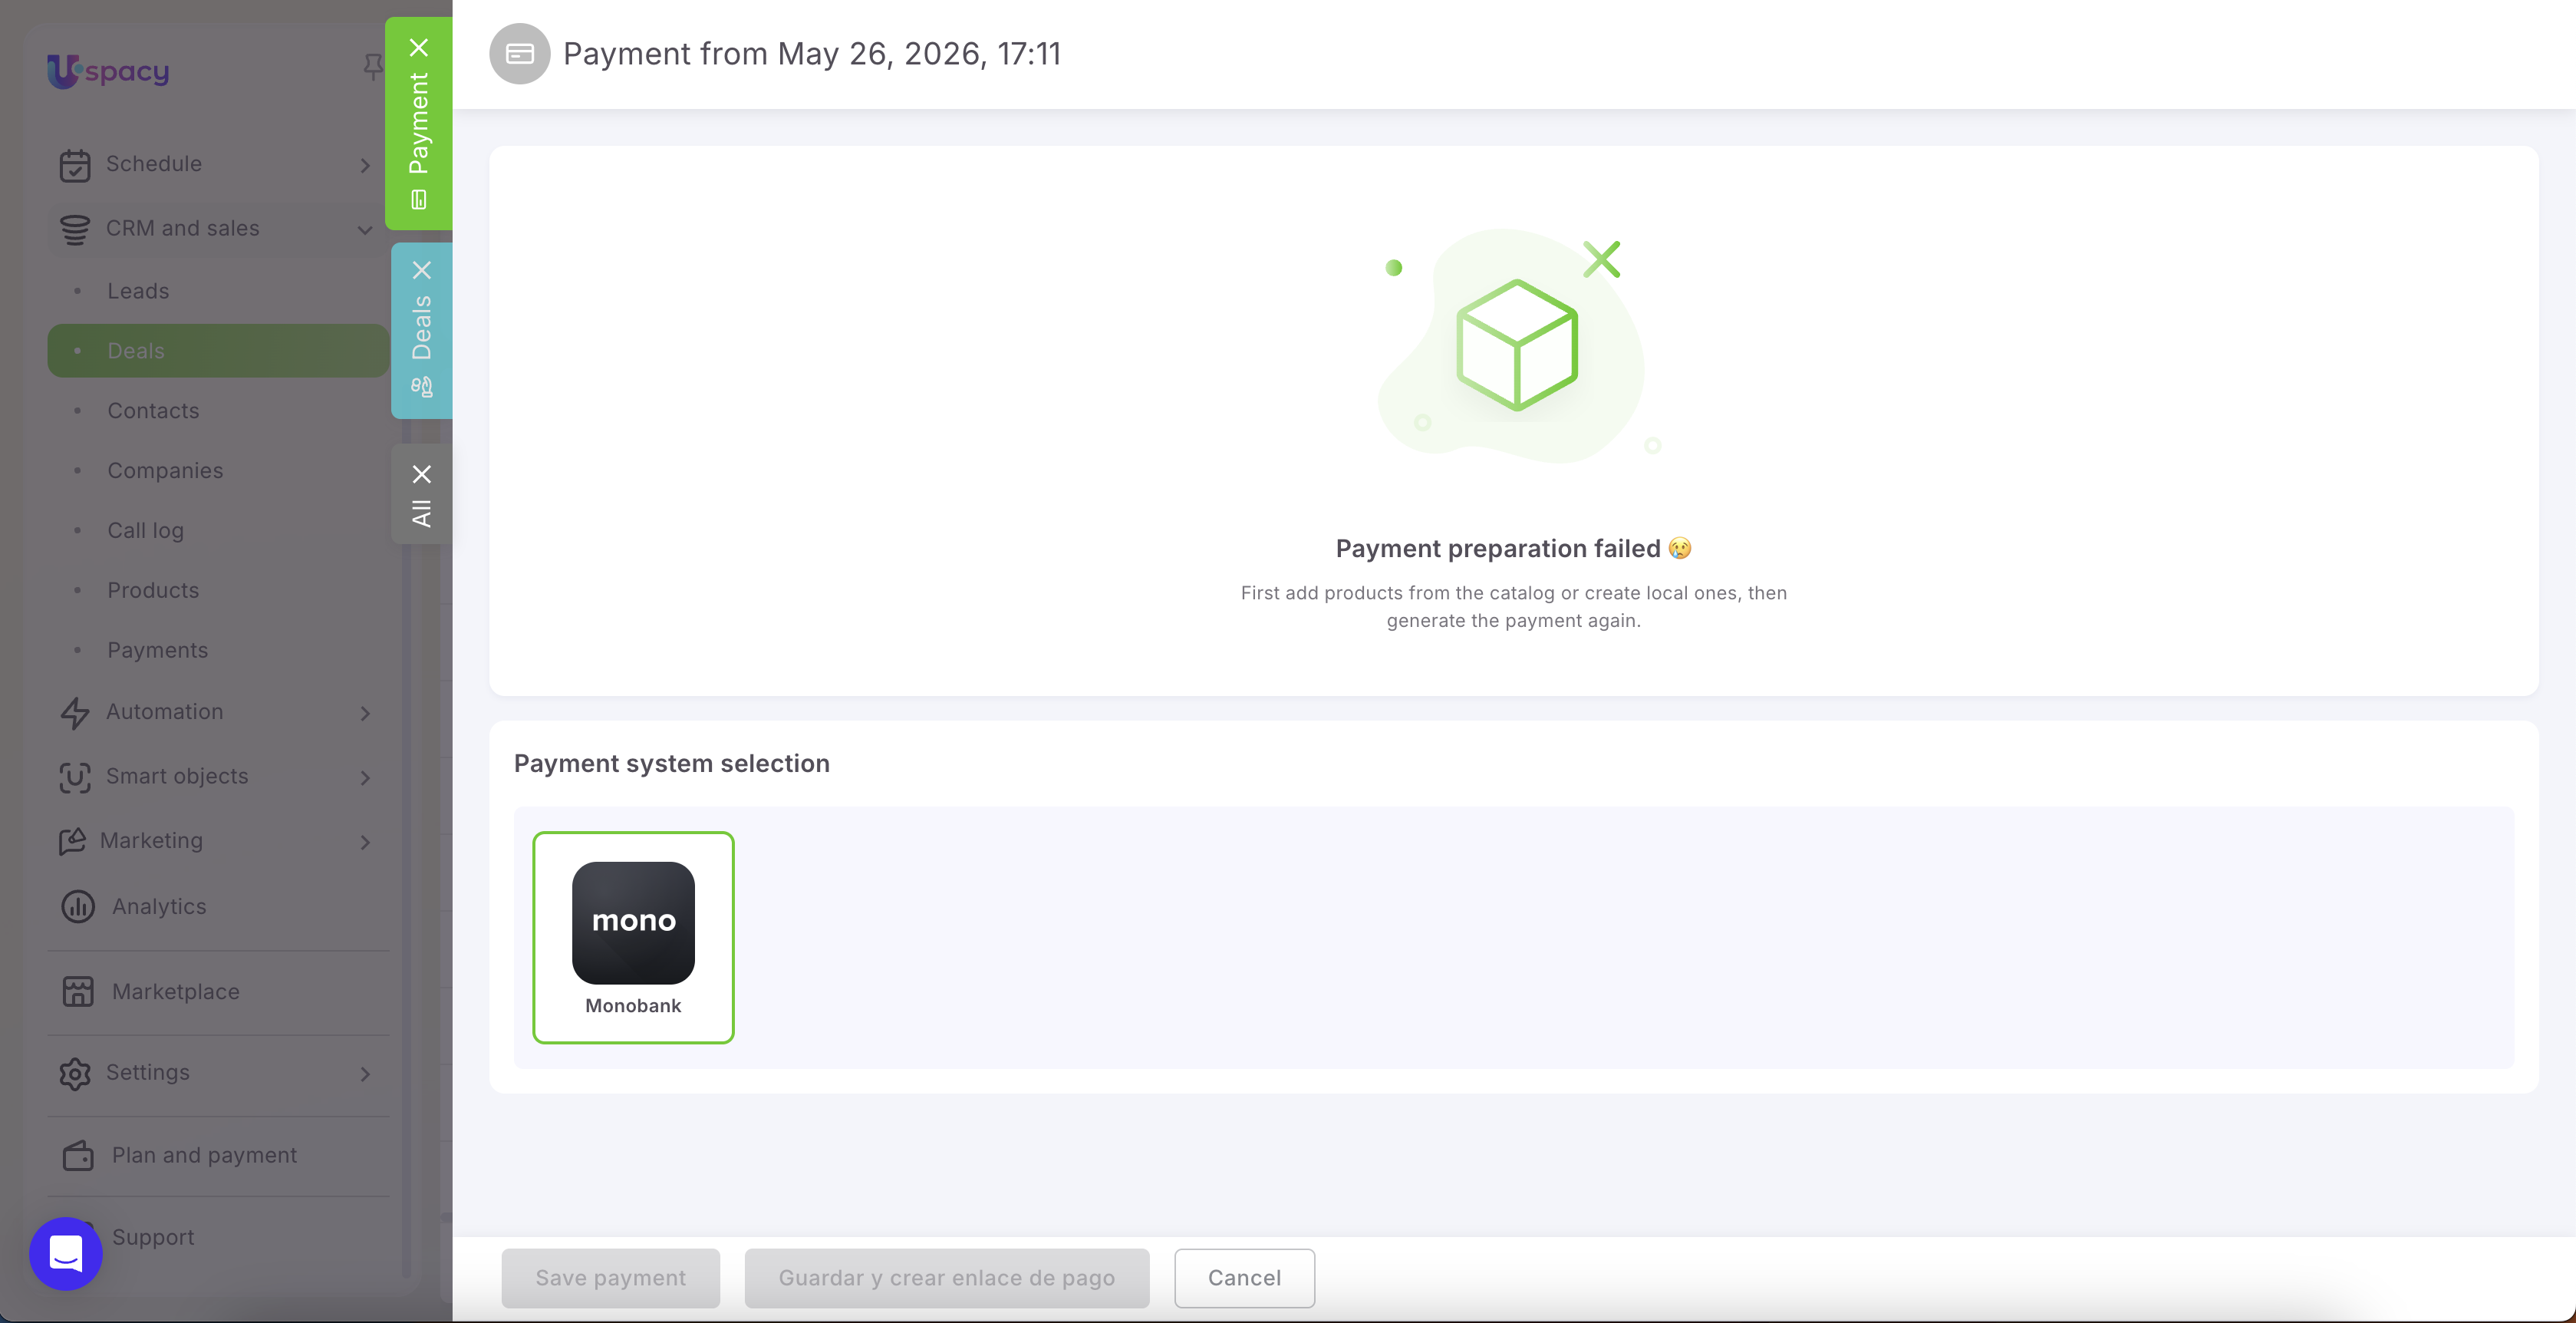
💡 If you do not use a product catalog, simply create a local product for the required amount.
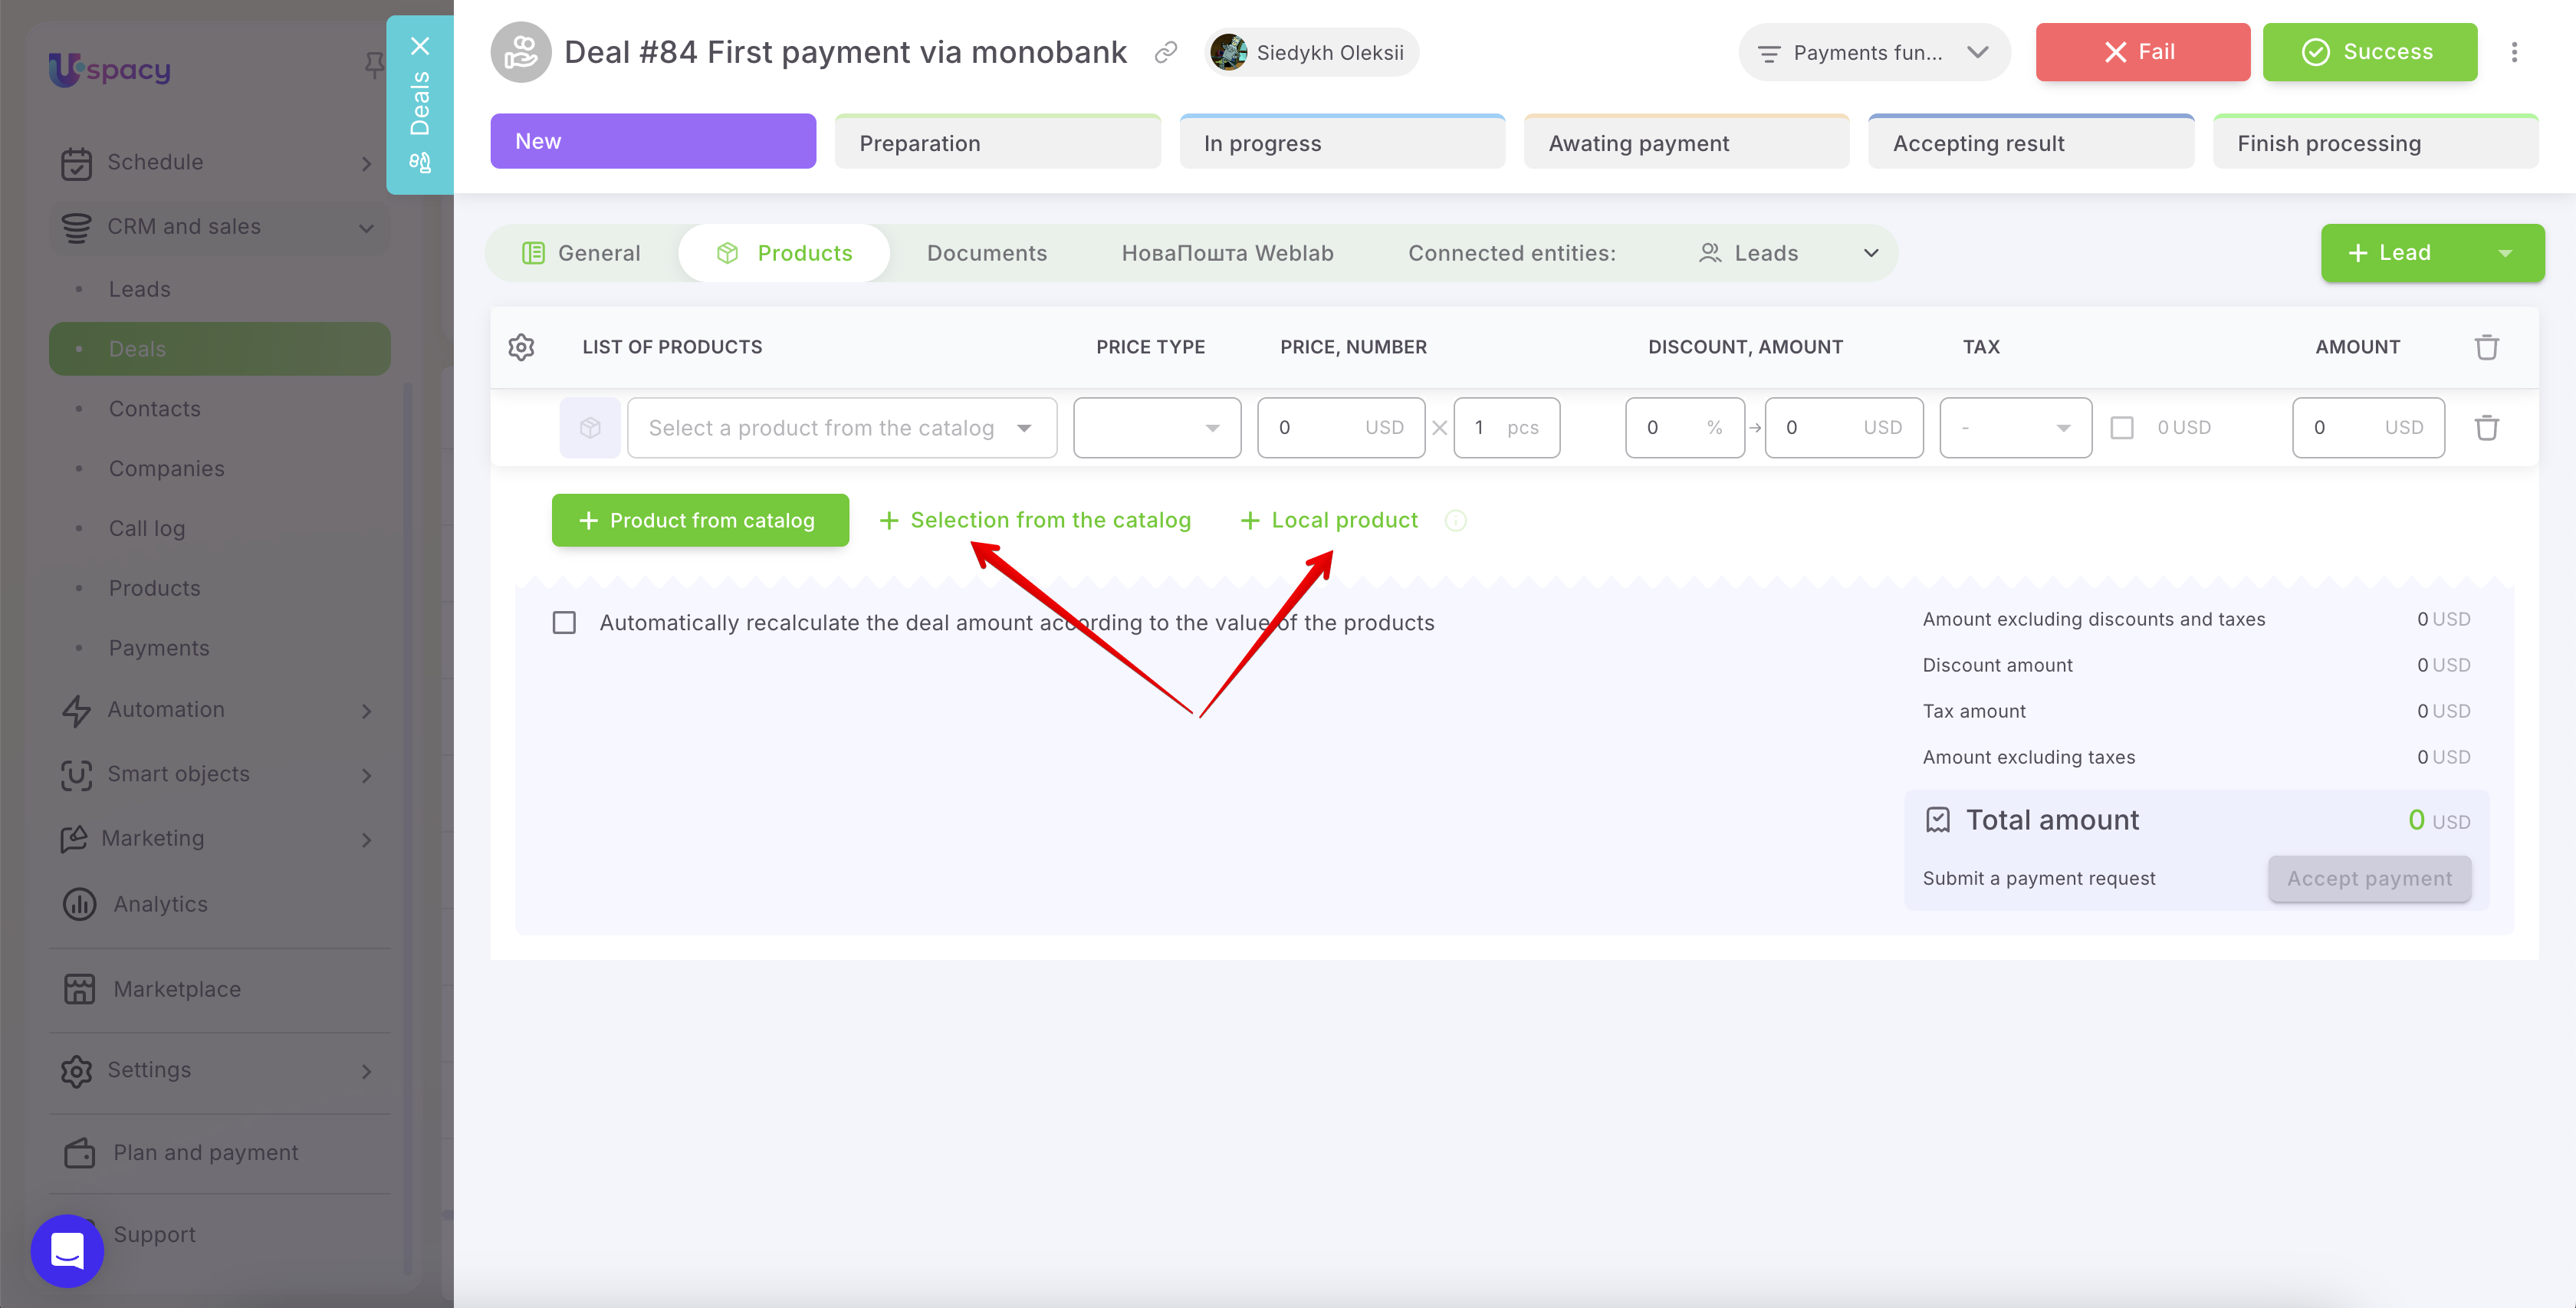
After that, the system will be able to generate a payment through Monobank, and you’ll be able to create a payment link for the client.
The payment creation page will open. At this stage, two actions are available. The first option is:
🟣 Save payment — the payment will be created in Uspacy with the Draft status. The payment link is not generated yet, so the client will not be able to complete the payment at this point.
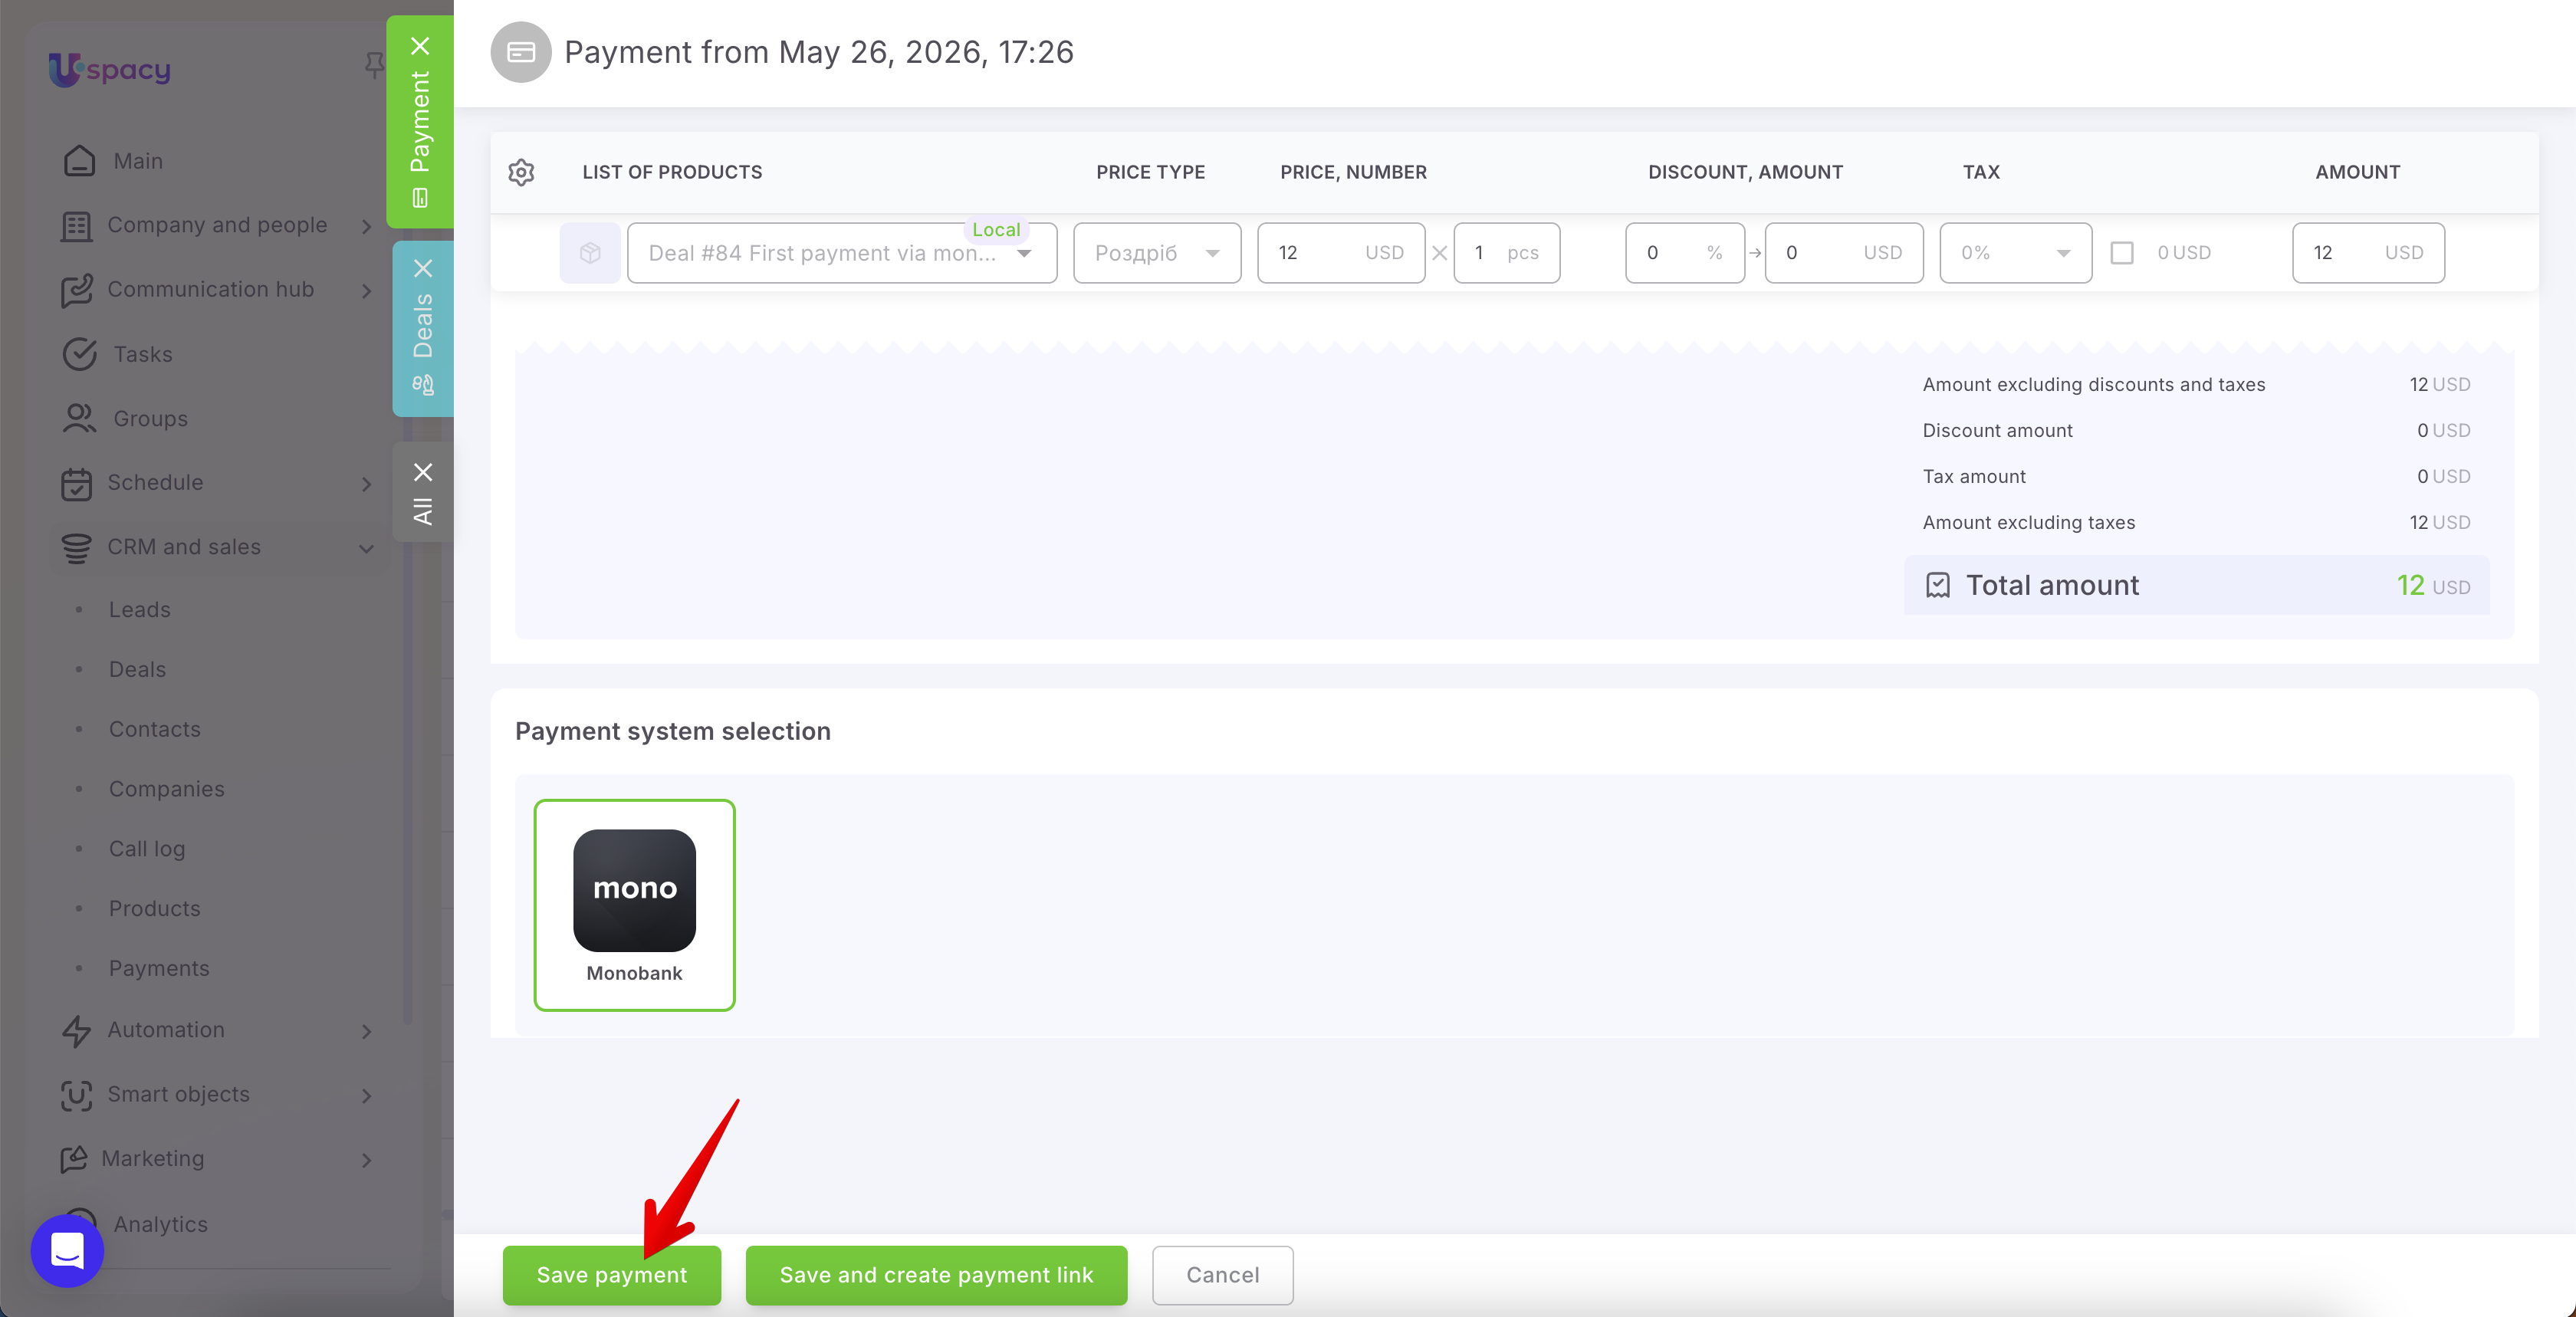
This option is convenient if you want to prepare and verify the payment first before proceeding further. To generate a payment link for such a payment, simply click Create payment link.
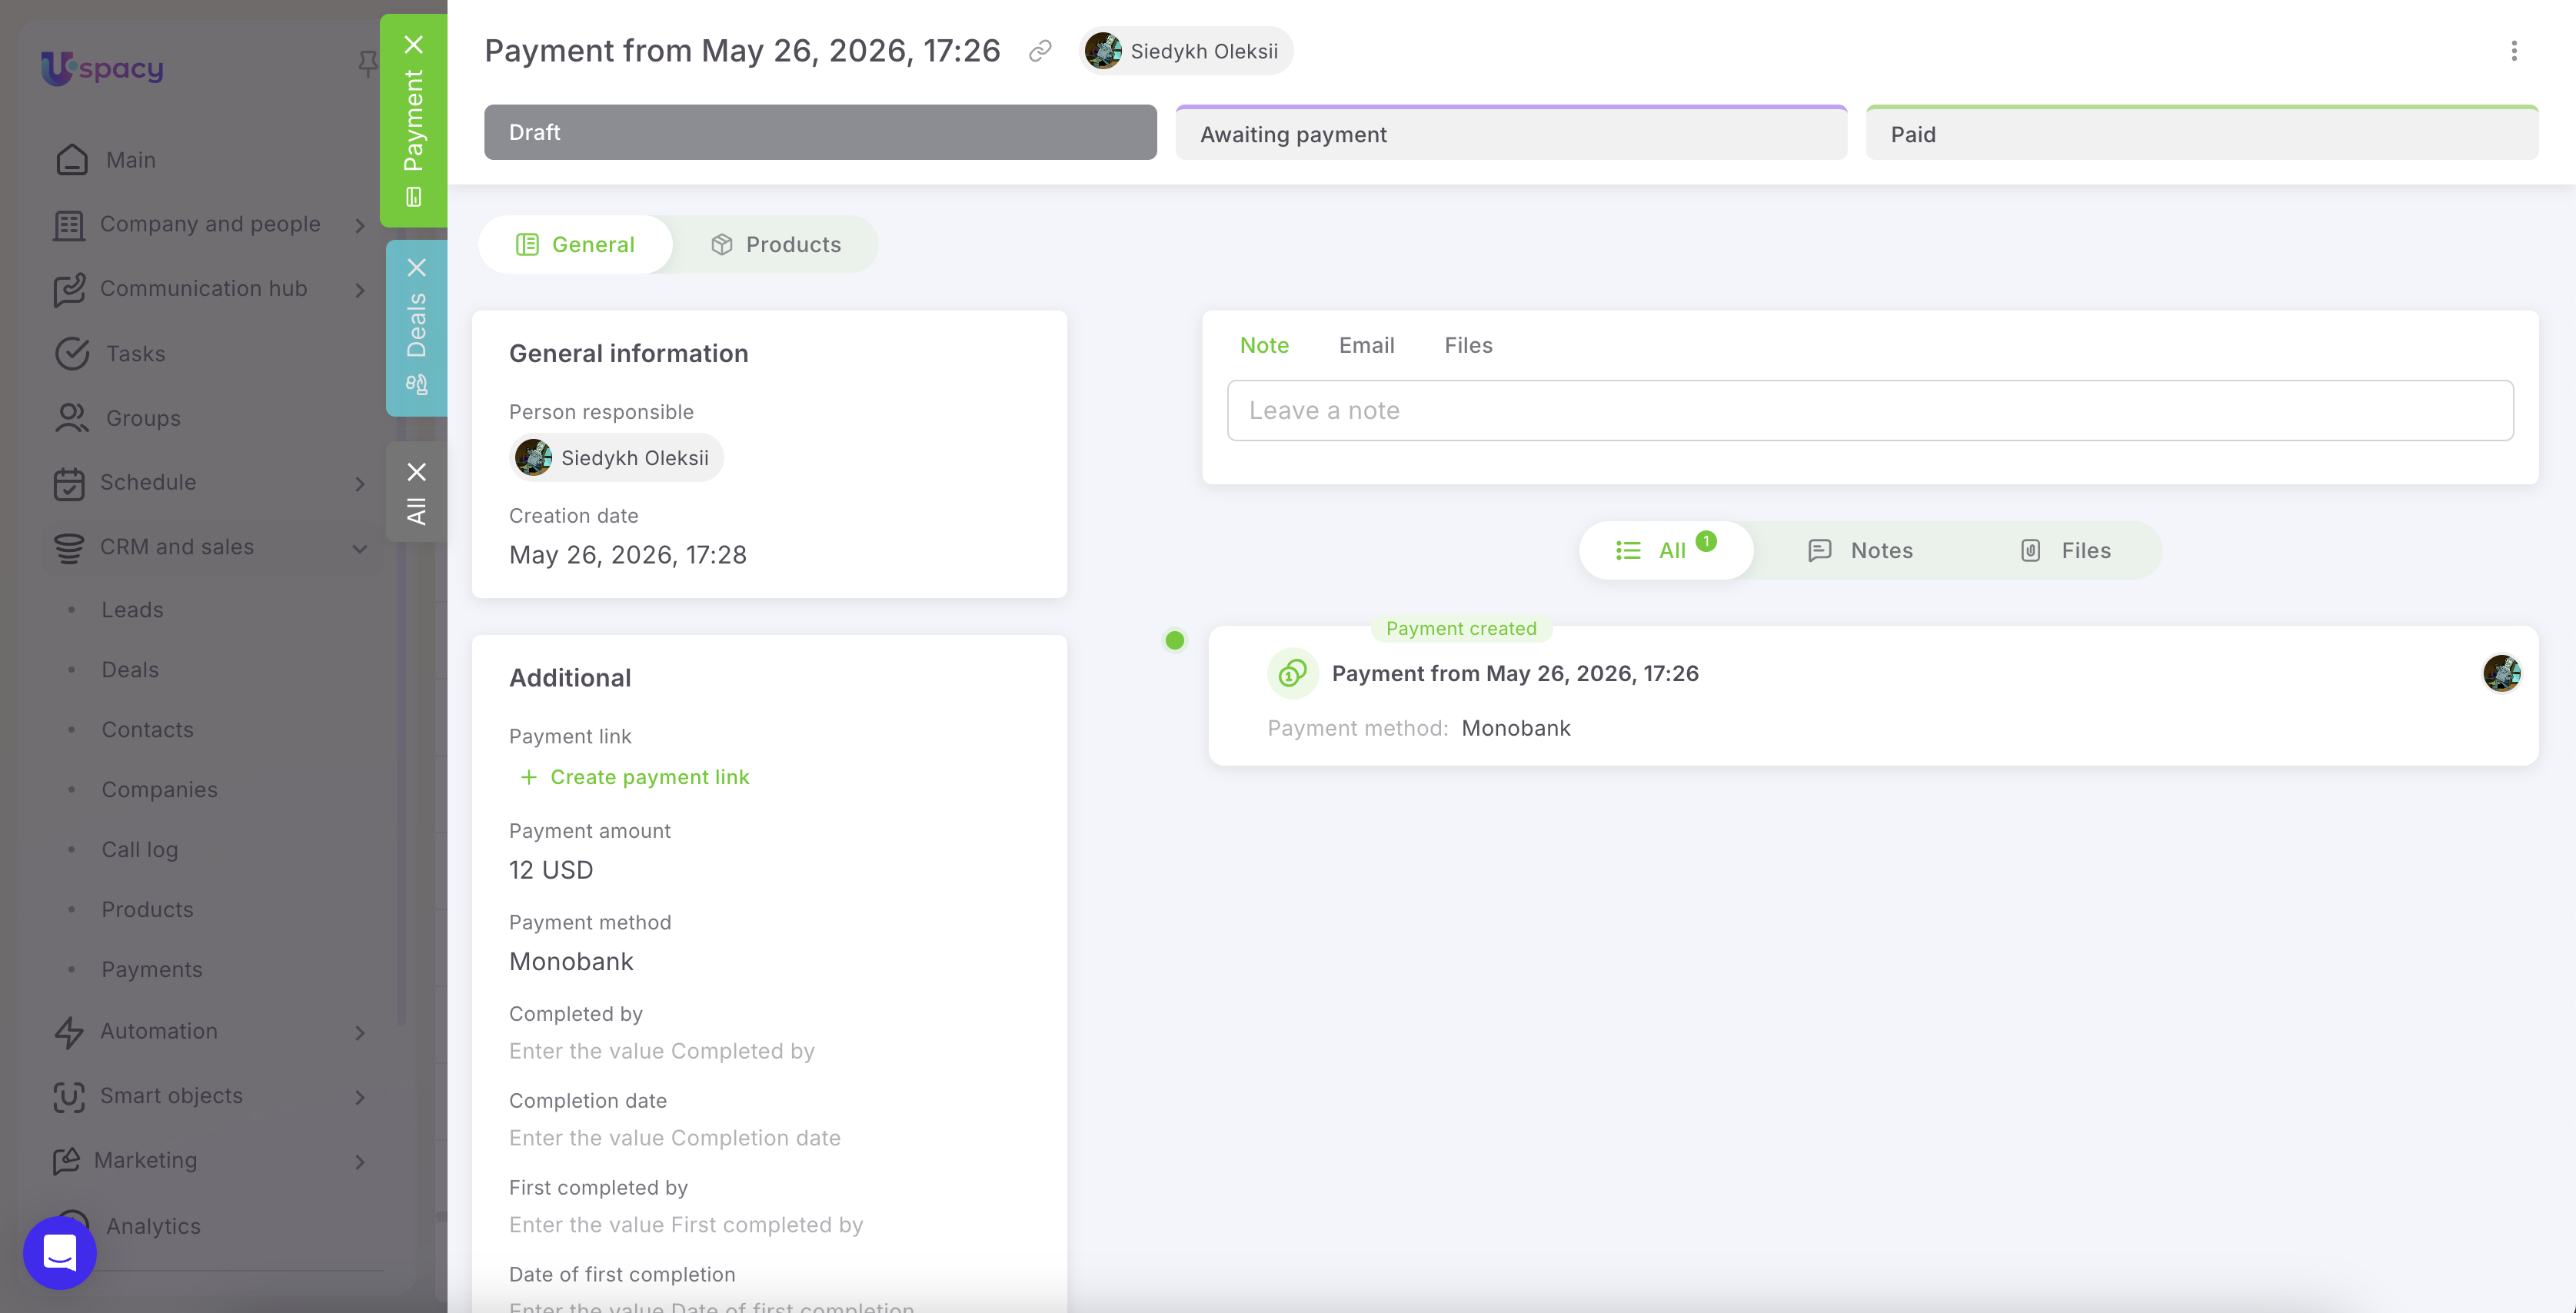
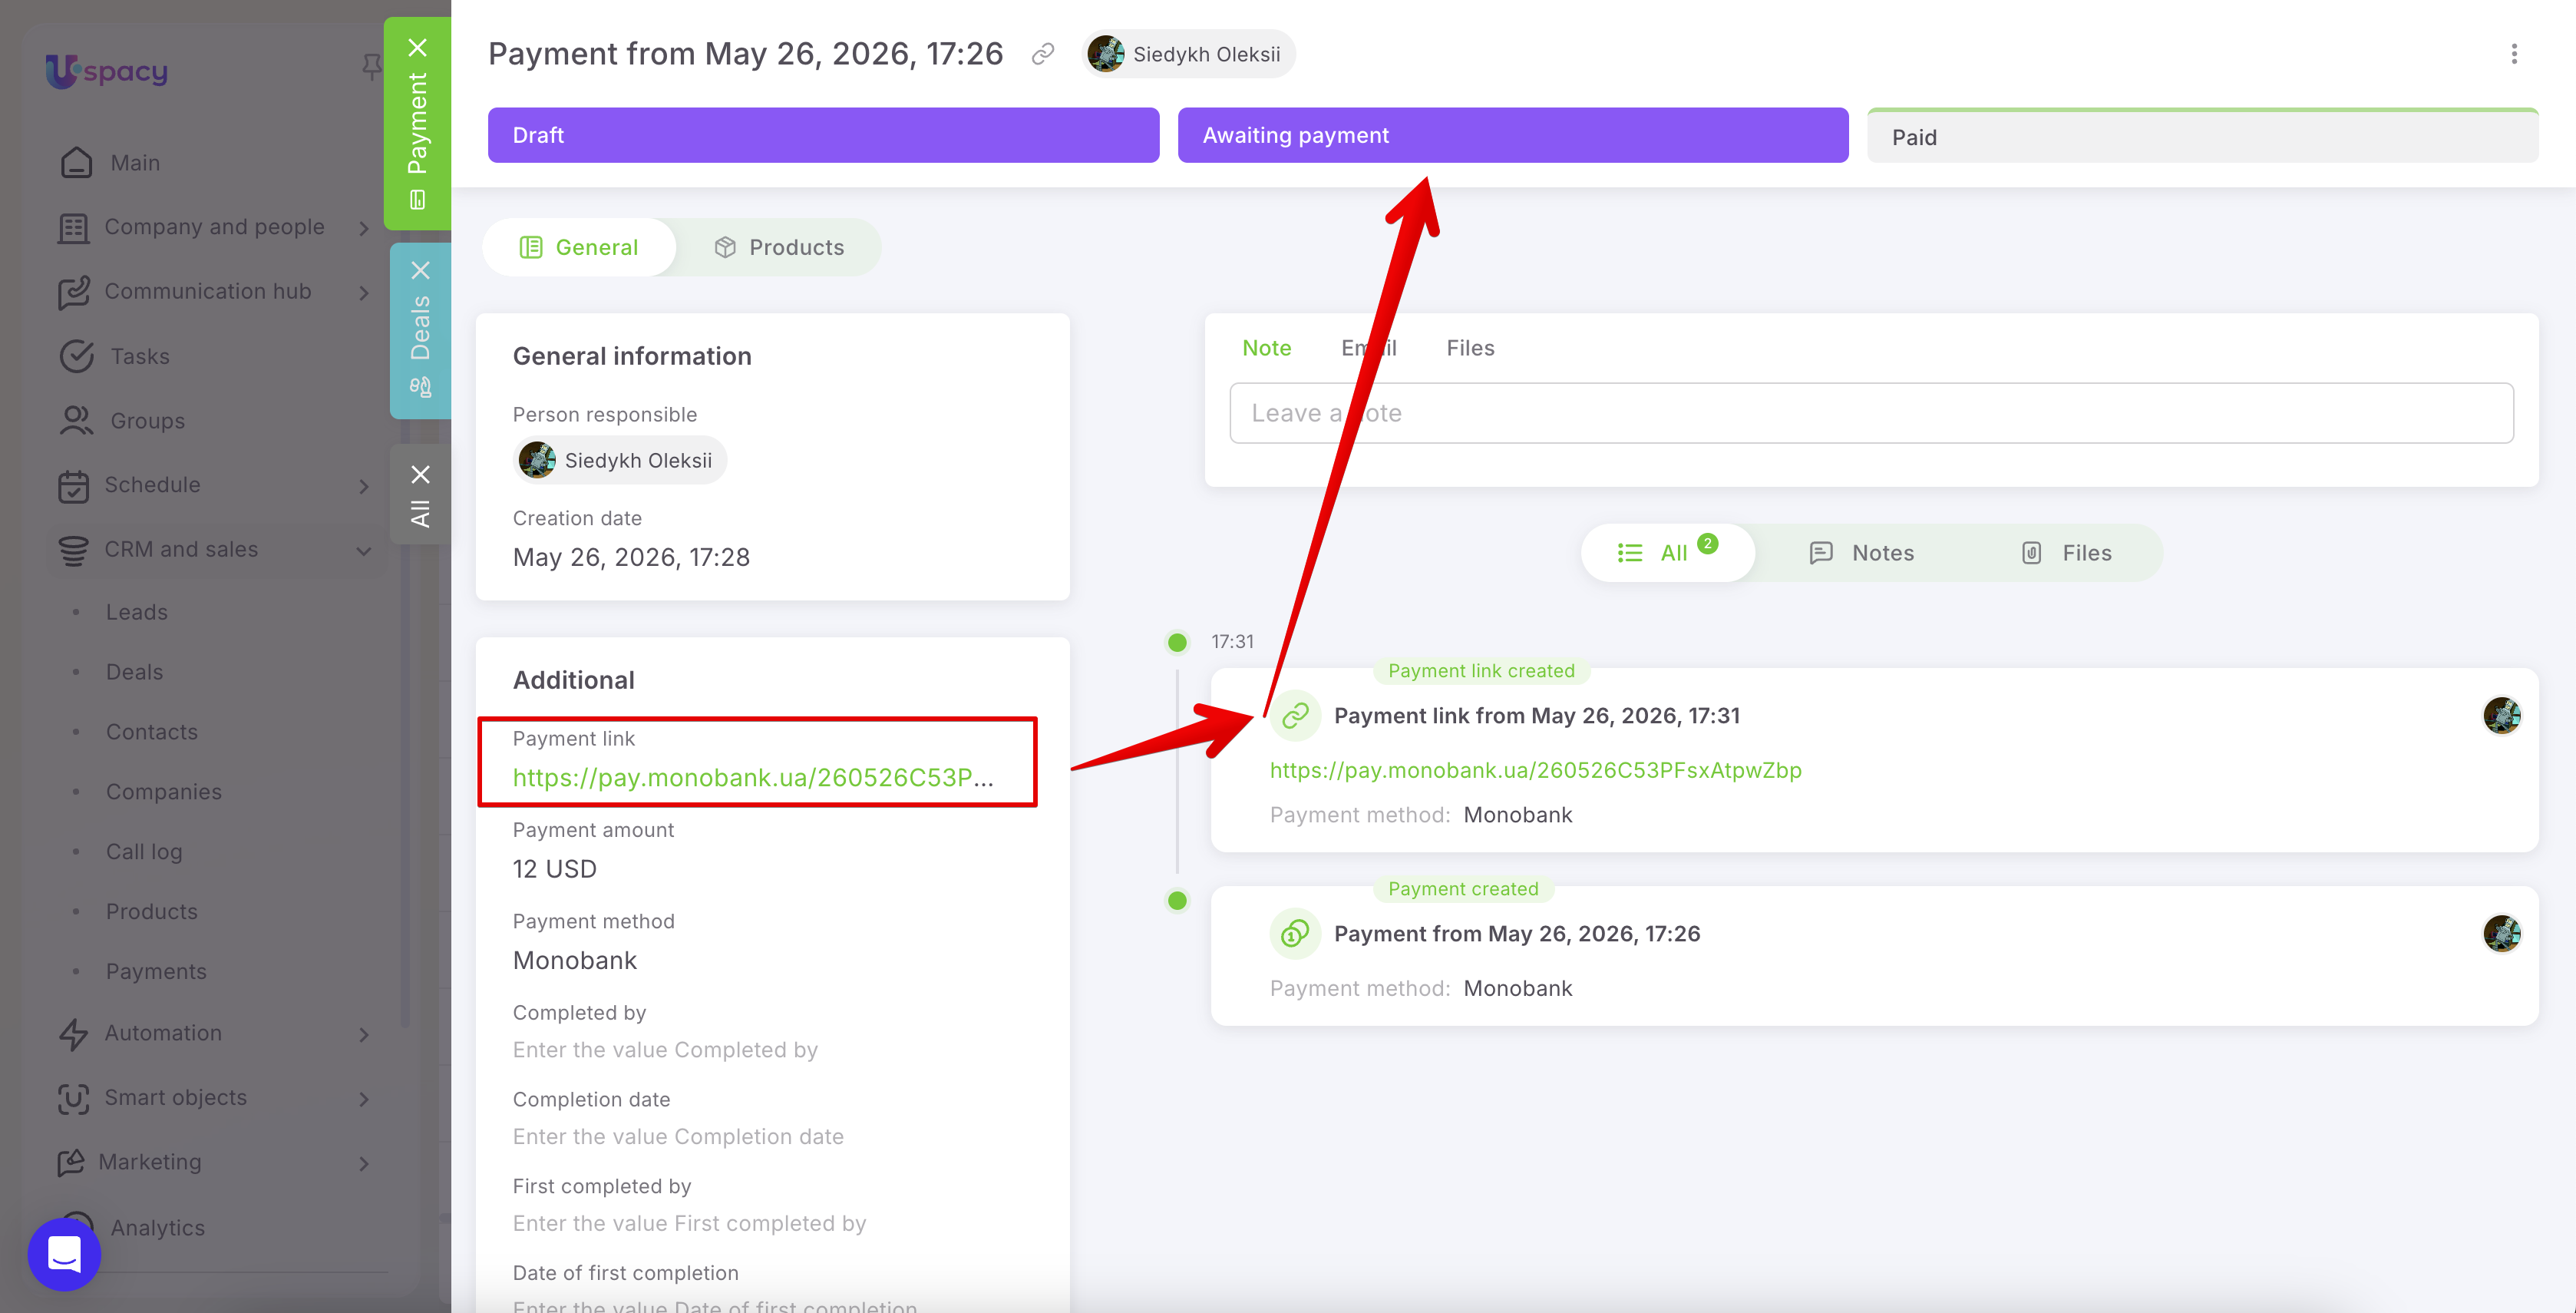
The system will then send a request to Monobank and generate a unique payment link for that payment. The link will appear in the corresponding field and will also be recorded in the card history as a separate event.
Once the link is generated, the payment automatically moves from the Draft status to Awaiting payment.
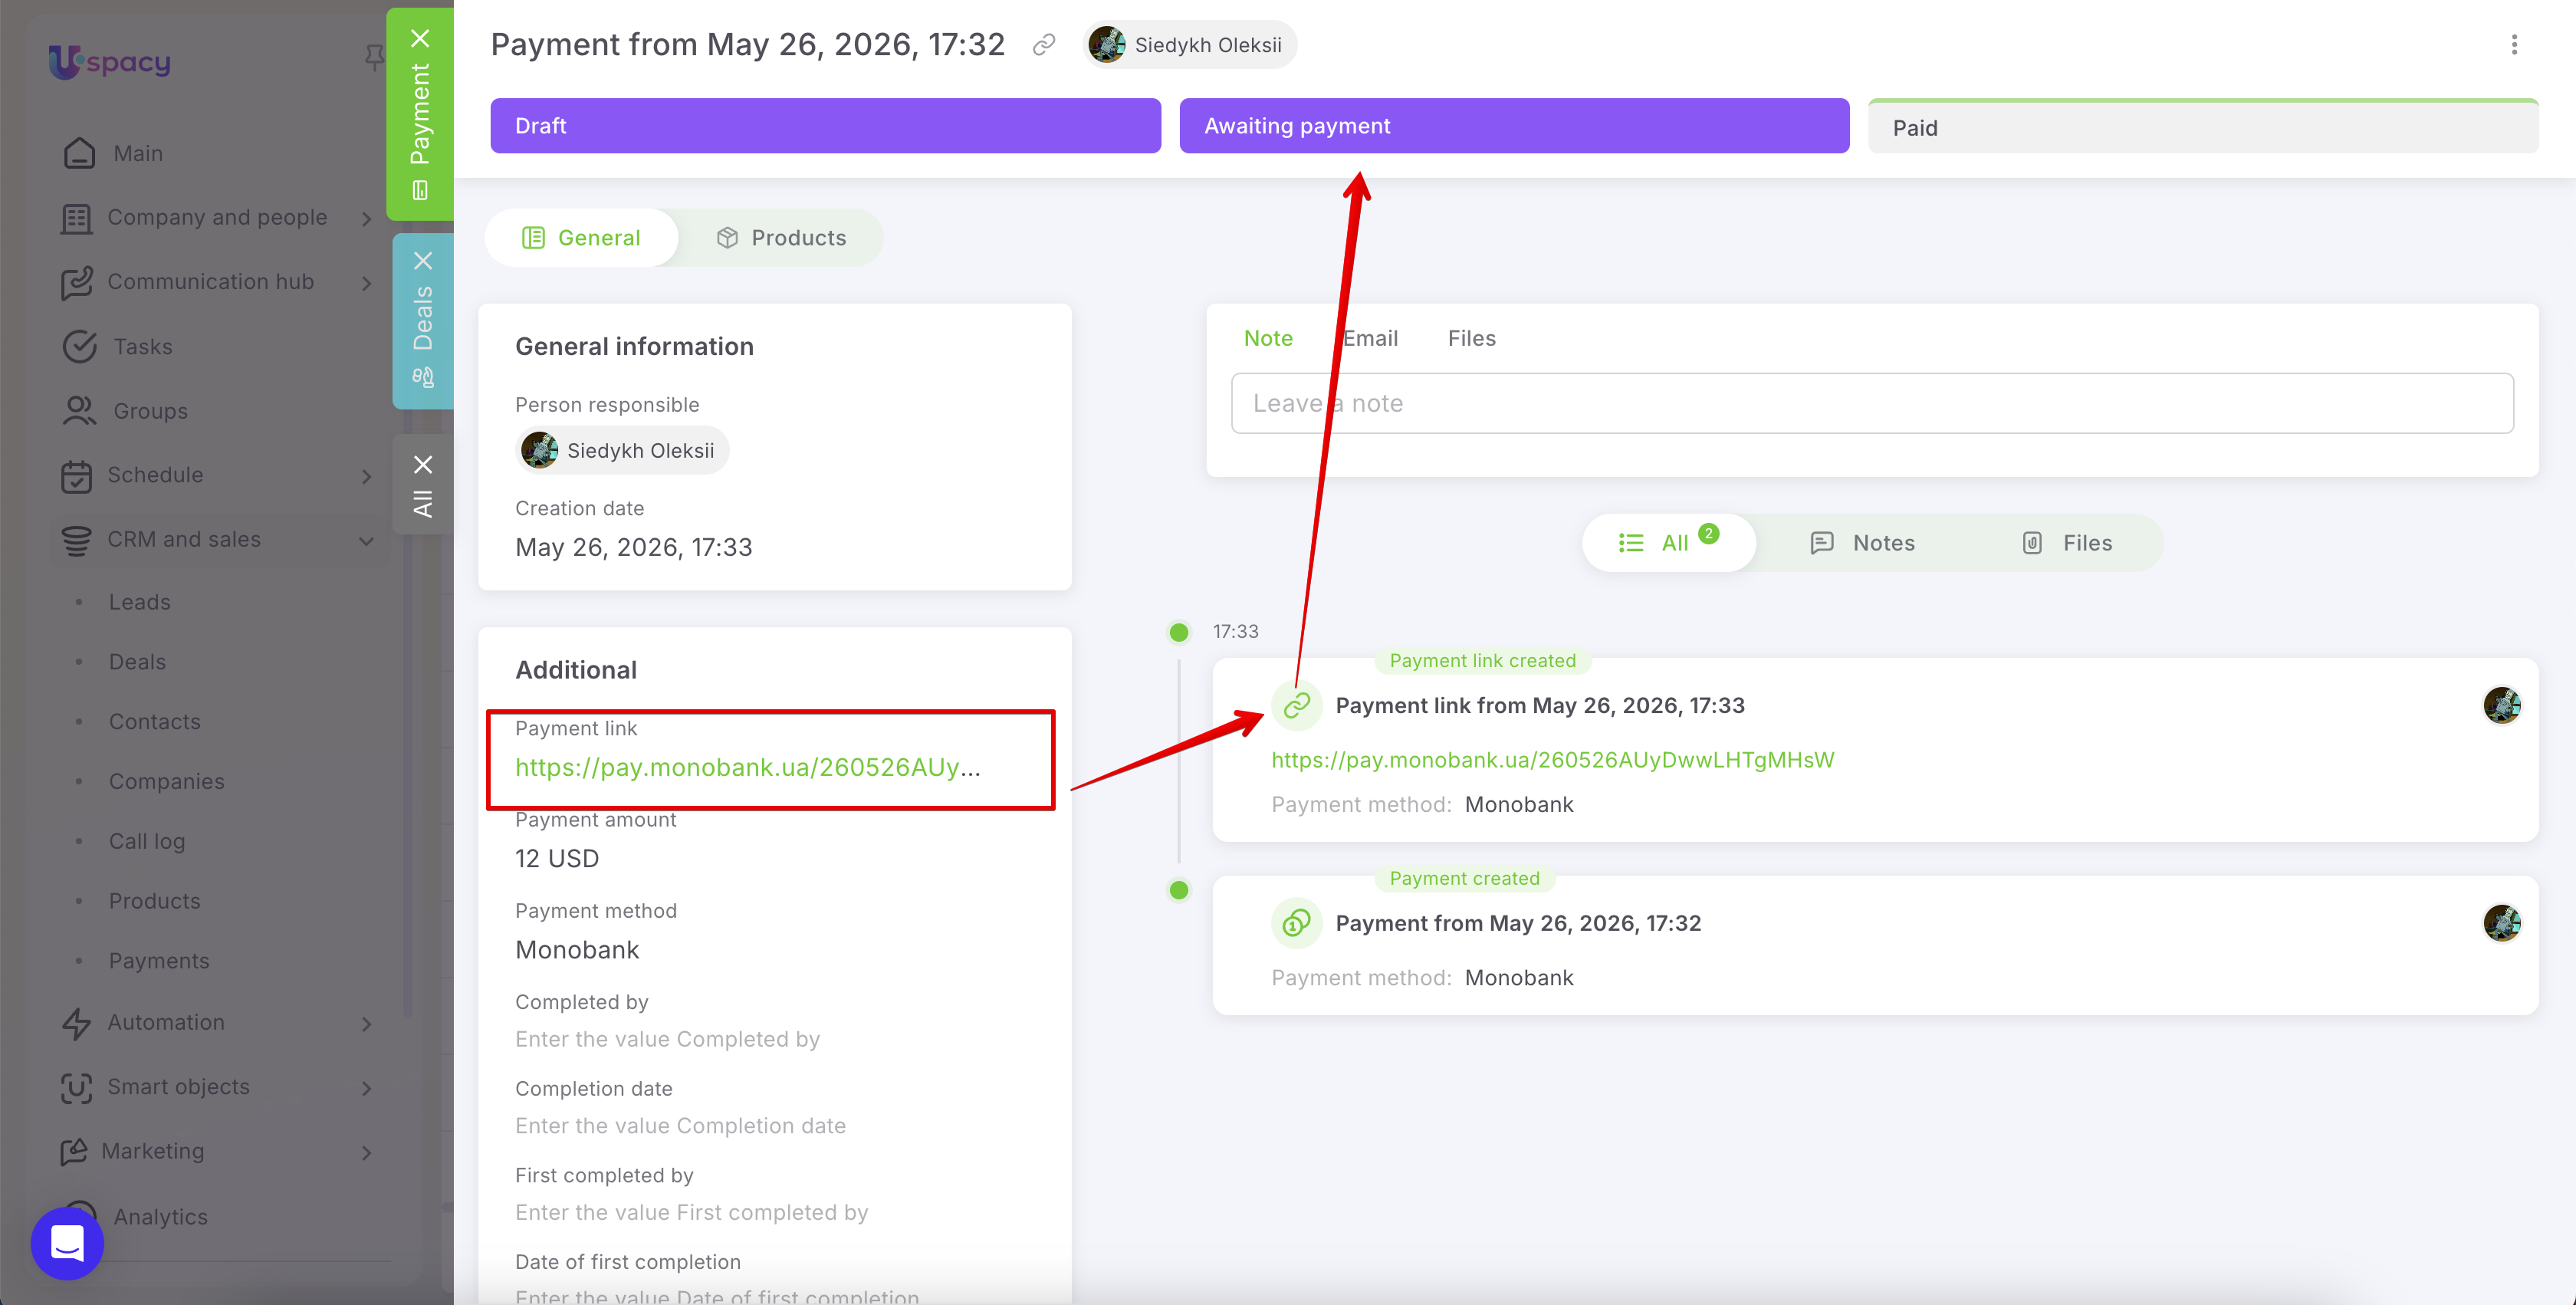
This means the payment has already been created, and the client can now follow the link and complete the payment. Copy the payment link and send it to the client using any convenient communication channel: email, chat, or another messaging platform.
At the same time, if all data has already been verified and the payment should be sent to the client immediately, you can simplify the process and generate the payment link during saving. That is exactly what the second option is designed for.
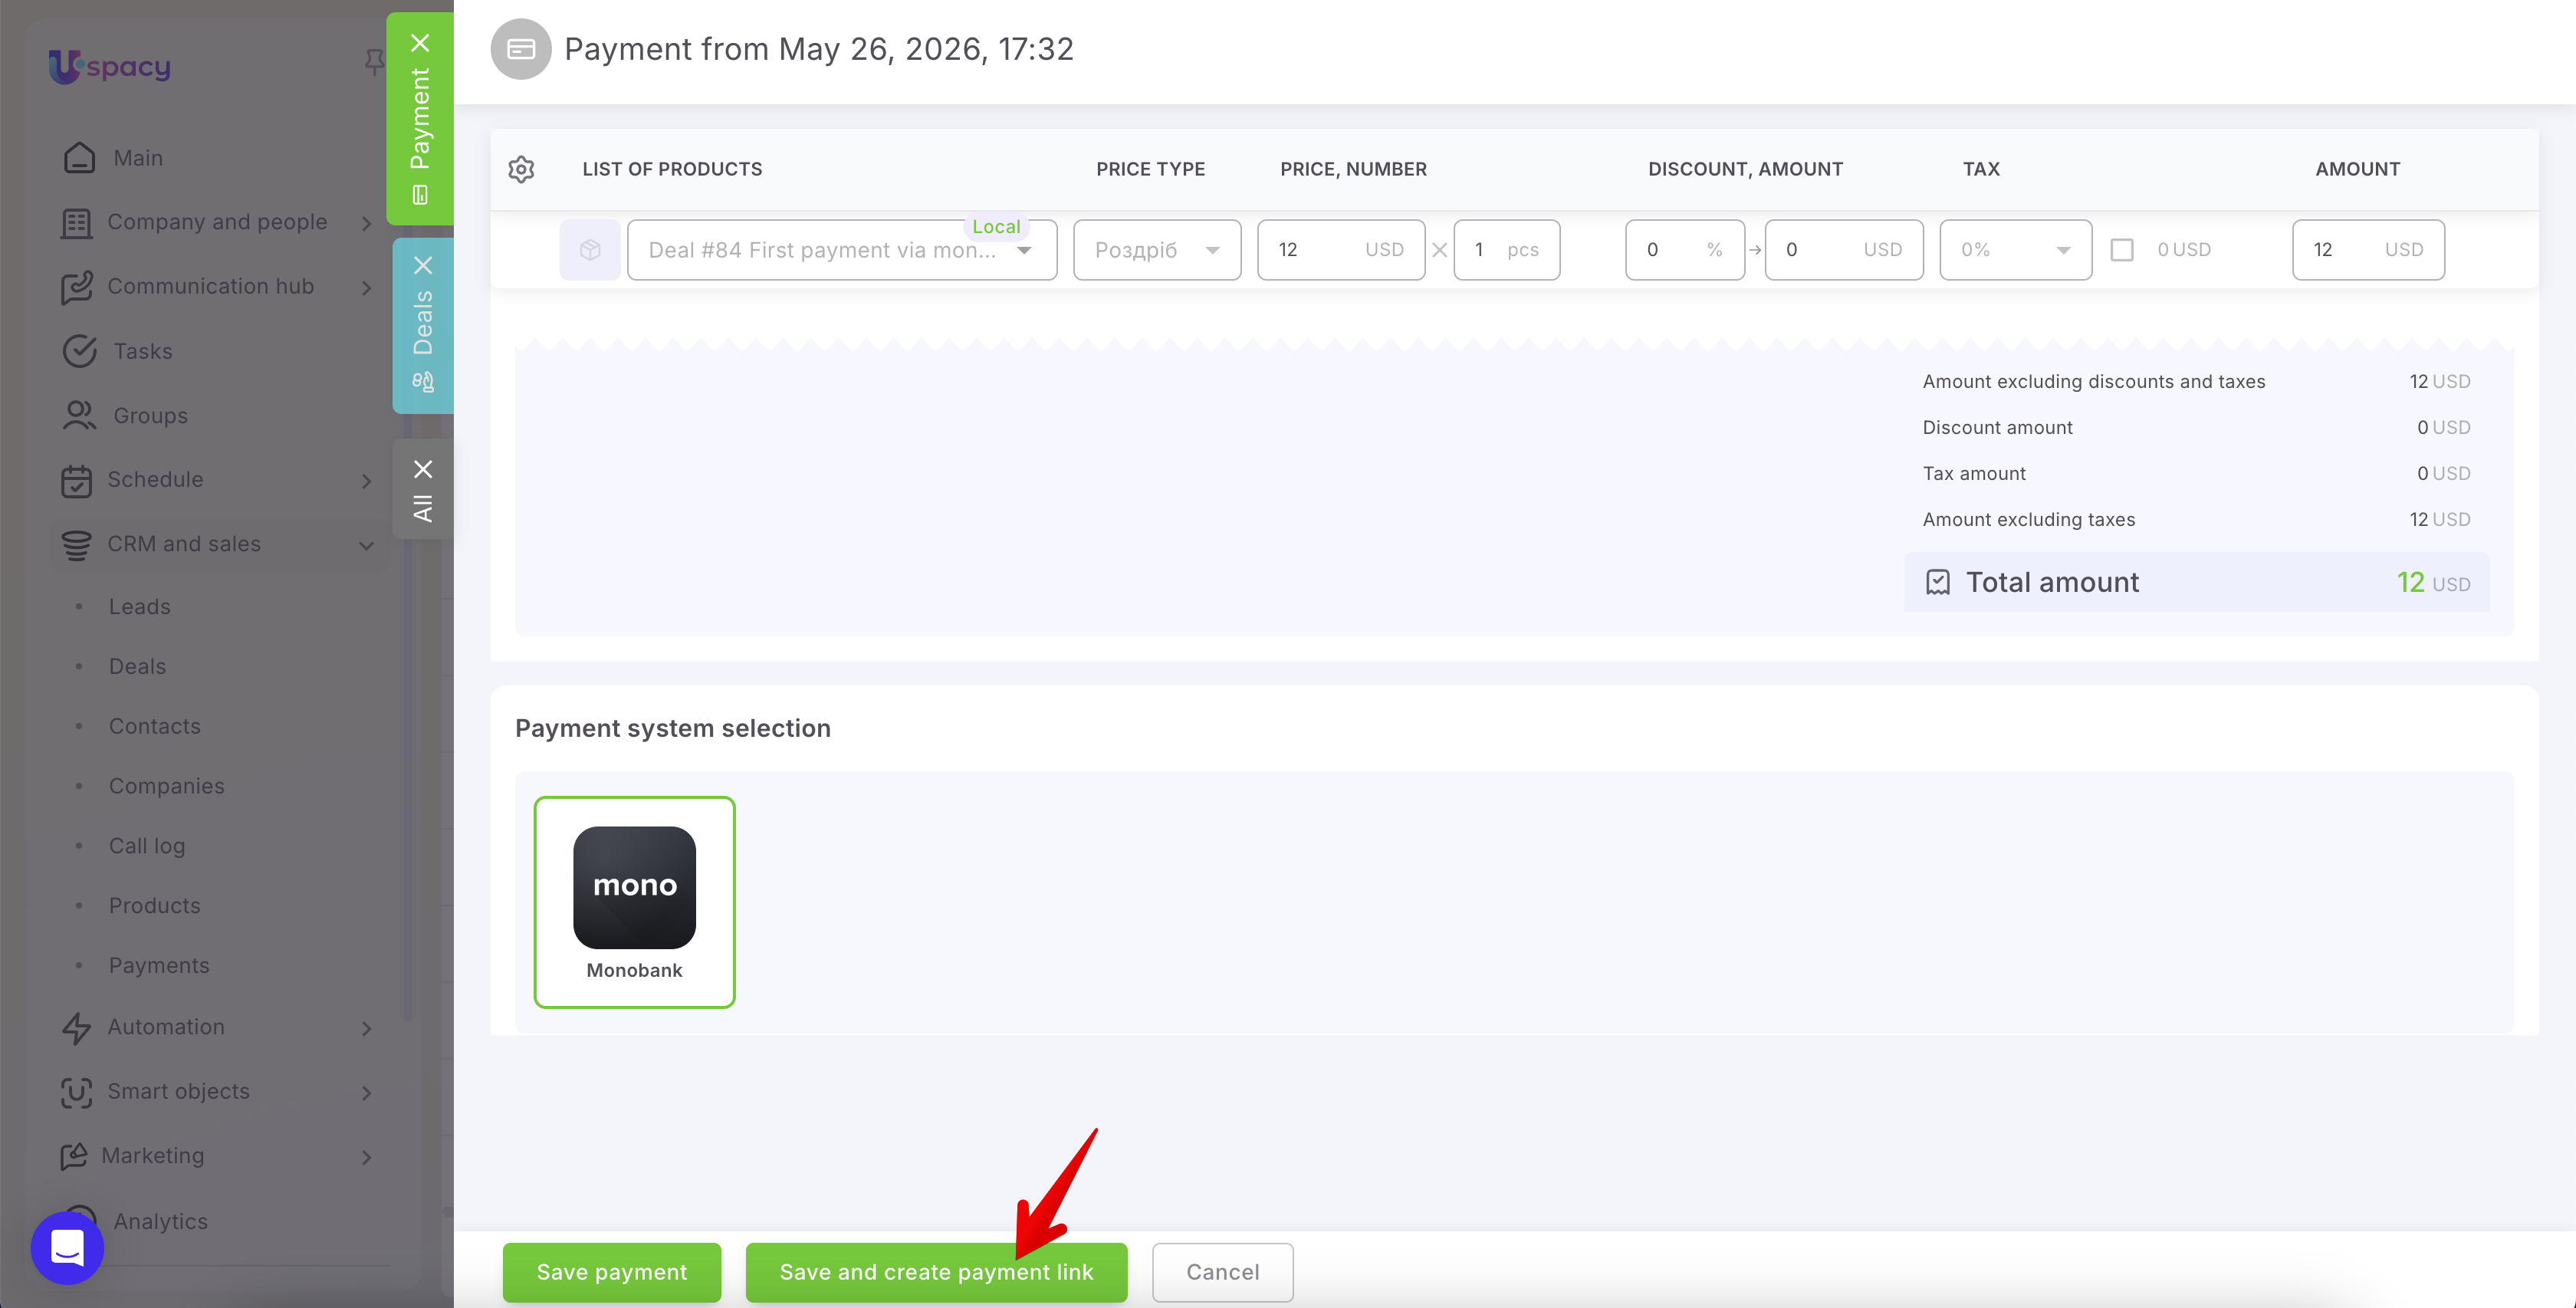
🟣 Save and create payment link — the system will immediately create the payment and generate the payment link via Monobank. After that, the payment will move to the Awaiting payment status, and the link can be copied and sent to the client.
After the payment link is generated, the payment status updates automatically. Once the client completes the payment, the payment moves to the Paid status, and the payment date is recorded in the system.
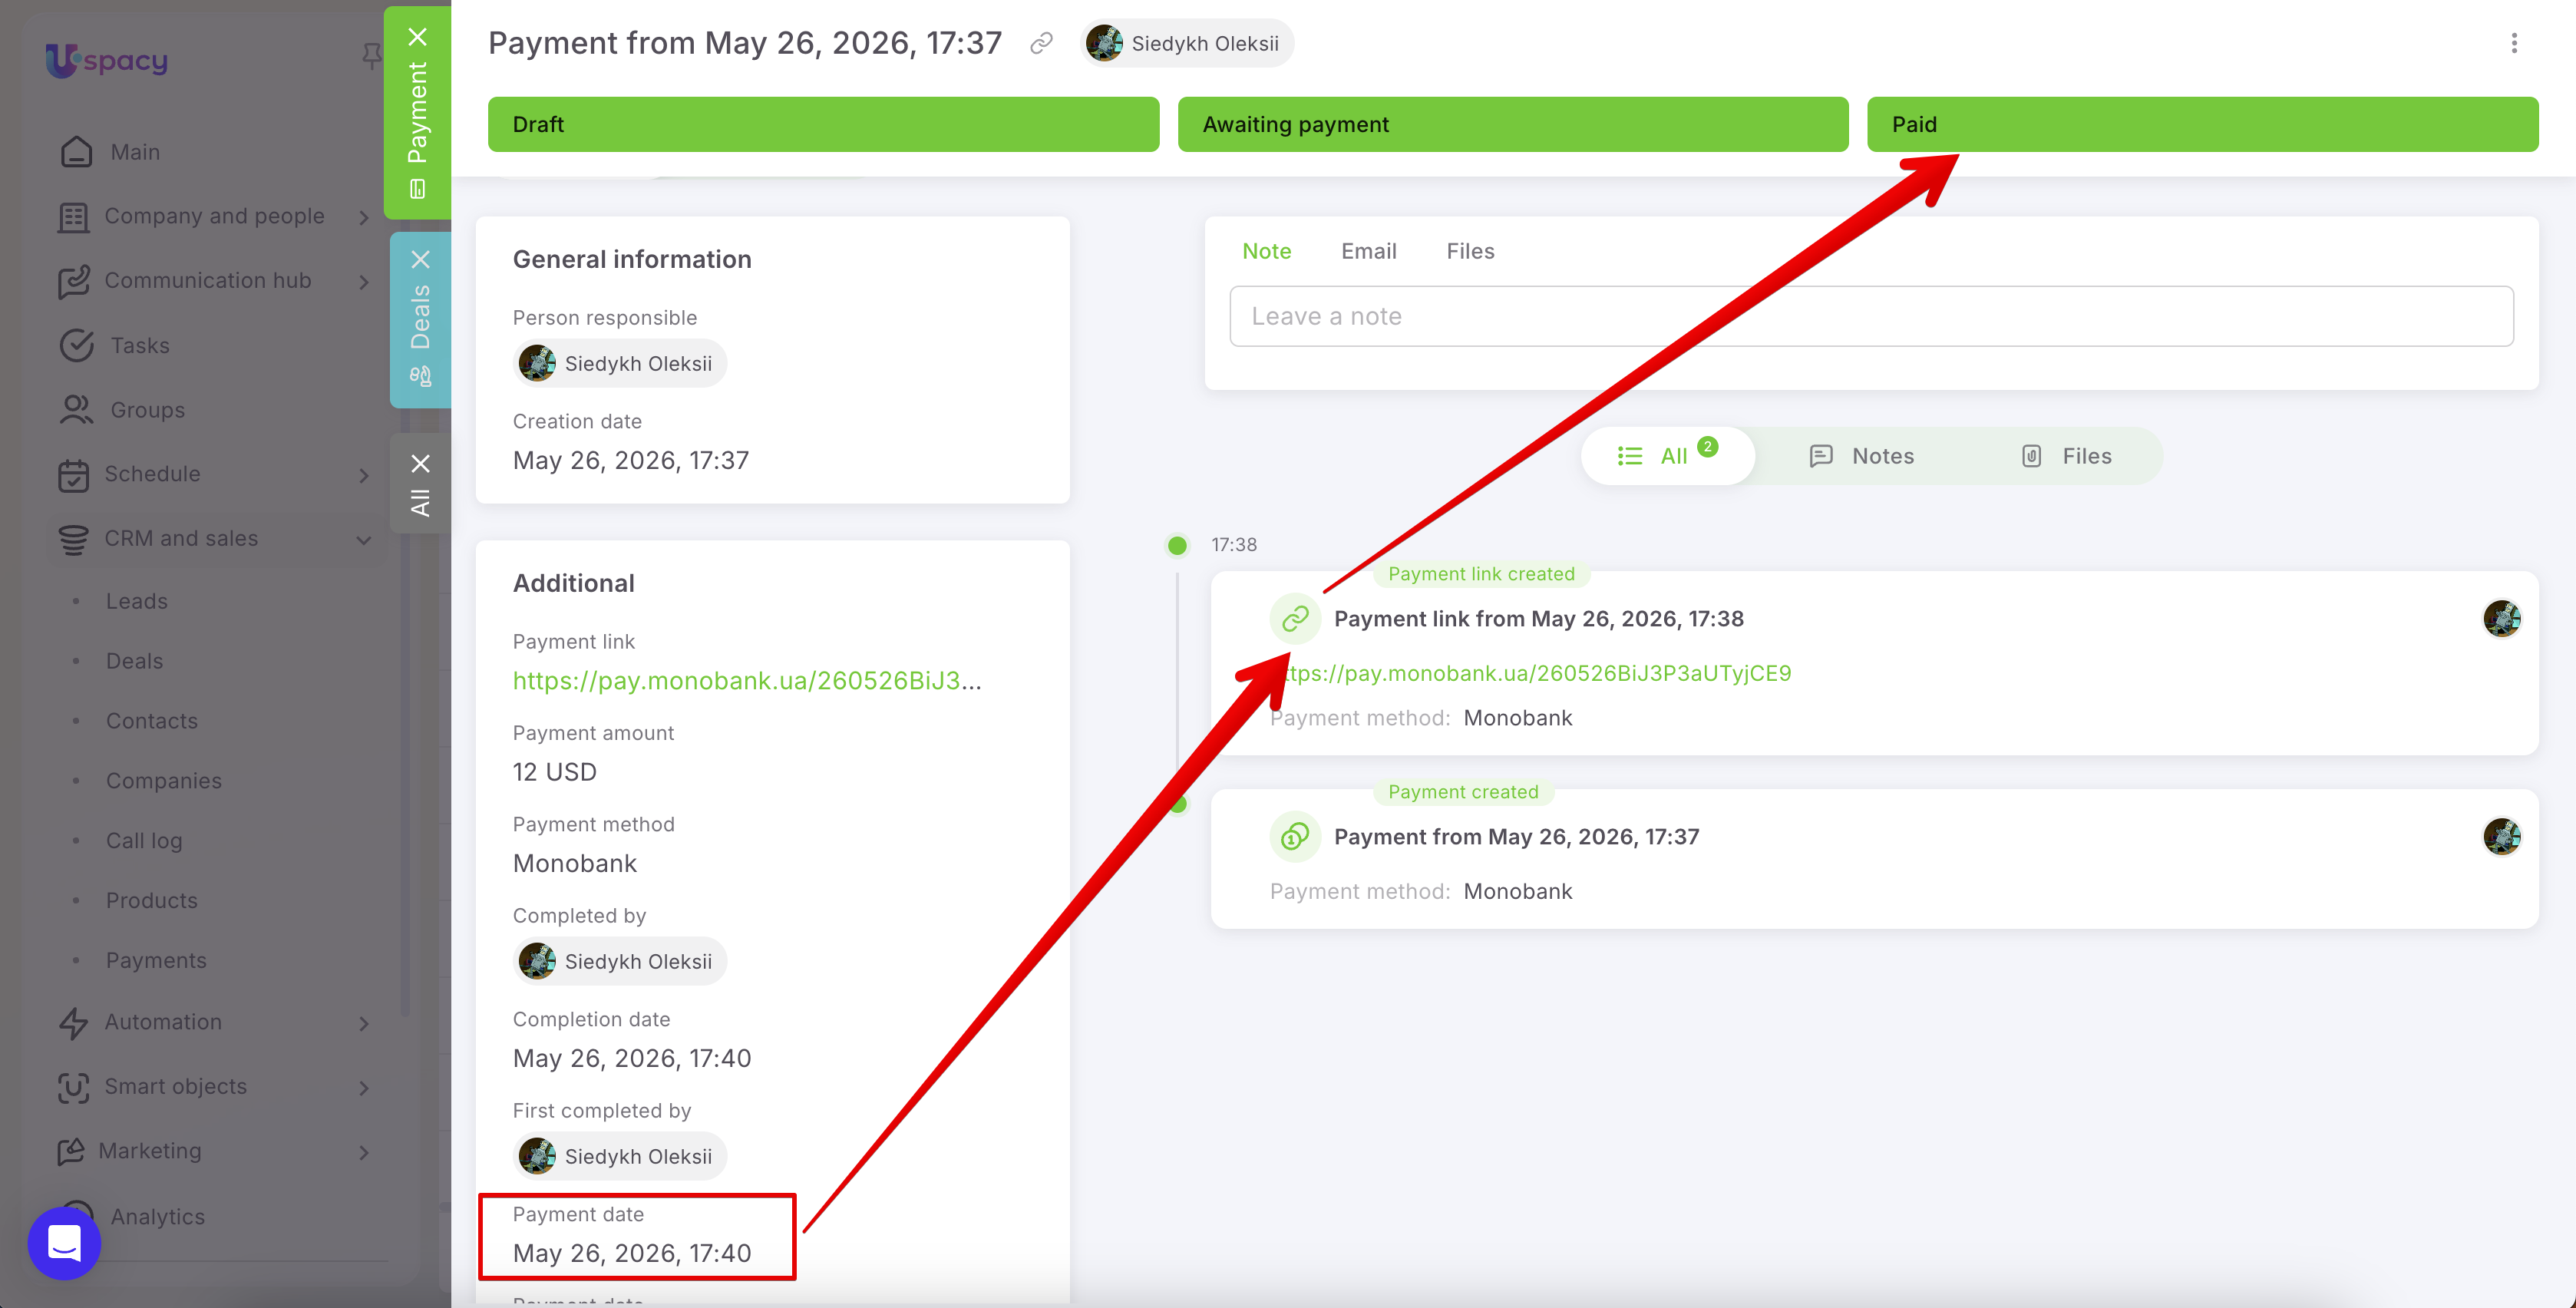
If the payment link expires before the funds are received, the payment will receive the Canceled.
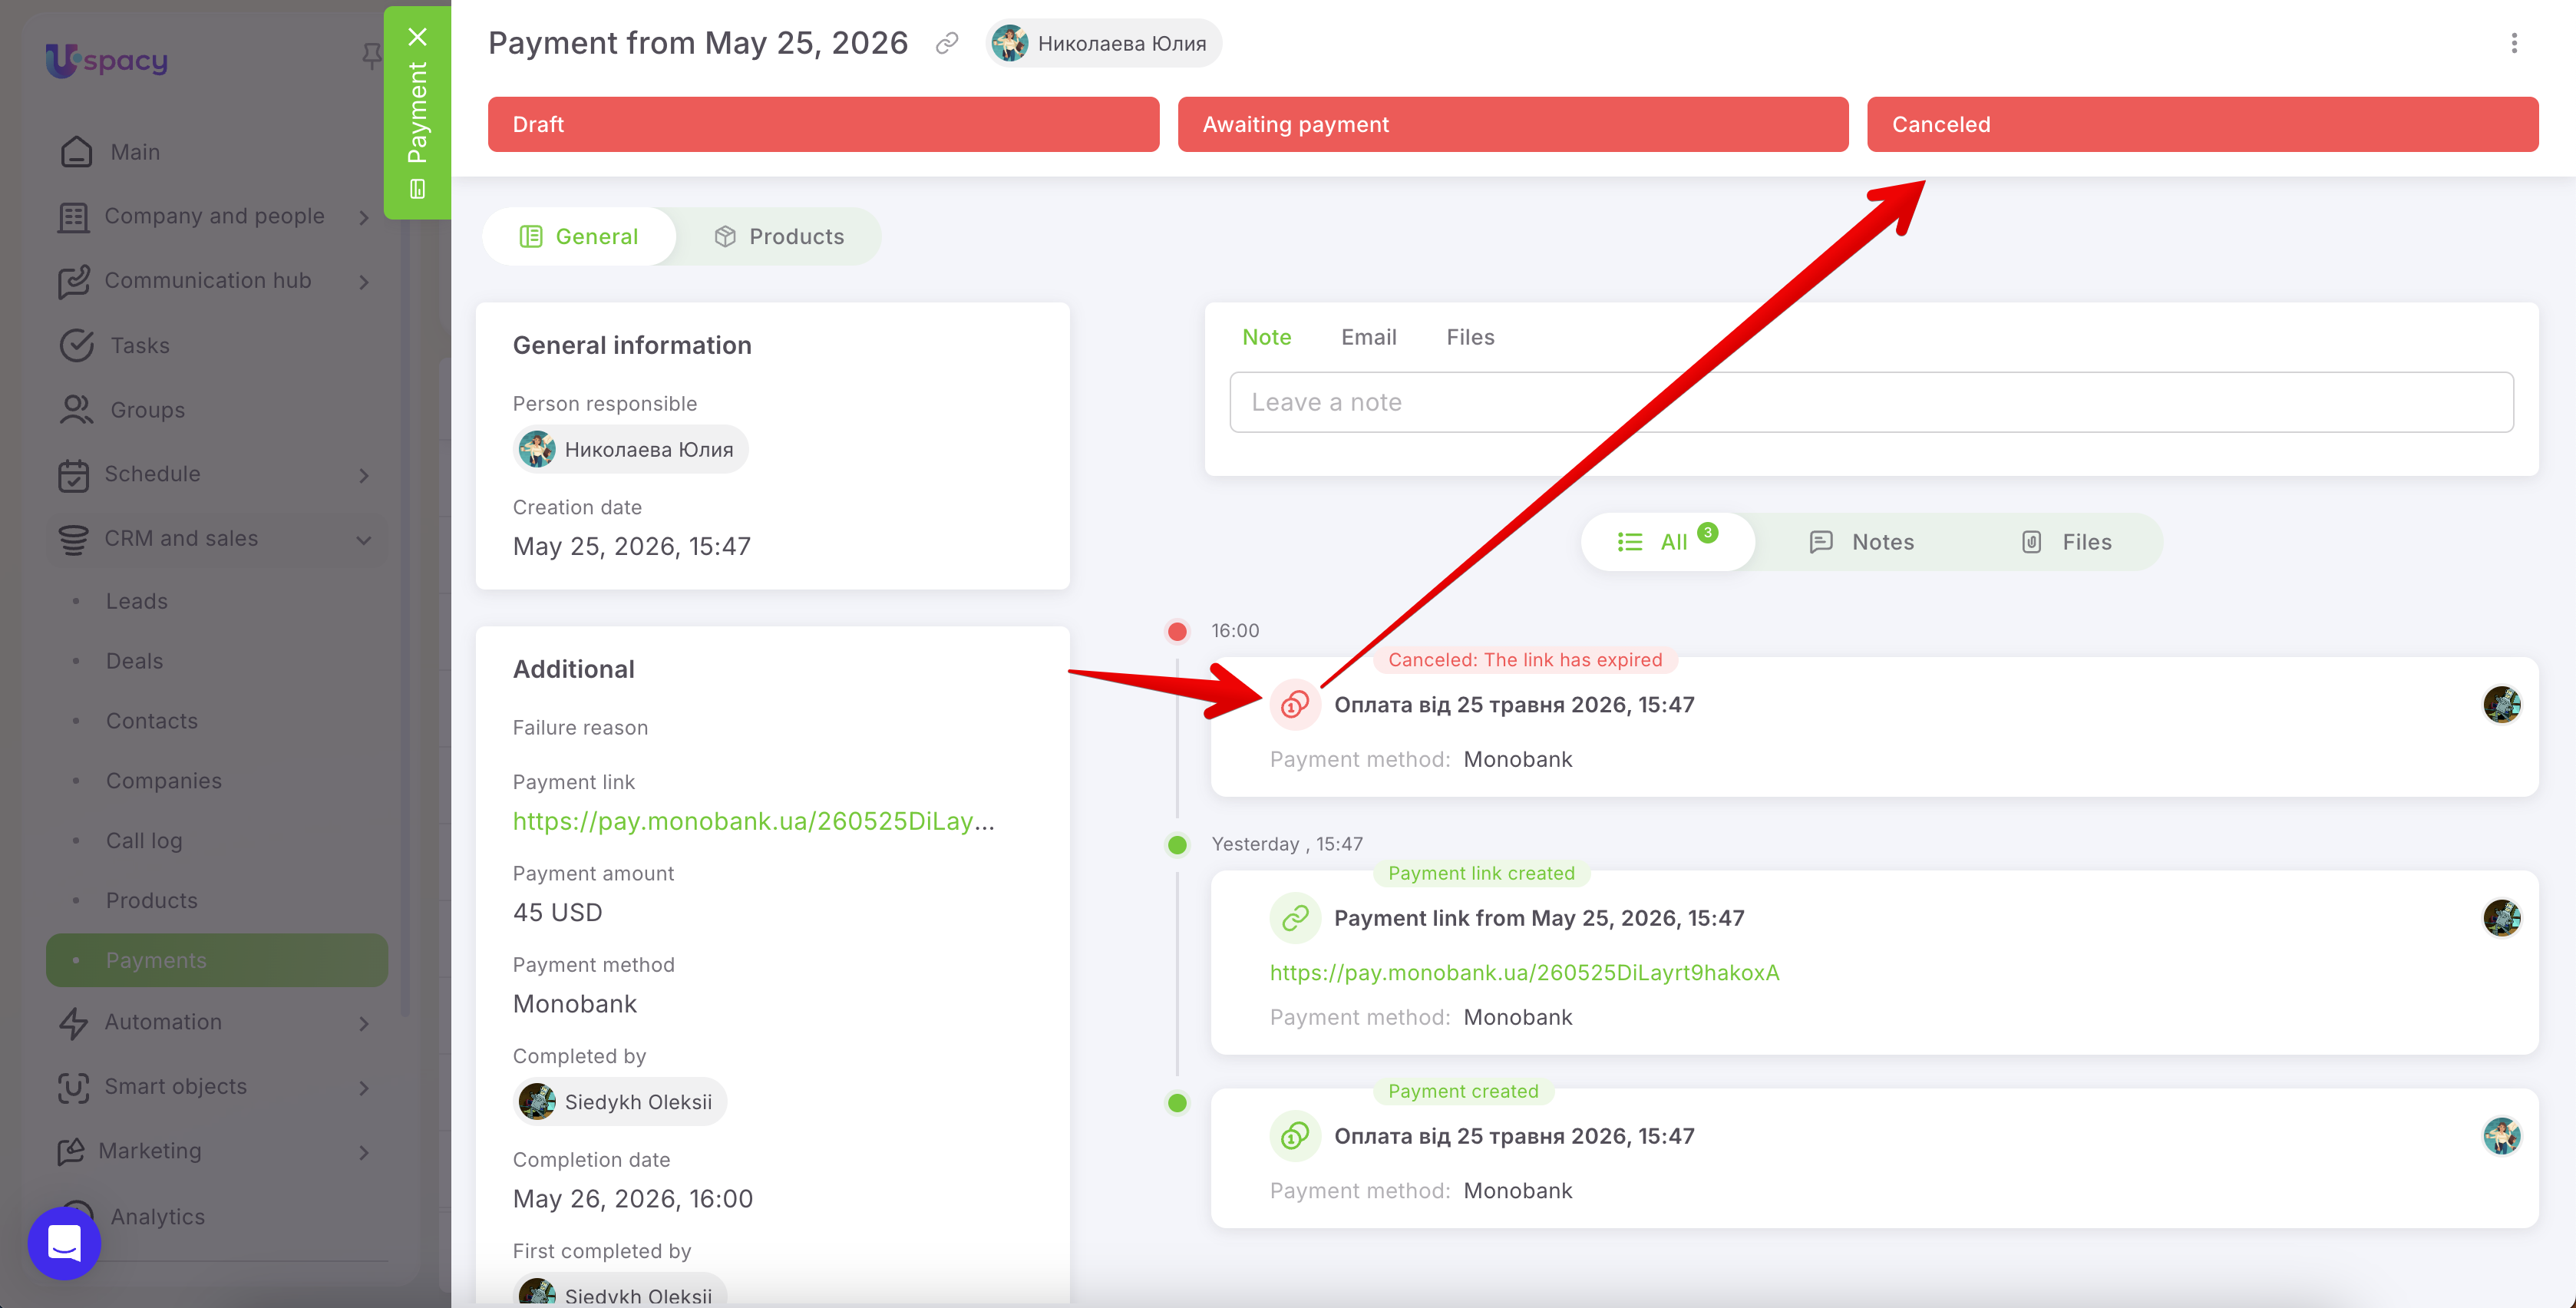
☝🏻 Please note that a payment can only be deleted while it is in the Draft status and no payment link has been generated yet. Once the payment link has been created, the payment moves to the Awaiting payment status, and deletion becomes unavailable. Likewise, payments in the Paid and Canceled statuses cannot be deleted because these records already contain finalized payment results.
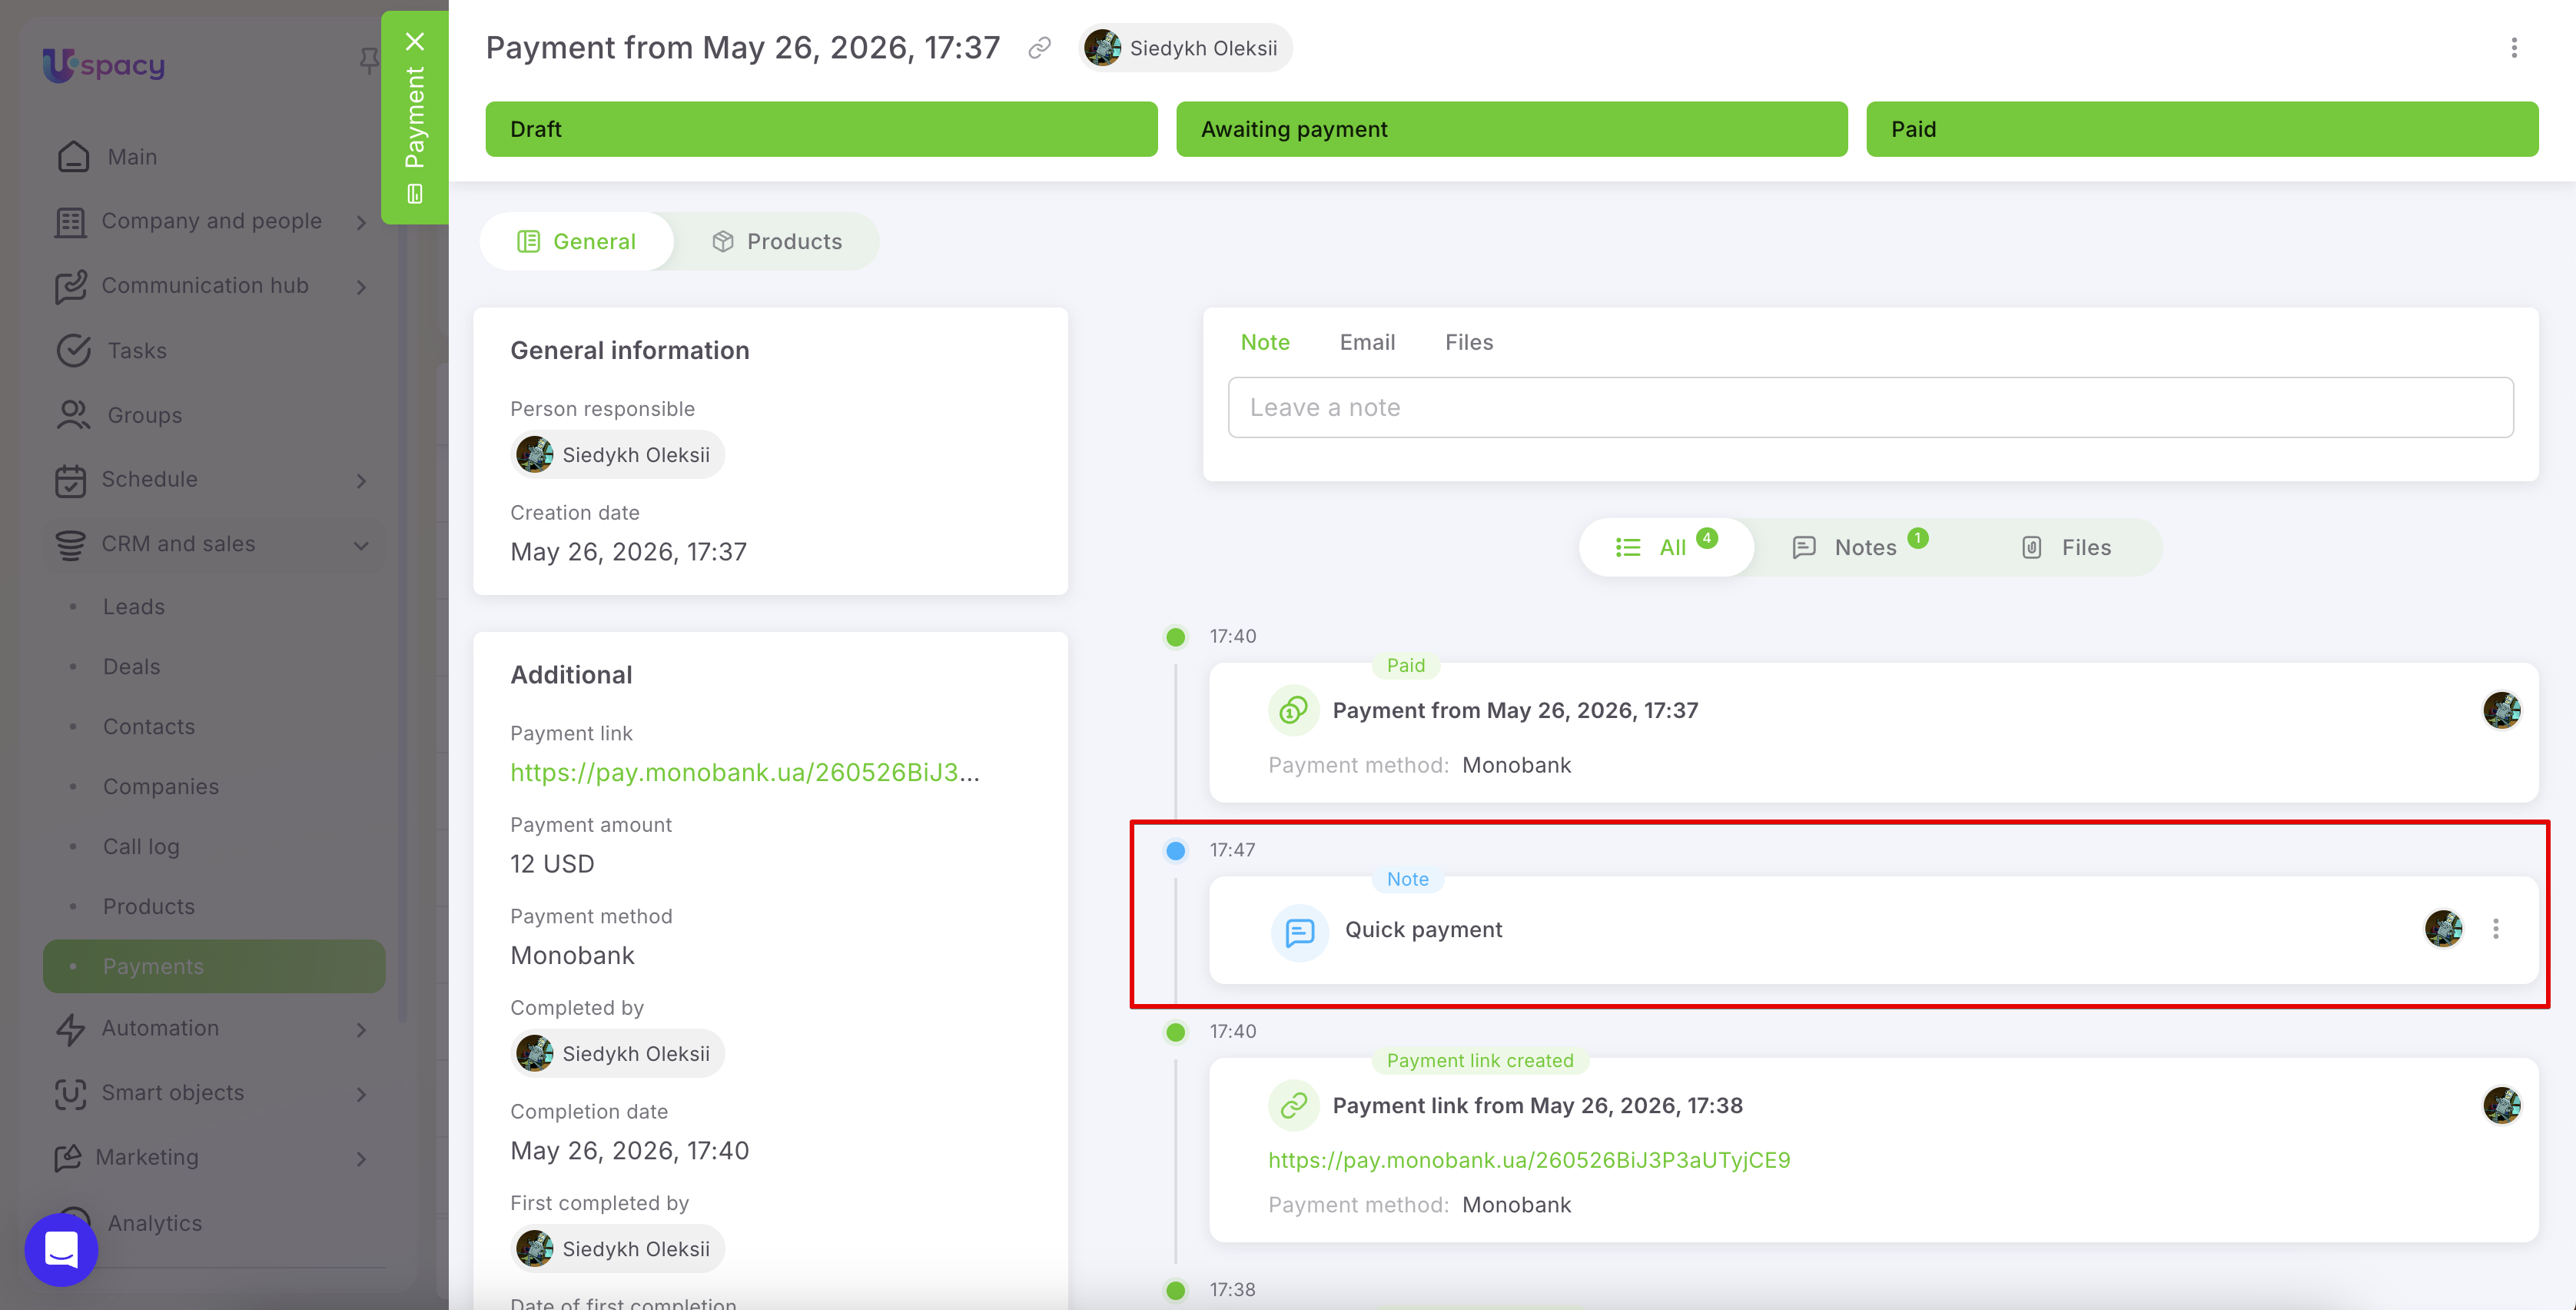
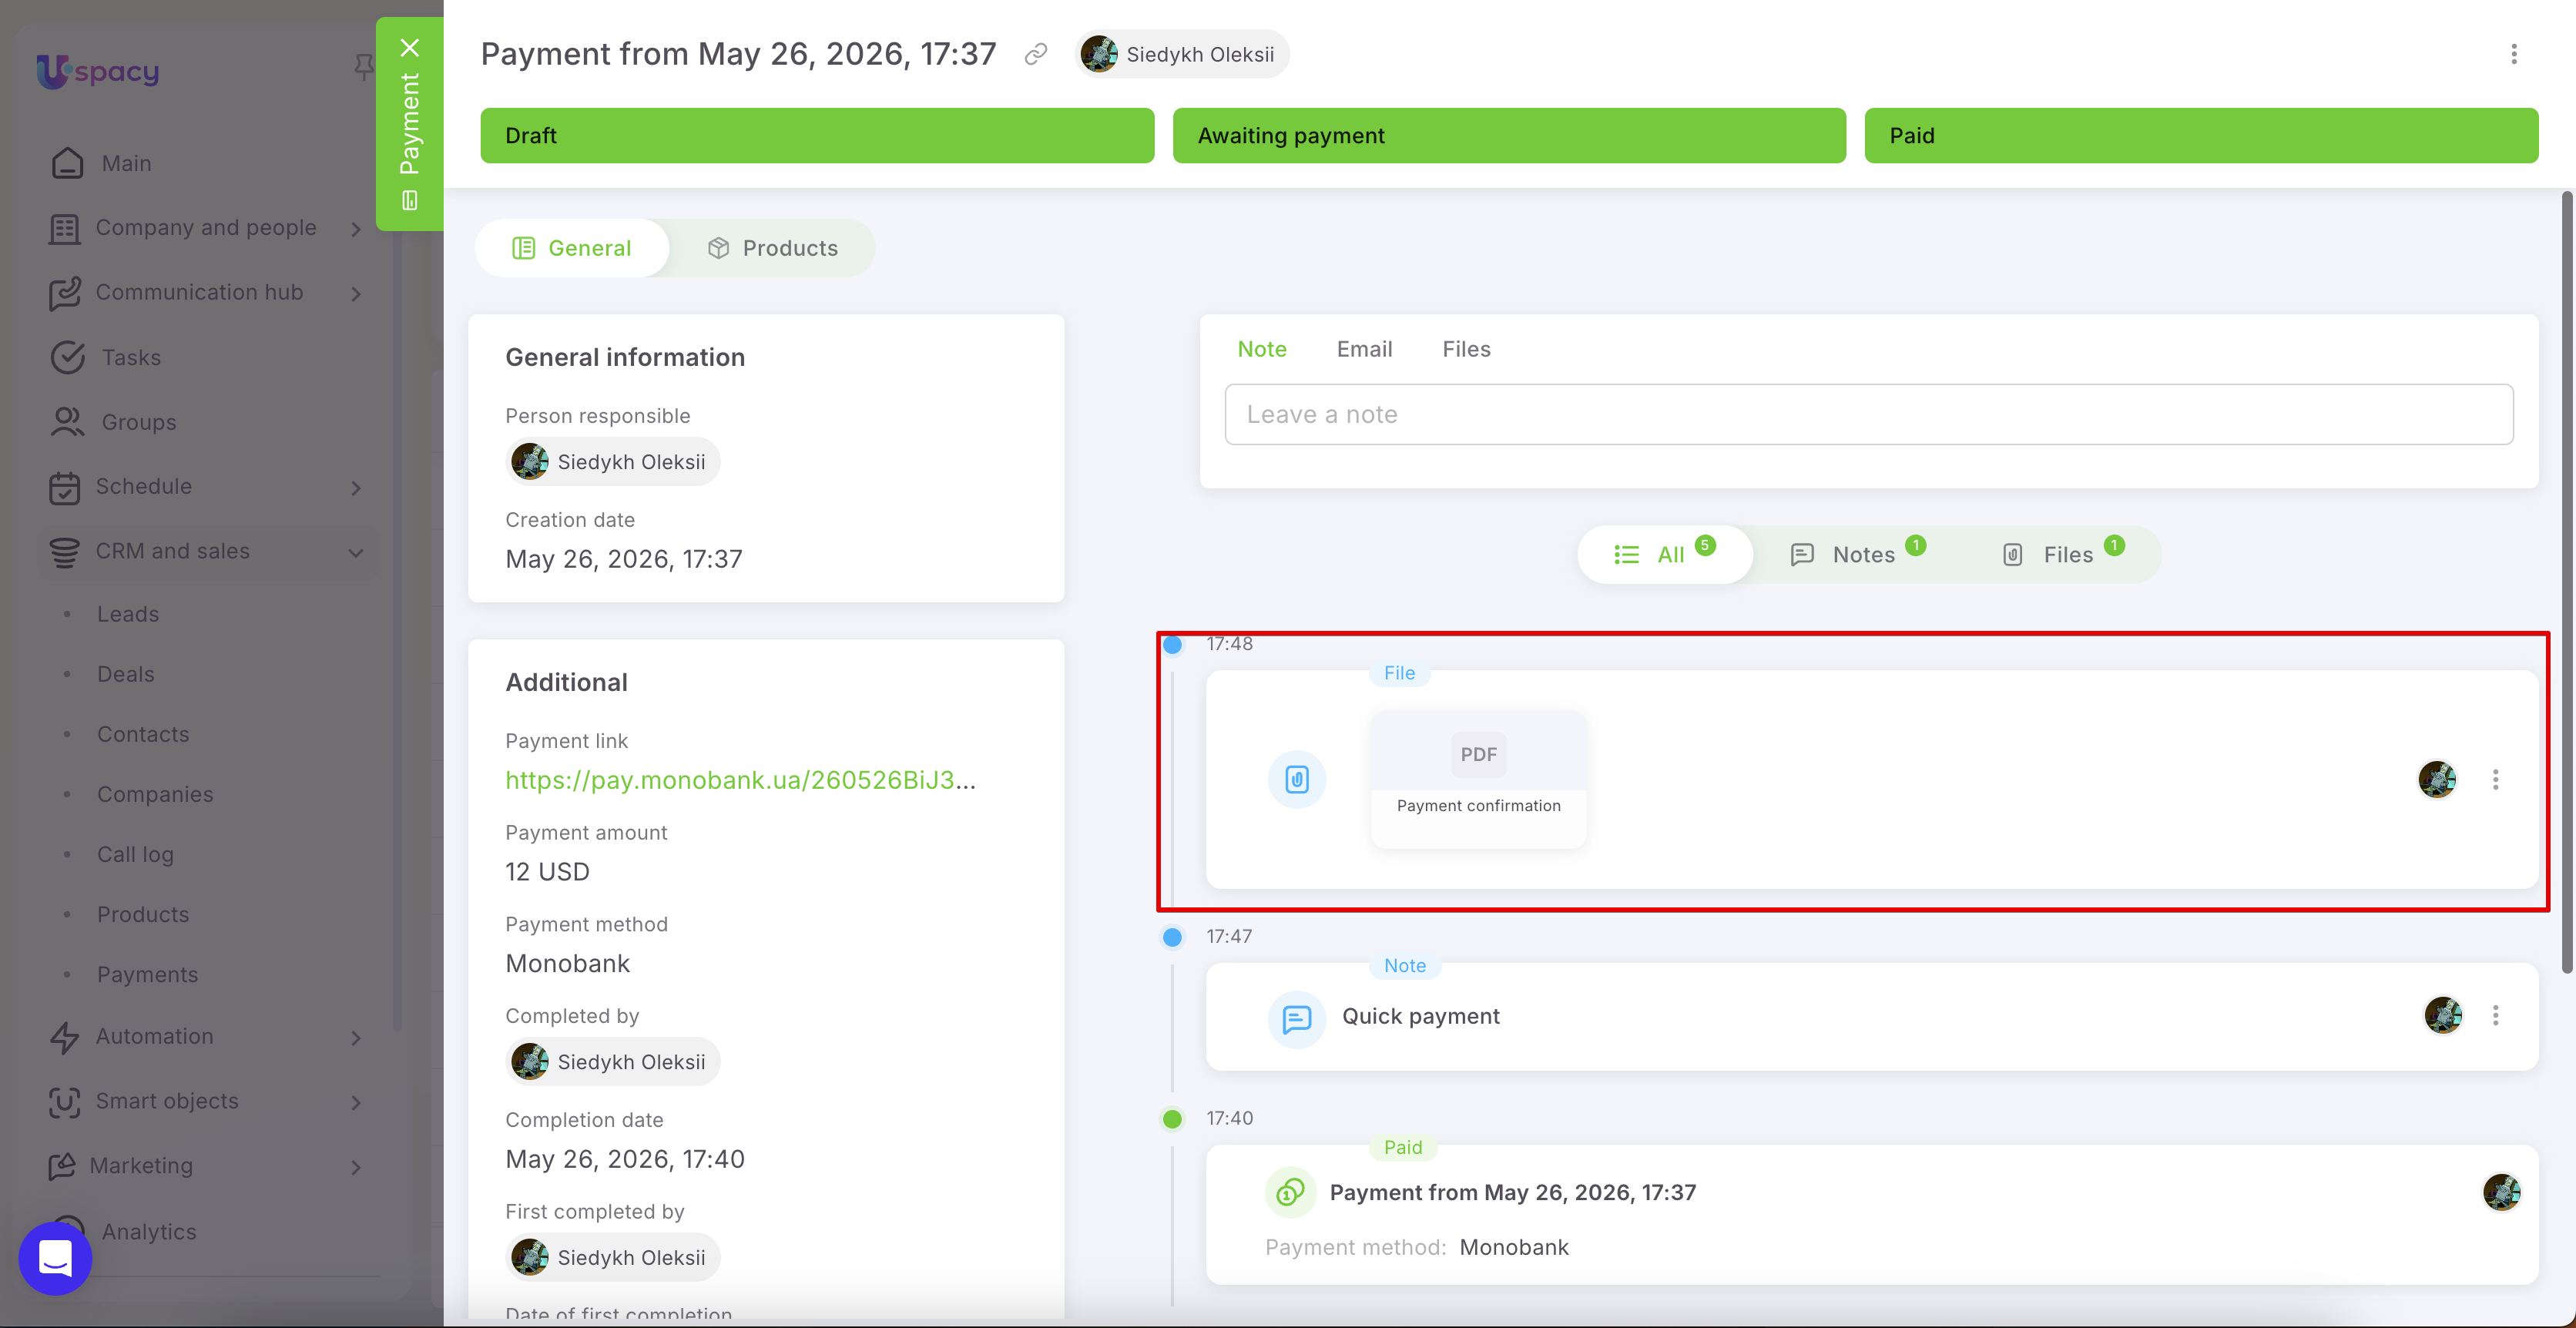
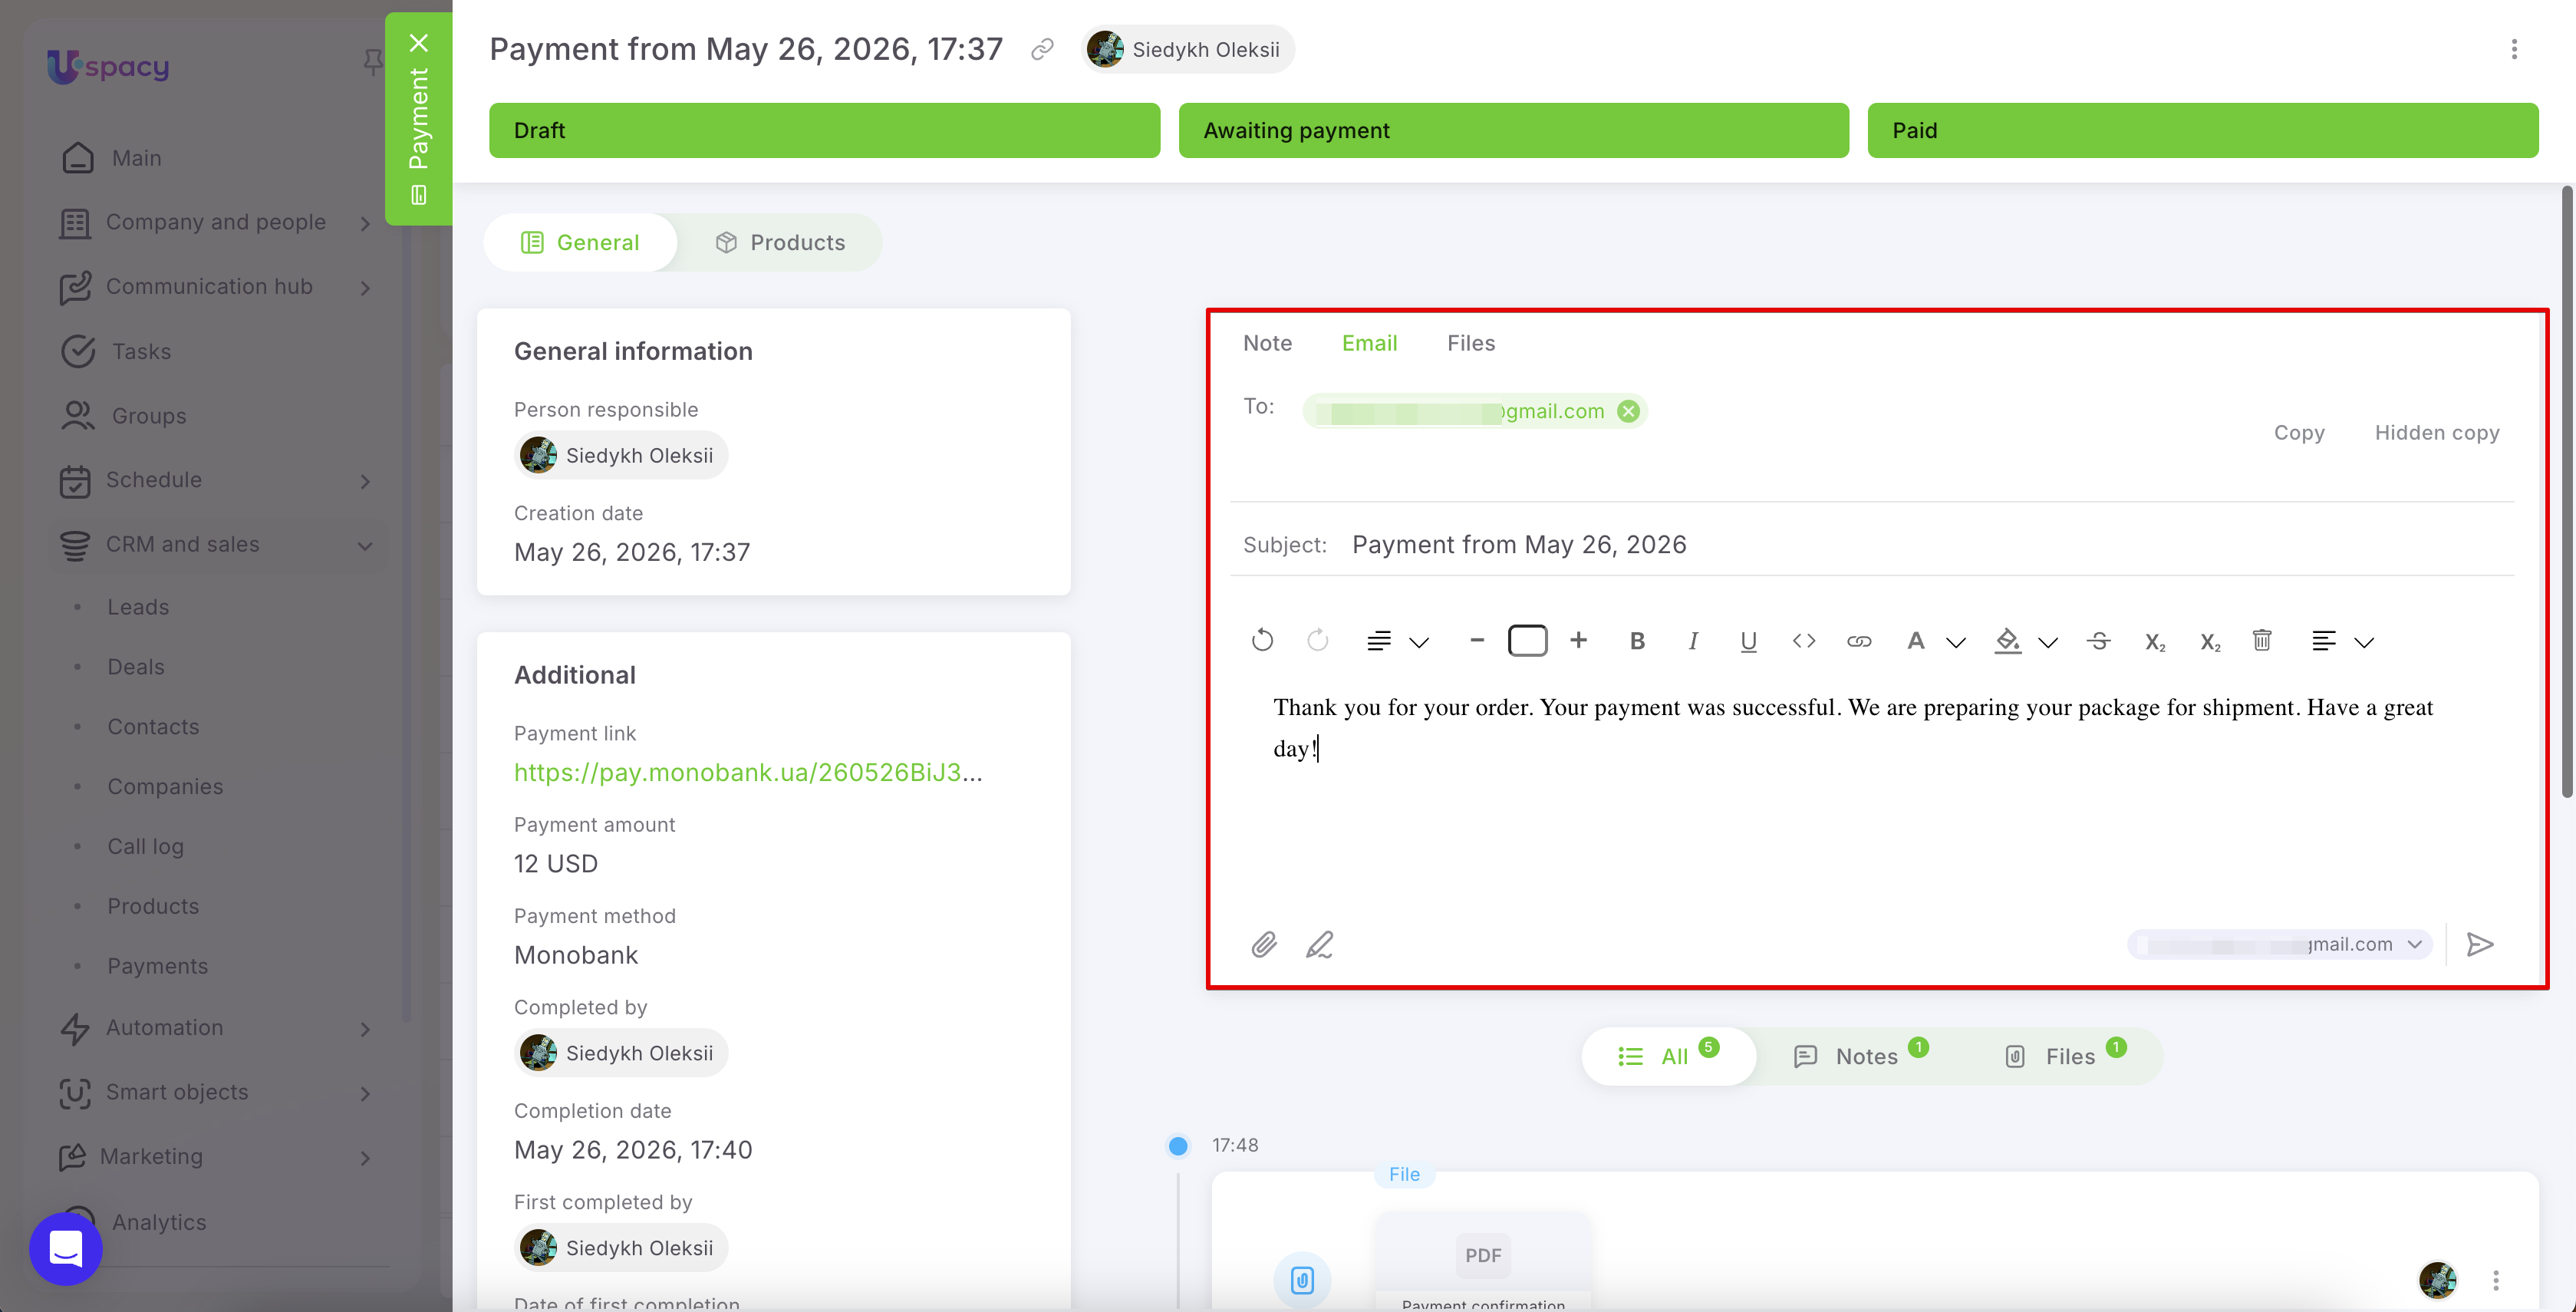
The payment card also includes the Notes, Email, and Files tabs. These tabs help keep all additional payment-related information in one place.
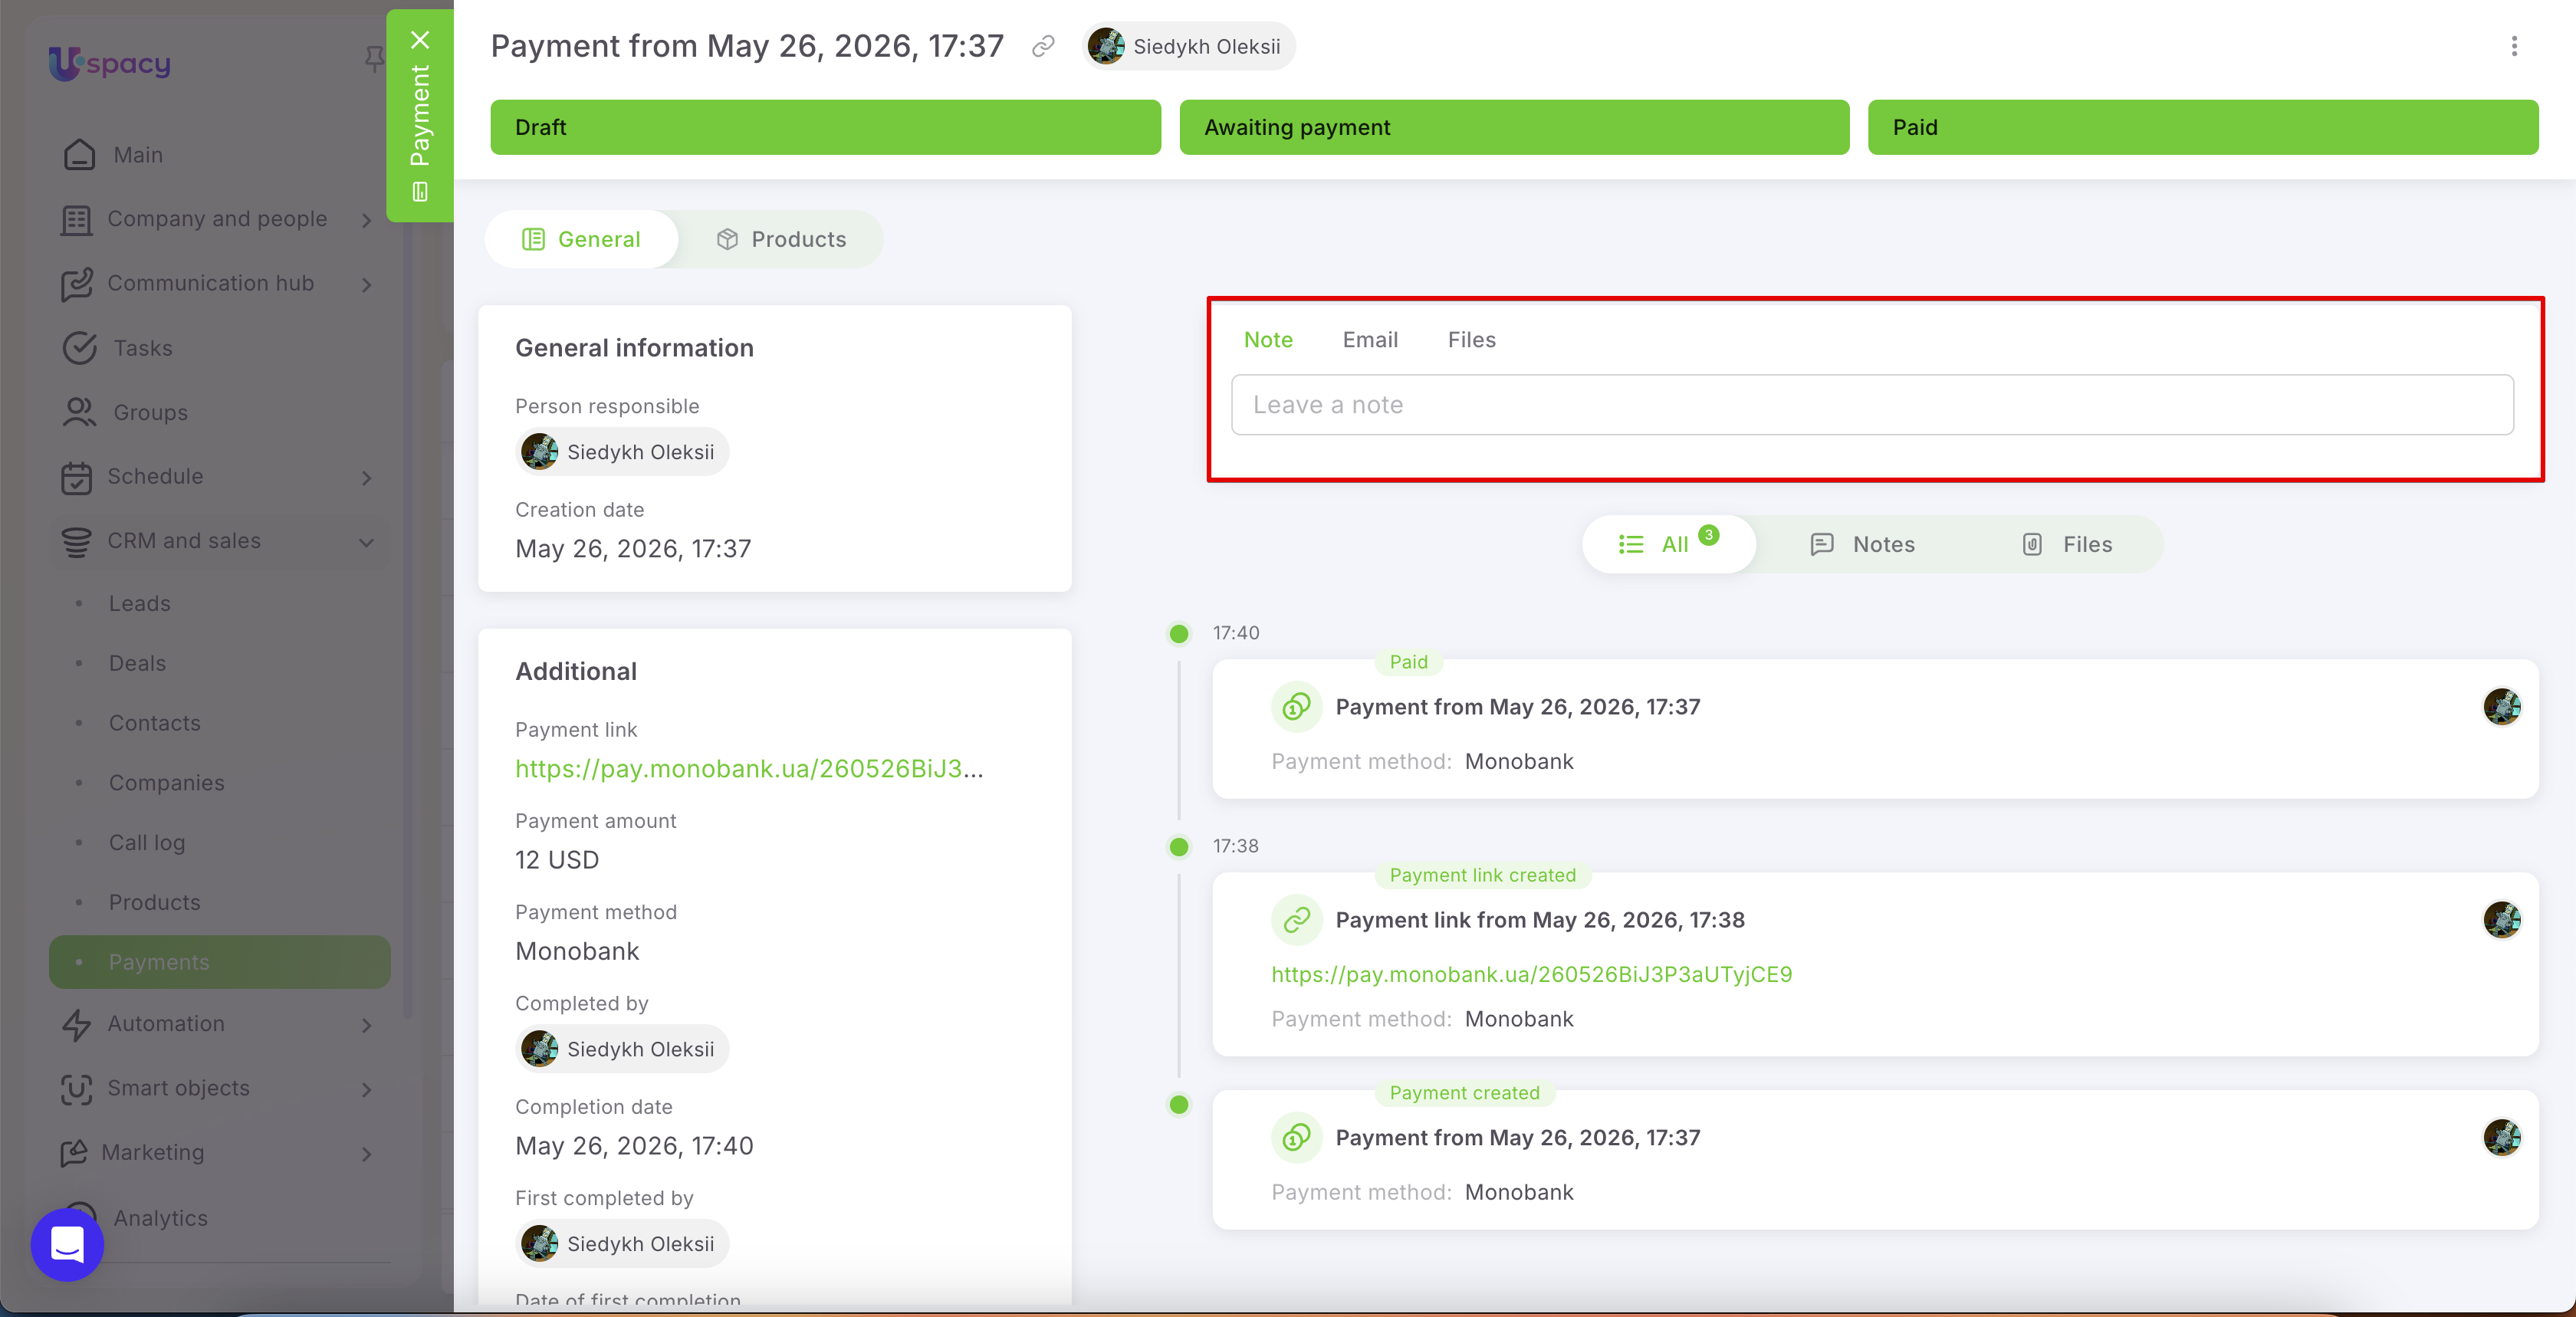
In the Notes tab, you can leave internal comments or important clarifications regarding the payment.
In the Files tab, you can upload documents, invoices, confirmations, or any other materials related to the payment.
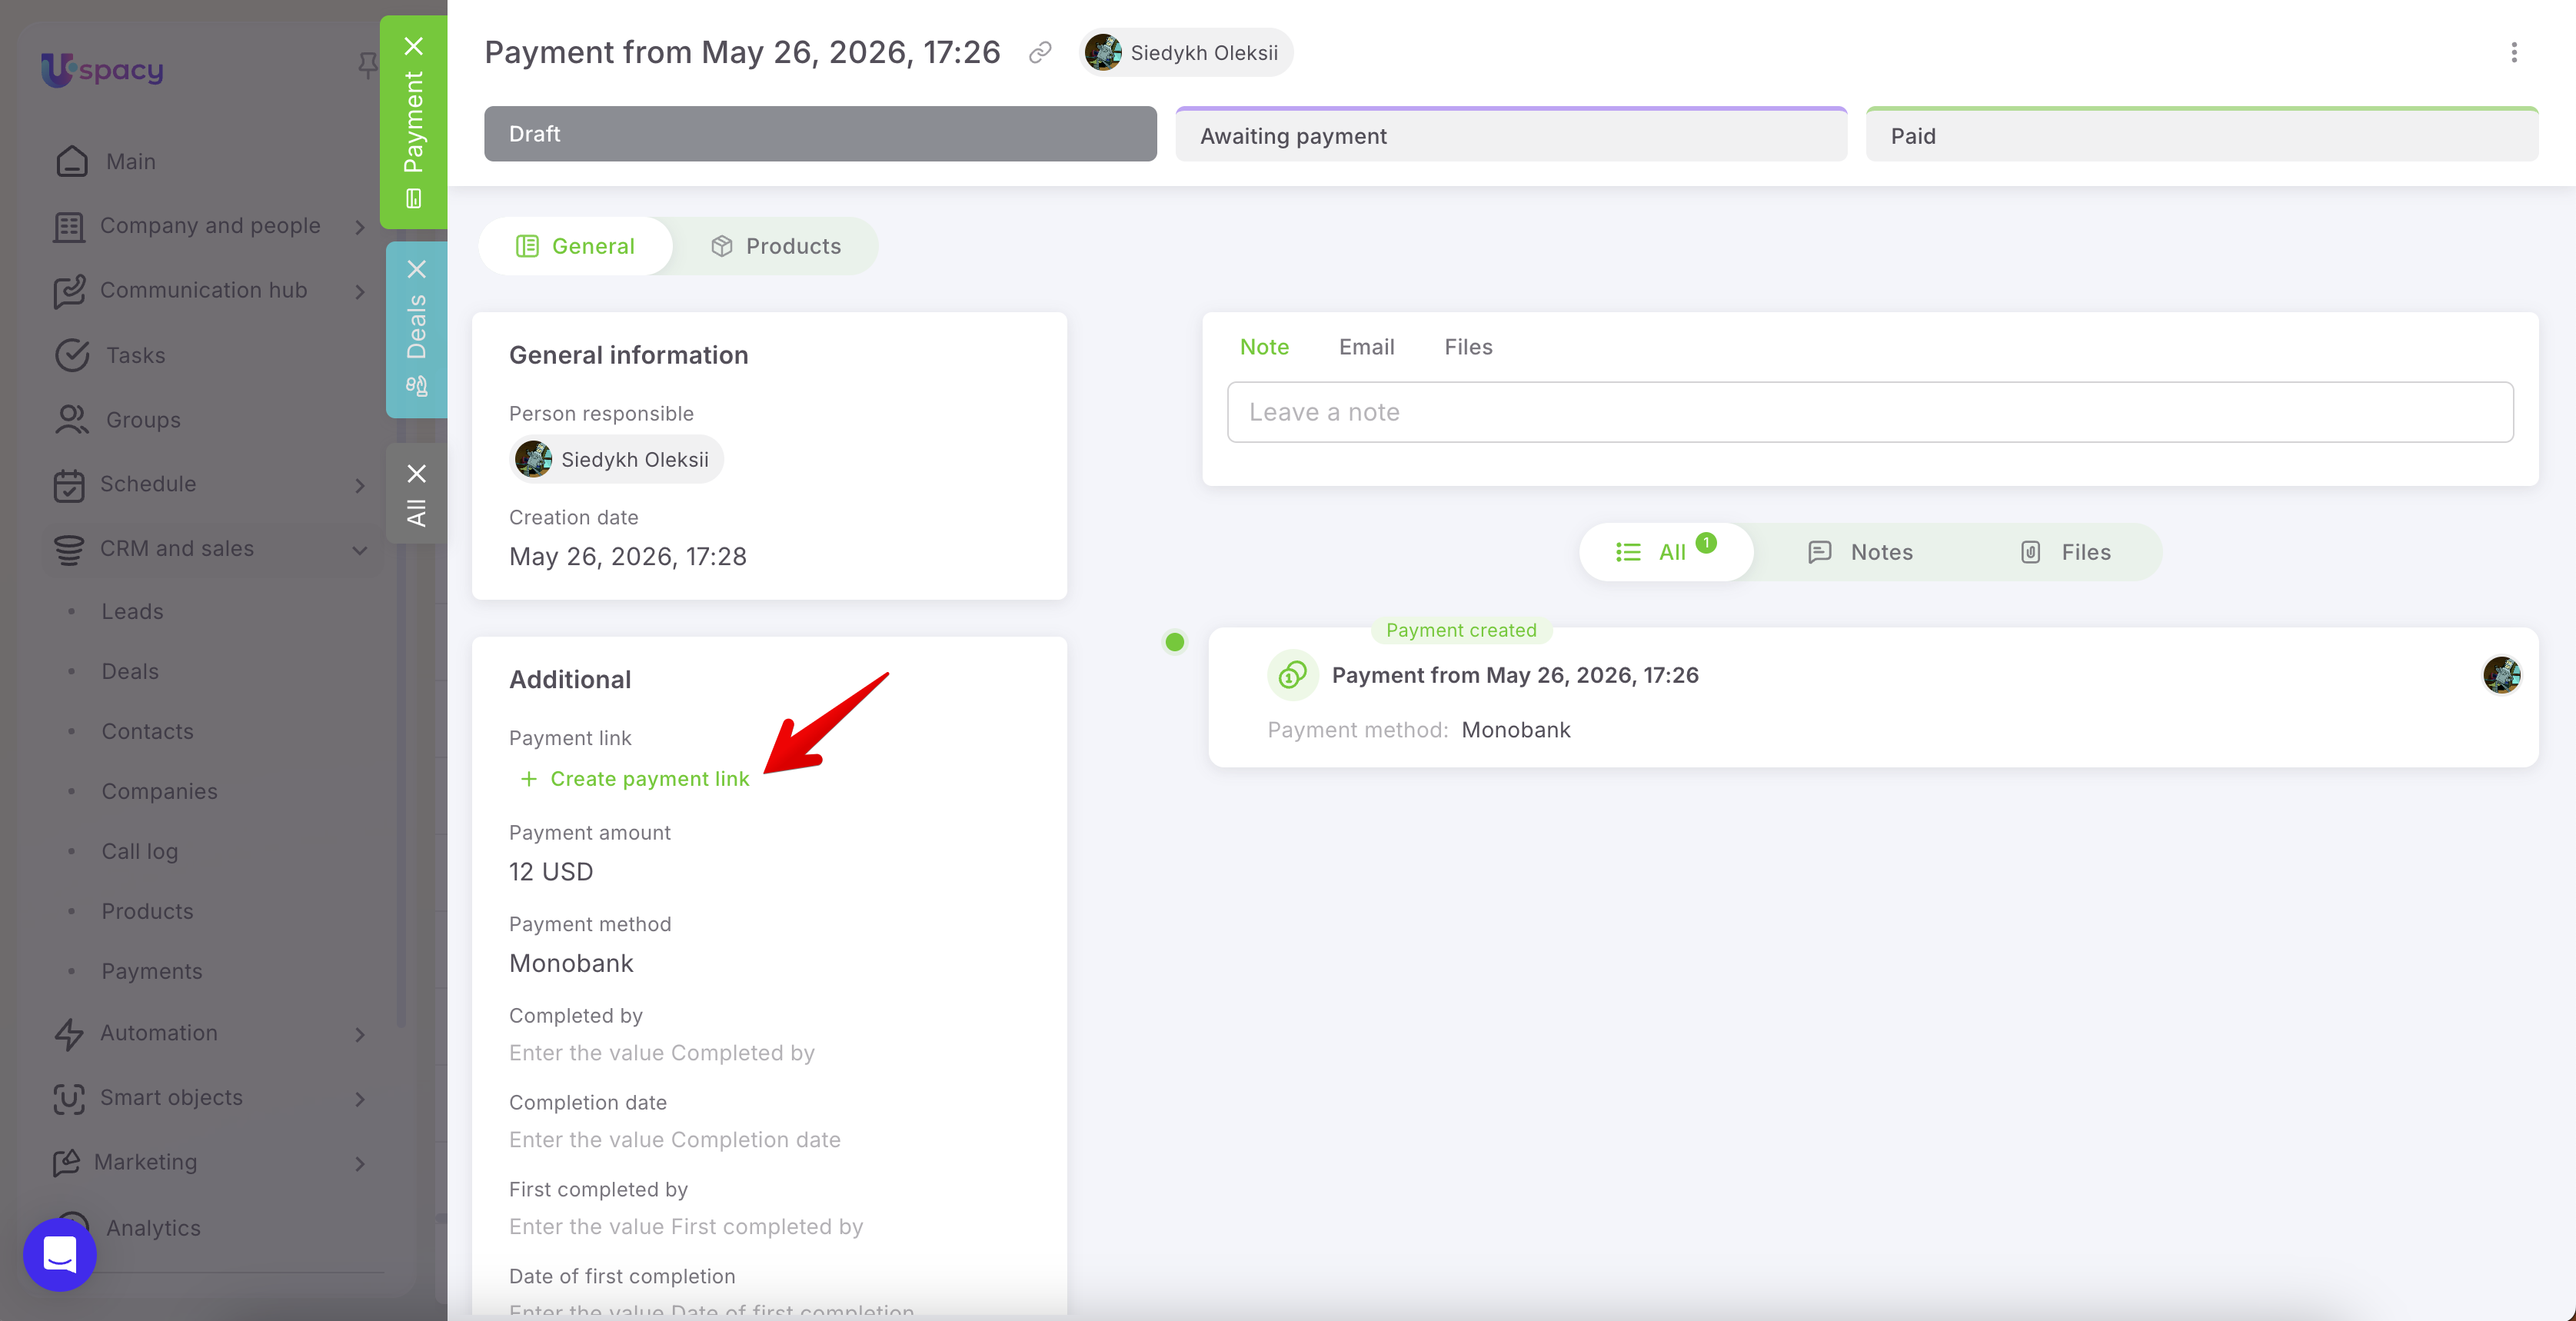
Using the Email tab, you can send an email to the client directly from the payment card. To do this, manually enter the recipient’s email address.
💡 Such emails are not linked directly to the payment itself. Instead, they will appear in the history of the element where the email address is stored.
The Uspacy integration with Monobank helps make payment processing faster and more transparent. You can create payments directly in Uspacy, generate payment links for clients, and track payment statuses without manual checks.
All key information remains available within the Space: amount, payment method, status, payment date, related deals, and other associated elements. Thanks to automatic status updates, your team can instantly see what is happening with each payment — whether it is still awaiting payment, already paid, or canceled due to link expiration.
Use Monobank payments to send payment links to clients faster, reduce manual work, and keep financial interactions fully under control directly within Uspacy.
If you have additional questions or you need to contact the support, send a request to this email [email protected]
Created: May 25, 2026 / Updated: June 5, 2026