Thanks to the CRM card, you can store all the necessary information about each element of the entities or smart objects in one place. In addition, if necessary, you can quickly add new data here or delete outdated ones.

For convenient work with the client base and sales at Uspacy, quick settings of the CRM card is available. Namely, the possibility to change the parameters of sections and fields in its left part.
🔍 You can read more about the appearance of the CRM card in this article. And here you will find information about the smart object element card.

Card settings features
🟣 Every Space user with permissions to CRM and Smart Objects (at least view permission) can customize their card according to their personal preferences. For example, Employee A might only have the default first section active, with all other sections removed. Meanwhile, Employee B could have created 3 custom sections, each containing 3 custom fields.
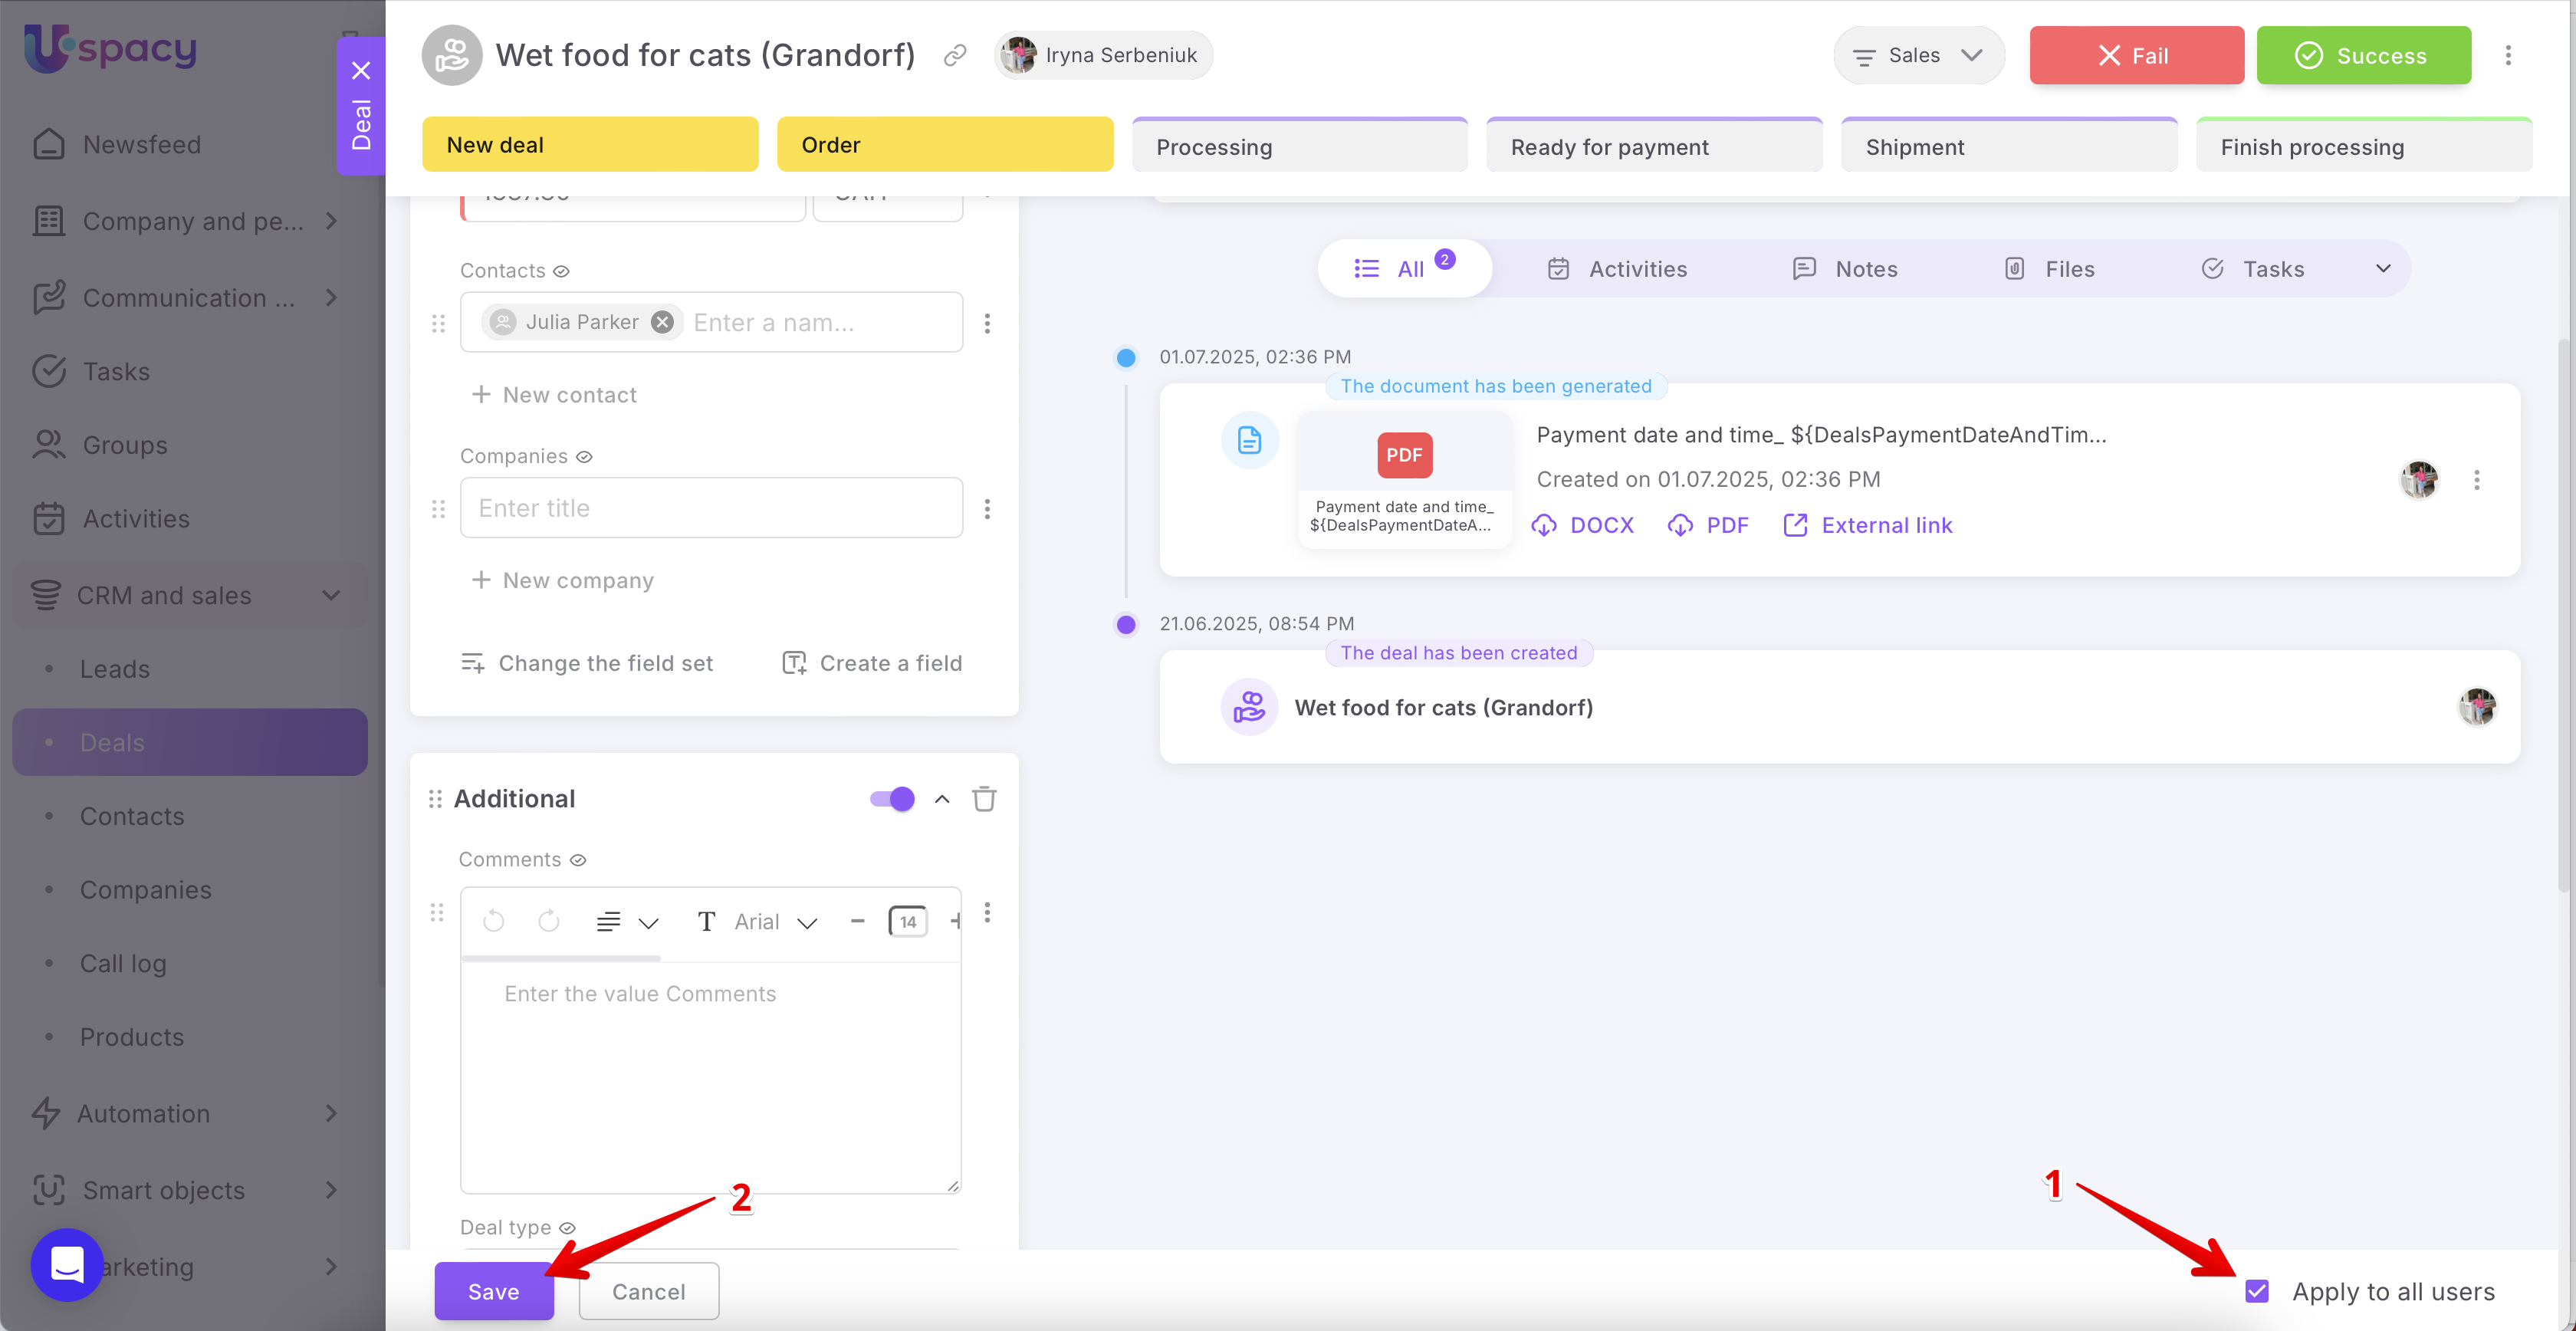
Despite this flexibility, the Space administrator or owner can apply a unified card layout for CRM to all users with a single click. They just need to use a special button, check the box “Apply to all users,” and of course, Save the changes.
At the same time, even after the administrator or owner applies a unified layout, users can still modify it individually to suit their own needs and customize their cards.
So, it all depends on your team’s workflow. This approach to managing CRM or Smart Object card layouts is convenient because you can easily standardize the interface for everyone with one click — or, alternatively, allow full freedom for employees to tailor their workspace for maximum comfort. 😉
So, about all possible settings below ⬇️
What can be changed in the card?
There are two function buttons at the bottom of the element card. With their help you can go to all possible settings.

The display of sections
It means to select the sections that will be shown in the element card when viewing it. To do this, first click on the Configure the card button.

Next, drag the toggle button.


If the option is deactivated, the section will not be displayed in the viewing mode. It will not disappear, but will be available for settings.

You can delete a section at all. To do this, you need to click on the trash can icon.

As a result, the section will disappear from the card. Fields contained in it will be hidden, but you can add them to another section.

❗️You cannot manage the display of the main section (its name depends on the entity or smart object you are working with). So it is not possible to delete it. You can only rename this main section.

Change the field set
It means to add any standard or custom fields that have already been created for the entity (basic or your own) in the card you are working with. To do this, you must first click on the Configure the card button.

Next, click on Change the field set (previously Add a field from the list)

In the window that opens, check the fields that you want to add to the section. They are listed in the Hidden fields block (1) as well as in other sections that the card contains.
Or, on the contrary, it is possible to hide those that are not needed here. They are contained in a block, the name of which corresponds to the name of the section (2), for which the fields are configured.
Don't forget to click Save (3) to apply changes.

The result will be displayed in the section at once.

Create a new field
💡Only the administrator or super administrator of Space has access to this action.
It means to add a completely new field to the section through the form for creating a custom field in CRM. To do this, you must first click on the Configure the card button.

Then,click on the Create a field.

Fill out all the required parameters for the new field and click Save.

🔍For more detail information on creating custom fields in CRM, go to the following article.
The result will be displayed in the section at once.
Move a field to another section
It means that without going to the change the field set window, you can remove the field from one section and add it to another. To do this, first click the Configure the card button.

Next, click the interaction menu button next to the desired field and select the option Move to section. After clicking this option, a list of sections in the entity card will expand. Just select the one to which you want to move the field.

As a result, it will immediately appear in the specified section and disappear from the one it was previously located in.

Configure the display of fields
That is, to select how each specific field added to the card will be displayed or not displayed. To do this, you must first click on the Configure the card button.

Next to each field you can see an icon that characterizes the way the field is shown in the card.


There are two of them:
🟣 Always show. That is, regardless of whether the field (1) is filled or not (2), it will be shown in the card when viewing it.

🟣Show only filled fields. That is, the field will be shown in the viewing mode only if it contains some value.

💡This method is automatically applied when adding or creating a new field in order to add it to the sections of the card.
In addition, you can Hide a field at all. That is, it will not be displayed in the card either in the viewing mode or during the configuration, even if it contains some data. It will appear and be added to a section only when you decide to add it.

💡 All custom fields created through the Settings section will be automatically included in the Hidden block. You need to select them from the list to display in the desired section of the card.
To use another method of display, click the interaction menu button next to the desired field.

Next, select an option to replace the current method (1) or use the Hide a field option (2).


Configure the field parameters
💡Only the administrator or super administrator of Space has access to this action.
That is, when changing the appearance of the card, you can immediately edit some parameters of the fields, for example, change their name, add value options to the list, or activate or deactivate two-way connection between related entities. To do this, you must first click on the Configure the card button.

Next, click the interaction menu button next to the desired field and select the Configure the field option.

Make changes and Save.

They will be immediately displayed on the card.

Configure your own order of fields and sections
That is, when changing the appearance of the card, you can immediately configure your own order of fields both in the sections and the sections themselves. To do this, you must first click on the Configure the card button.

Next to the name of each field you can see special dots. They are responsible for the possibility to move fields. Hold down the left mouse button on this icon and simply drag it to the desired place.

☝🏻Please note that fields can be moved within one section. That is, if you want to place the field N in another section than the one in which it is currently located, then first add it from the list to the desired section, and only then change the order.
Similarly, you can move sections. Hold the icon with the left mouse button and drag it to the desired place on the left side of the card.

Add a new section to the card
That is, create your own information block on the left side of the card and add the required fields to it. To do this, click on the Add a section button.

Next, enter its name (1) and specify whether it will be displayed on the card in the viewing mode (2).
💡If you do not specify the name of the section, then after saving it will be automatically named as "New section".

Then add some fields to the section. You can either add existing ones from the list or create new ones.

And also configure the display method and order for these fields.

To cancel the creation of a section, click on the cross.

How to save the changes made?
Each of the above changes needs to be saved. Therefore, after performing any actions related to the left part of the card, you need to Save them. To do this, do not forget to click on the corresponding button in the lower left part.

This way, all the changes will be applied. And the next time you open the card, its current settings will be displayed.
💡If you created a new section, filled it with fields, but canceled saving the settings, the new section will of course not appear in the card, but the created fields will not be deleted, they can be found among the hidden ones.
How to restore the standard card view?
If you need to return to the standard design of the left part of the card, you can use the Restore standard appearance button. It will be active in the settings mode.

You will need to confirm your actions.

As a result, the created sections will be deleted. Custom fields located in them, as well as hidden, will move to the Additional block and will be displayed in the Show only filled fields way. The standard ones - Always show mode.
That is, the card will contain only standard sections that are characteristic of the entity you are working with. The fields in them will be placed according to the standard order.

If you have additional questions or you need to contact the support, send a request to this email [email protected]
Created: January 16, 2024 / Updated: July 3, 2025