Make data collection simple and efficient with Forms! It’s a powerful tool for automating the process of client interaction. With Forms, you can quickly and conveniently gather important information, structure it, and instantly send it to CRM for further processing.

In Uspacy, there are two types of forms:

🟣 Ready-made, pre-configured thematic forms with a defined list of fields, which can be changed if needed.

🟣 Custom forms, that is, ones created by you from scratch, adapted to the needs of your workflows.

💡 Currently, among the predefined forms, only the Contact information type is available for use.
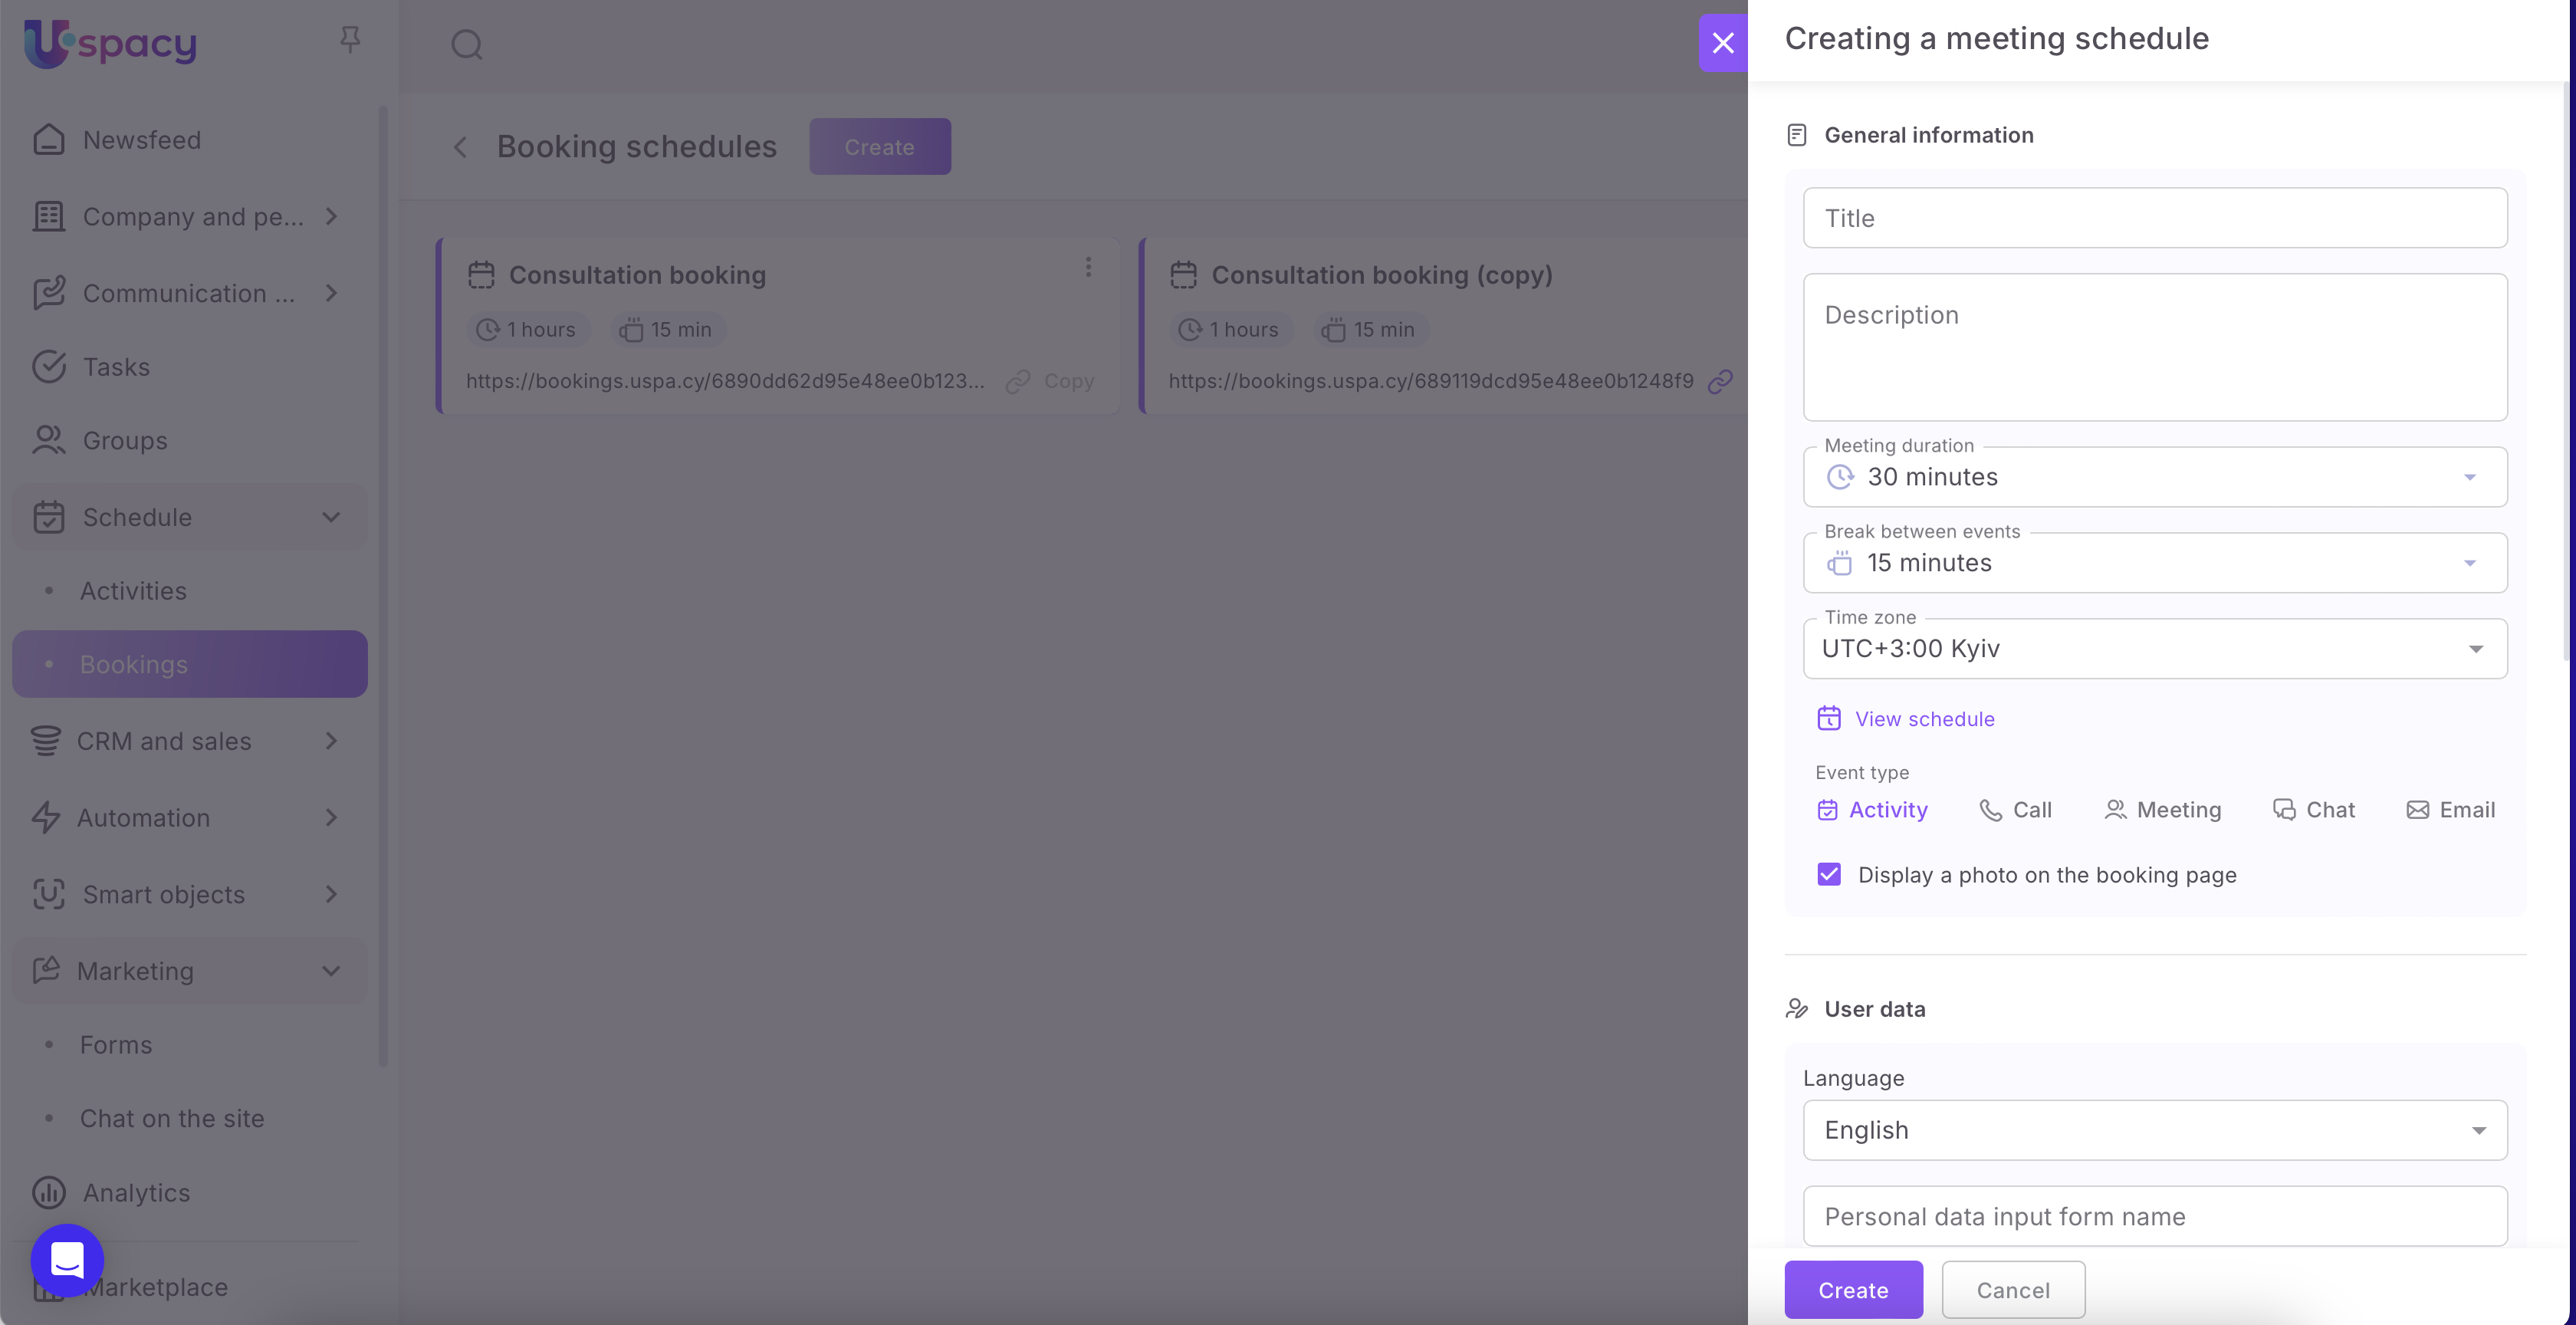
The Consultation booking type will redirect you to the Booking page to create a new schedule.
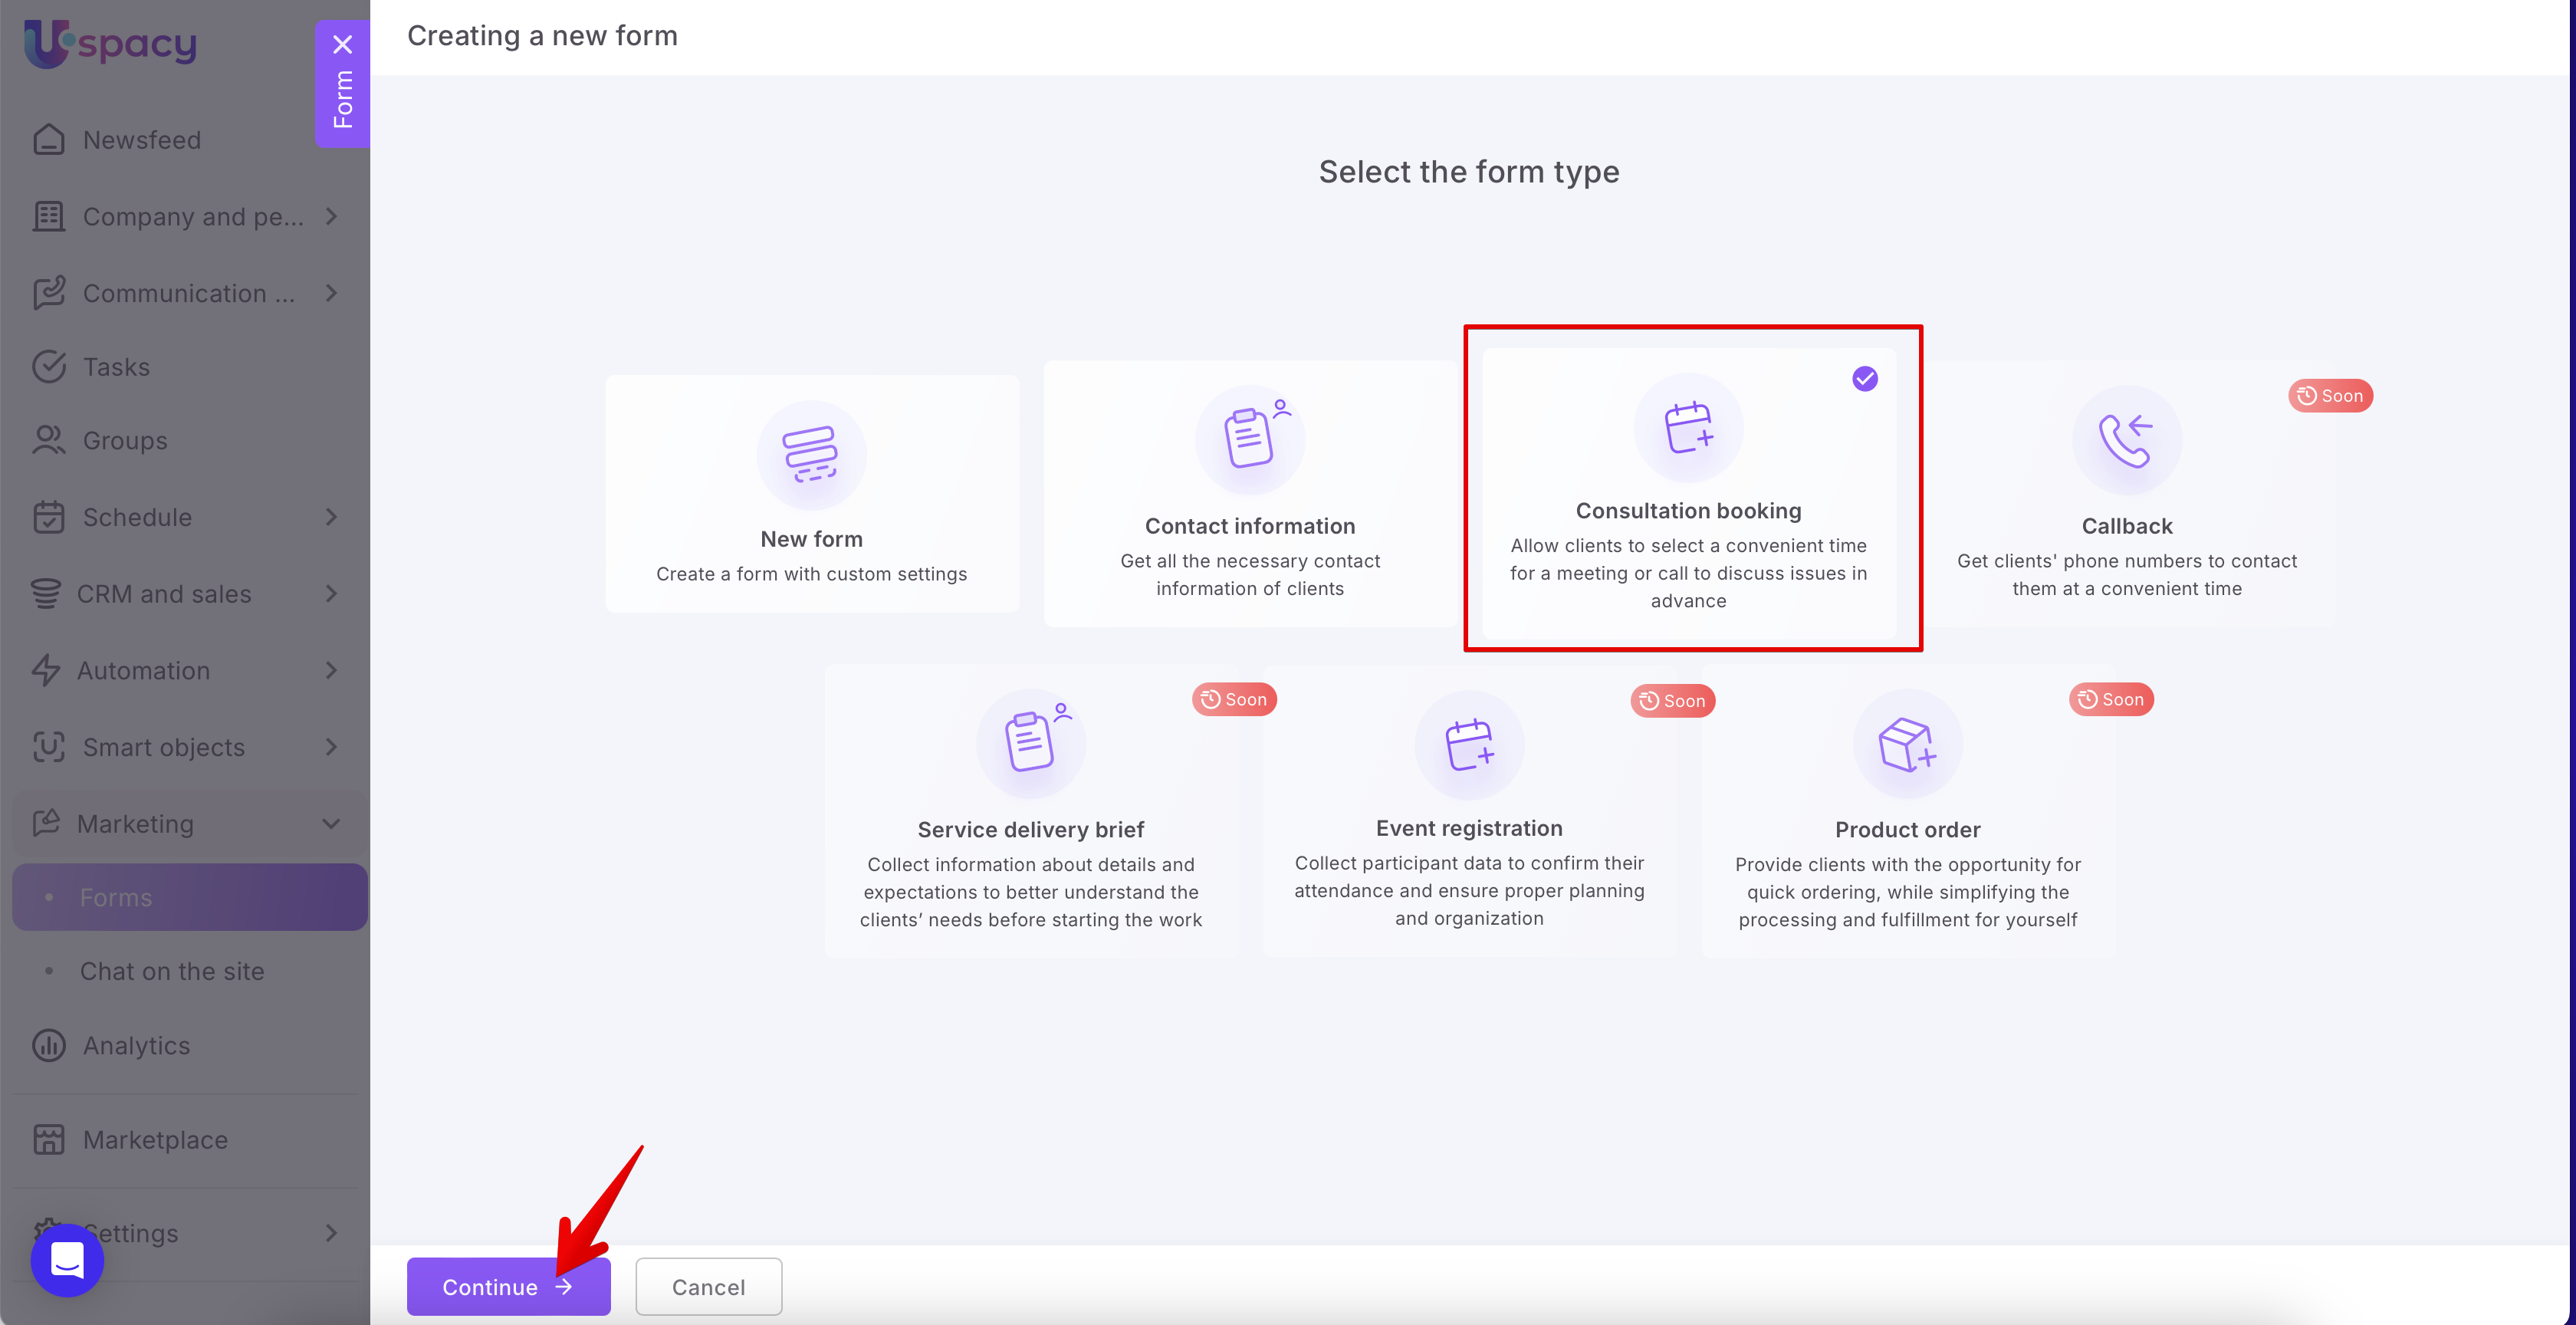
🔍 You can read more about creating a booking schedule in this article.
How to create a new form?
🌟 The number of forms available for creation depends on the plan:
First, you need to go to the Forms page in the Marketing section.
💡 Access to this section is available only to the administrator or the Space owner.

Then click on the Create button.

Alternatively, if your Workspace doesn’t have any forms yet, you can use the + New form button in the table.

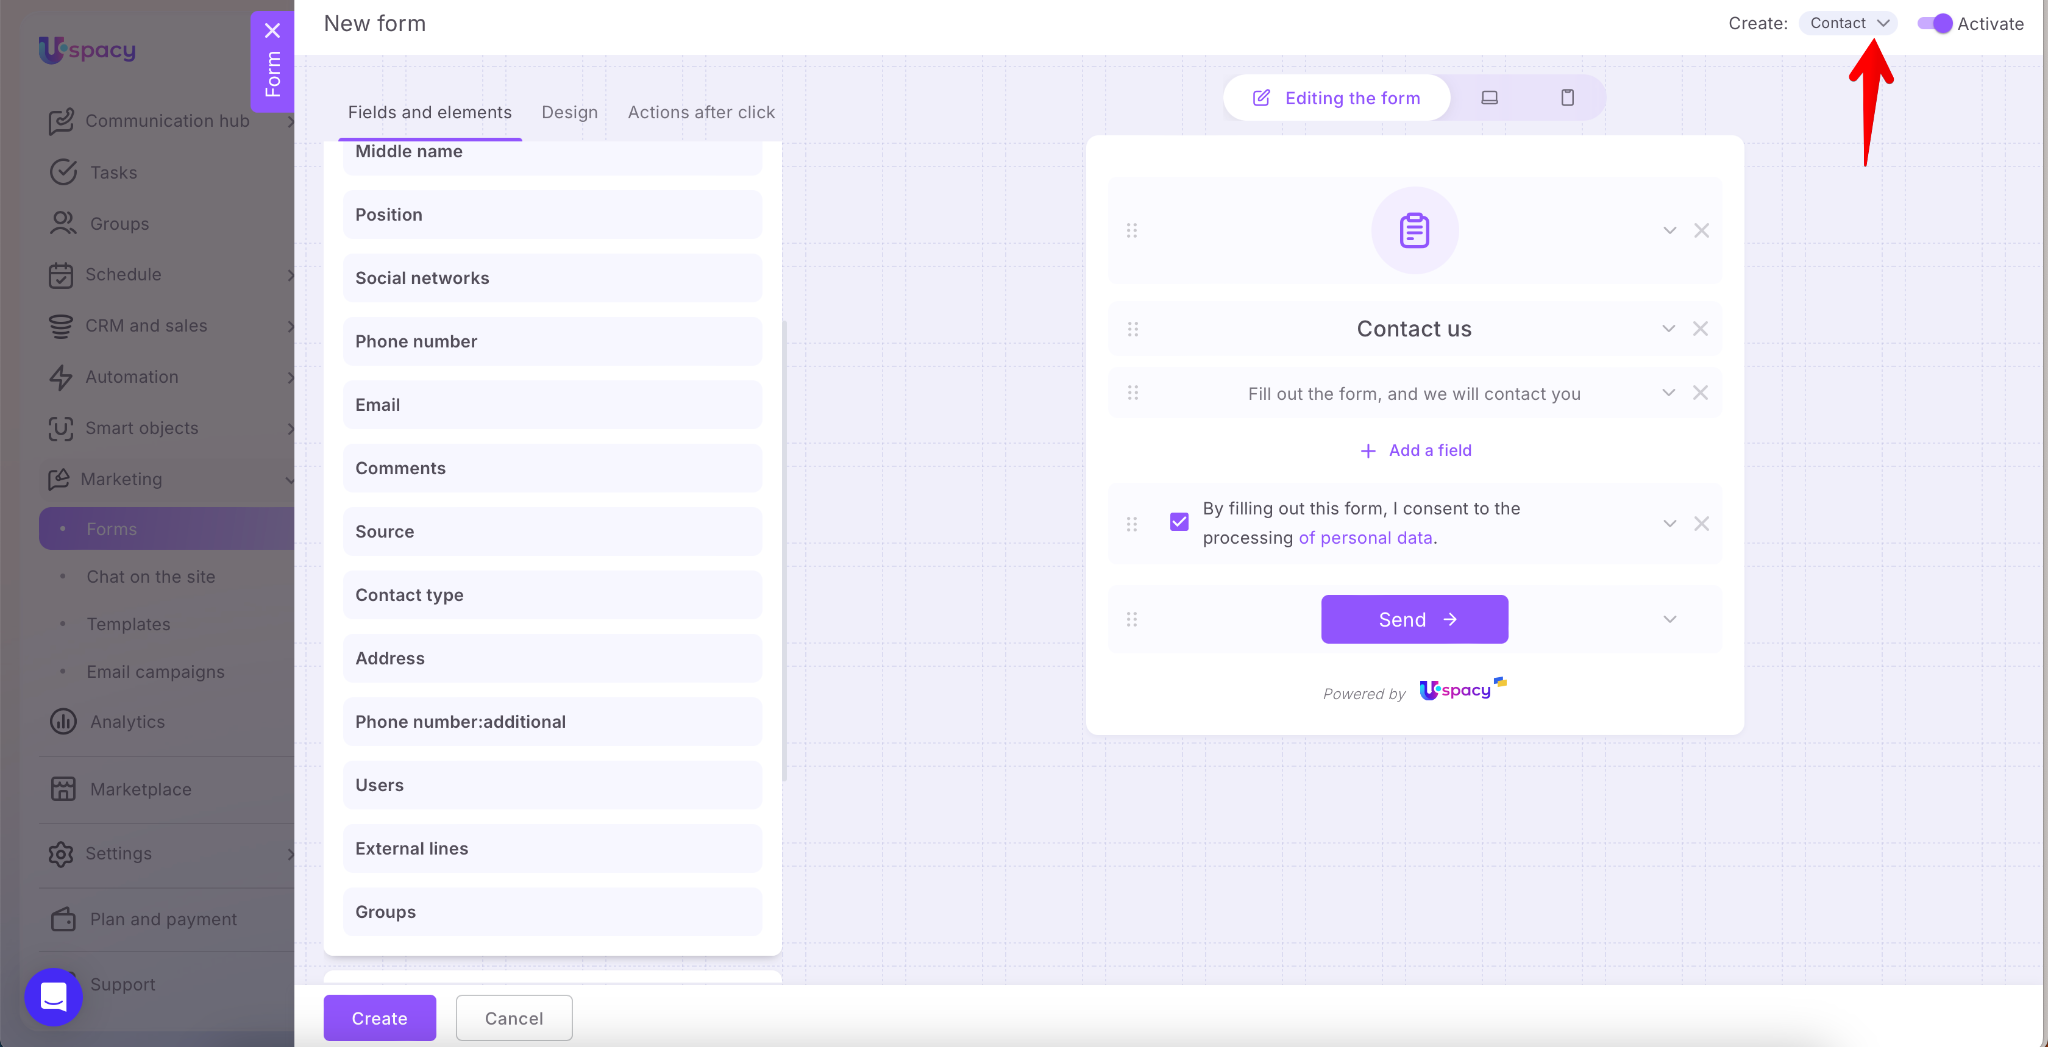
A window will open where you need to select the type of form you wish to create. You can select your custom form with individual settings or one of the predefined types (currently, only the Contact information type is available). After that, click on the Continue button.

Let’s create a form from scratch.

But first, we need to decide which entity to create based on the form submission. It can be a lead or a contact.

💡 Note 💡
If you select one of the predefined types, the fields that should be included in the form for that type will be automatically marked. Additionally, the entities that should be created based on the submission will be specified.

However, you can always add the necessary fields, remove unnecessary ones, select a different entity for creation, and customize the form as you like. For example, you can remove extra elements or change the colors. So, while the form has a specific type, the set of fields, settings, and appearance can be customized. The type is just a template and a hint that can speed up the creation process.
Next, we’ll define:
Fields
This is the information we’ll receive from users who fill out the form. The list will include all available fields for addition.
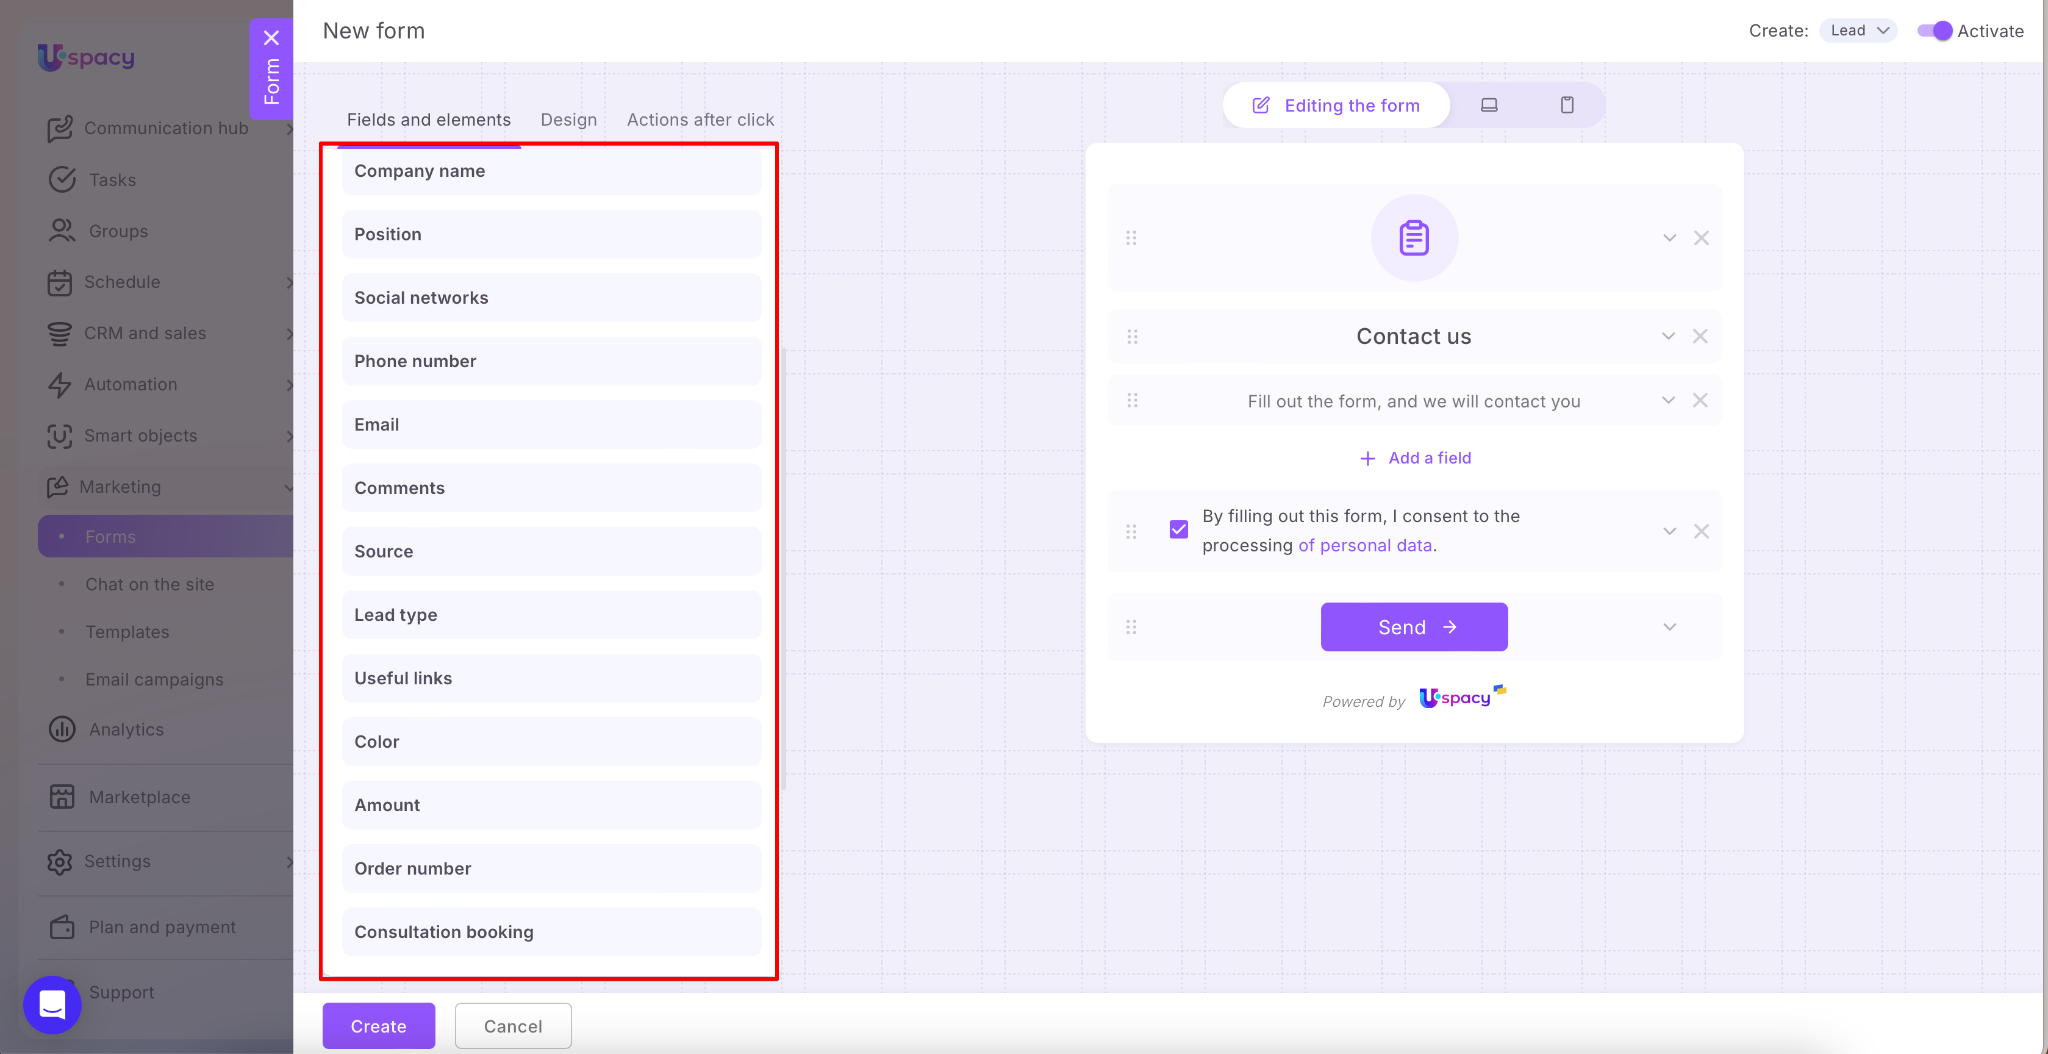
It depends on the entity being created based on the form submission.
Also, note that this list includes all custom fields you’ve created, except for those of type File, Image, User, or Binding to entity.
Next, select the fields you want to include in the form.

Or we can add them using a special button.

We can also make additional settings for each field, such as:

🟣 Field name in the form – describes the information the user should enter in this field.

🟣 Placeholder text – displayed in the field before the user starts typing information.

🟣 Hint text – a short explanation that appears under the form field, providing additional information or clarification on how to properly fill out a specific field.

🟣 Required field – indicates that this field must be filled out for the form to be successfully submitted.

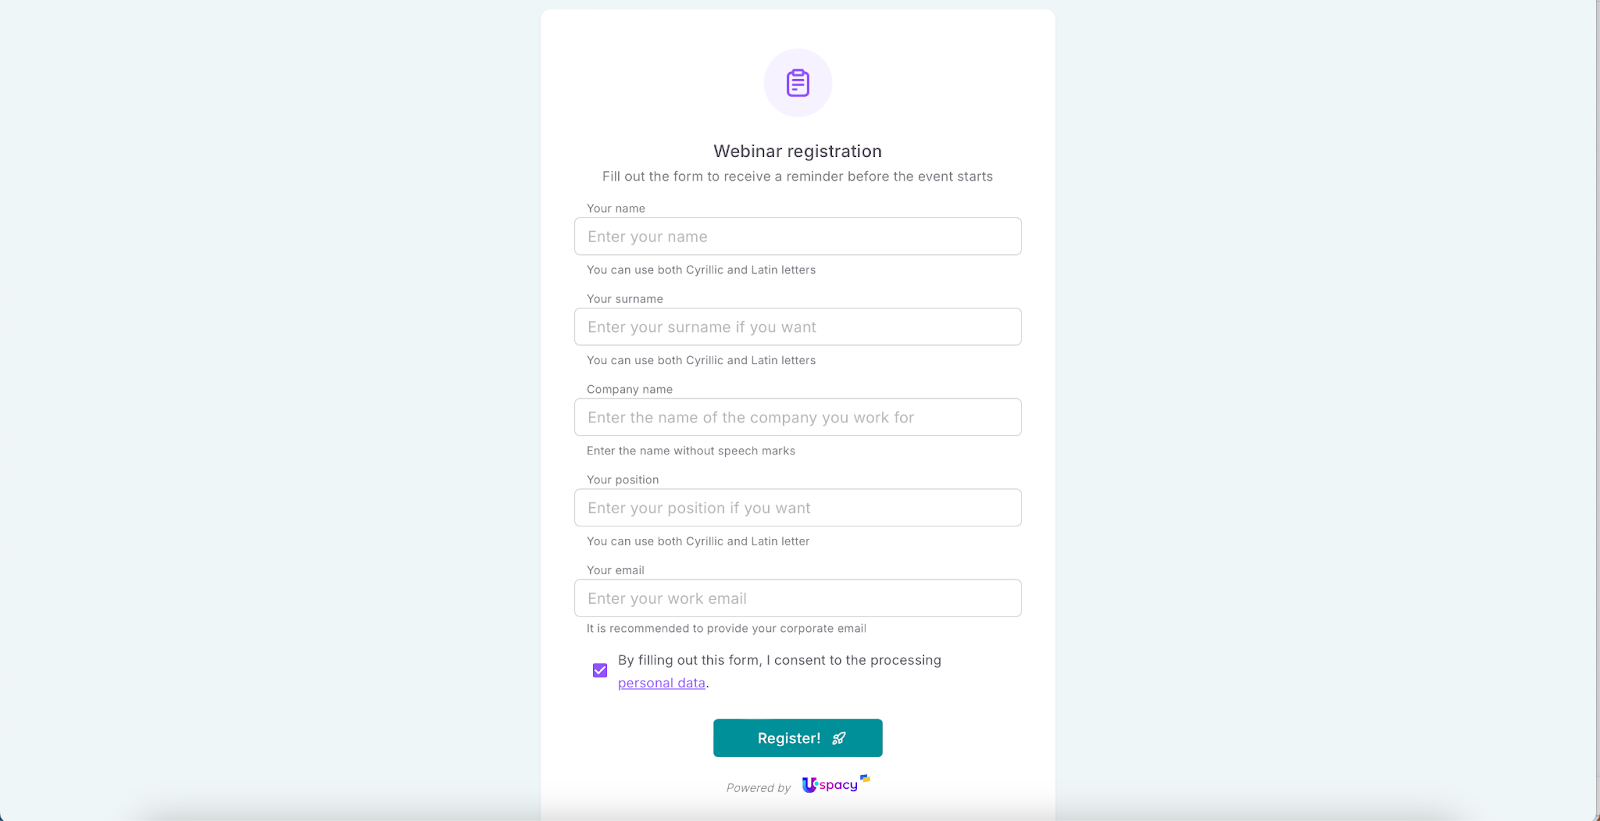
As a result, if you set up all the fields for the form in this way, it will look something like this:

To remove unnecessary fields, just click on the cross next to each one.

Other elements
Some of them are already placed on the form (Icon, Header, Subheader, Consent to data processing). However, you can remove them if they're not needed, and also add others (Banner, Logo, Separator).

So, let's look at each element individually.
🟣 Banner is a large image that can span the entire width of the top part of the form. It serves to visually engage users and reinforce the form's context (e.g., a promotion, invitation, event). It can contain an illustration or a branded image that you'll need to upload from your computer.
🌟 This element is only available on commercial plans. You can find more details about the features of different pricing plans ➡️ on a separate page of our website.

🟣 Logo – is an image placed at the top of the form, typically featuring a company's brand mark or name. It helps users quickly identify who the form is from. Like a banner, the logo image also needs to be uploaded from your computer.
🌟 This element is only available on commercial plans. You can find more details about the features of different pricing plans ➡️ on a separate page of our website.

🟣 Icon is a graphic element placed at the top of the form. You can select one from the standard options provided.

🟣 Header is a short, clear text that explains the purpose of the form. You can write anything you like, and even use the built-in editor within the input field. This lets you change the text size, color, alignment, and more.
🔍 You can read more about the features of the built-in text editor in this article.

🟣 Subheader – This is additional text below the header, which can include hints and explanations. It also helps make the form clearer and increases the likelihood of it being filled out. The input field also contains a built-in text editor.
🔍 You can read more about the features of the built-in text editor in this article.

🟣 Consent to data processing – This is a required element to ensure compliance with personal data protection requirements (e.g., GDPR, Personal Data Protection Law). This field informs the user that their data will be processed and allows them to confirm their consent.

You can write your own text for the data processing warning. Additionally, you can add a link to the privacy policy page on your website.
🔍 You can read more about the features of the built-in text editor in this article.

Moreover, you can define whether the user’s consent to data processing is required for successful form submission.

There is also a setting for automatic consent. If this option is inactive, the user must manually check the box.

You can also customize the color scheme. This allows the consent checkbox field and active links to be highlighted in the color you select from the list or specify using a HEX code.

🟣 Separator is a visual element used to structure a form. It helps separate fields or blocks into logical sections, making the form clearer and easier to complete. Typically, it's placed after the form fields, before the data processing consent.

However, like other components, a separator can be moved to any part of the form you need it to be in ⬇️
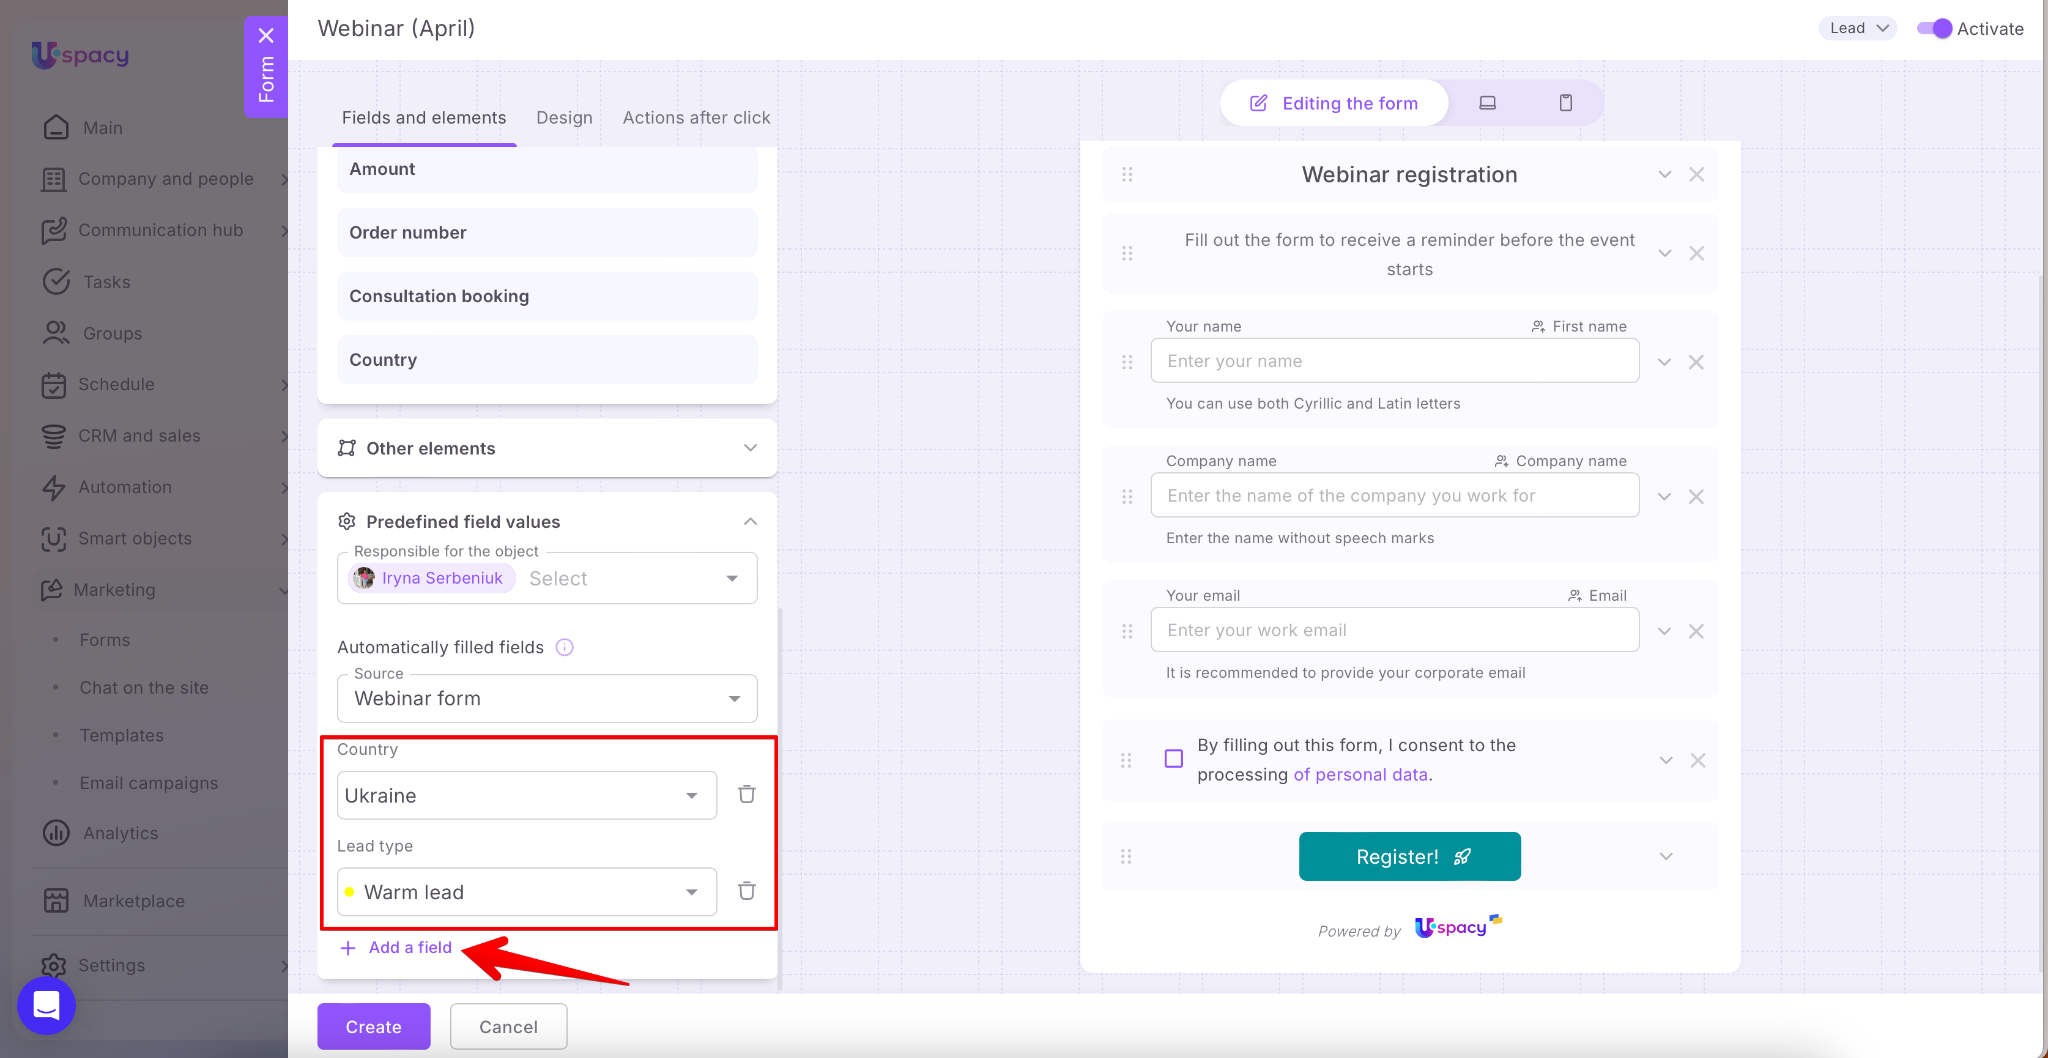
Predefined field values
This section allows you to set default values for new elements created through the form. These fields are not visible to the user in the form, but in the created element’s record, they will be automatically populated with the predefined values.
This helps prevent errors, speeds up request processing, and ensures that all new leads or contacts are immediately placed in the correct segment and workflow.
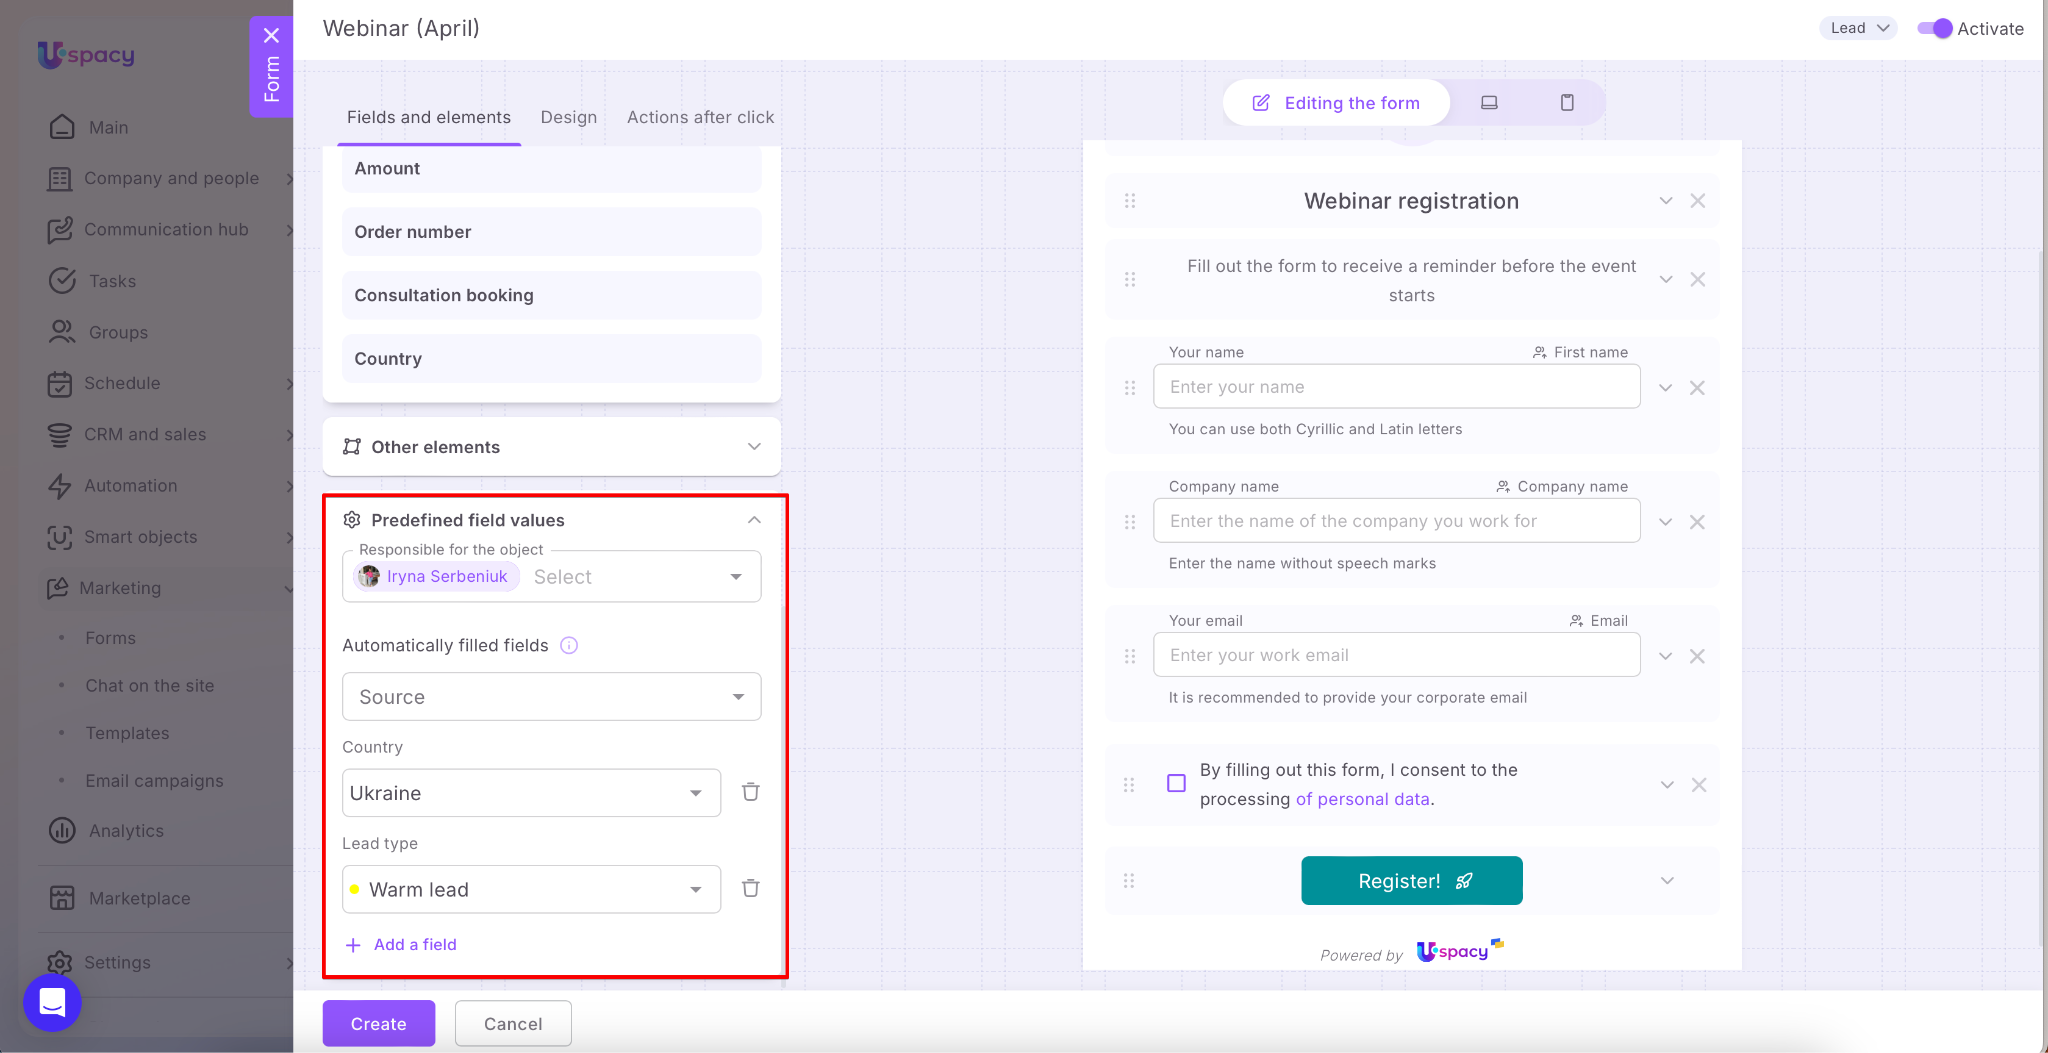
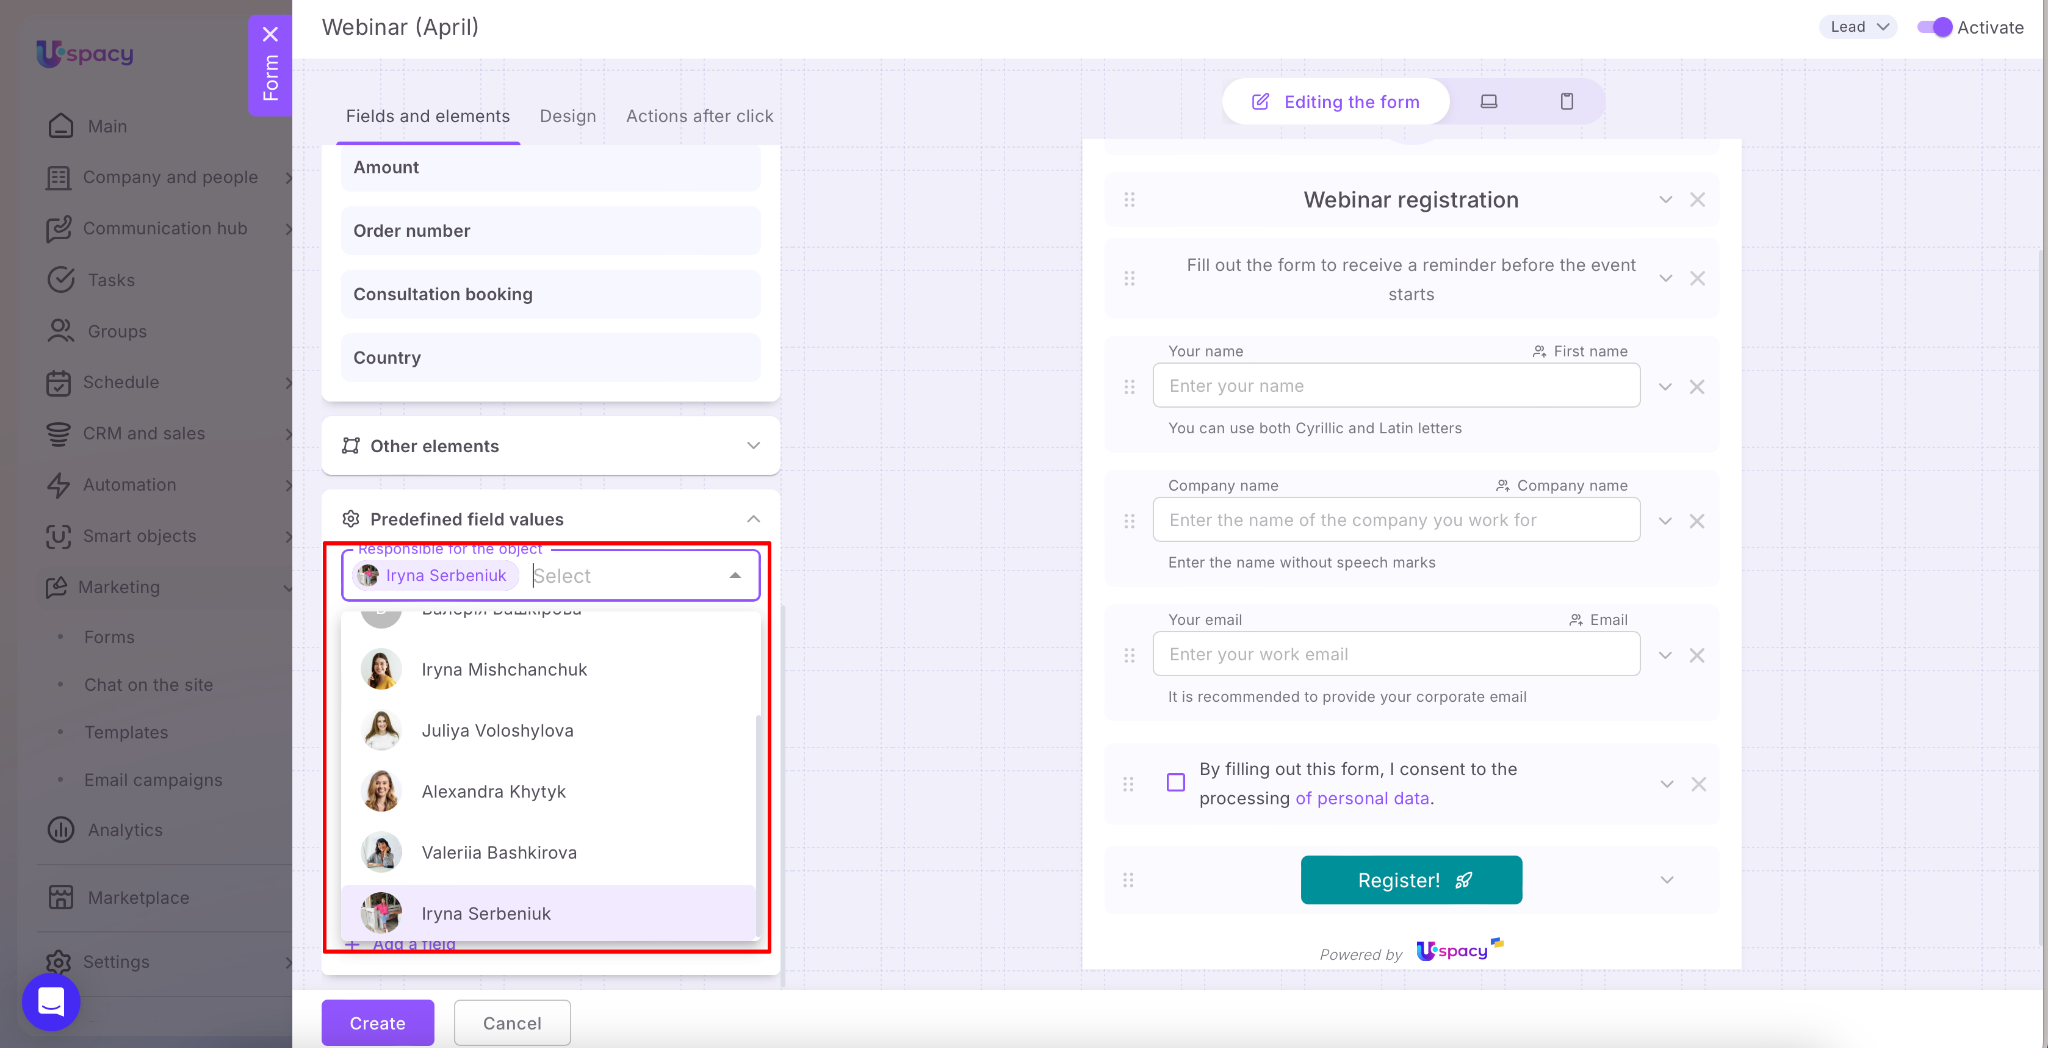
🟣 Responsible for the object – This is the user who will be responsible for the CRM entity element created based on the form. You need to select one of the active users in the Workspace.
💡 The system automatically adds the user who created the form to this field. Therefore, if the person responsible should be another user, you need to account for that and change.
🟣 Automatic field filling – This requires selecting a value for the Source field.
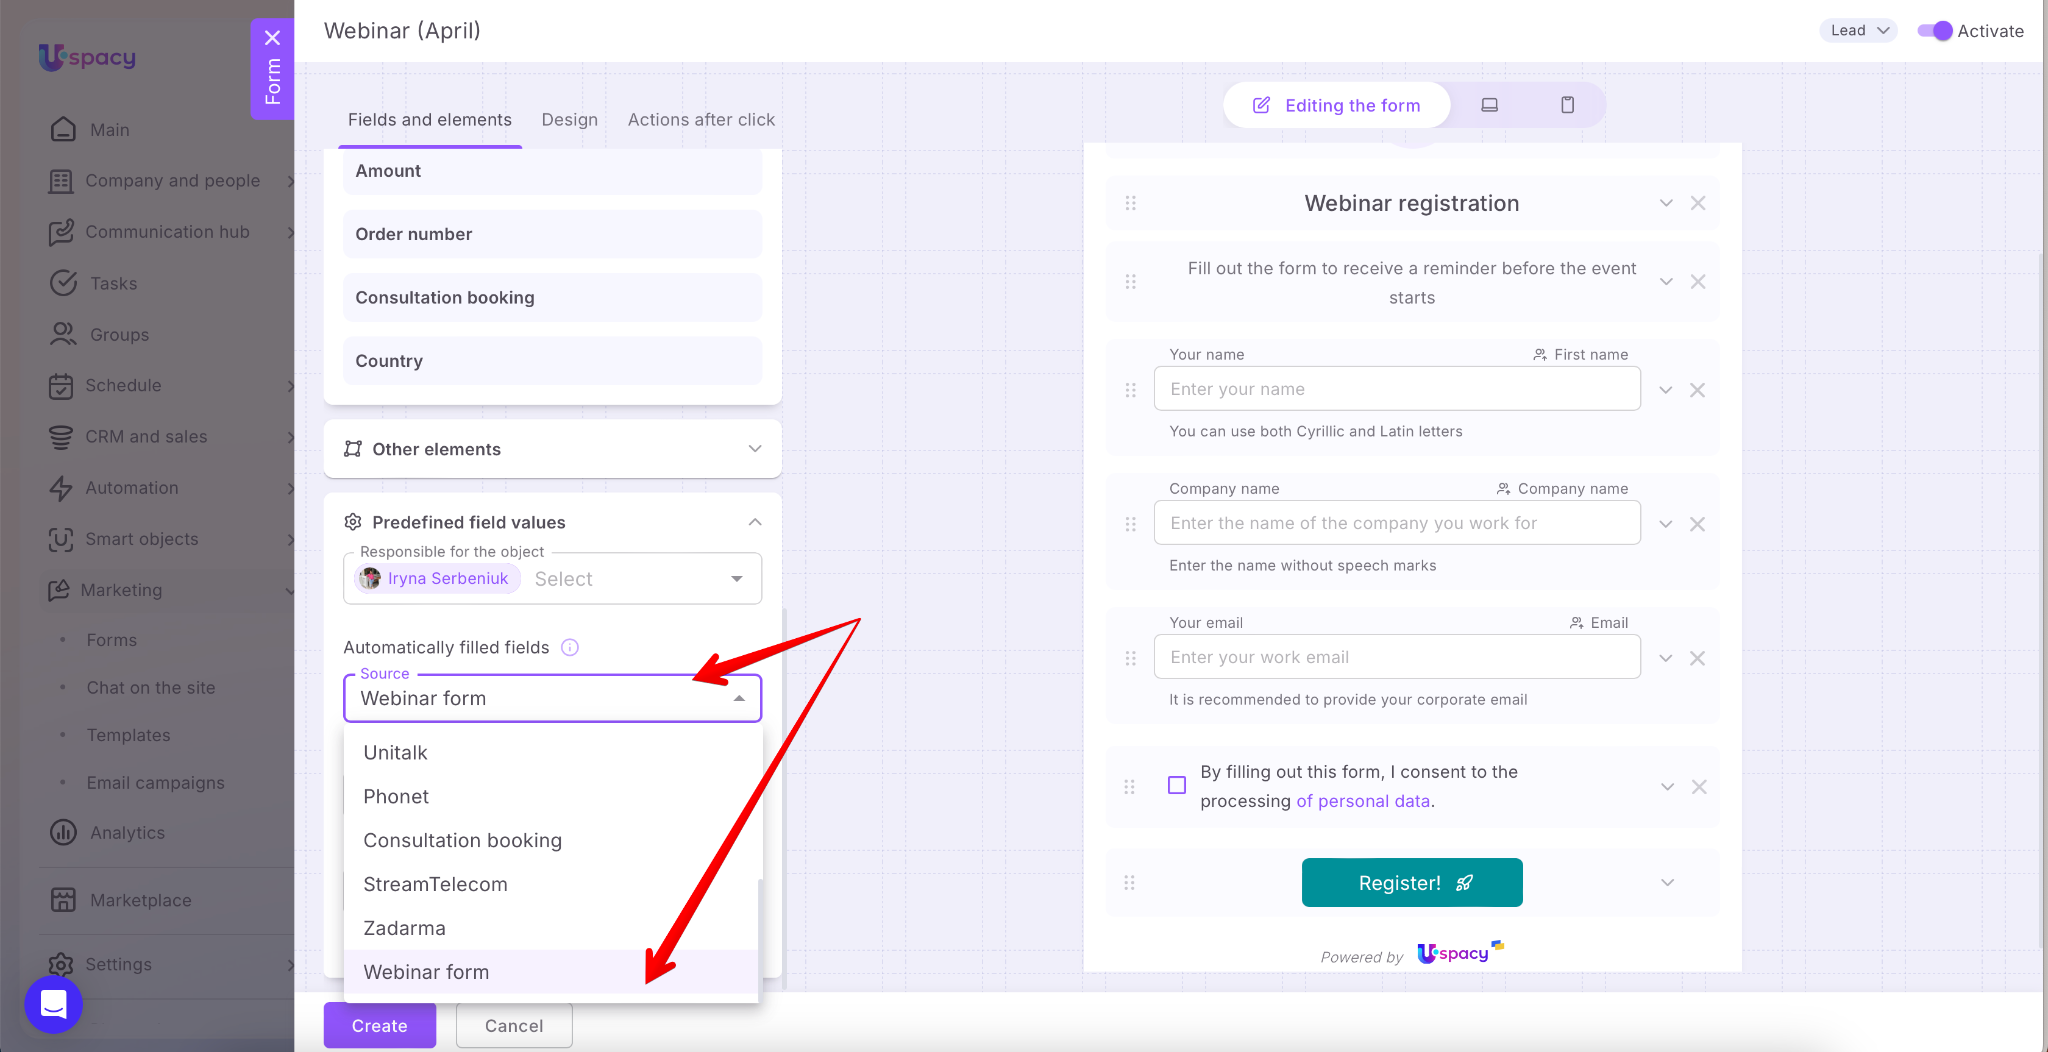
The system will automatically add it to the CRM entity element cards created based on the form.

You can add your own option to use for filling. This means your list can include not only standard sources but also those that represent forms you’ve created.
If needed, you can add any other default or custom field, so you don’t have to fill it out manually each time.
Send button
In addition to the previous three blocks, the form settings also include the ability to change the parameters of the button used by the client to confirm the form submission.

🟣 Button text and icon – These depend on the button’s purpose. The button should clearly indicate the action the user will take after clicking it. The icon adds additional attention.

Of course, you can disable its display if needed.

You can also select the color for the button from the available standard options.

Alternatively, you can manually enter a HEX code.

Arranging fields and elements
You can arrange the fields and other form elements in any order that works best for you. Hold down the special move icon (six dots) and drag the component to your desired location. This lets you quickly change the form's structure without extra steps.

Almost done! We just need to give the form a name since we forgot to do this at the very beginning 😉.

Also, note the active option. It is automatically enabled when the creation window is opened.

Finally, click Save.

Before saving all parameters, you can also configure post-click actions — that is, what will happen after the form is completed.

As a result, the form will appear in the list on the page.

So, the form is ready for use!

💡Uspacy forms support the UTM tags. Therefore, after submission, the corresponding field in the card of the element created based on it will be automatically filled out.


If you have additional questions or you need to contact the support, send a request to this email [email protected]
Created: April 3, 2025 / Updated: February 4, 2026