
The Uspacy MCP Server allows you to connect Claude to your Workspace data and tools. After setup, you can use natural language prompts to find information in Uspacy and perform supported actions.
For example, Claude can find a contact or deal, display tasks with a specific due date, create a CRM record, update a task, or move it to another date.
The Uspacy MCP Server provides 25 tools. Whether a specific request can be completed depends on the available MCP tools, your permissions in Uspacy, and the information included in your prompt.
What you need before you connect
Make sure that:
- you have a Claude account;
- you have an active Uspacy account;
- you have access to the required Workspace;
- you know the email address and password for the Uspacy account you want to connect.
Next, prepare the Uspacy MCP server URL.
If you work with a single Workspace, you can use the general URL:
https://mcp.uspacy.com/mcp
In this case, the Workspace the user authenticated with most recently will be connected.
If you have multiple Workspaces and need to connect to a specific one, add its domain to the Uspacy MCP server URL:
https://mcp.uspacy.com/mcp/domain.uspacy.ua
For example, to connect to the company.uspacy.ua Workspace, use:
https://mcp.uspacy.com/mcp/company.uspacy.ua
💡 If you have multiple Workspaces, we recommend using the URL that includes the domain of the desired Workspace. This ensures that Claude works with data from the correct Workspace.
How to add the Uspacy MCP Server to Claude
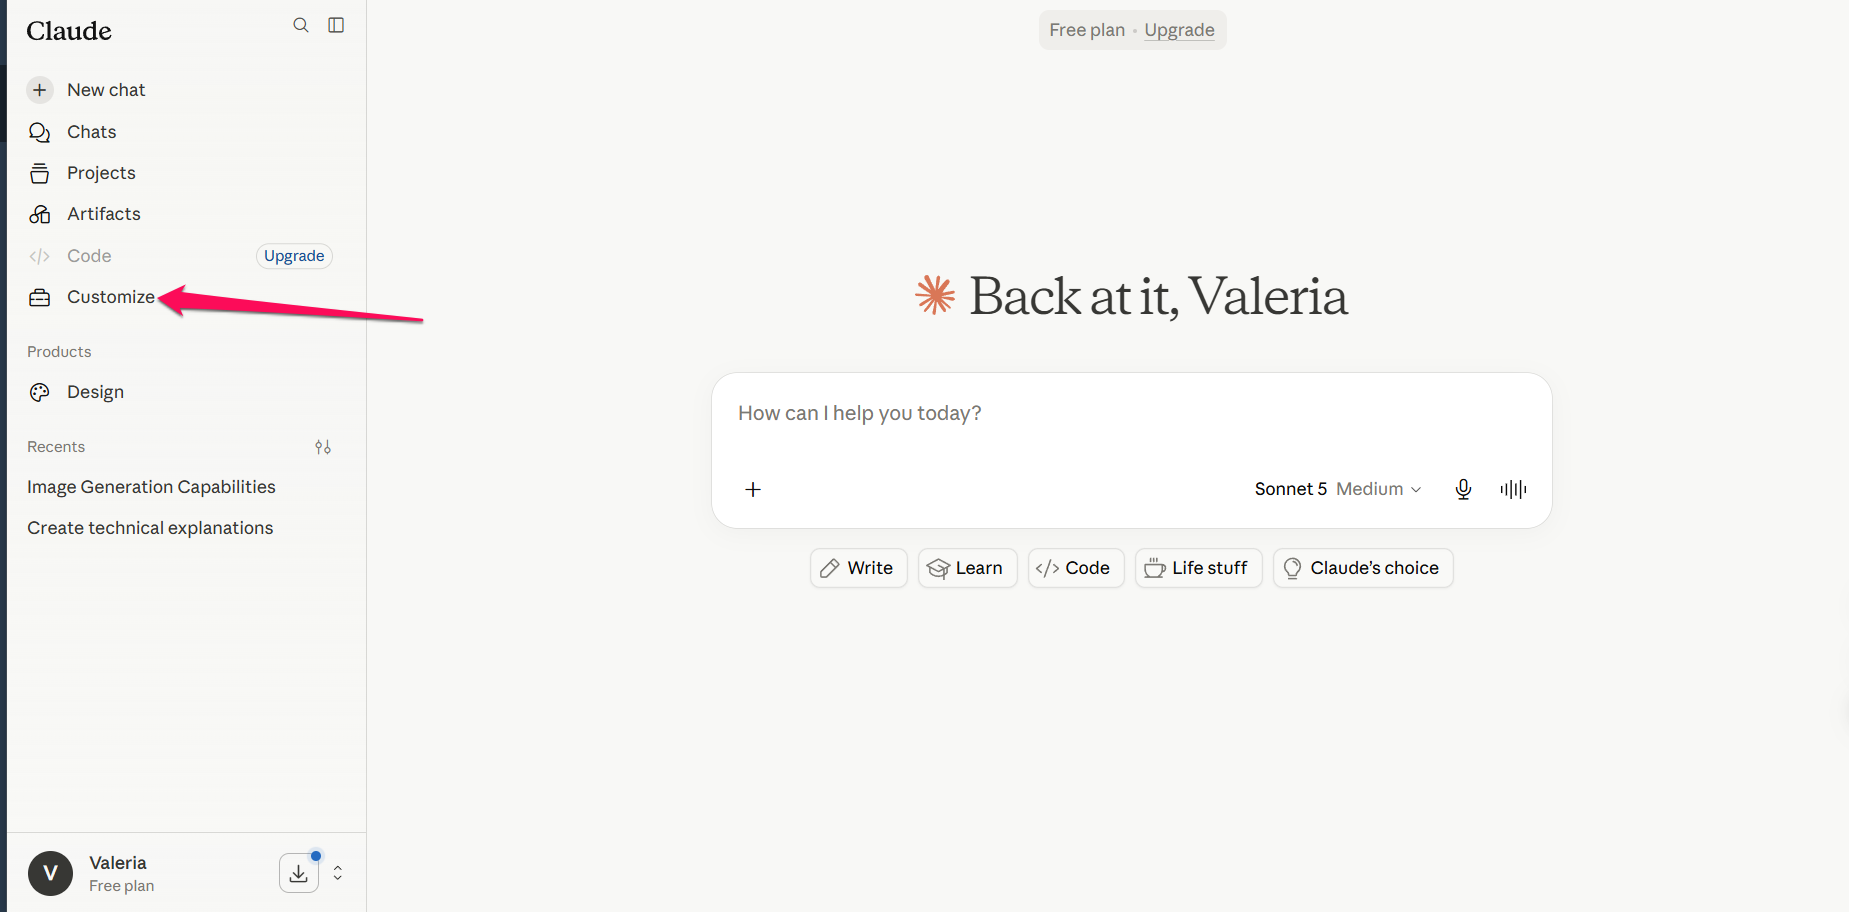
Open Claude and click Customize in the sidebar.
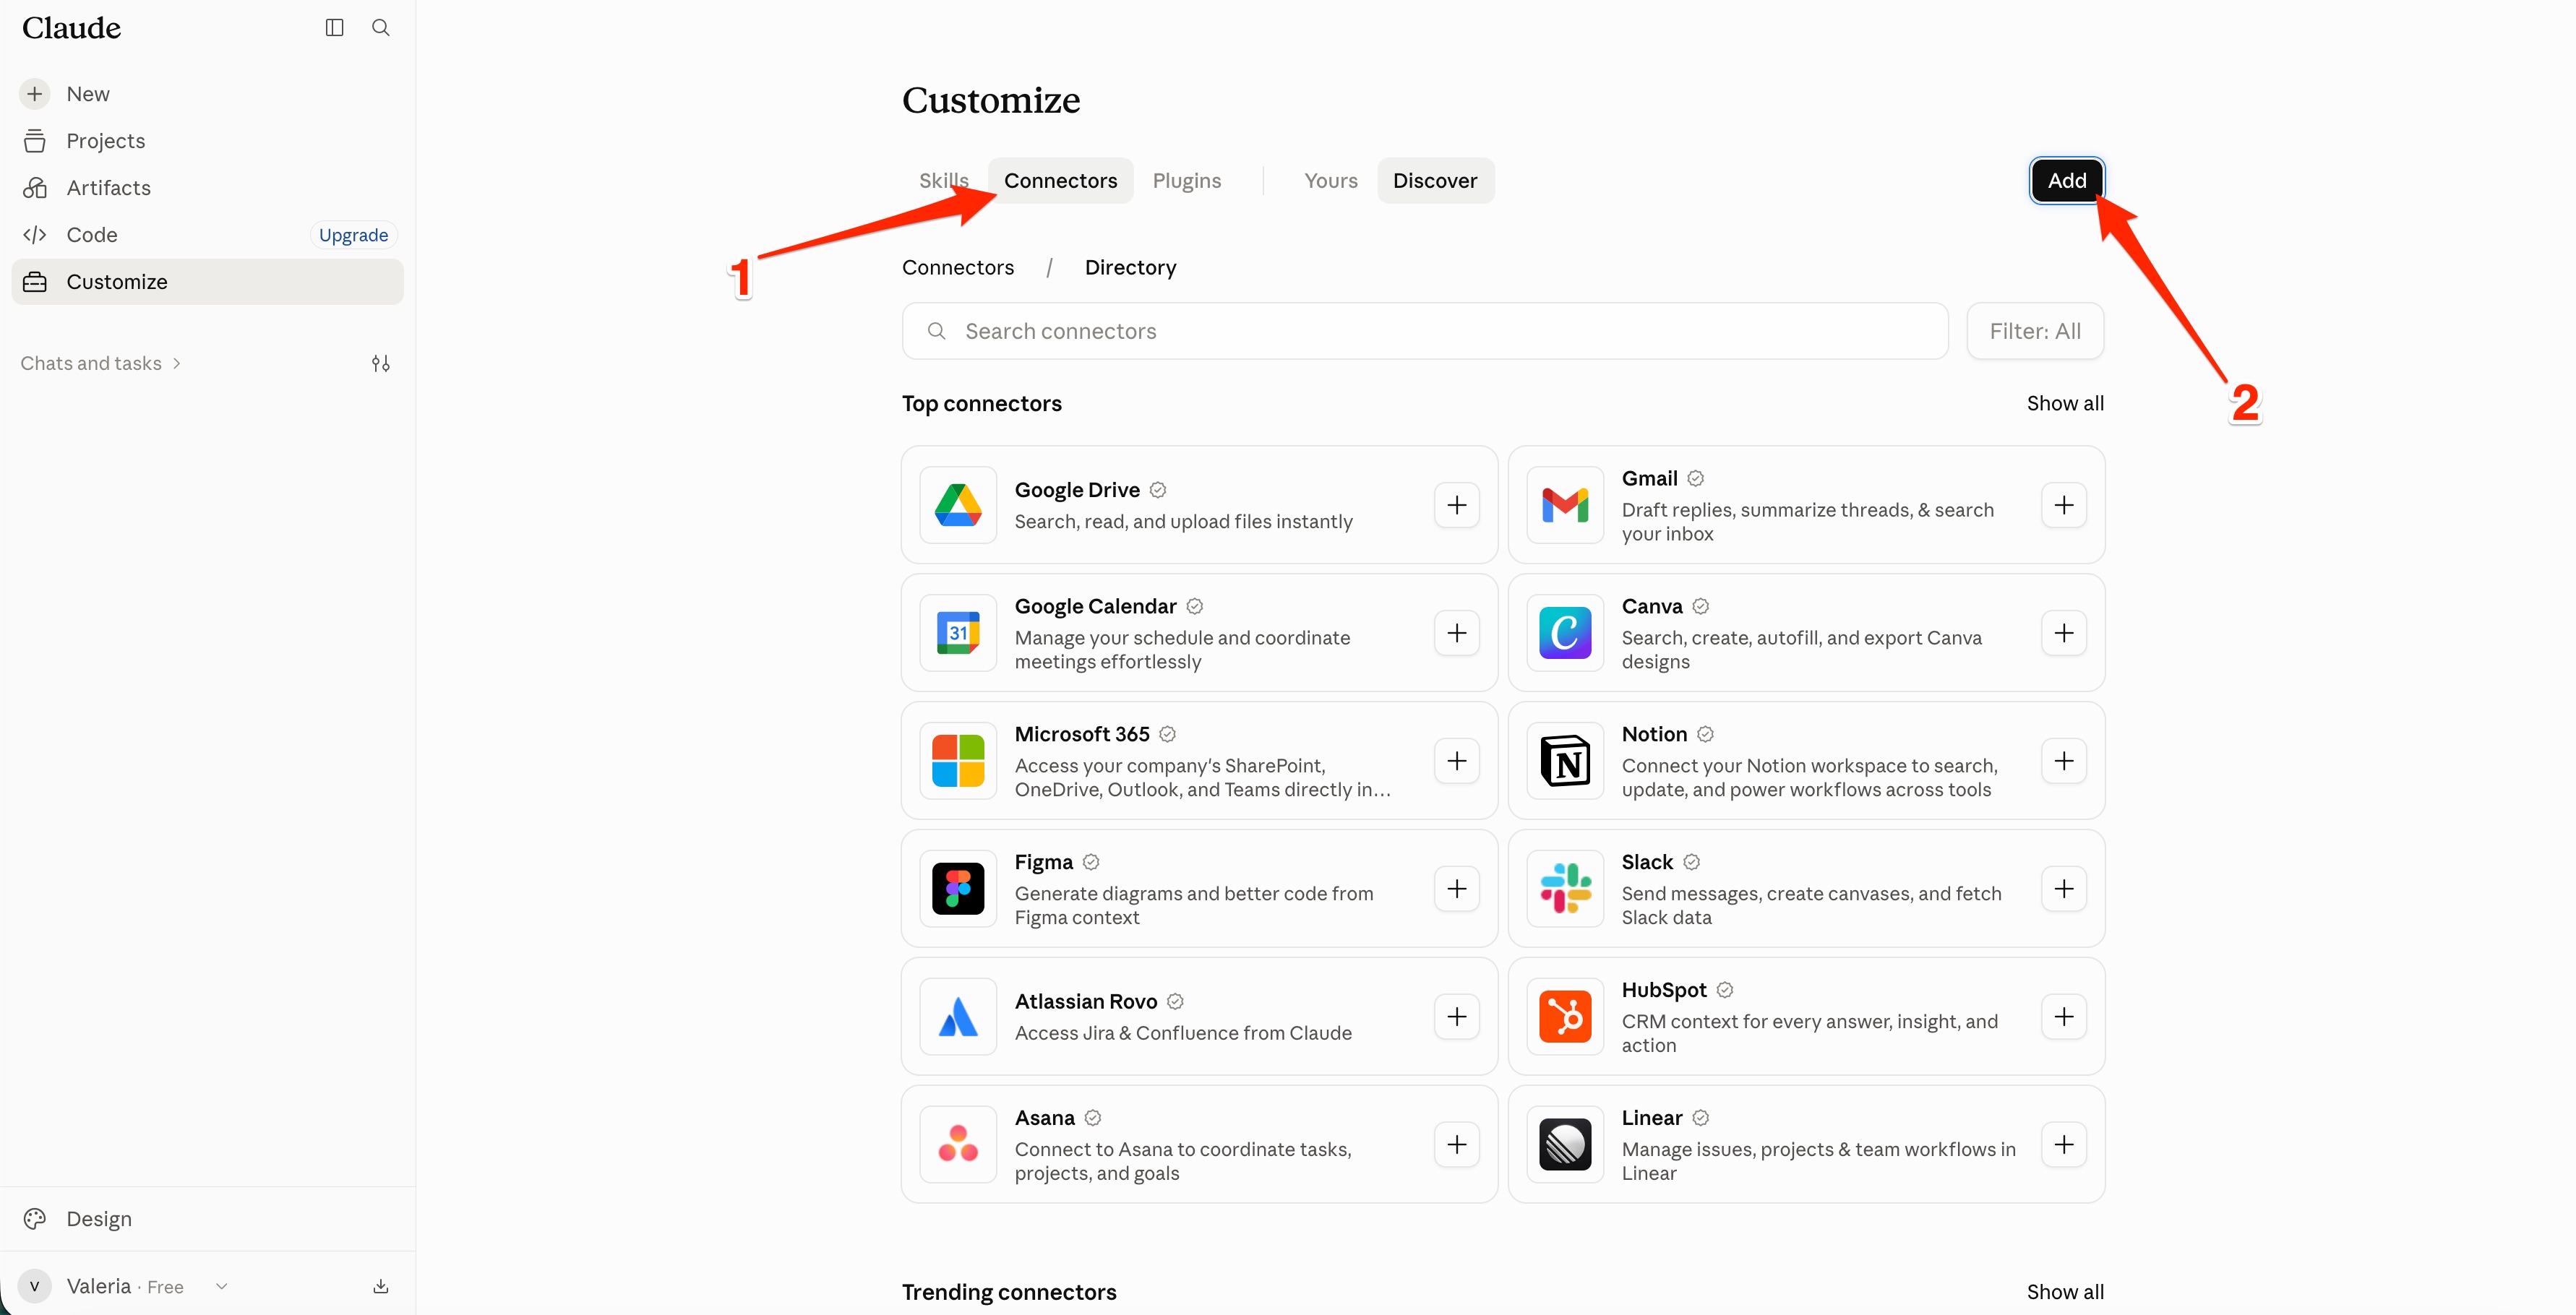
At the top of the page, open the Connectors tab and click Add.
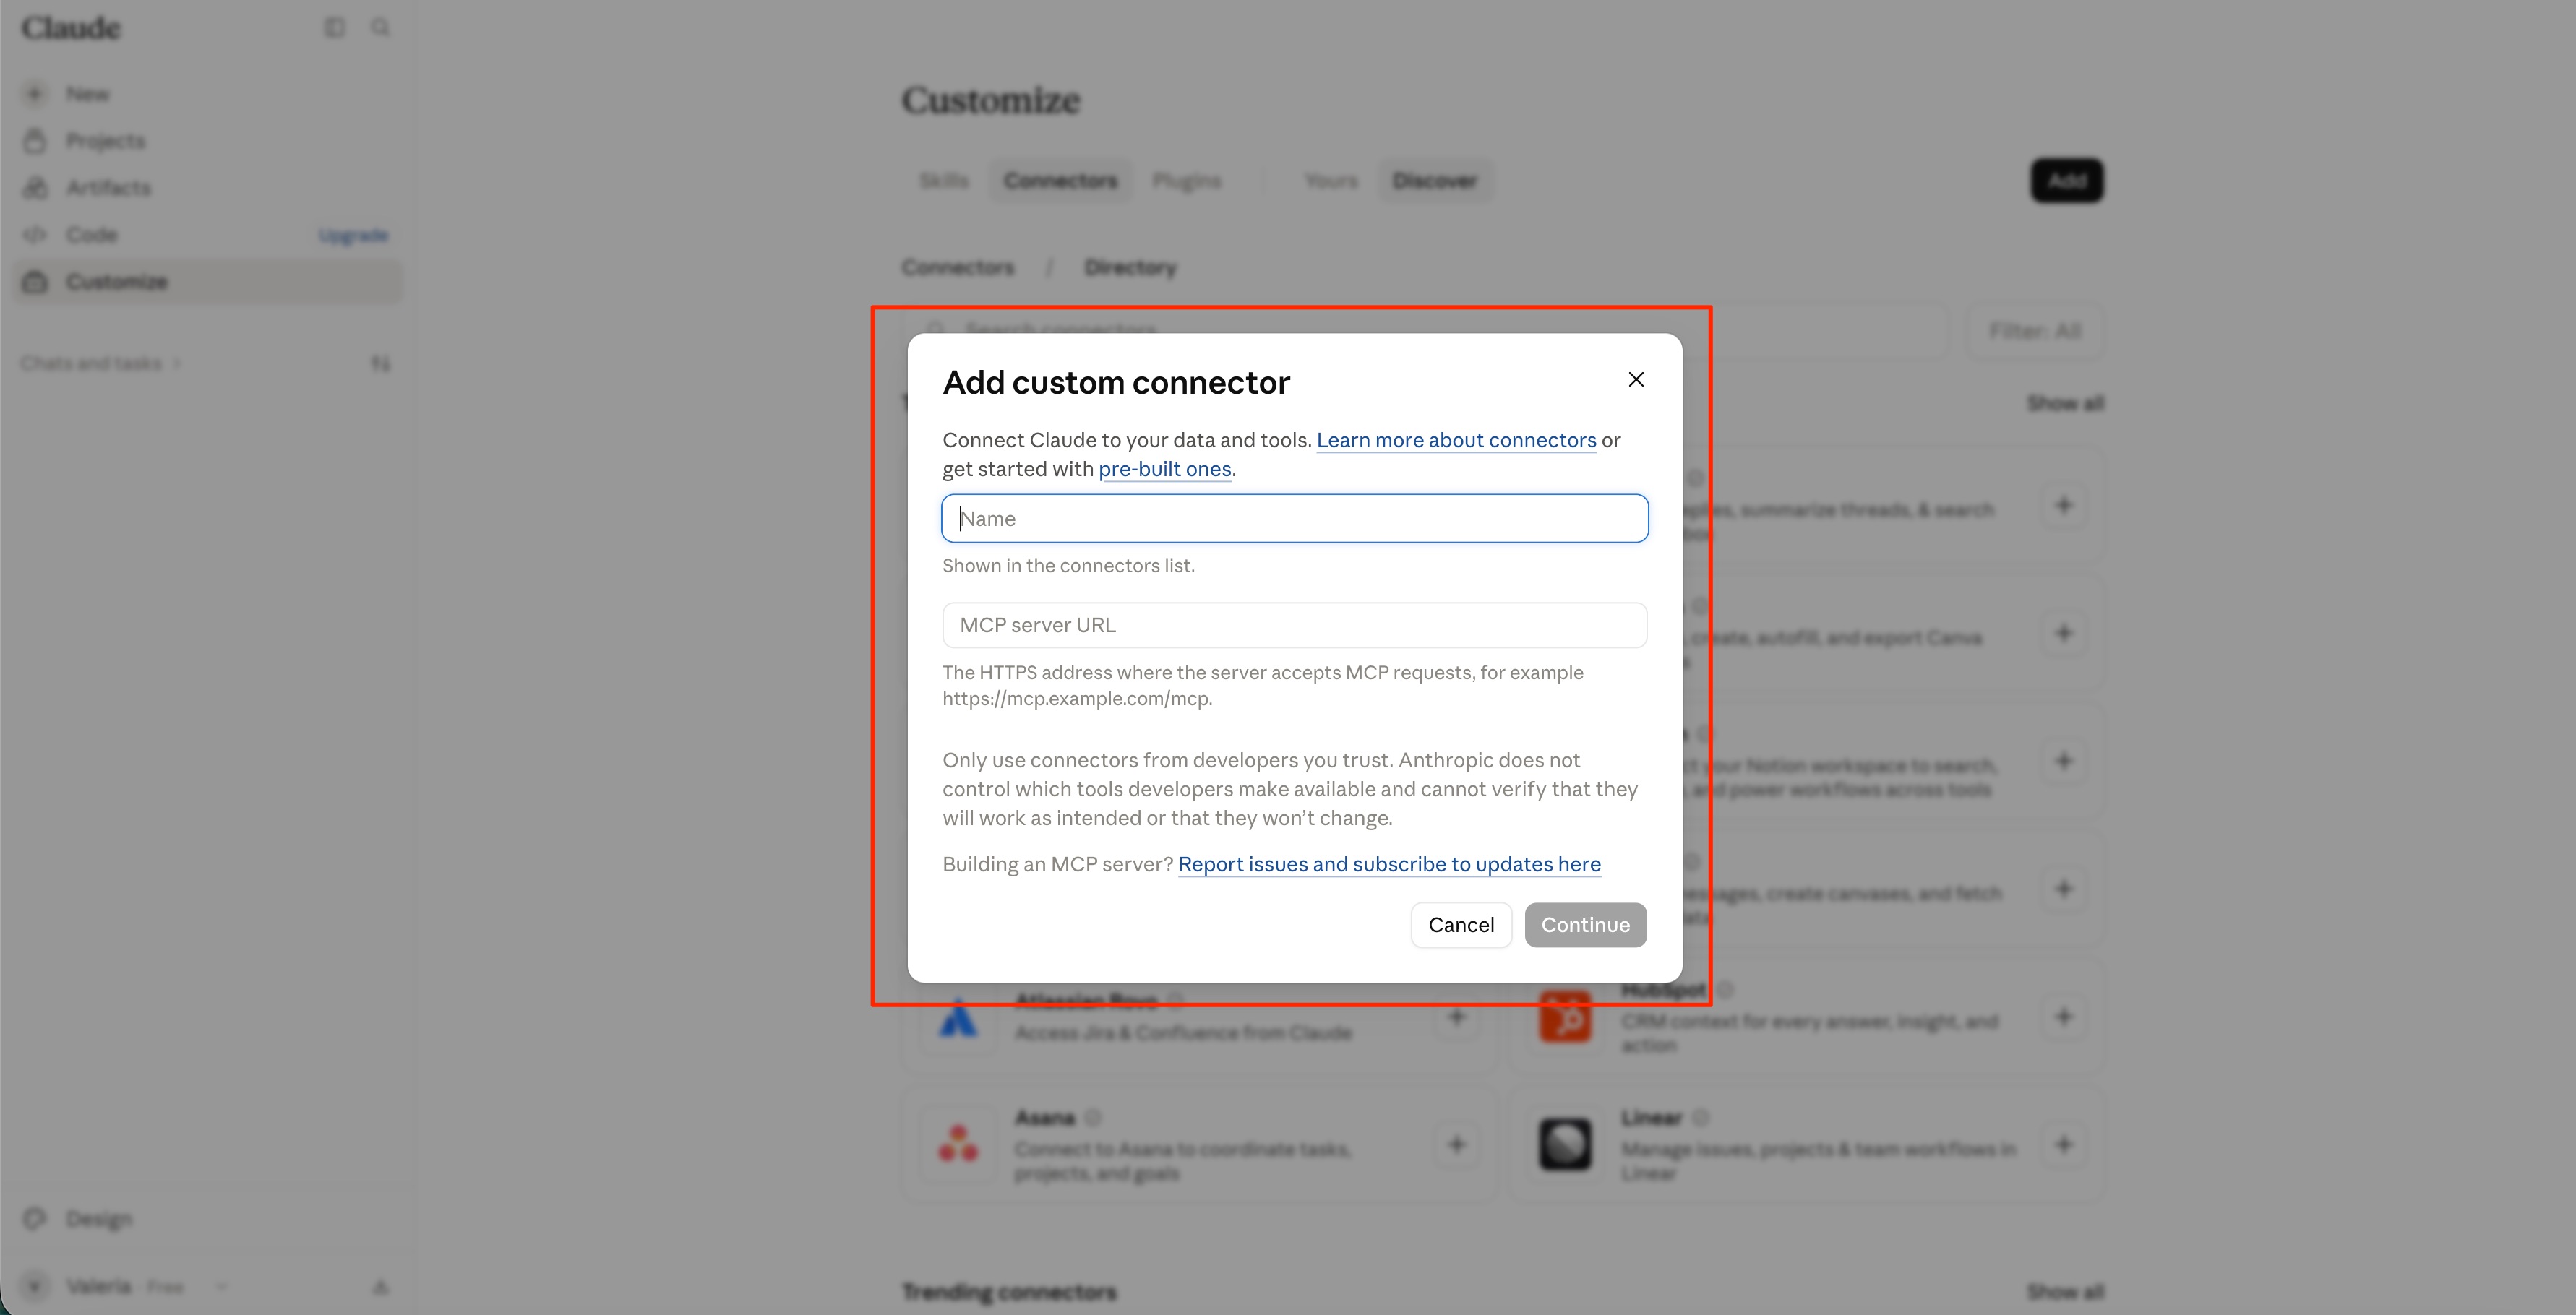
The Add custom connector form will open. In it:
- In the Name field, enter a name for the connection, such as Uspacy.
- In the MCP Server URL field, enter the Uspacy MCP server URL.
To connect to the Workspace you authenticated with most recently, use:
https://mcp.uspacy.com/mcp
To connect to a specific Workspace, use the URL that includes its domain:
https://mcp.uspacy.com/mcp/domain.uspacy.ua
For example:
https://mcp.uspacy.com/mcp/company.uspacy.ua
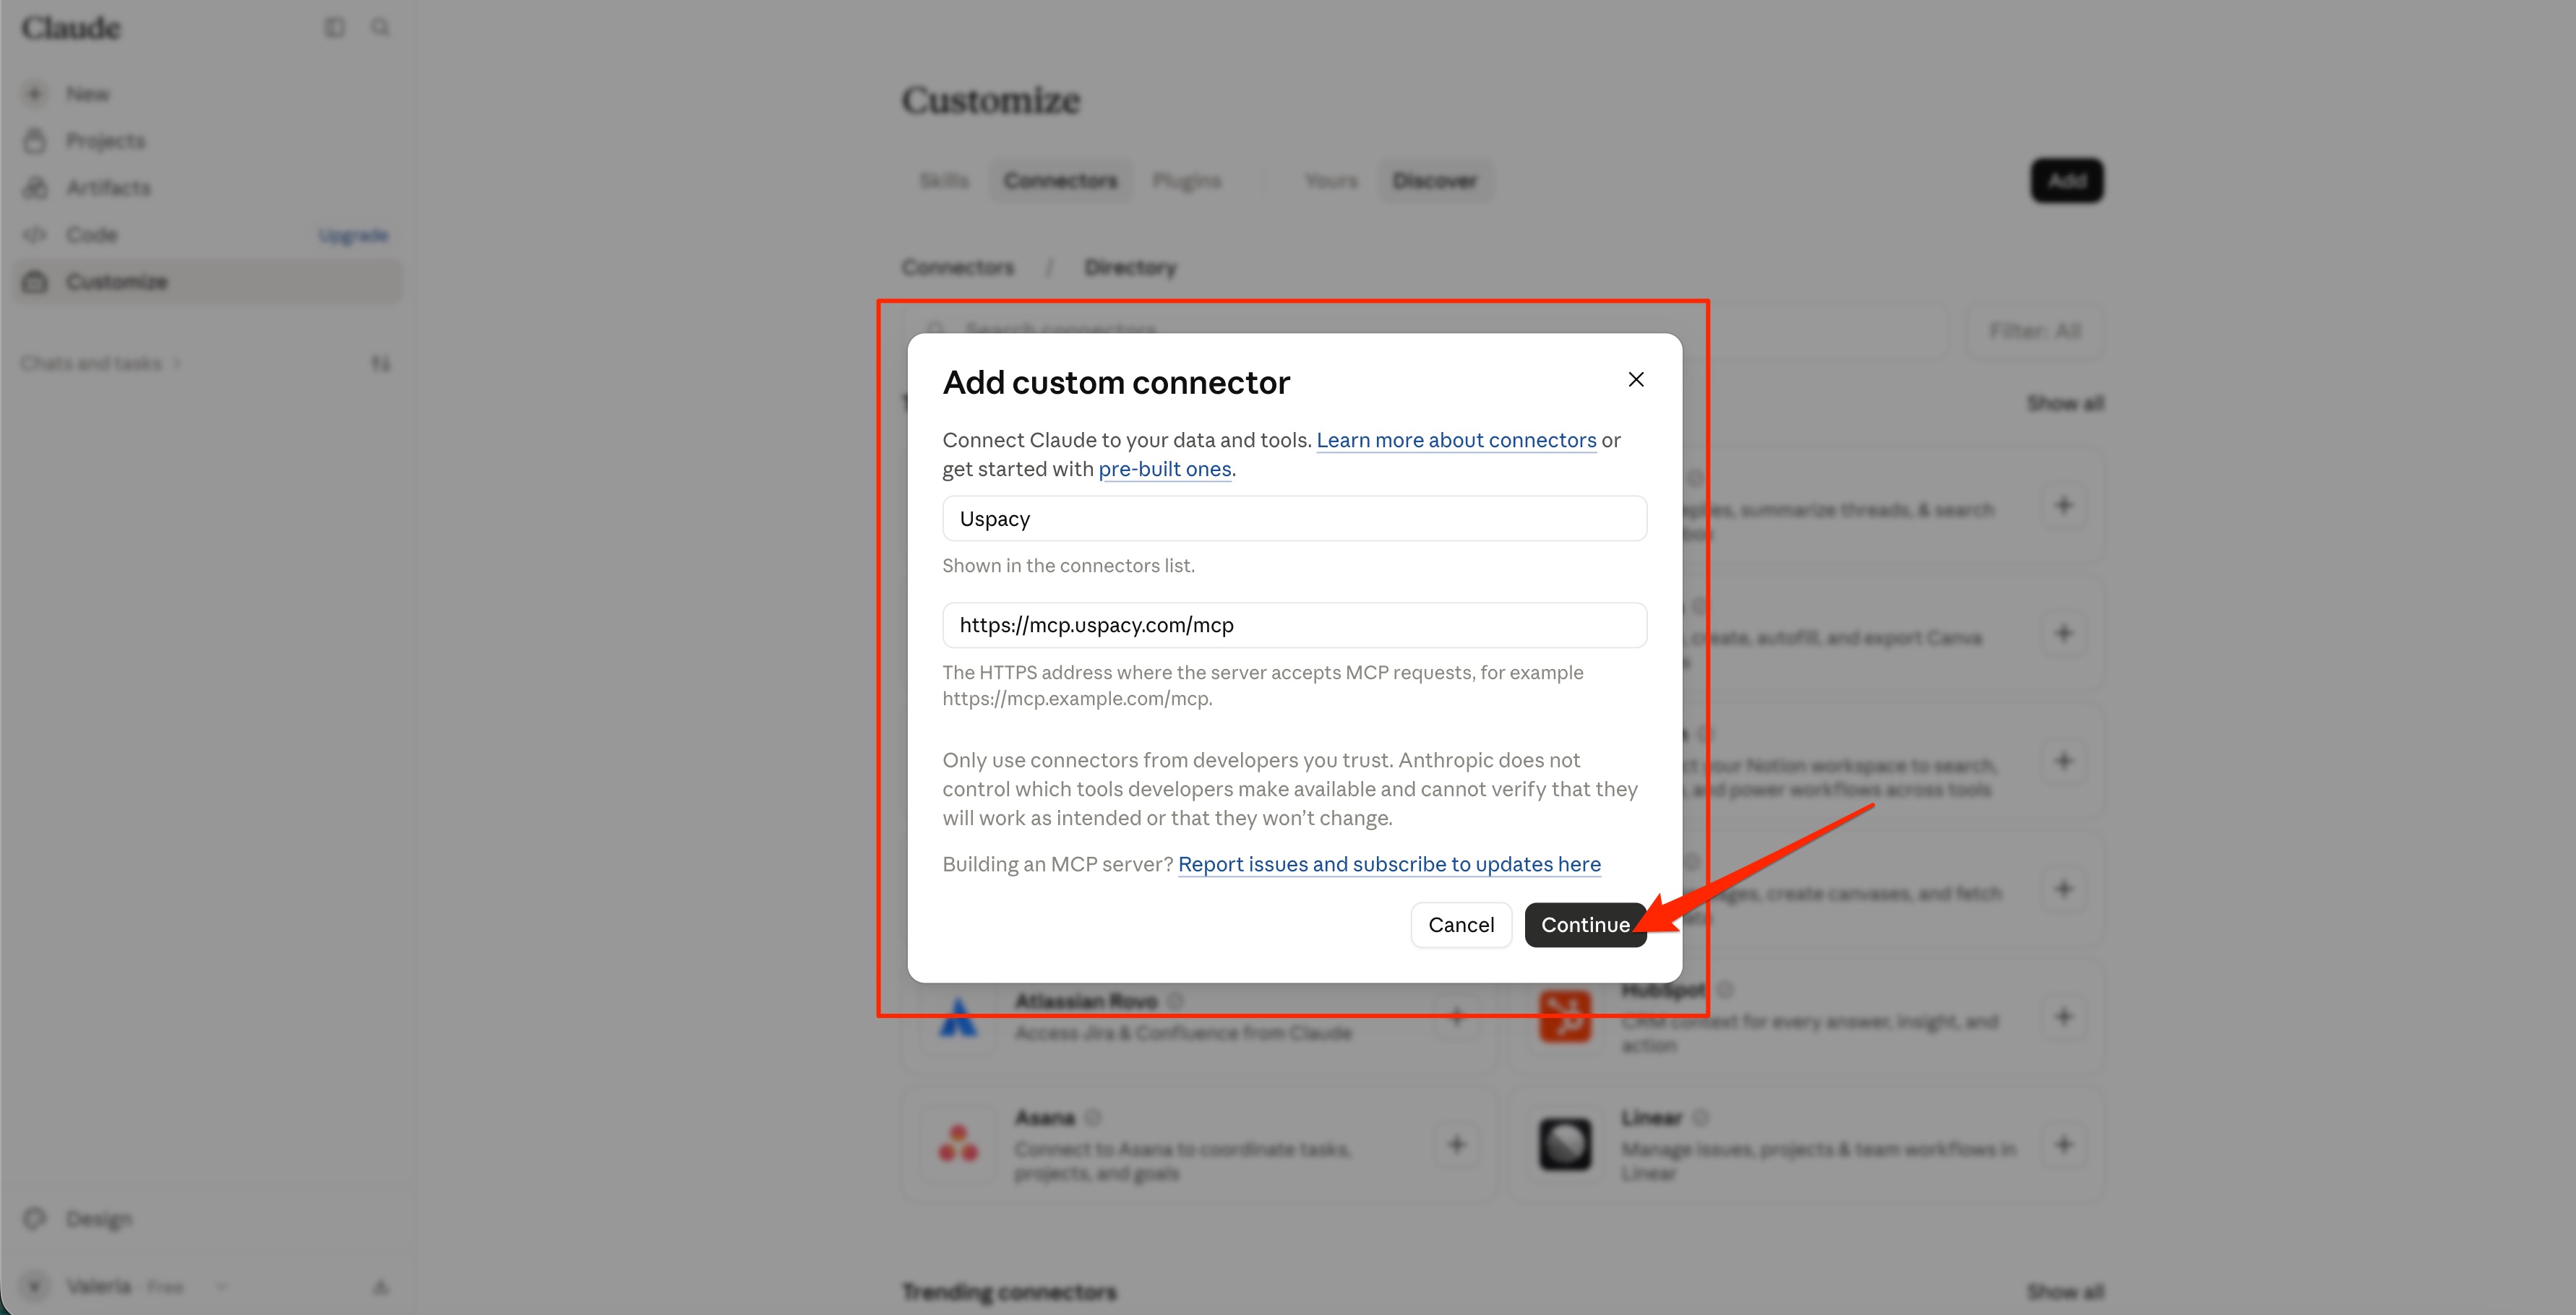
Click Continue.
Important: Make sure to use the correct Uspacy MCP server URL format. For a general connection, use https://mcp.uspacy.com/mcp. To connect to a specific Workspace, use https://mcp.uspacy.com/mcp/domain.uspacy.ua.
In the next step, you need to select an authorization method.
In the Authentication section, leave Sign in now selected. This means that the user will authenticate with Uspacy immediately before starting to work with the MCP Server tools.
In the OAuth client section, leave Register automatically selected. Claude will automatically register an OAuth client for the Uspacy connection, so there is no need to enter a Client ID or Client Secret manually.
Then click Add.
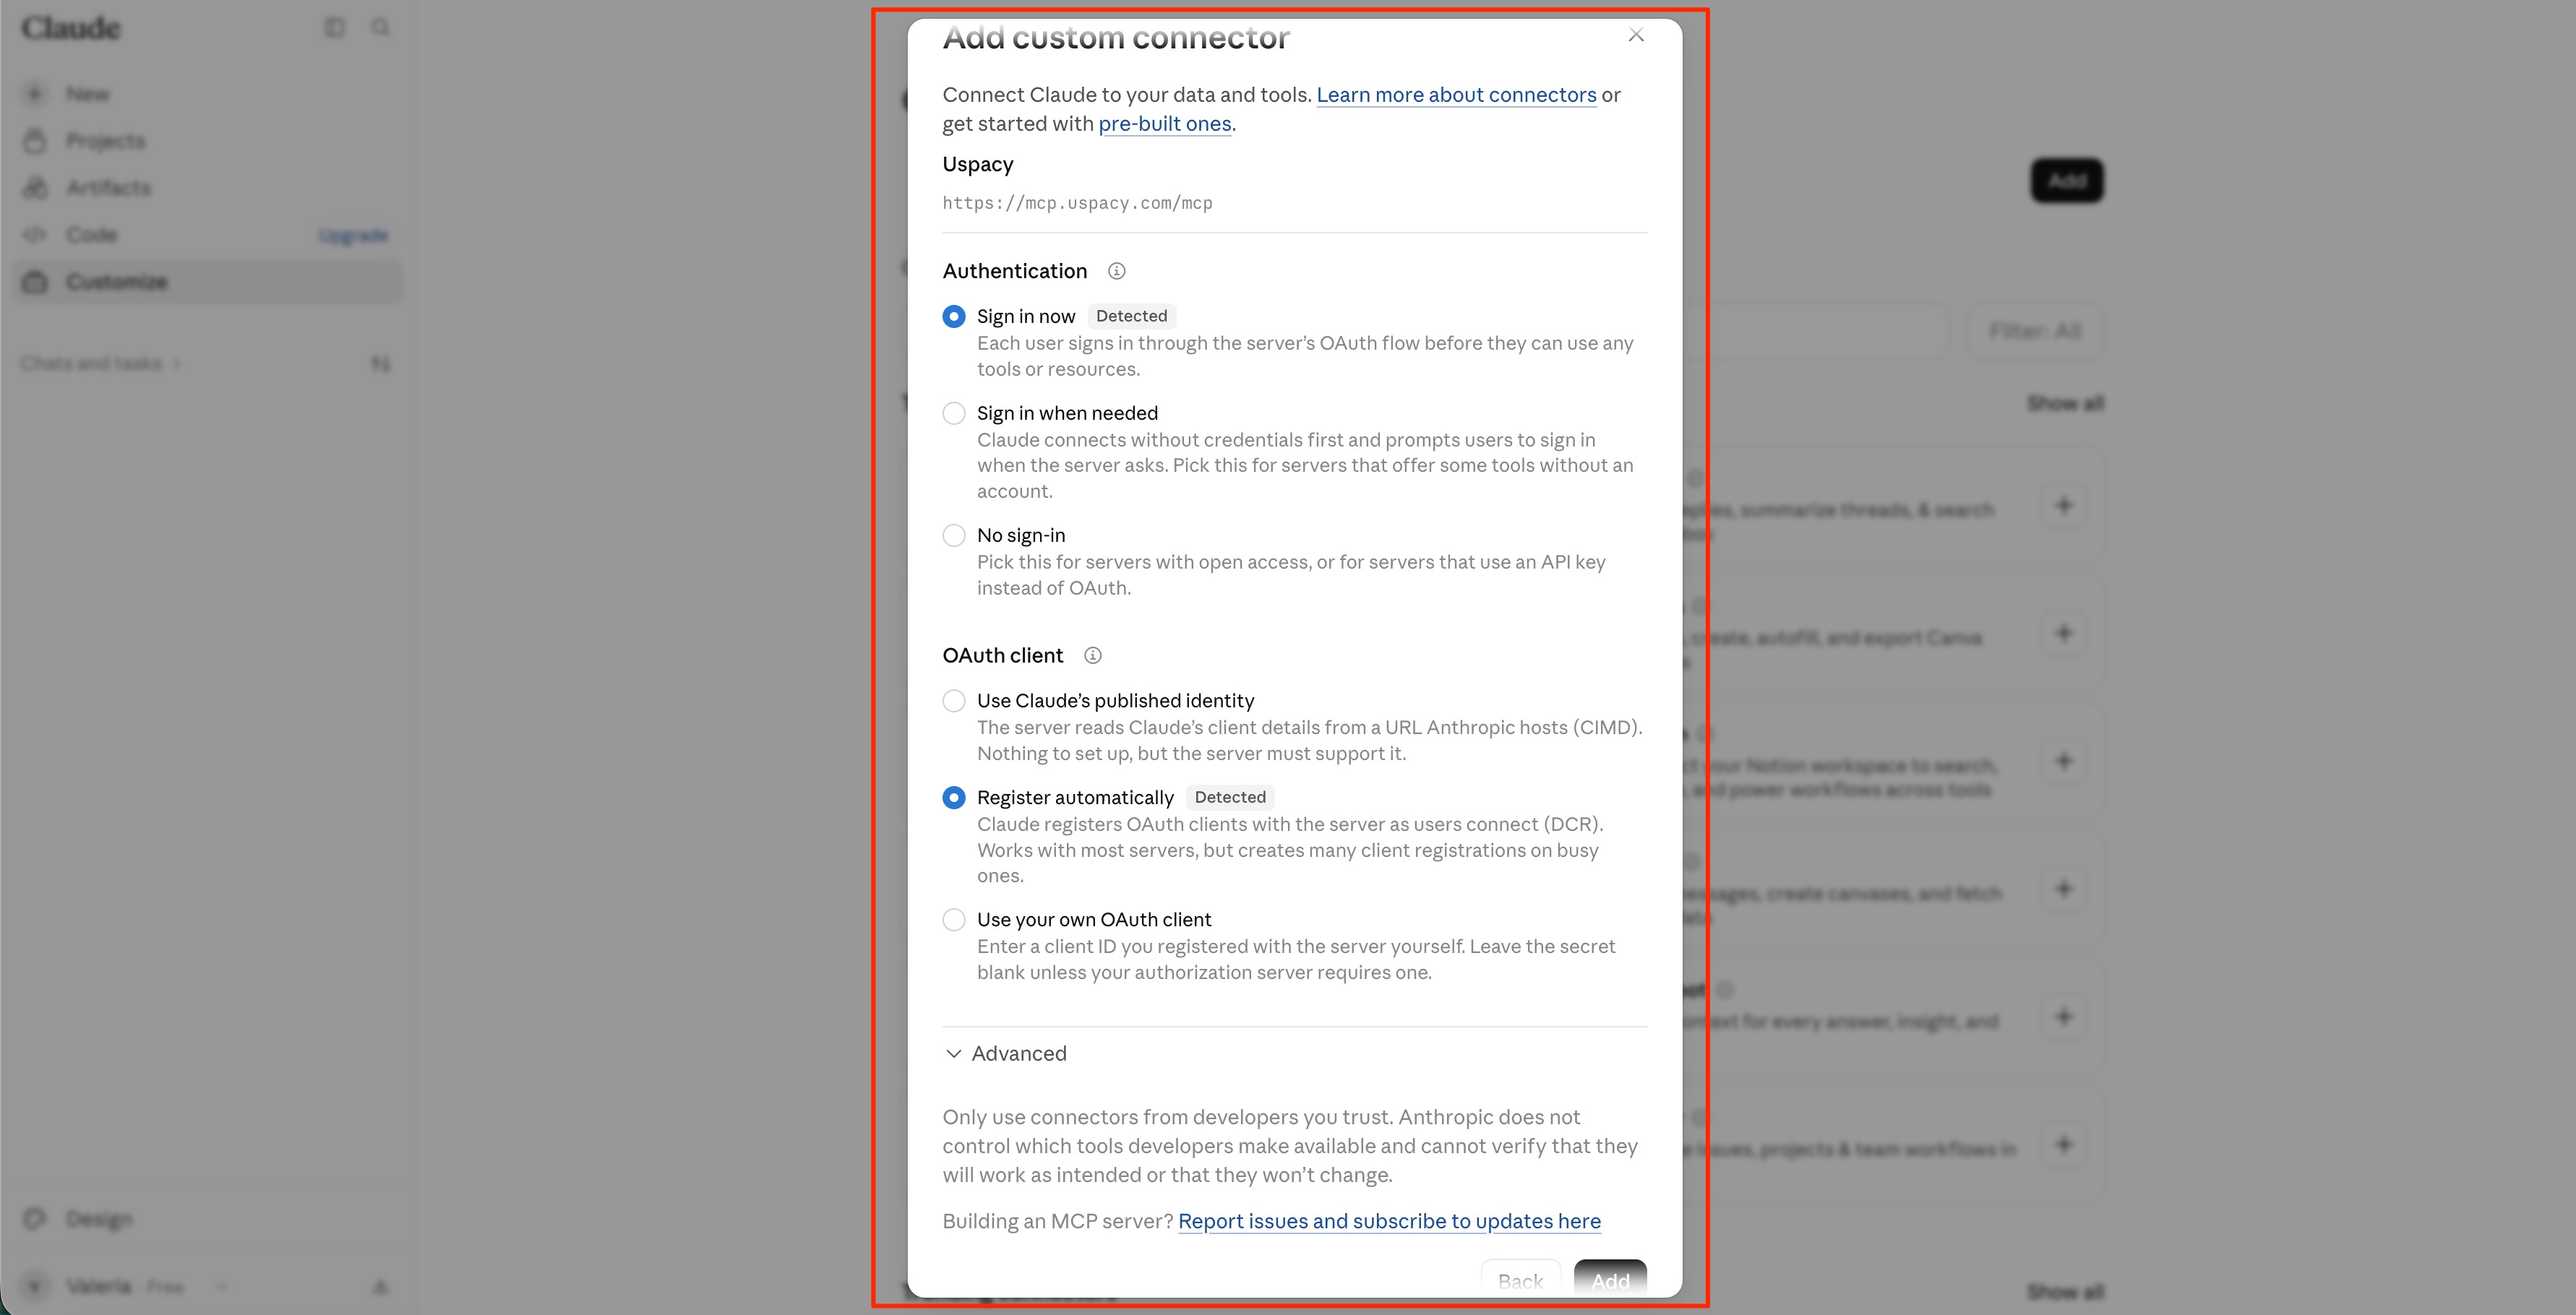
Note that Claude automatically identifies the appropriate parameters for the Uspacy MCP Server and marks them as Detected. For a standard connection, you do not need to change these settings.
Connecting through the Claude connector directory
The Uspacy MCP Server is available in the Claude Connector Directory. You can find and connect to it without manually entering the server name or URL.
This method is convenient if you work with a single Workspace and want to set up the connection quickly.
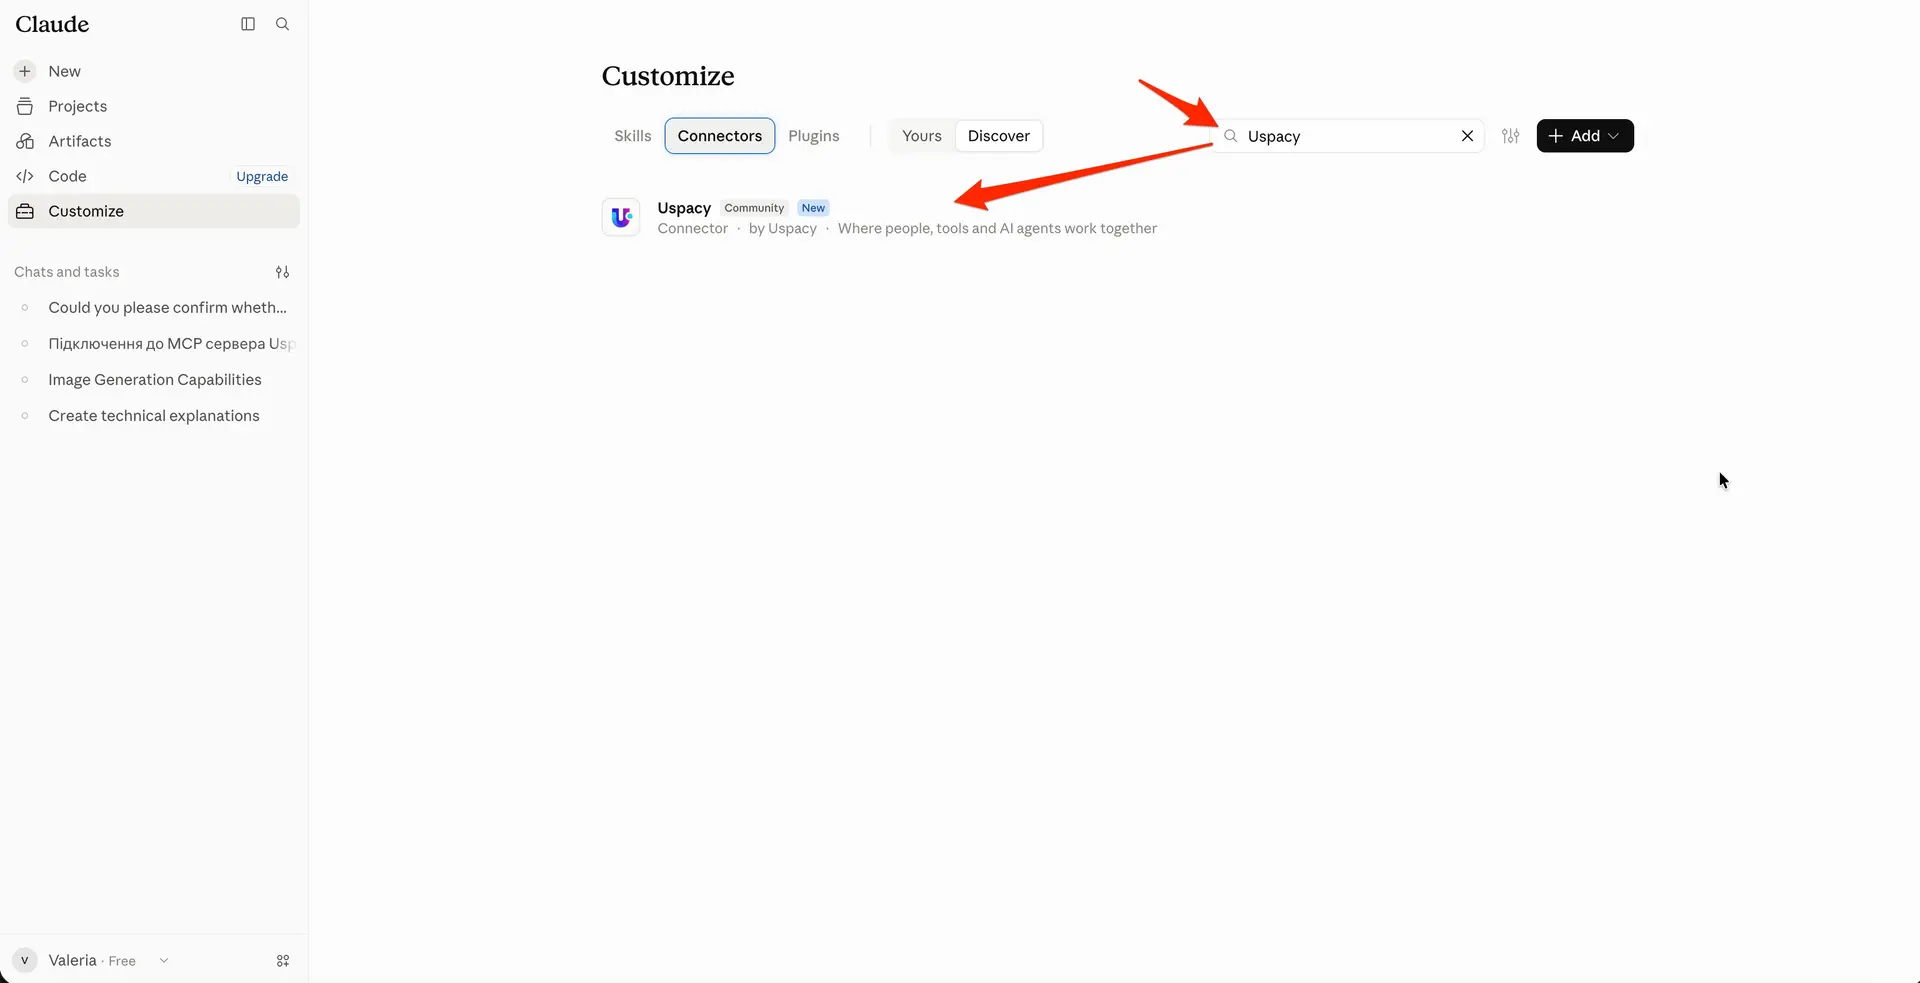
In Claude’s sidebar, open Customize and navigate to the Connectors tab. Enter Uspacy in the search bar and select the connector from the search results.
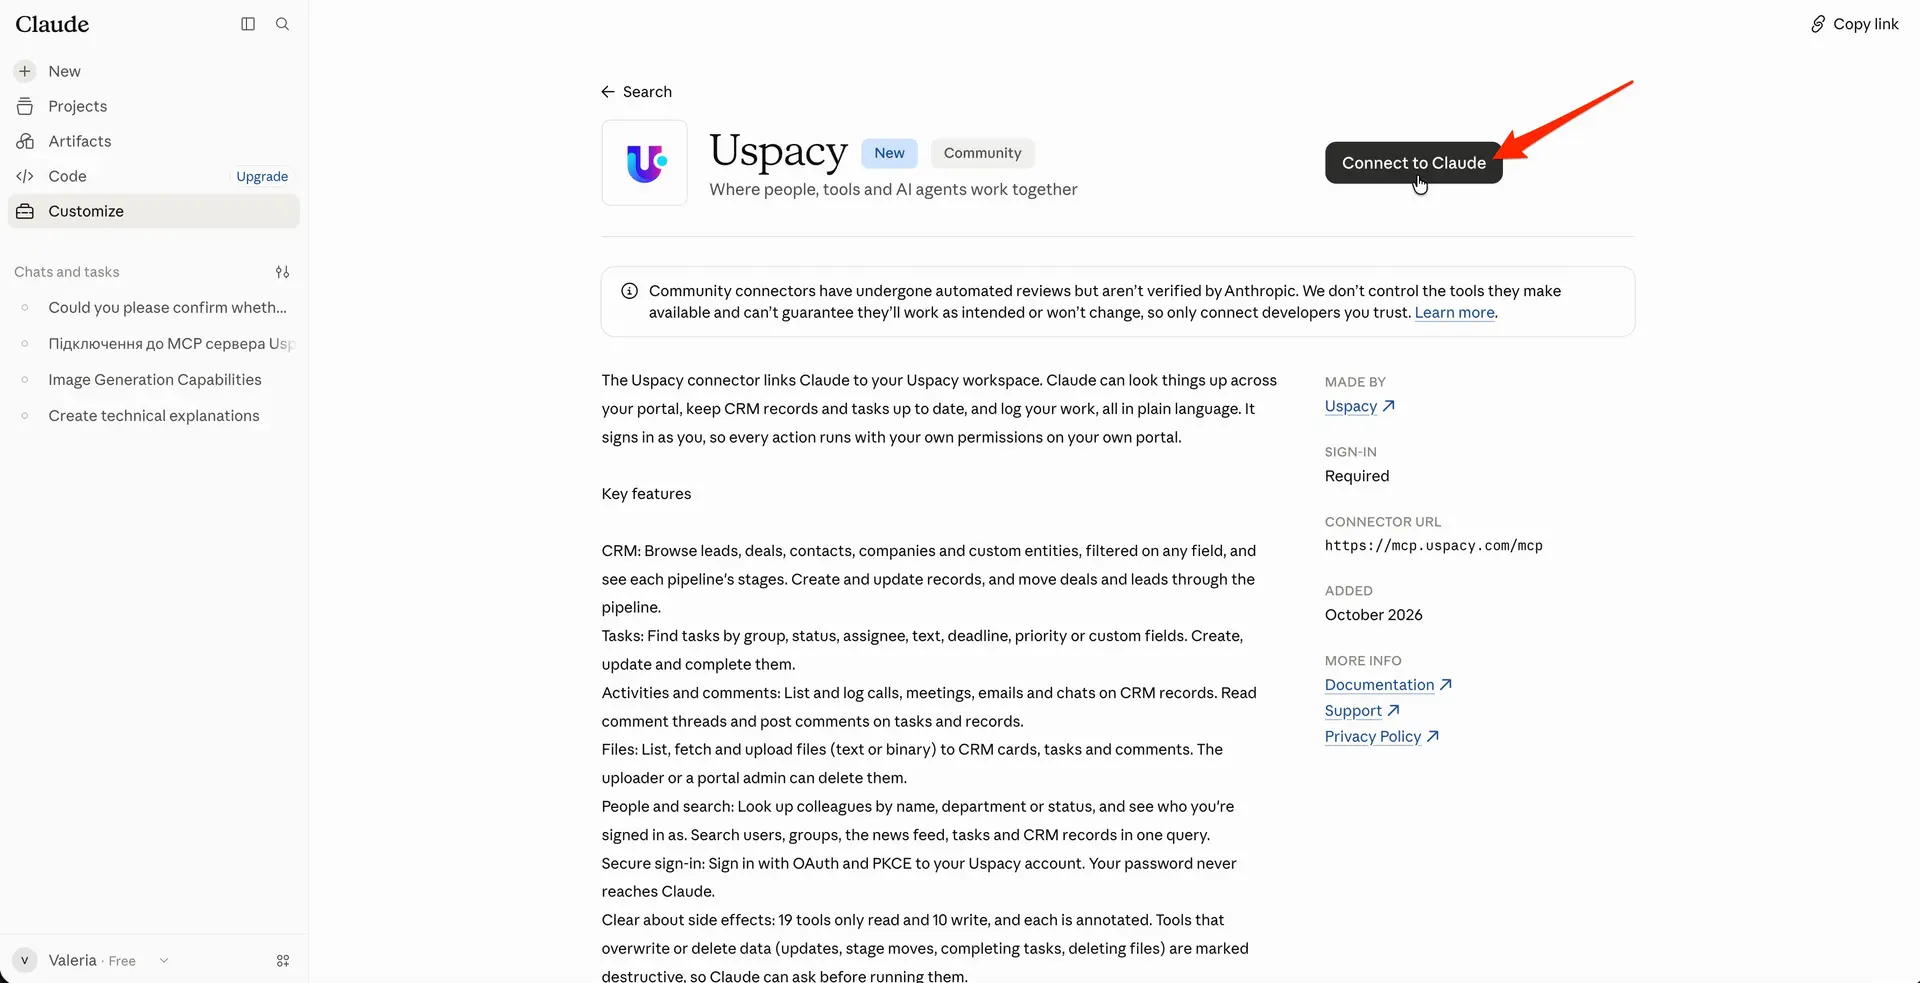
On the connector page, click Connect to Claude.
You’ll be redirected to the Uspacy authorization page. Sign in and grant access to your account as described in the next section, How to authenticate with Uspacy.
💡 If you work with multiple Workspaces, we recommend adding the connector manually. This allows you to specify the MCP server URL associated with the domain of the specific Workspace you want to connect.
The connector in the directory uses the general URL https://mcp.uspacy.com/mcp, so it connects to the Workspace you most recently authorized in Uspacy.
How to authenticate with Uspacy
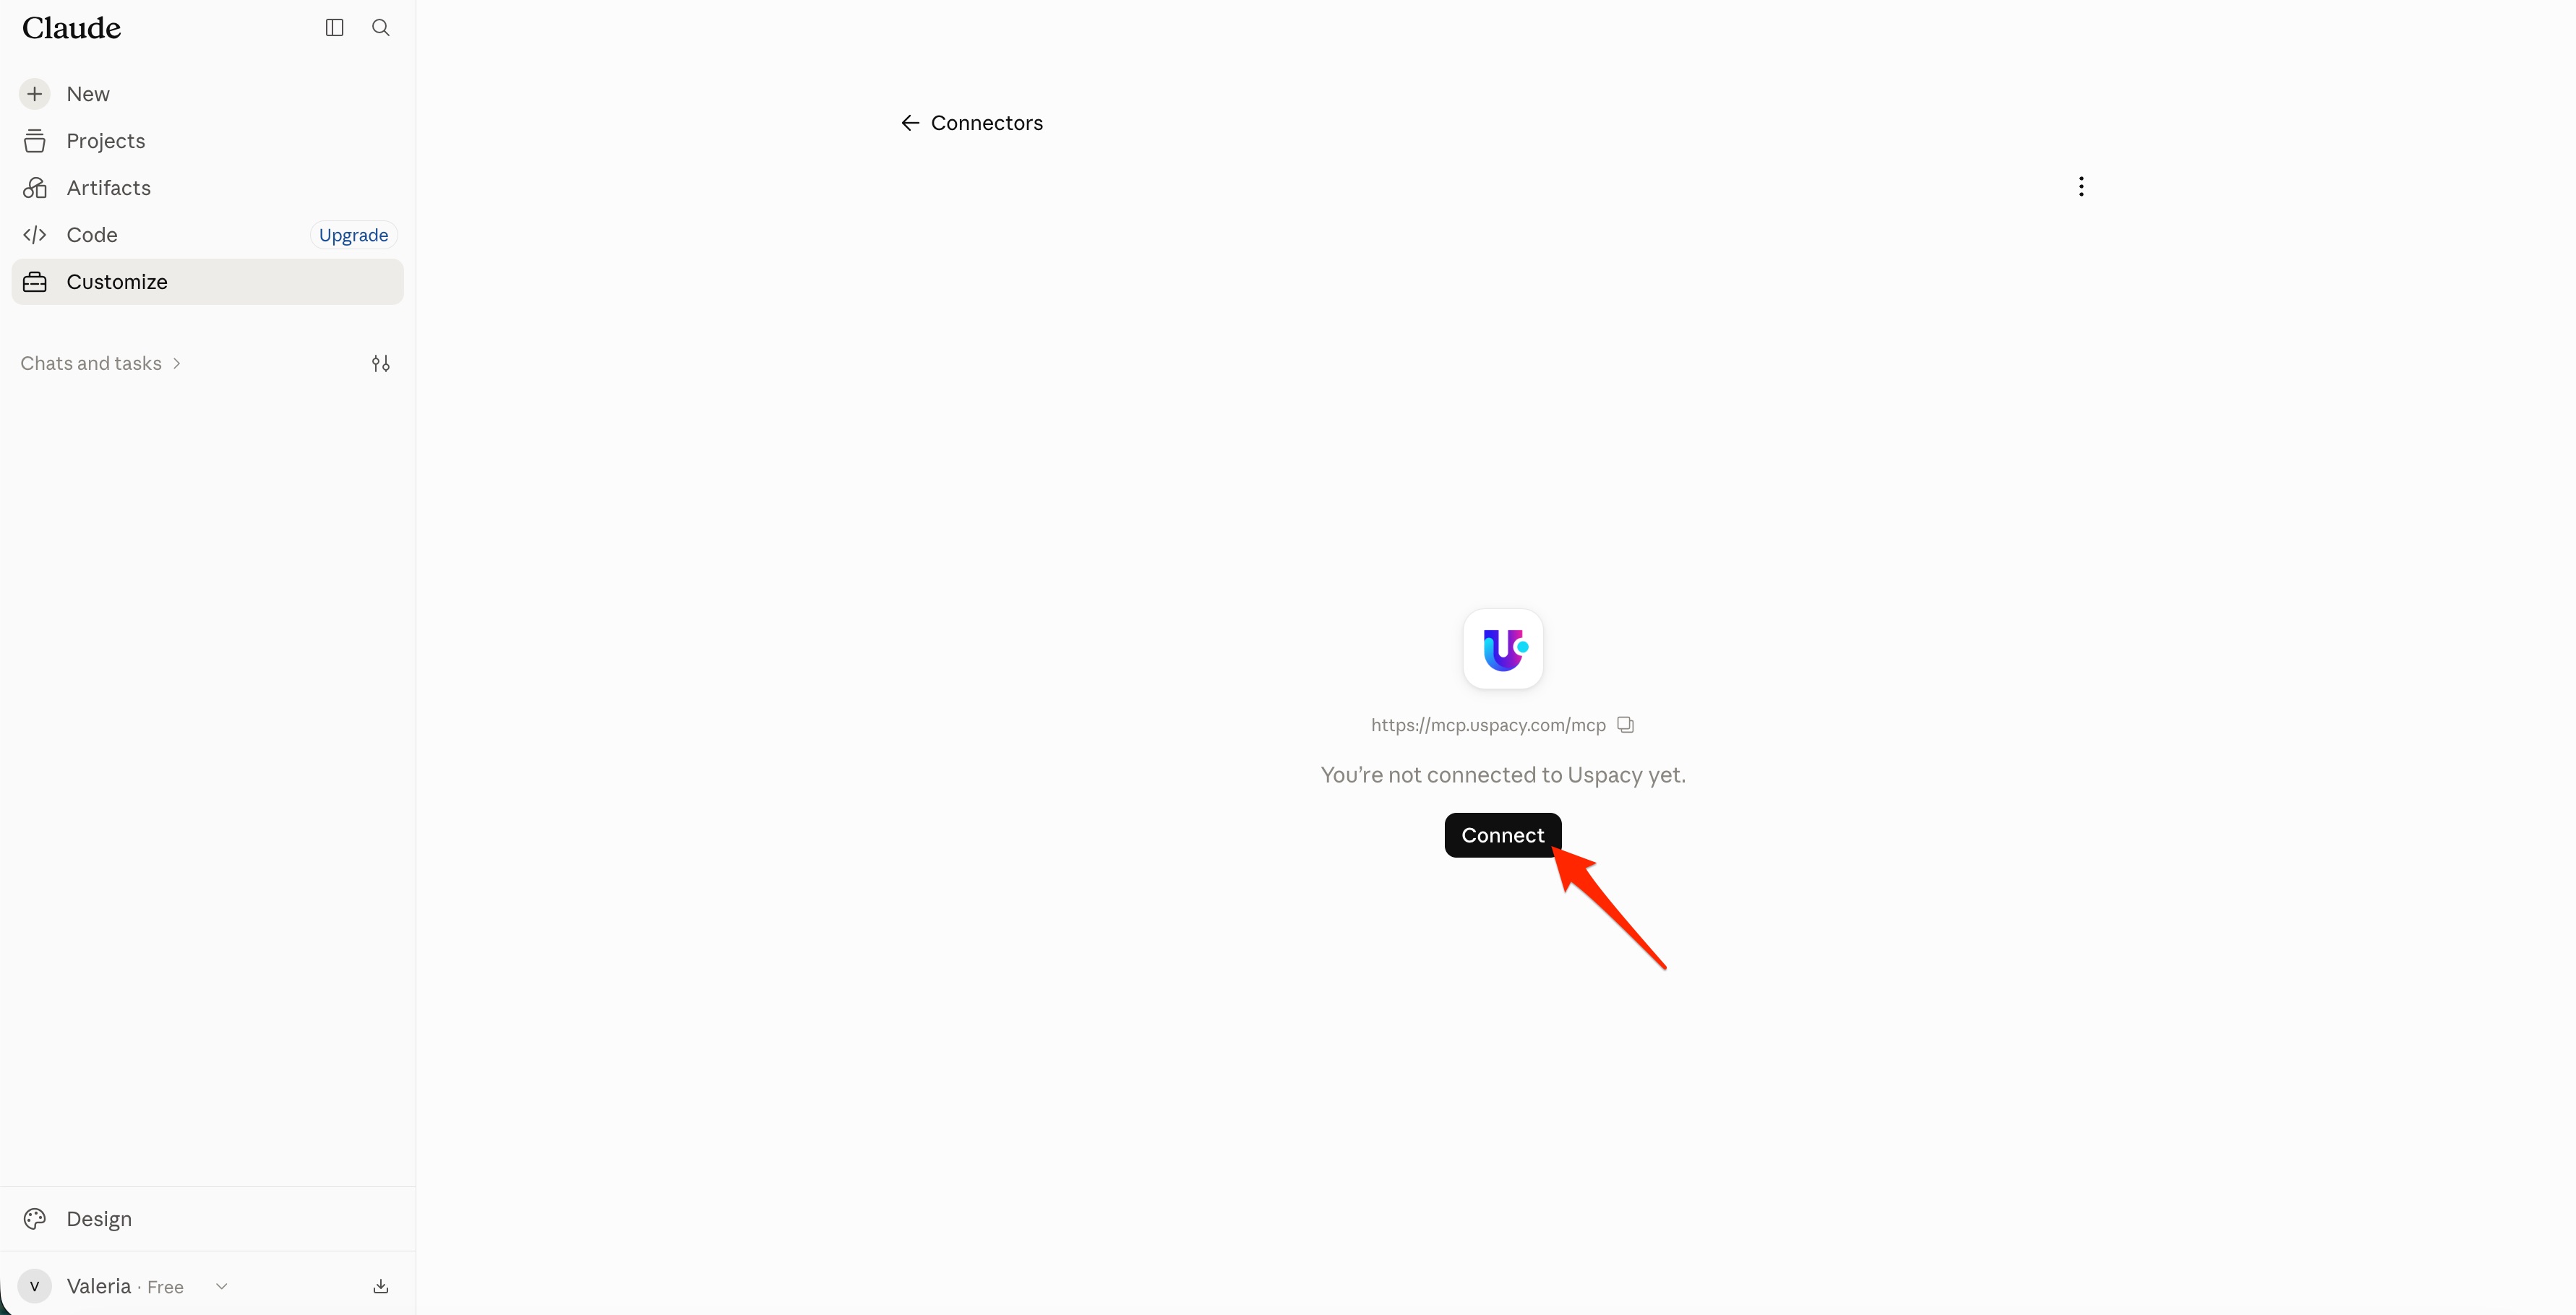
After adding the connector, the Uspacy authorization page opens automatically with a message that the connection has not yet been completed.
To give Claude access to your Uspacy account, click Connect.
The Uspacy sign-in page opens in your browser.
Follow these steps:
1. Enter the email address and password for the required Uspacy account. Click Continue.
Note: Authentication applies to a specific Uspacy account. Claude can access only the data available to the user whose credentials were entered during setup.
The Workspace Claude works with also depends on the URL specified when setting up the MCP connection. If you use the general URL, https://mcp.uspacy.com/mcp, the Workspace the user authenticated with most recently will be selected. If the URL includes a specific Workspace domain, the connection will use that Workspace.
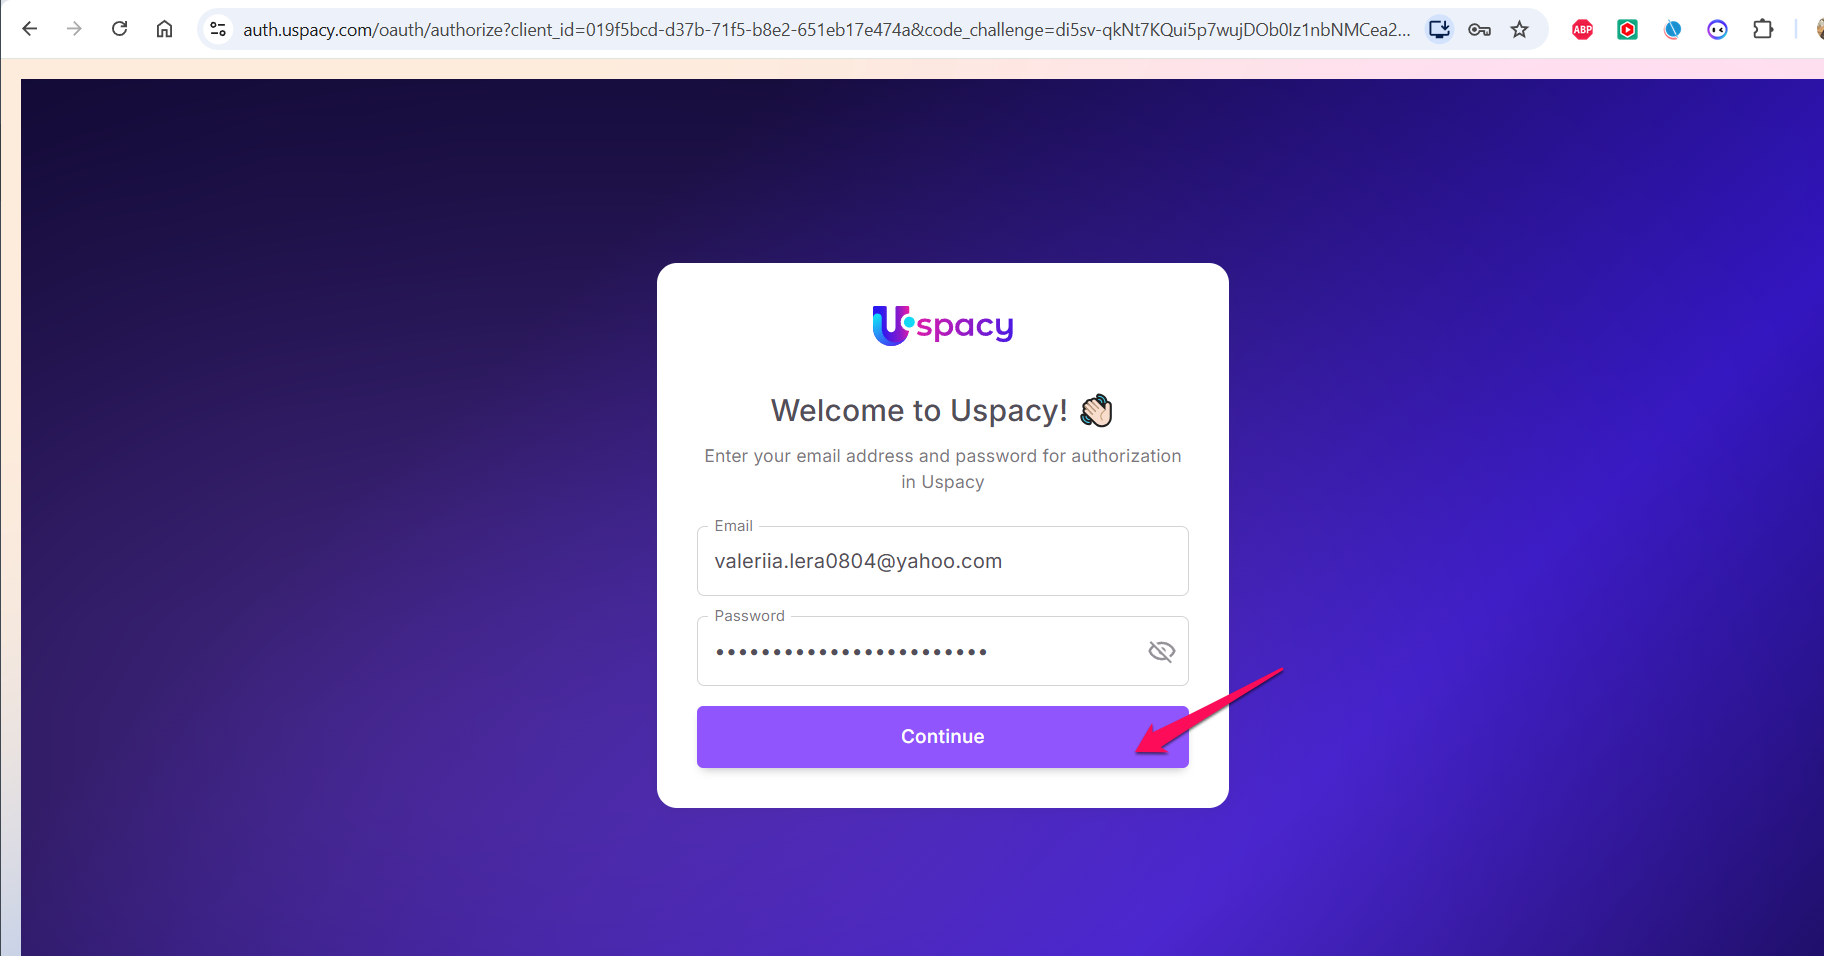
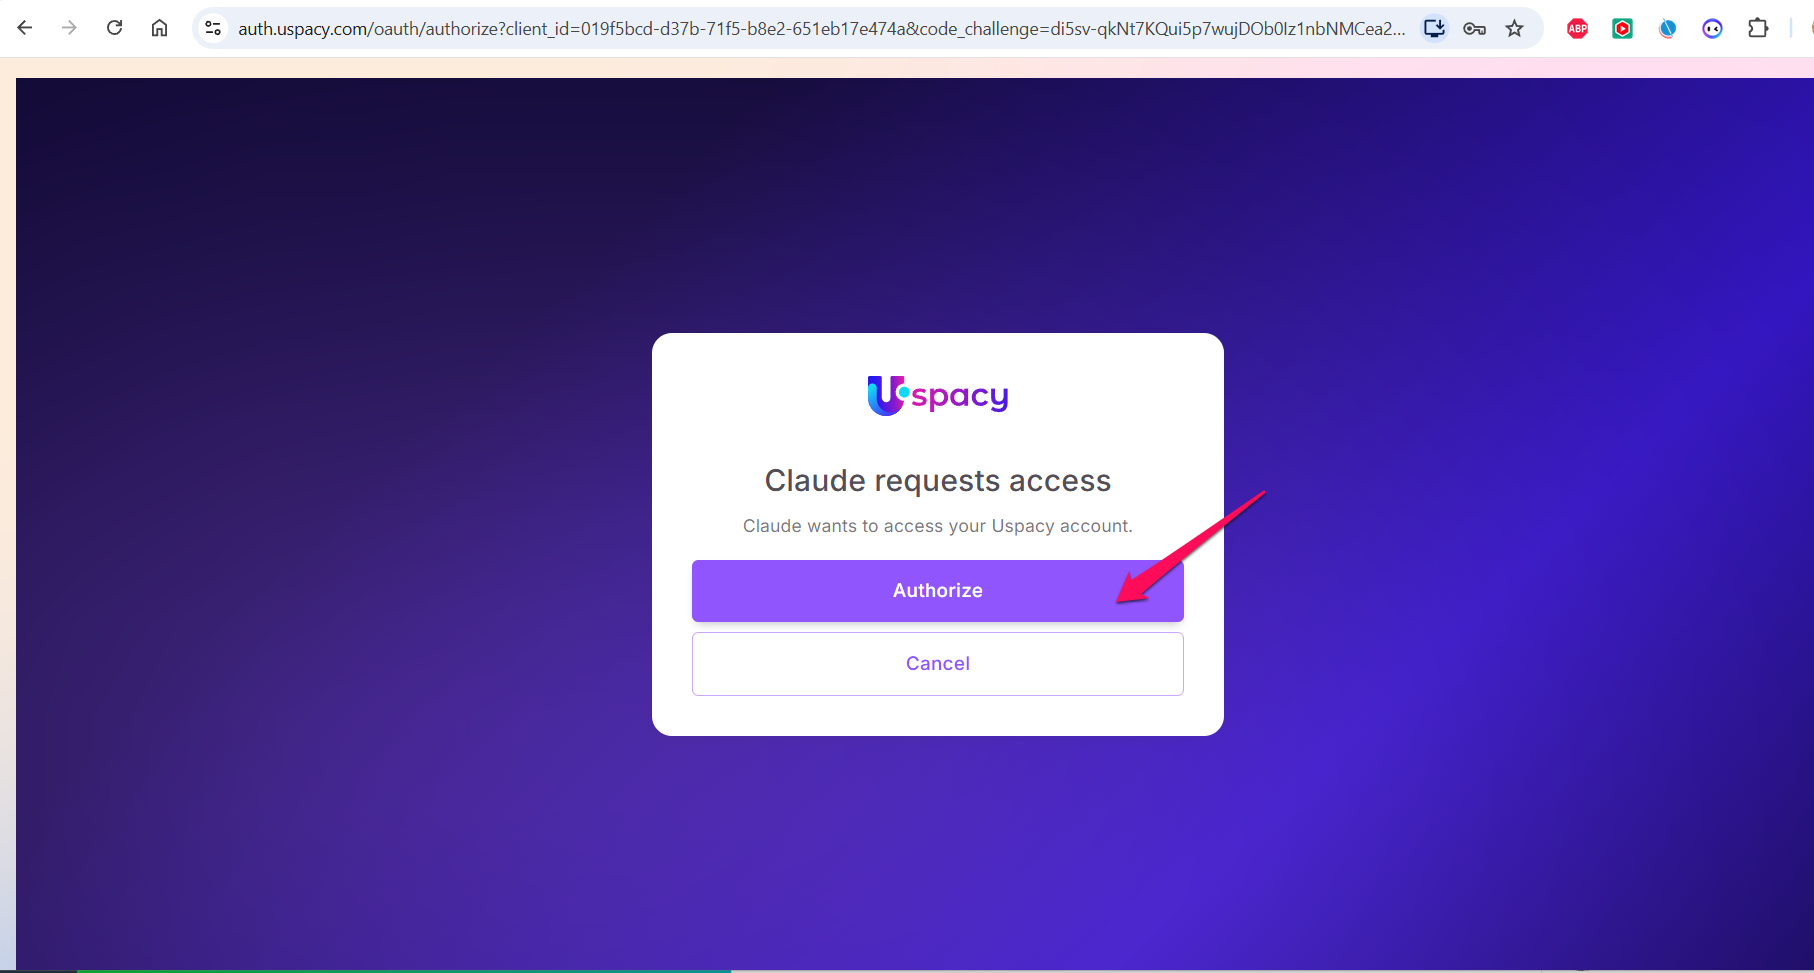
2. On the access request page, verify that the connection is being created for Claude. Click Authorize.
After successful authentication, you'll return to Claude. A Connected to Uspacy message appears in the upper-right corner of the page.
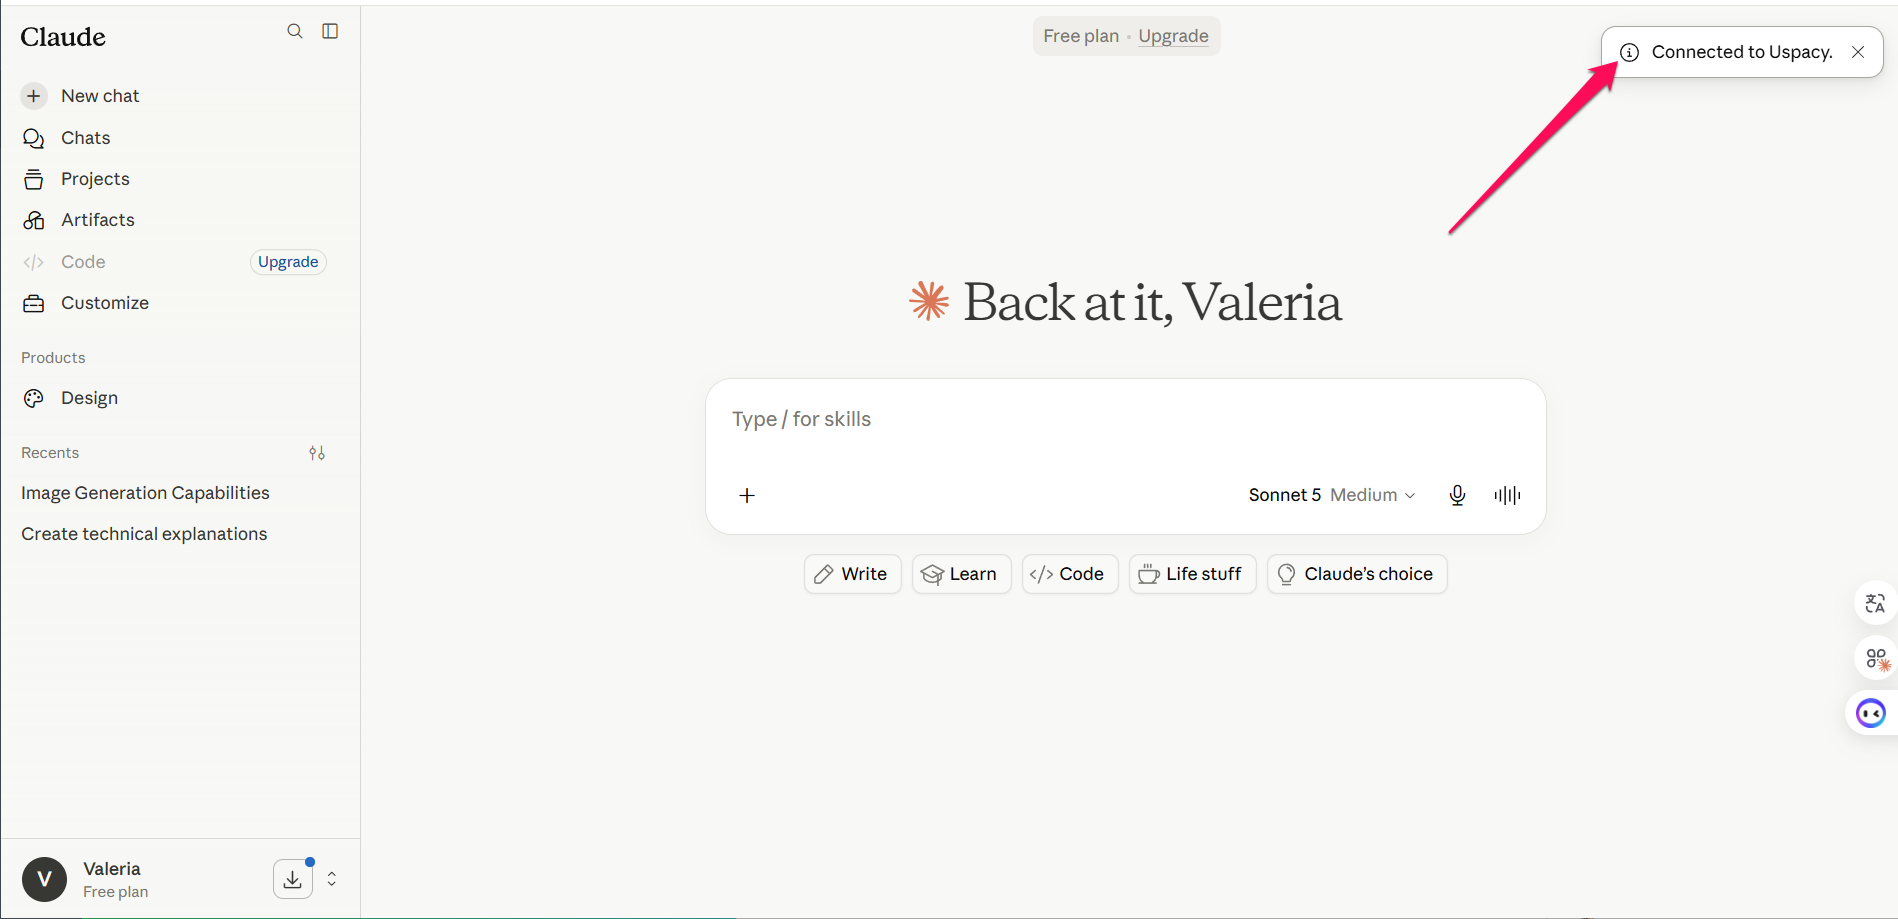
This means the connector has been created and Claude has access to the Uspacy MCP Server tools.
How to verify that the connection is working
After authentication, create a new chat in Claude and send a simple request that does not modify data.
For example:
Can you please confirm whether you’re connected to the Uspcy MCP?
If the connection is working, Claude will check the available tools and confirm that it can interact with Uspacy data.
The AI assistant may also list available areas it can work with, such as:
- CRM;
- tasks;
- activities;
- comments;
- users;
- global search.
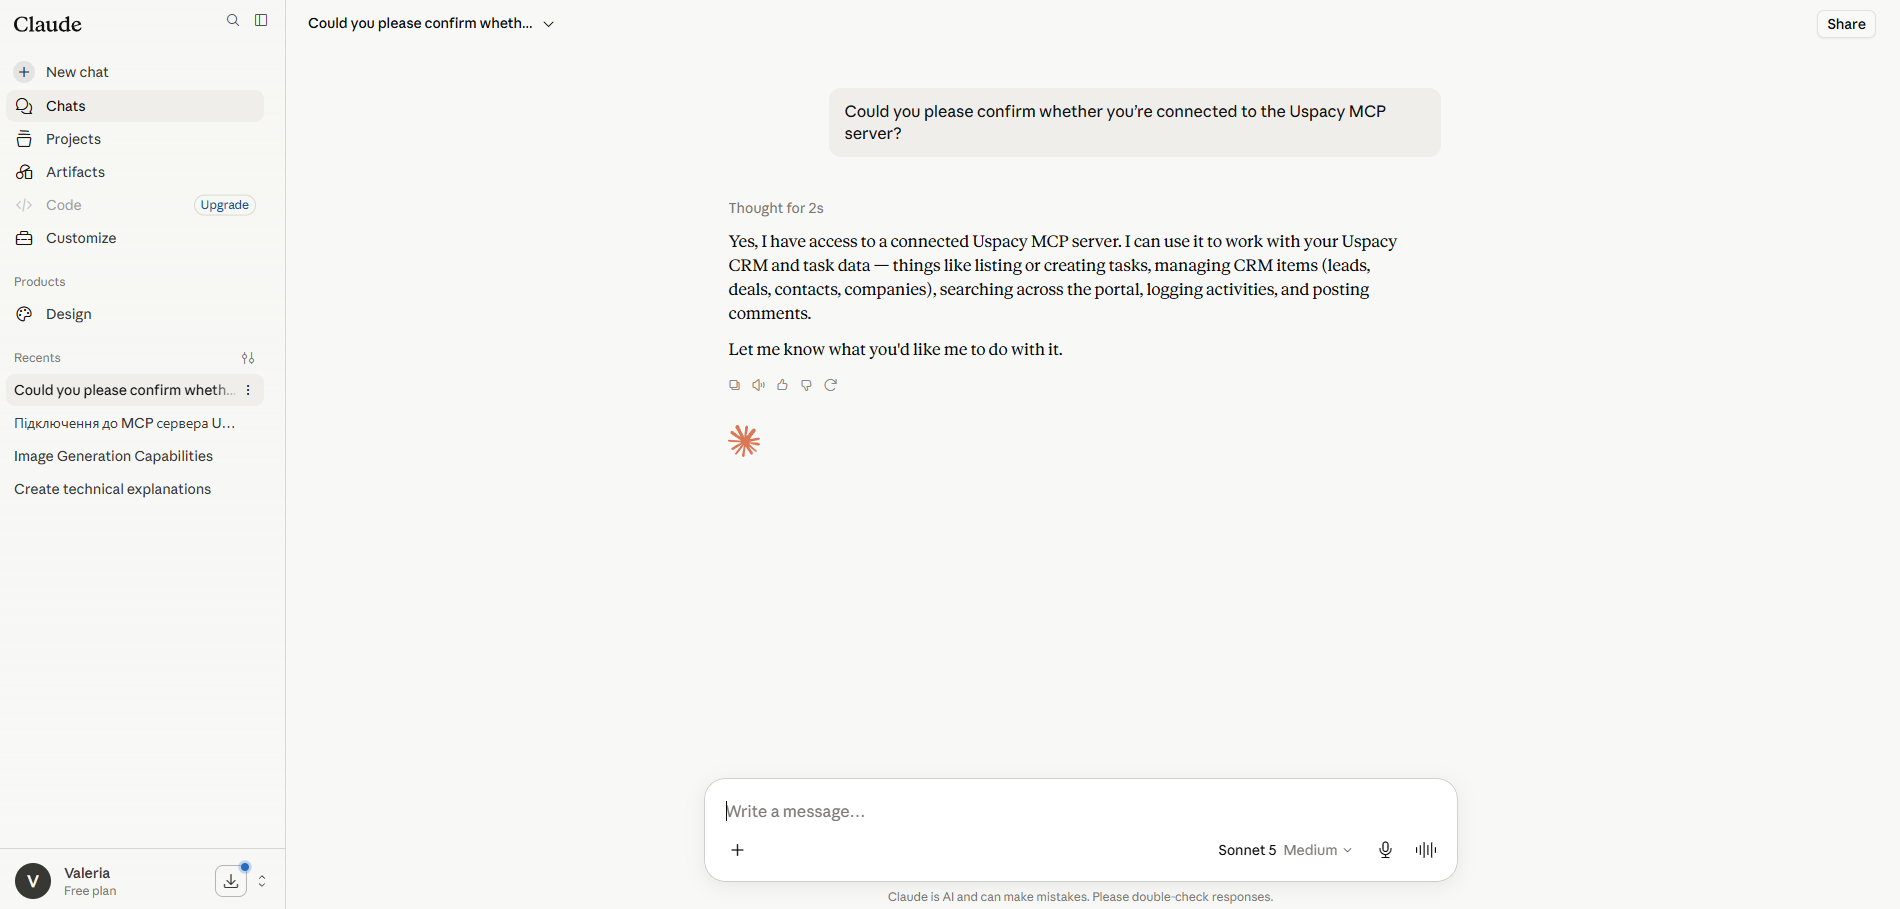
You can then test retrieving specific data. For example:
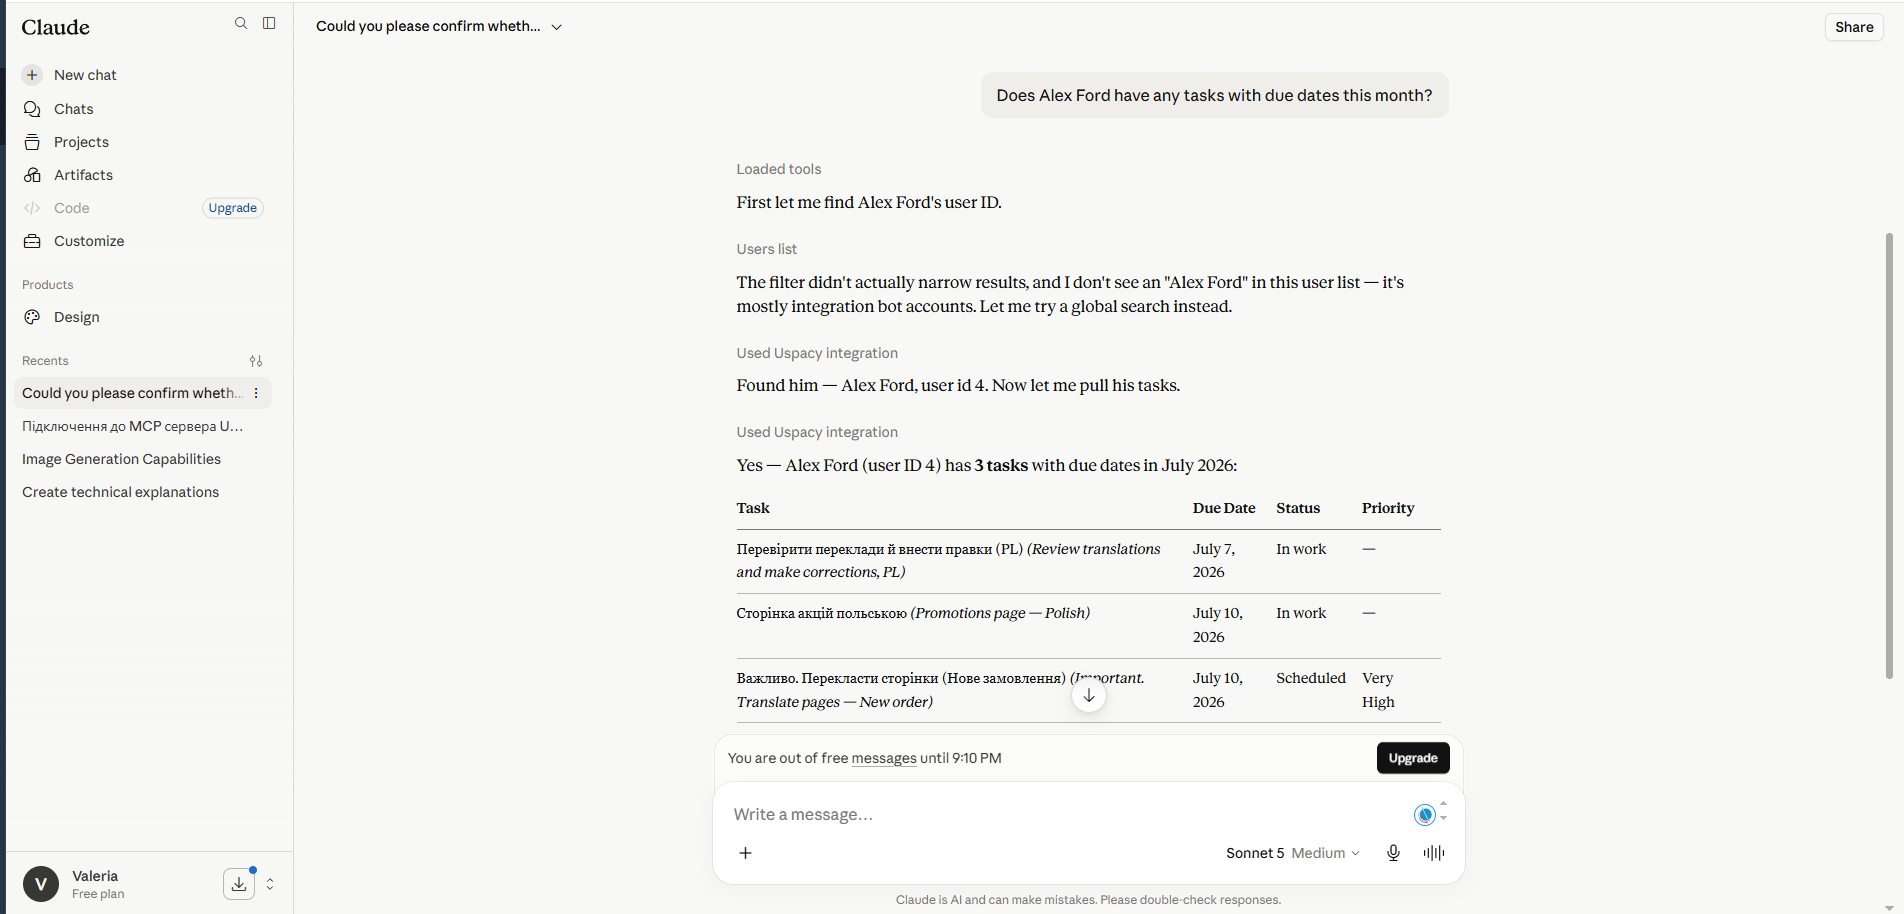
Does Alex Ford have any tasks with the due dates this month?
Claude will identify the current user, find the relevant tasks, and display the results.
How to grant permission to use Uspacy tools
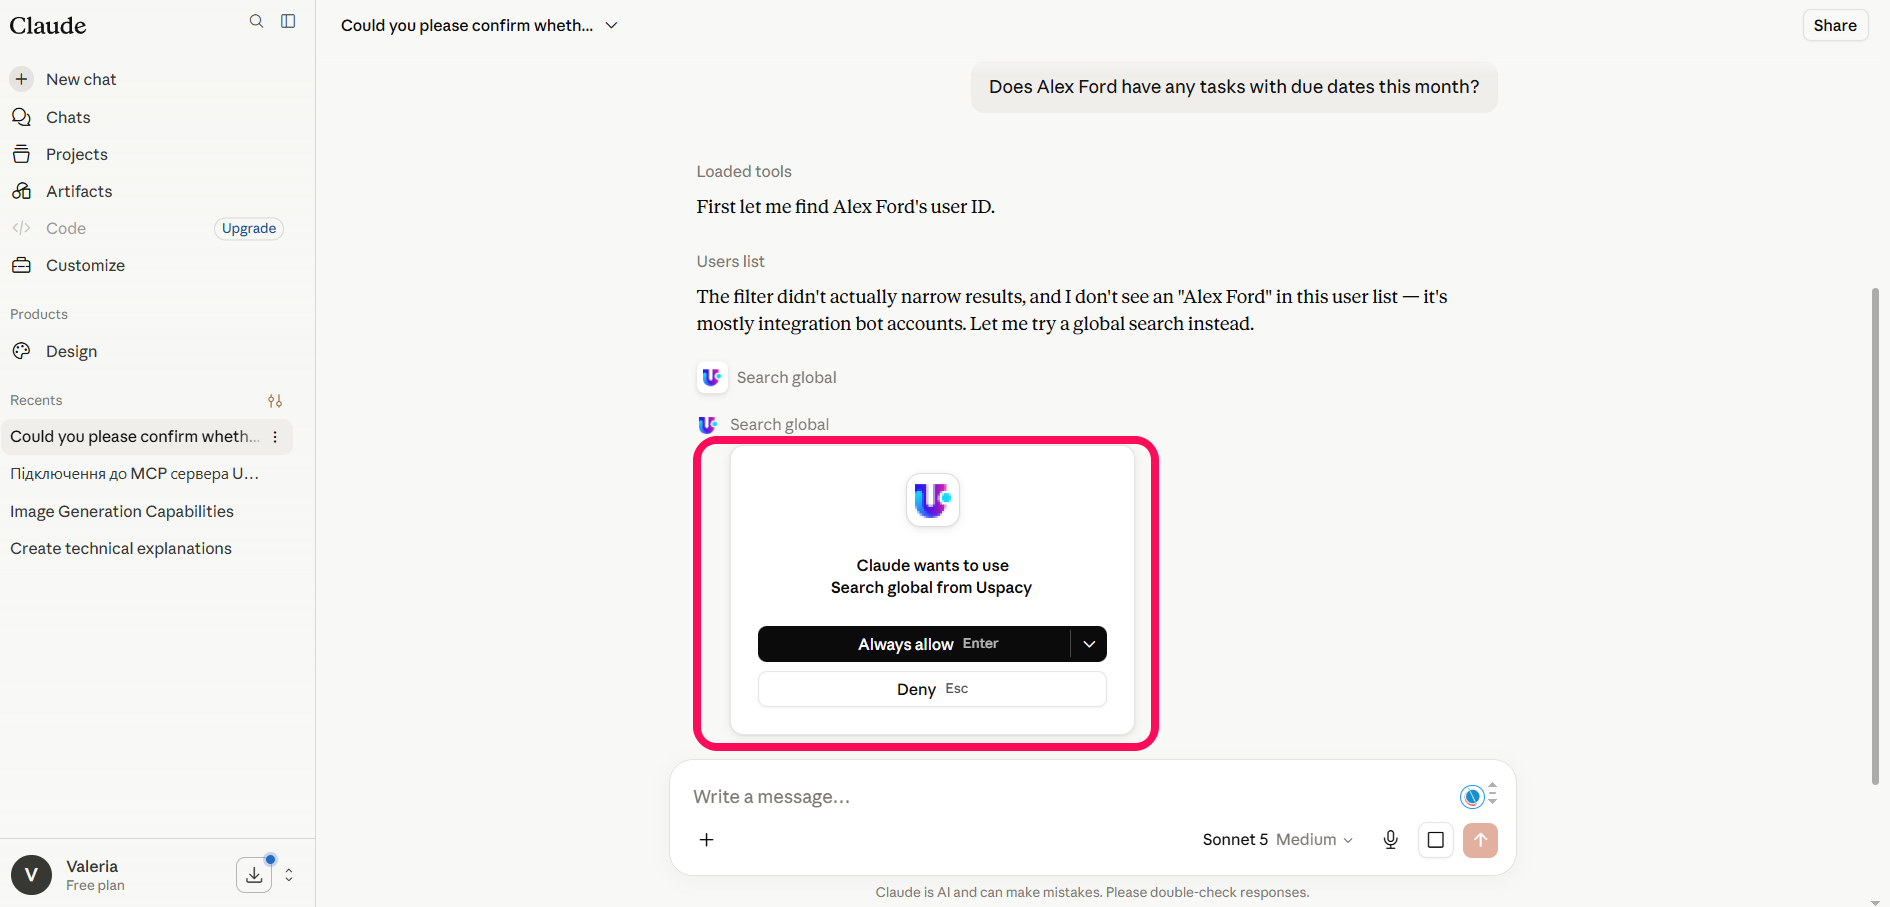
When using a specific MCP tool for the first time, Claude may request additional confirmation.
For example, when searching for tasks, the AI assistant uses the Search global tool. Before running the request, a confirmation window appears showing which tool Claude wants to use.
The available options are:
- Always allow — always allow this tool to run without additional confirmation.
- Allow once — allow the tool to run only for the current request. To select this option, click the arrow next to the Always allow button.
- Deny — prevent the tool from running.
For tools that only view or search information, Always allow can be used.
For actions that create or modify data, it is safer to use Allow once and review the request details before each confirmation.
Important: Do not grant permanent permission to tools unless you understand what data they can modify.
After receiving the task list, you can continue working in the same chat:
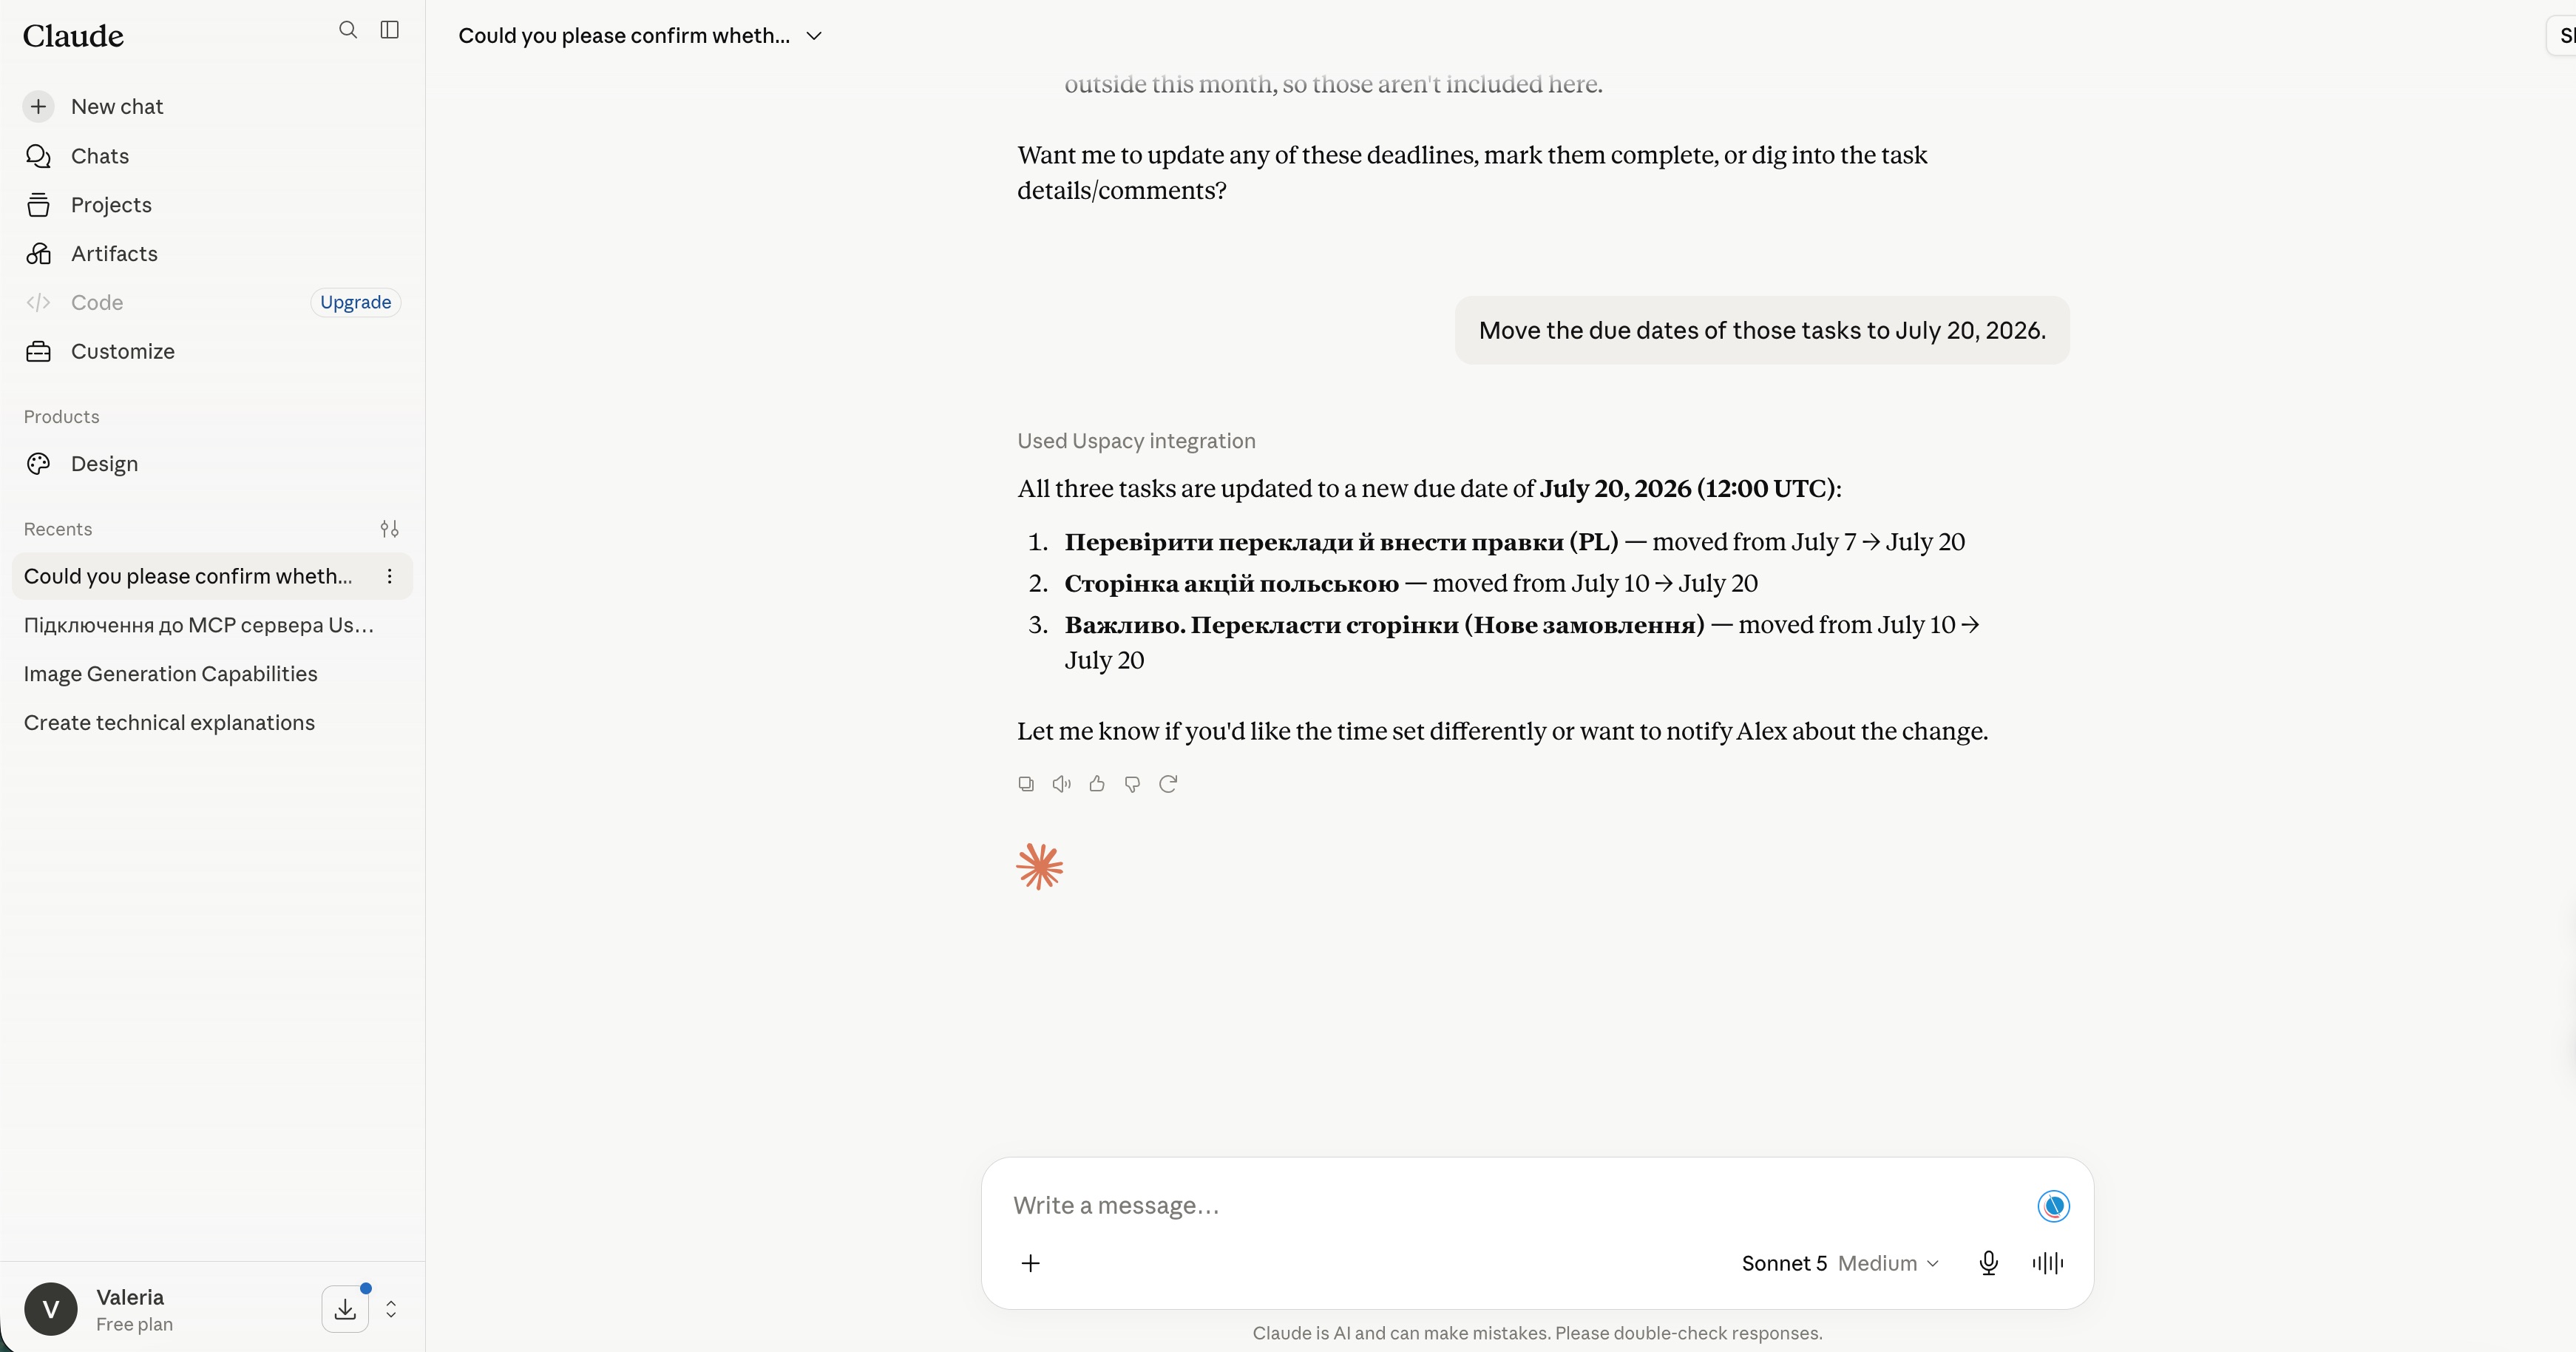
Move the due dates of those tasks to July 20, 2026.
Claude will use information from the previous request, identify the required tasks, and update them using the Uspacy MCP Server tool.
After completing the request, the AI assistant will report:
- which records were updated;
- what values were applied;
- which records were not changed and why.
For example, Claude may leave a task unchanged if its current due date is already later than the date you specified.
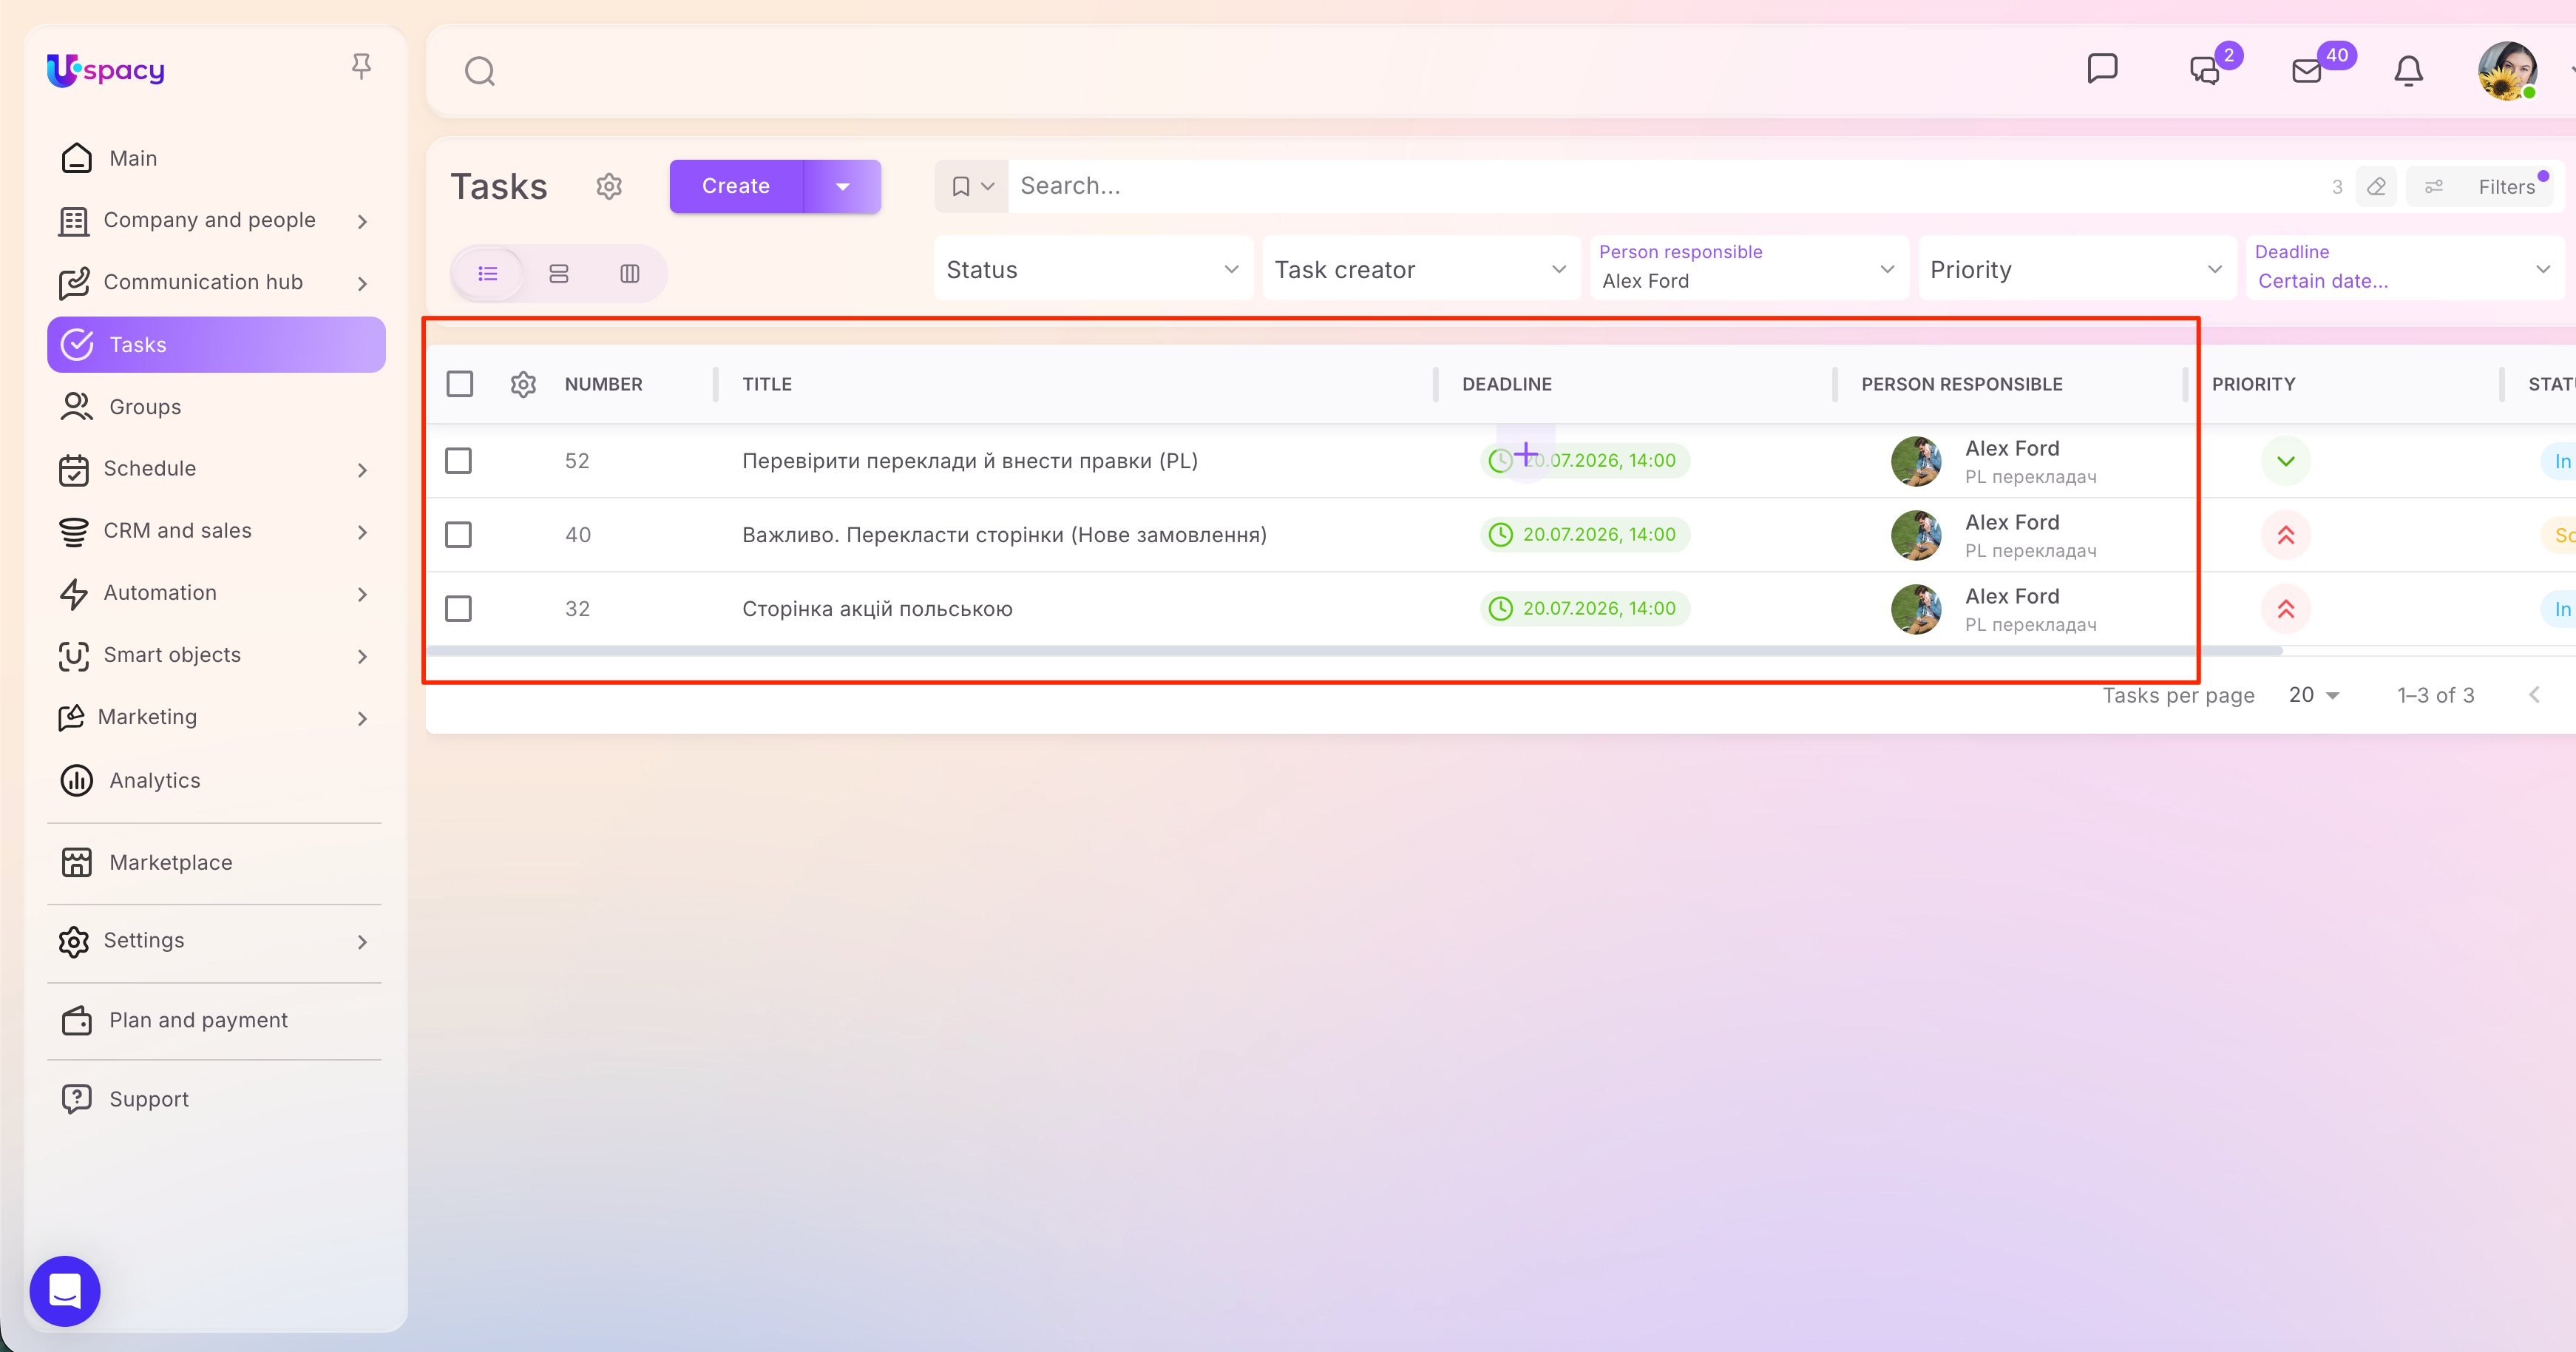
After the command is completed, open Uspacy and verify that the required changes have been saved.
Created: July 14, 2026 / Updated: October 23, 2026