Magento is an ecommerce platform that helps you manage products, pricing, and orders, while providing clients with a convenient shopping experience on your site.
We'll guide you step-by-step on how to connect Magento to Uspacy so that orders from your website automatically appear in your CRM Workspace. The system will immediately create a Lead or Deal, generate and link a new or existing Contact, and allow you to assign a responsible manager—without any manual data entry.
In addition, we’ll explain how to install the module via ZIP archive, retrieve your Magento Installation Domain and Magento Auth Secret, connect your store to Uspacy, and ensure the integration is set up correctly.
Let’s go step-by-step ⬇️
Magento settings
Step 1. Installing the Uspacy/Magento module via ZIP
🟣 Upload the archive ➡️ uspacy-magento-integration-module.zip (must be downloaded). Copy the file to the root directory of your Magento project on the server.
🟣 Extract the archive directly into the correct folder:
mkdir -p app/code/Uspacy/Magento
unzip uspacy-magento-integration-module.zip -d app/code/Uspacy/Magento
After extraction, your directory structure should look like this:
app/code/Uspacy/Magento/registration.php
app/code/Uspacy/Magento/etc/module.xml
...
❗️Important: Make sure you extract the files directly into app/code/Uspacy/Magento — NOT just app/code/.
🟣 Enable the module by running the following commands from your project root:
bin/magento module:enable Uspacy_Magento
bin/magento setup:upgrade
🟣Compile DI and clear cache: Recompile Magento’s DI (Dependency Injection) and flush the cache to make sure the new module features are applied and visible in the admin panel and storefront.
bin/magento setup:di:compile
bin/magento cache:flush
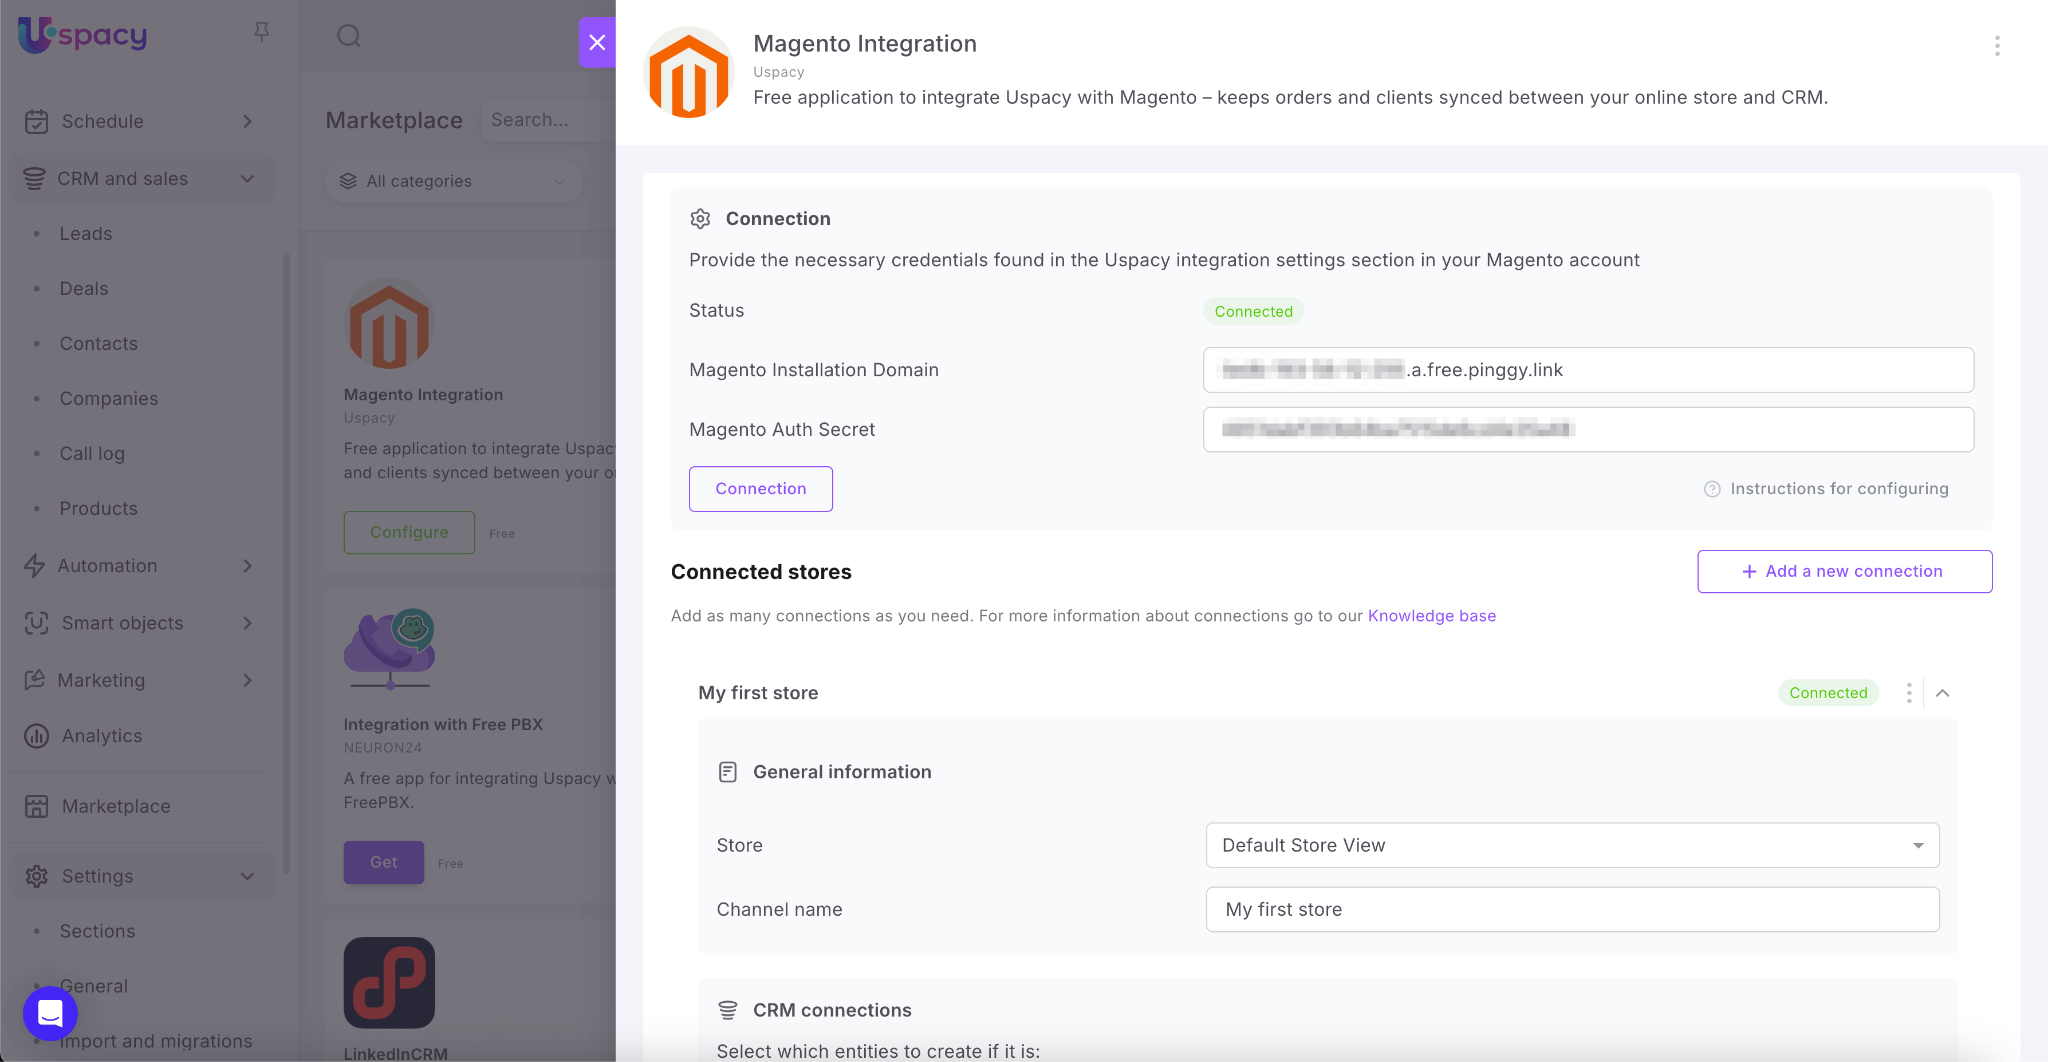
Step 2. Admin panel configuration and retrieving integration data
In your Magento Admin panel, go to: Stores (1) → Configuration (2).
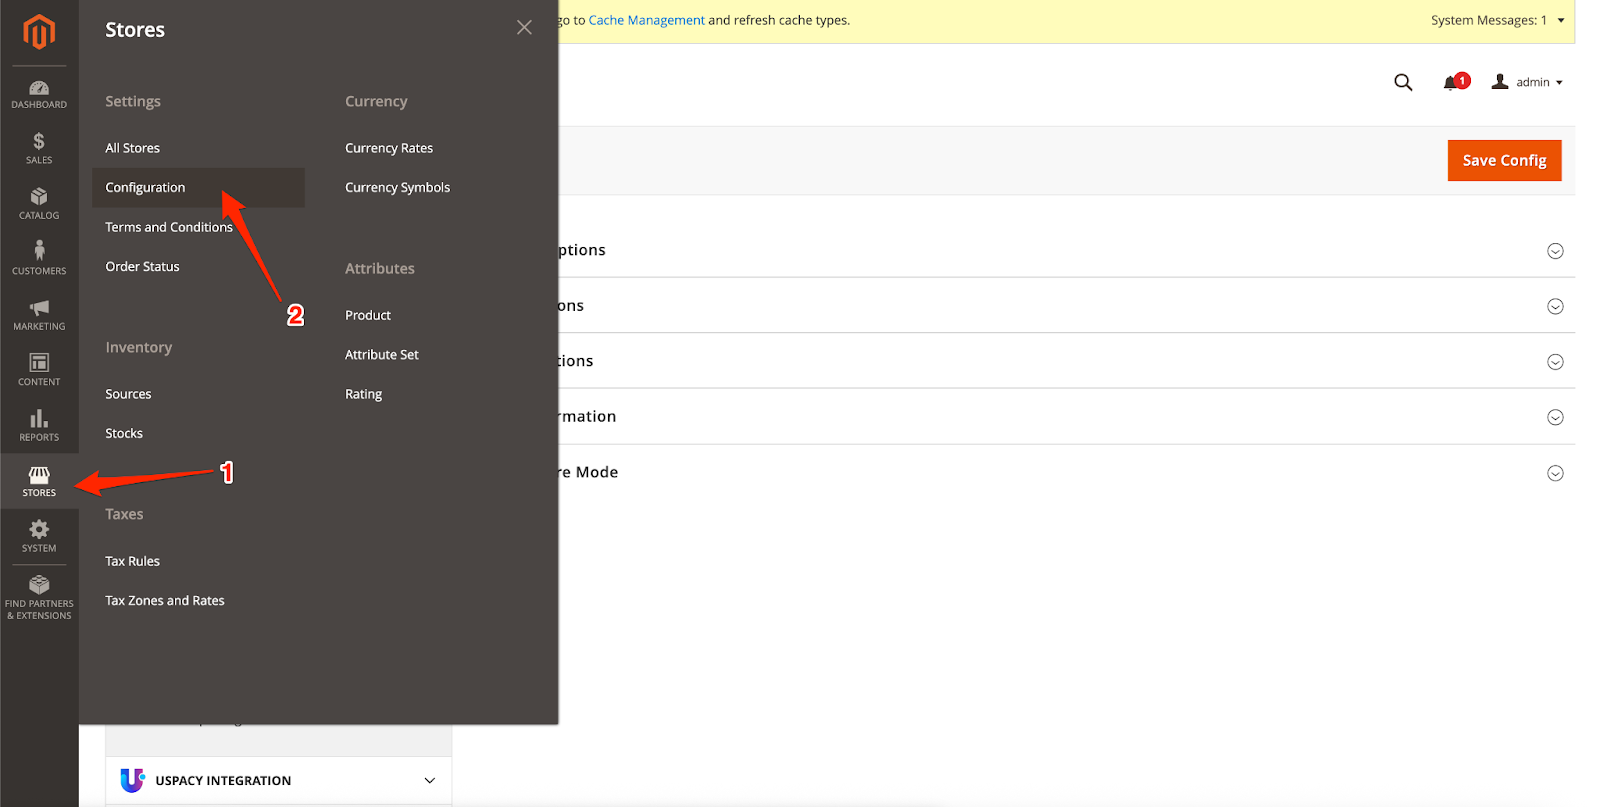
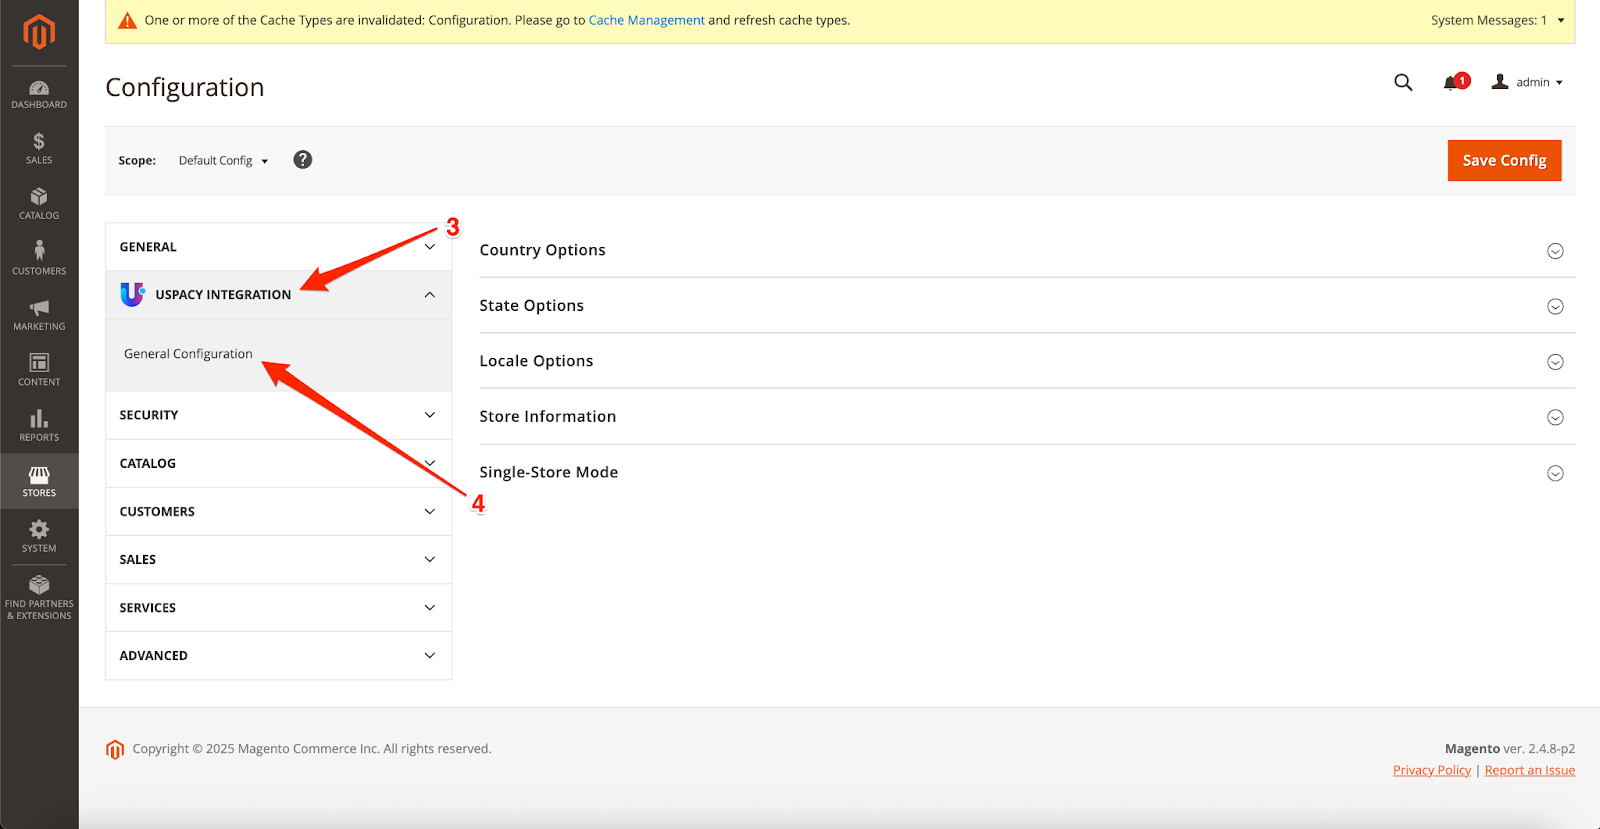
Then expand: Uspacy Integration (3) → General Configuration (4).
On the page that opens, set Enable Integration to Yes.
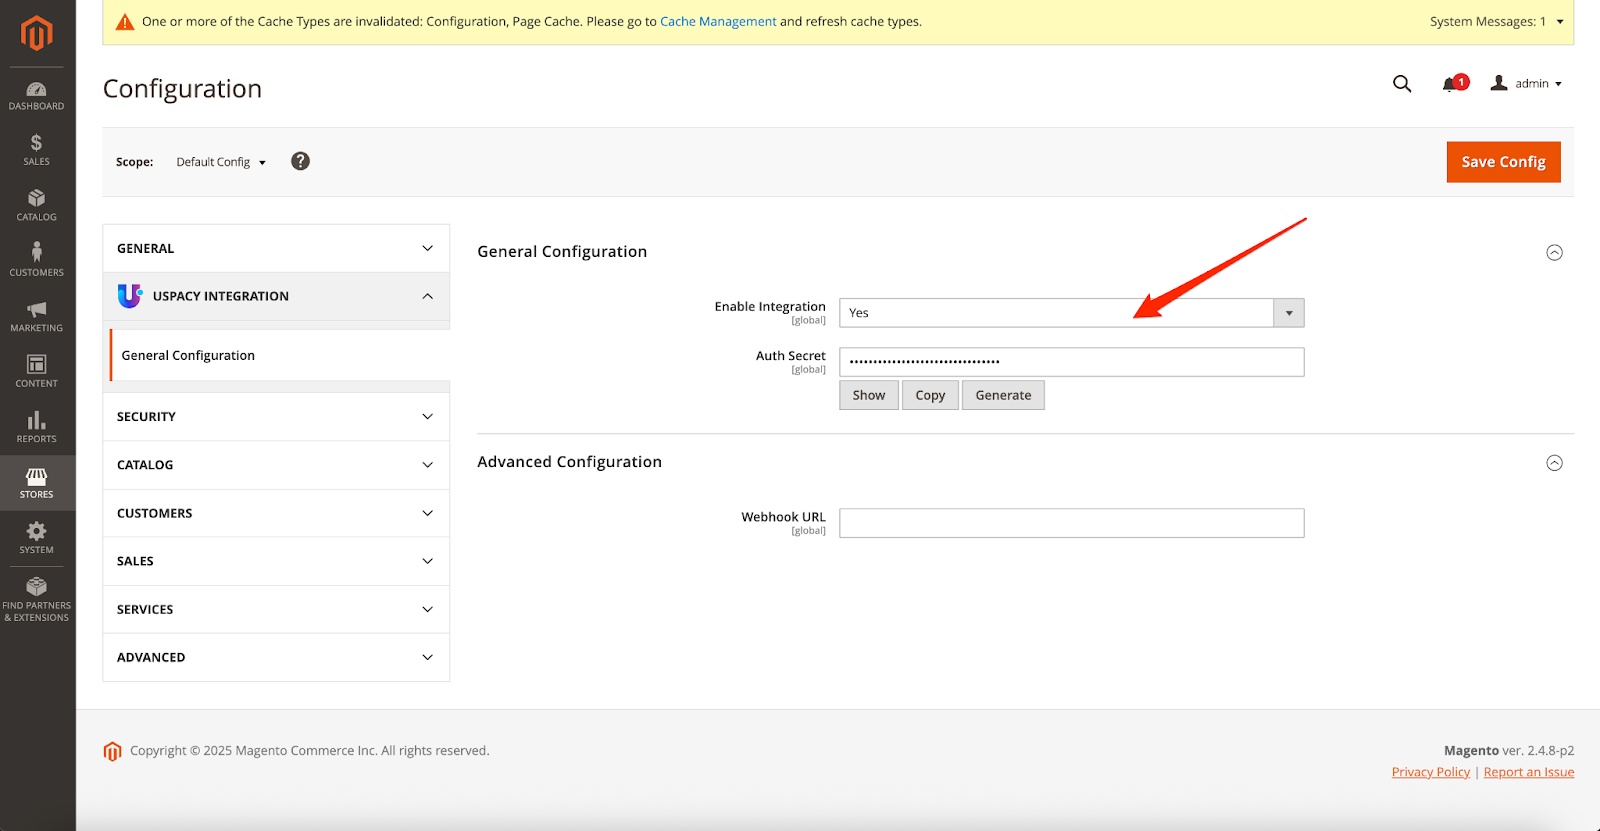
Now copy and save the following:
🔗 Auth Secret – you can use the Copy button.
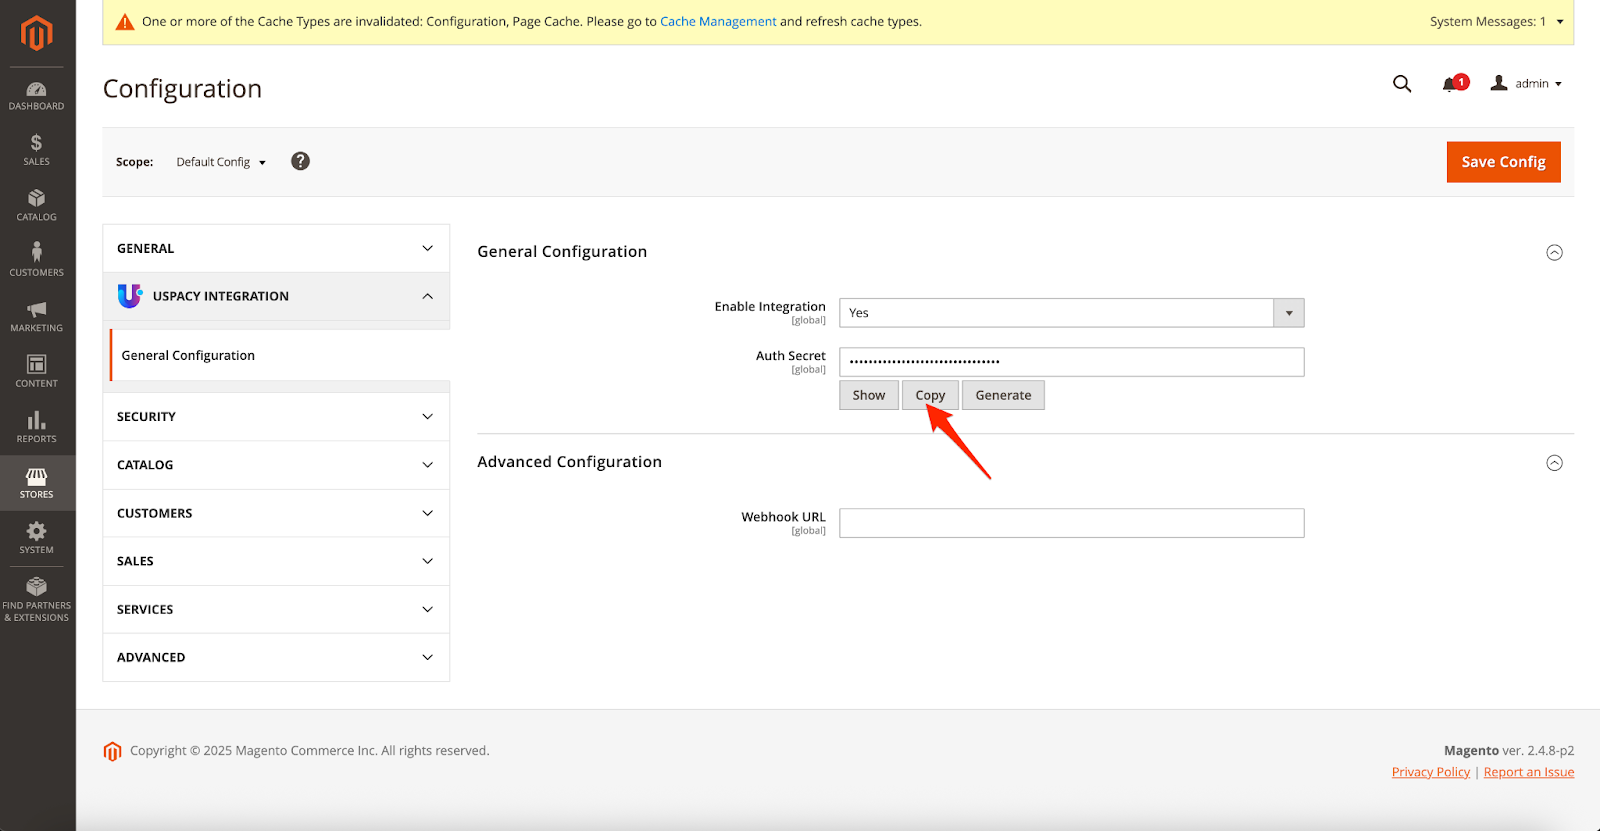
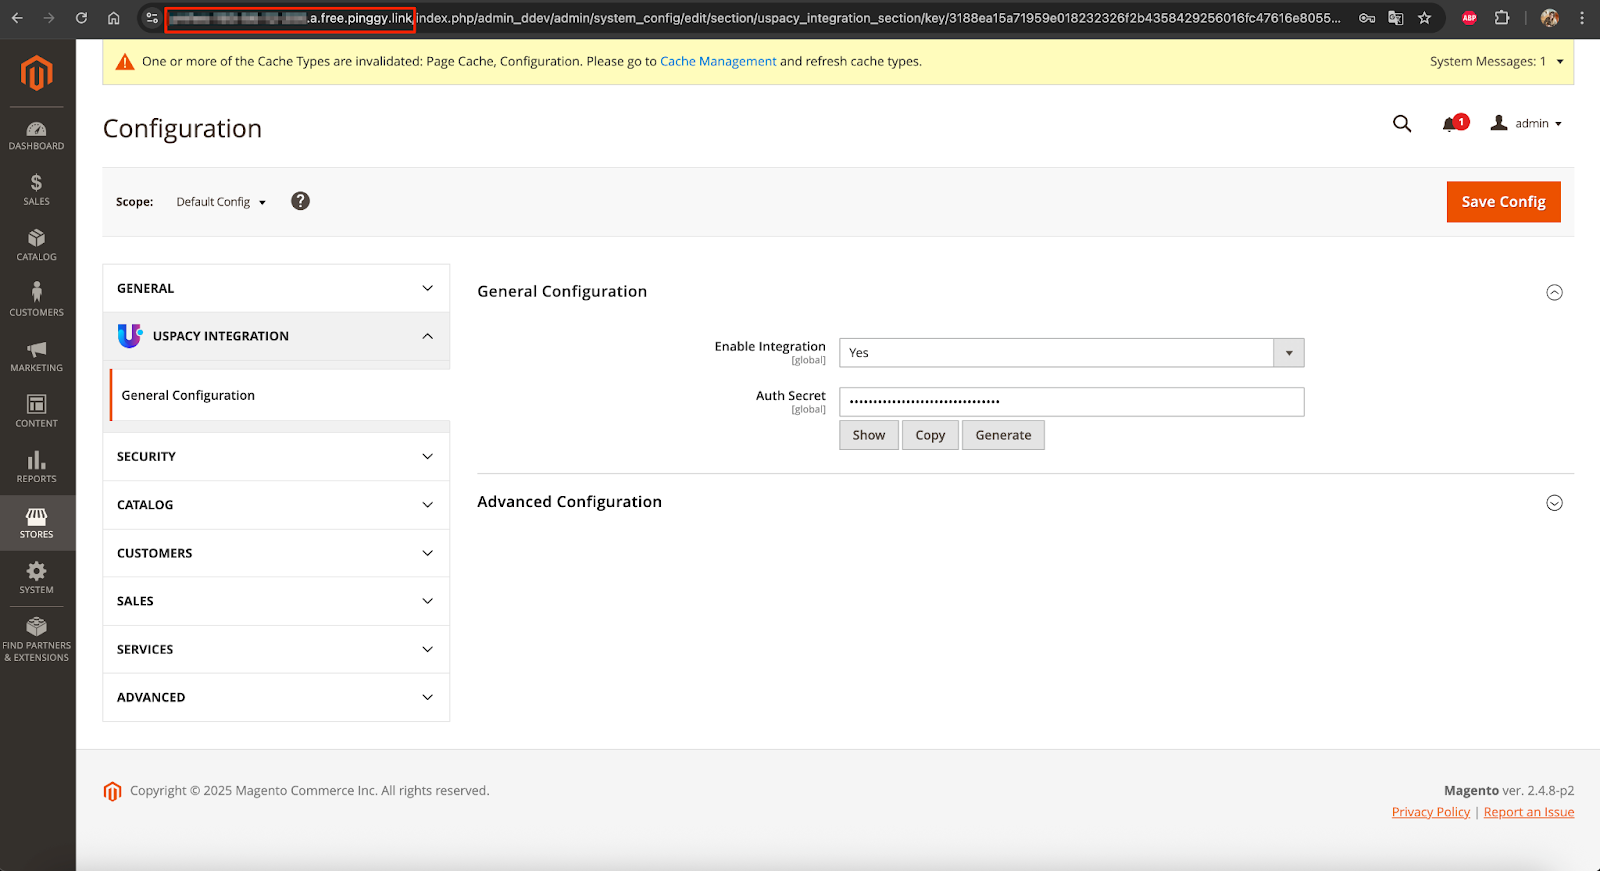
🔗 Domain Name – without https://.
💡 These values are required to complete the integration in Uspacy.
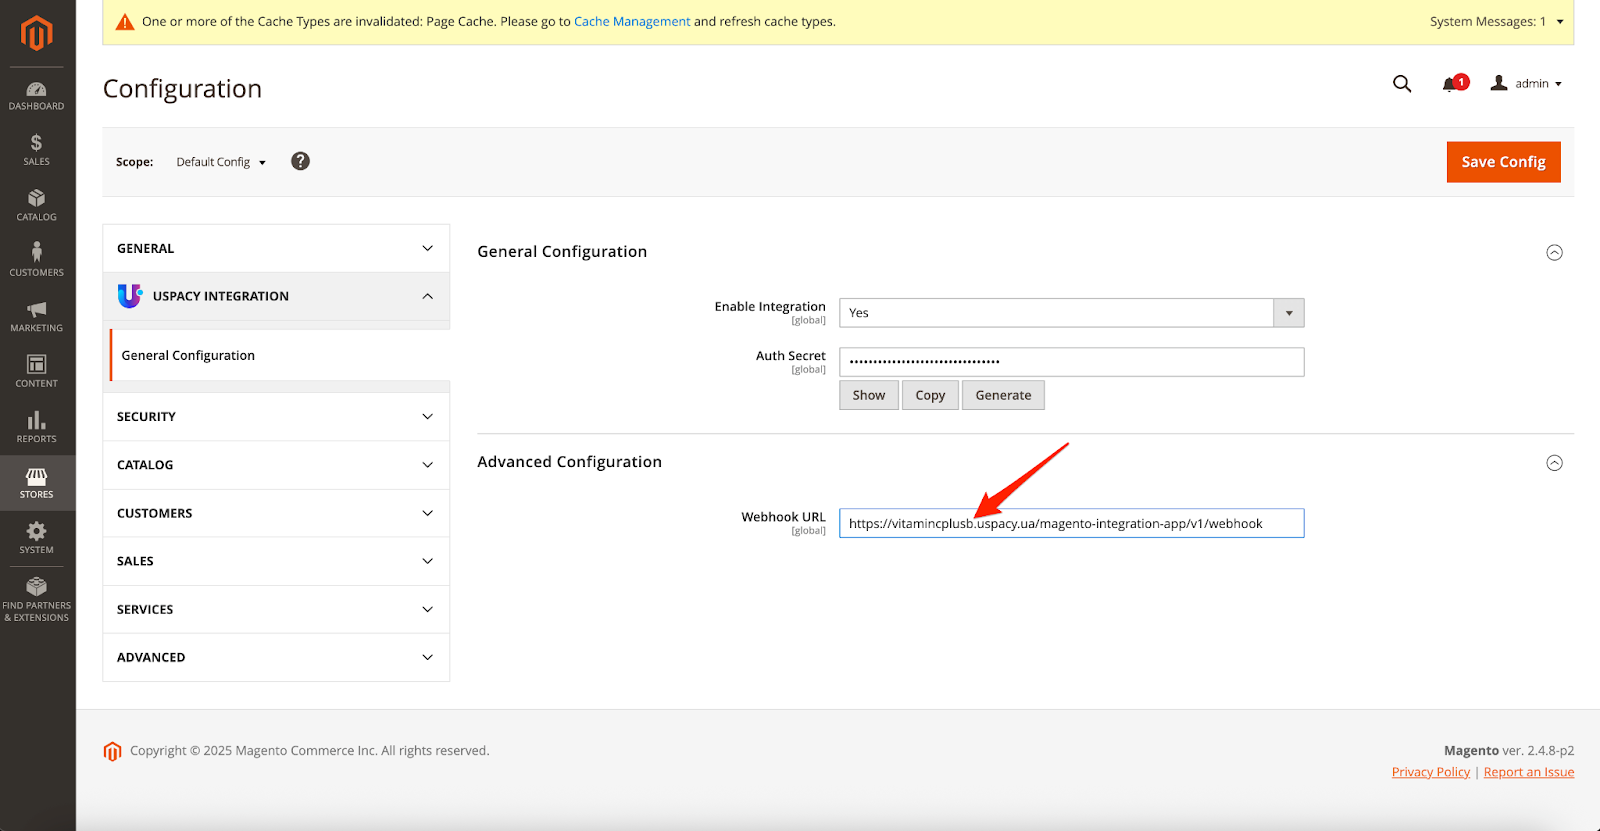
Additionally, on the configuration page, there's an Advanced Configuration section where you’ll find a Webhook URL. This field will automatically populate with a portal link once the integration is successfully connected within your Workspace.

Uspacy settings
Step 1. Installing the integration app
In the Marketplace section, you’ll find a free app for Uspacy–Magento integration. Install it by clicking the Get button.
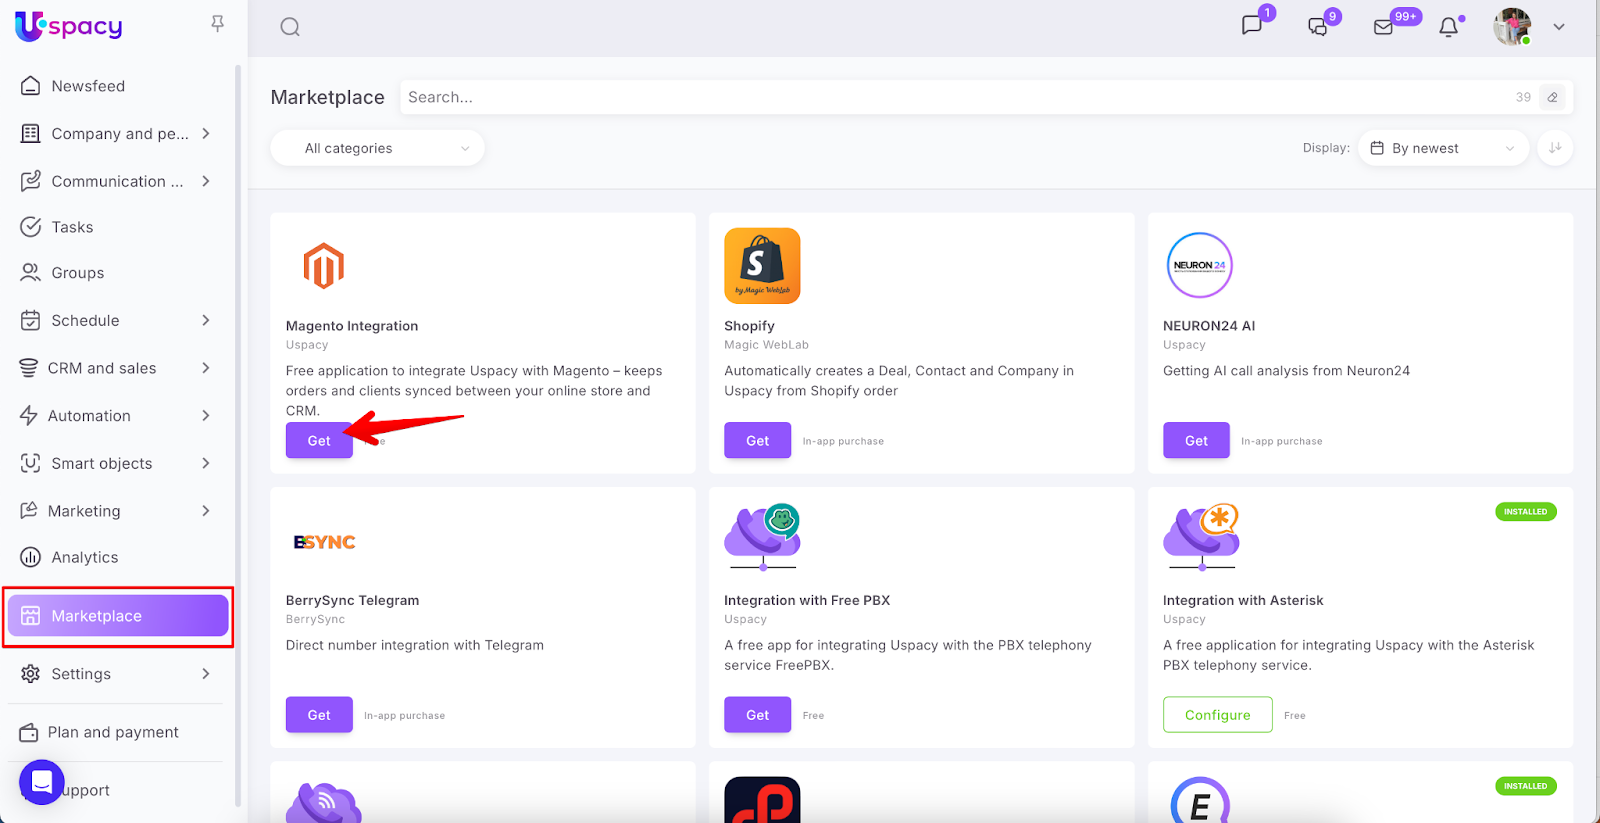
💡 Note: Only the Space owner or administrator has permission to install the app.
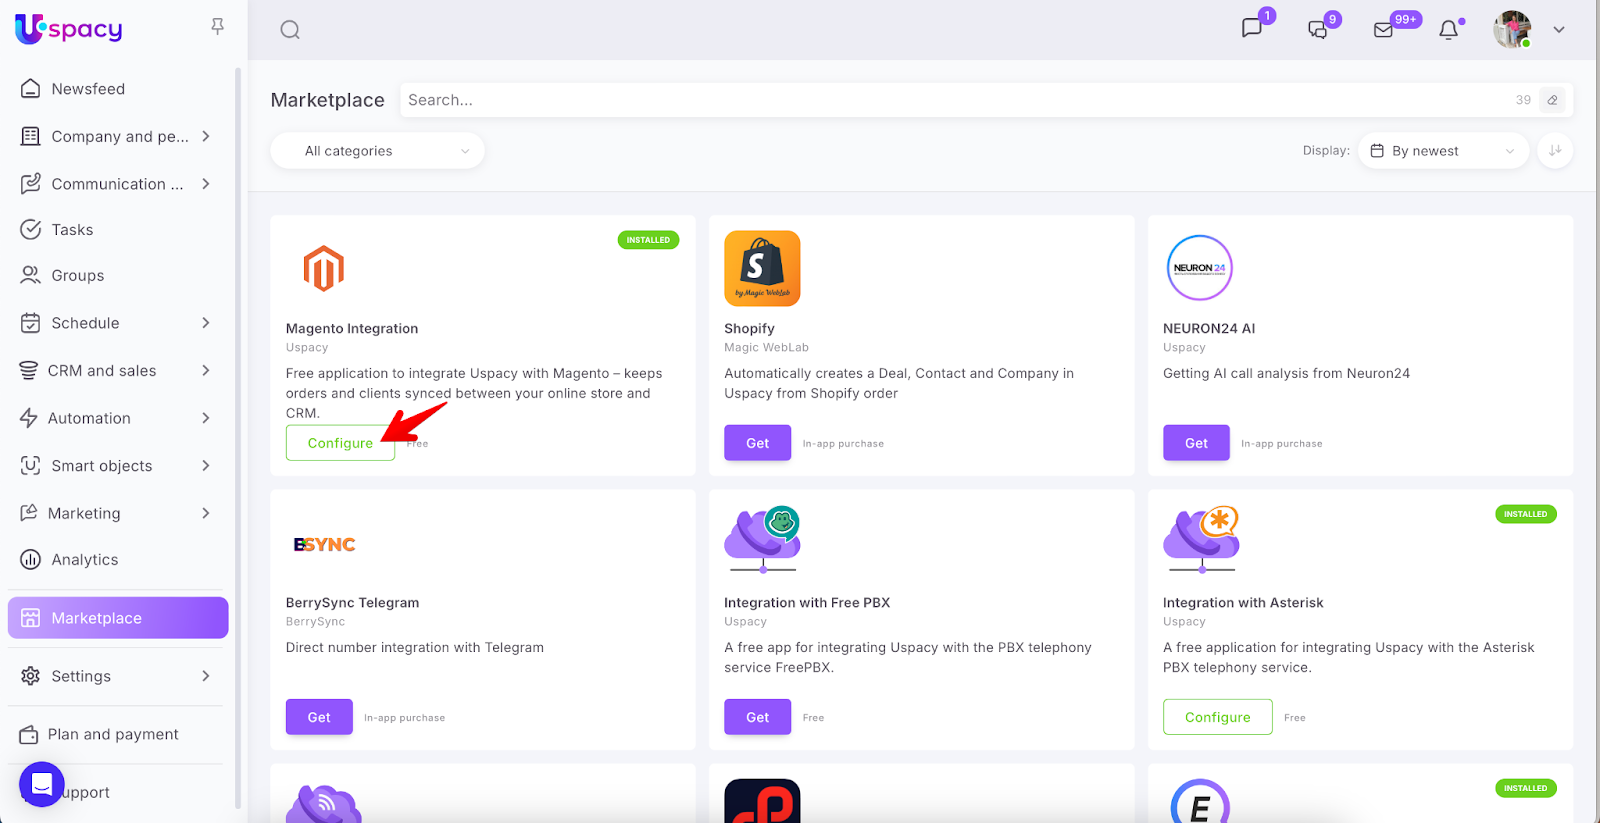
After installing the app, configure it.
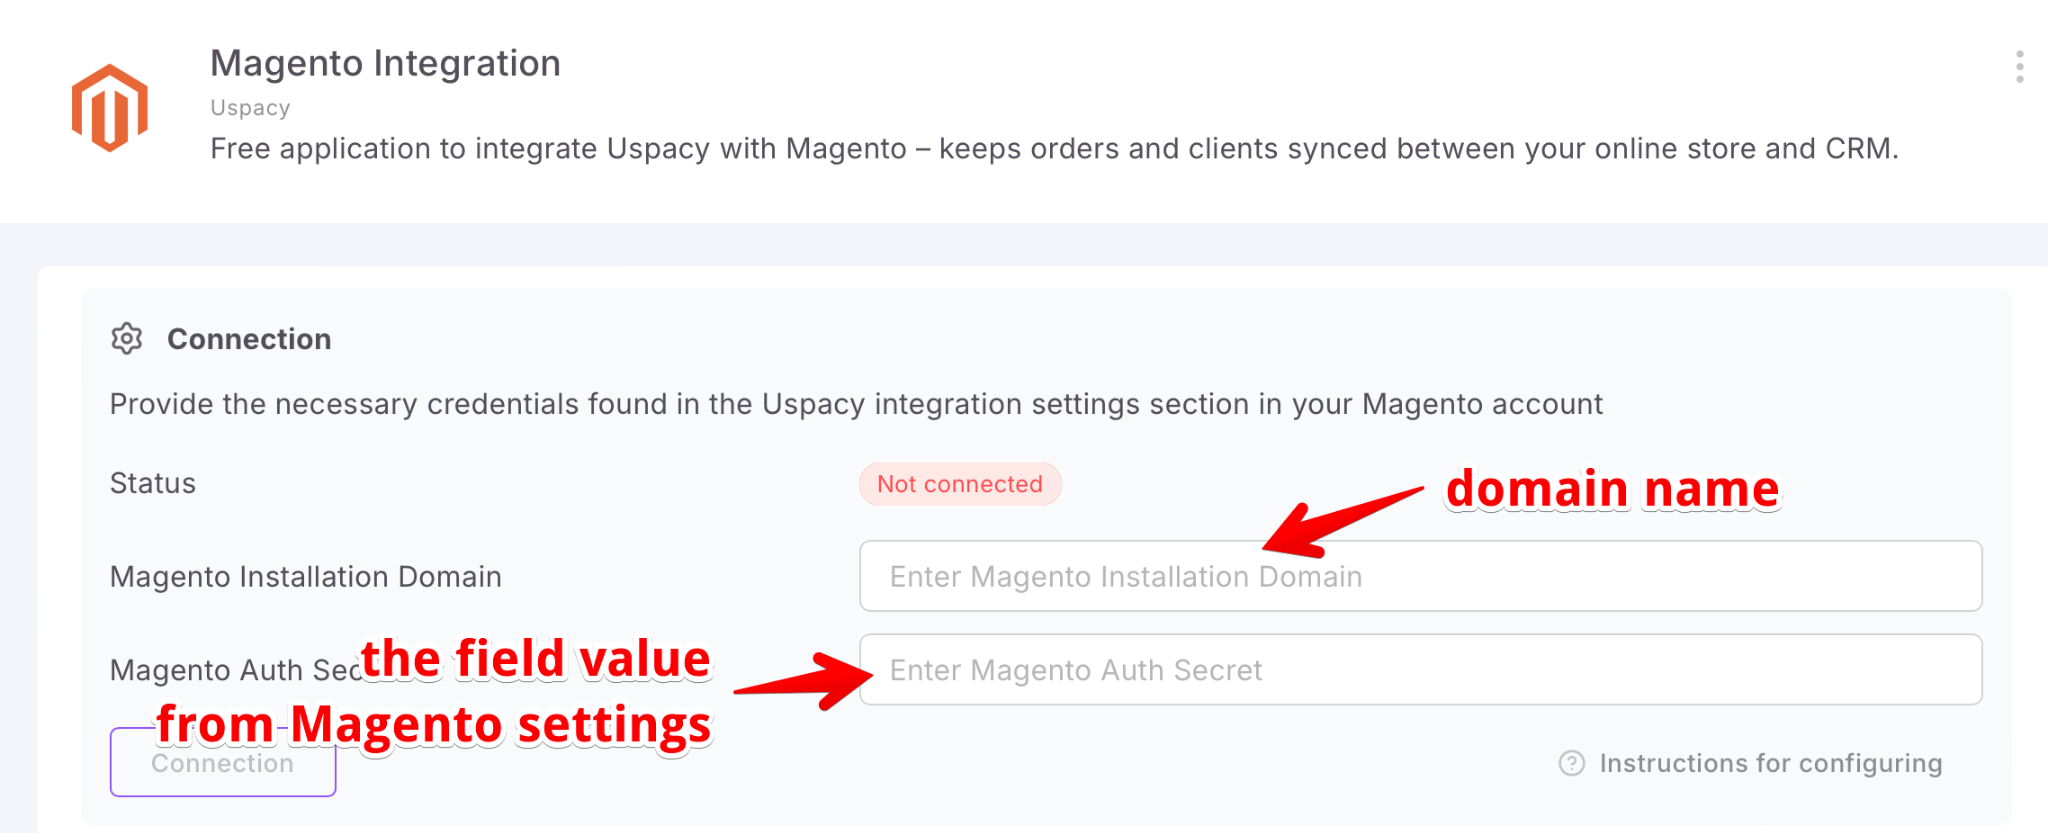
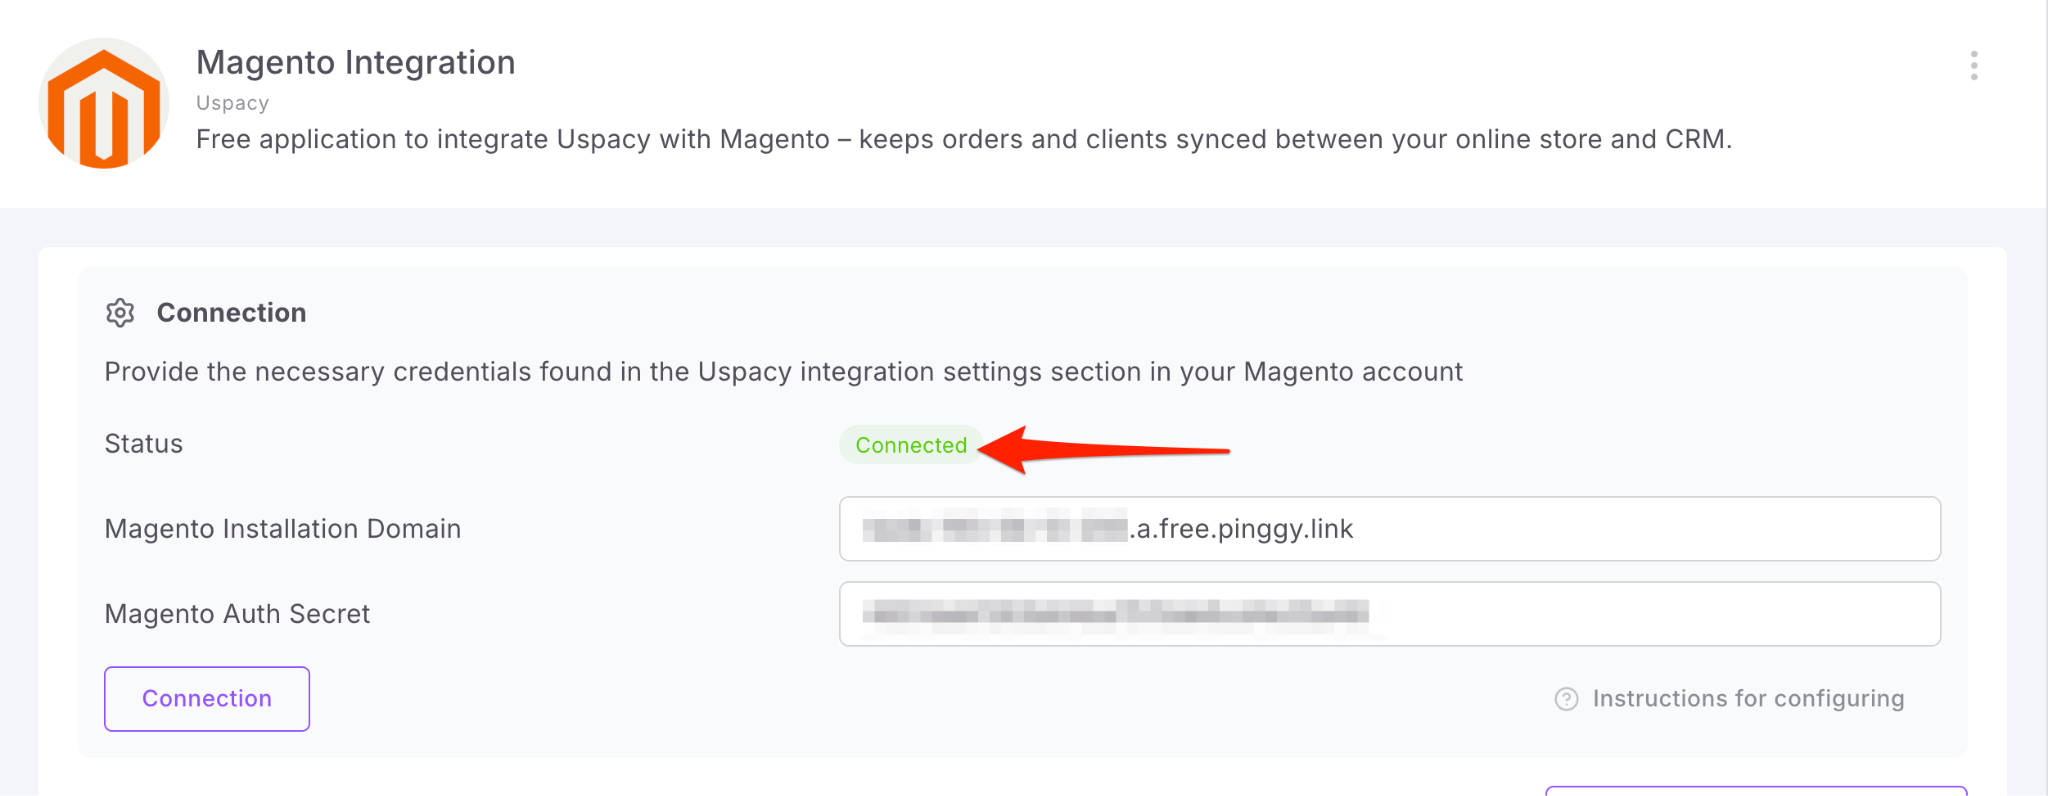
Step 2. Connecting the Integration
In this settings block, you’ll need to fill out two fields using the data you previously retrieved from Magento: Magento Installation Domain and Magento Auth Secret.
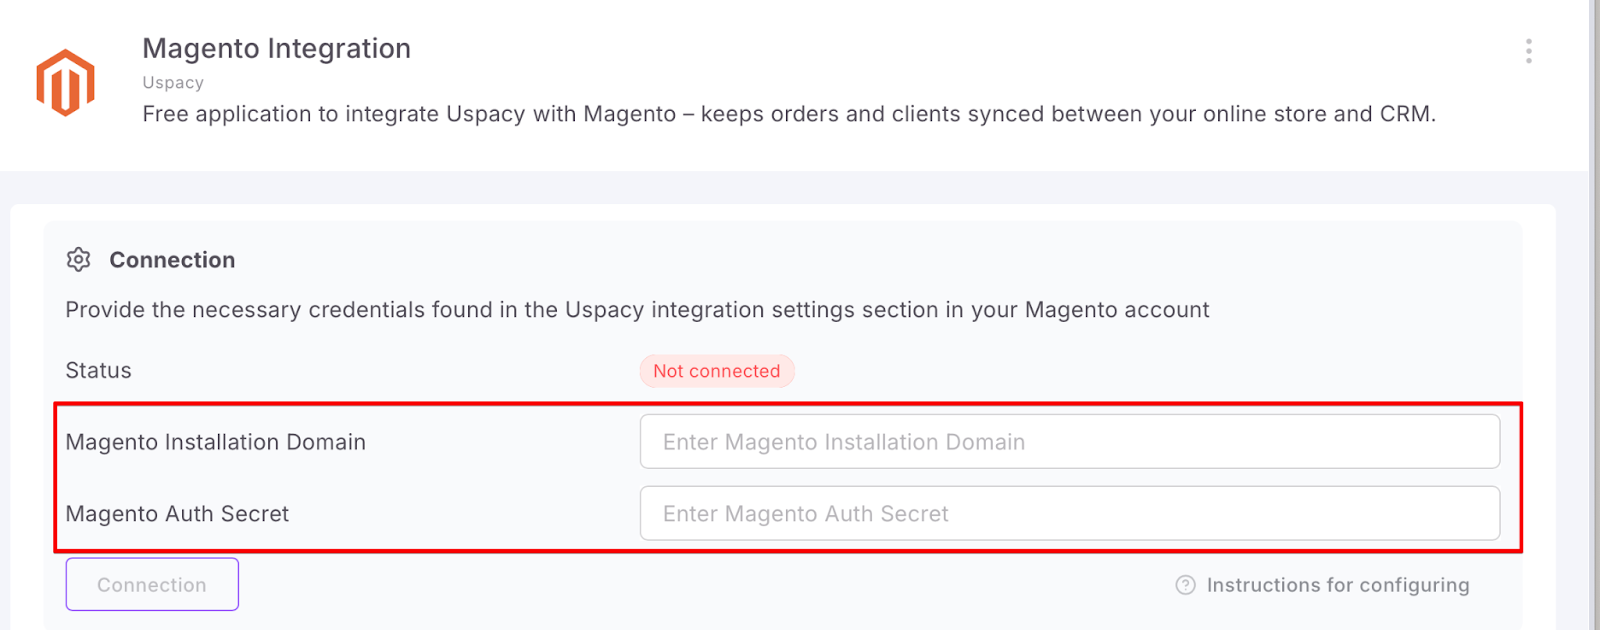
Then click Connect.
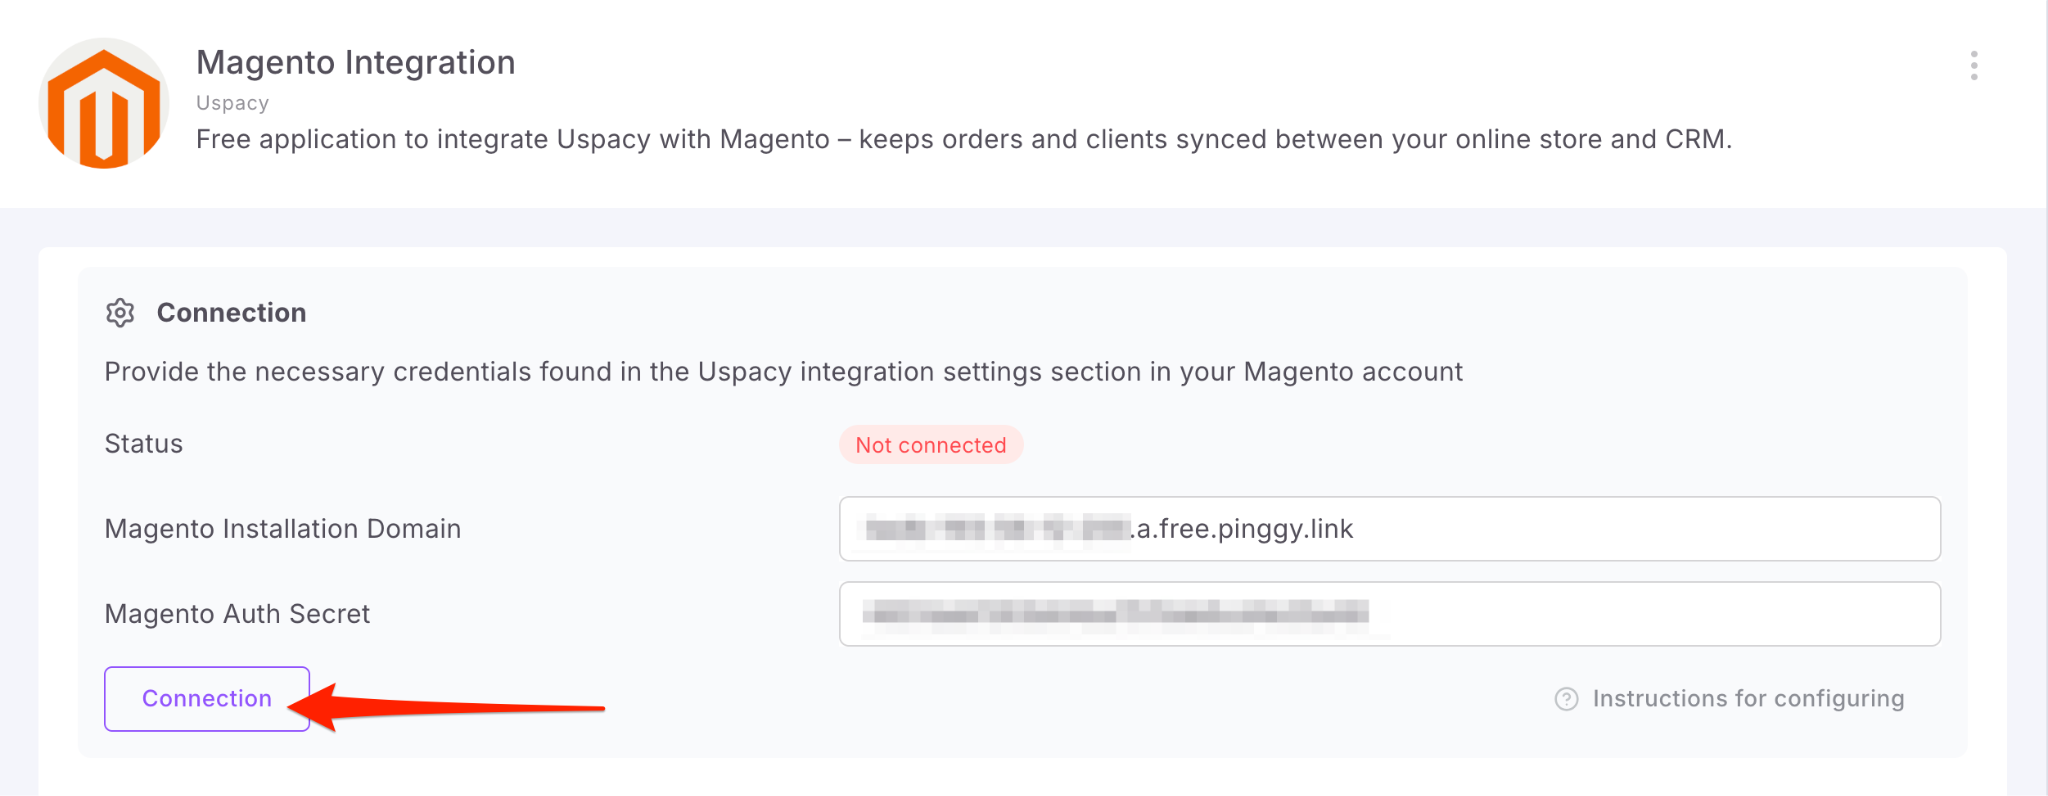
After a successful connection, the integration status will update automatically.
☝🏻 Reminder: After a successful connection, the Webhook URL field in your Magento settings will automatically populate with the address of your Uspacy Workspace.

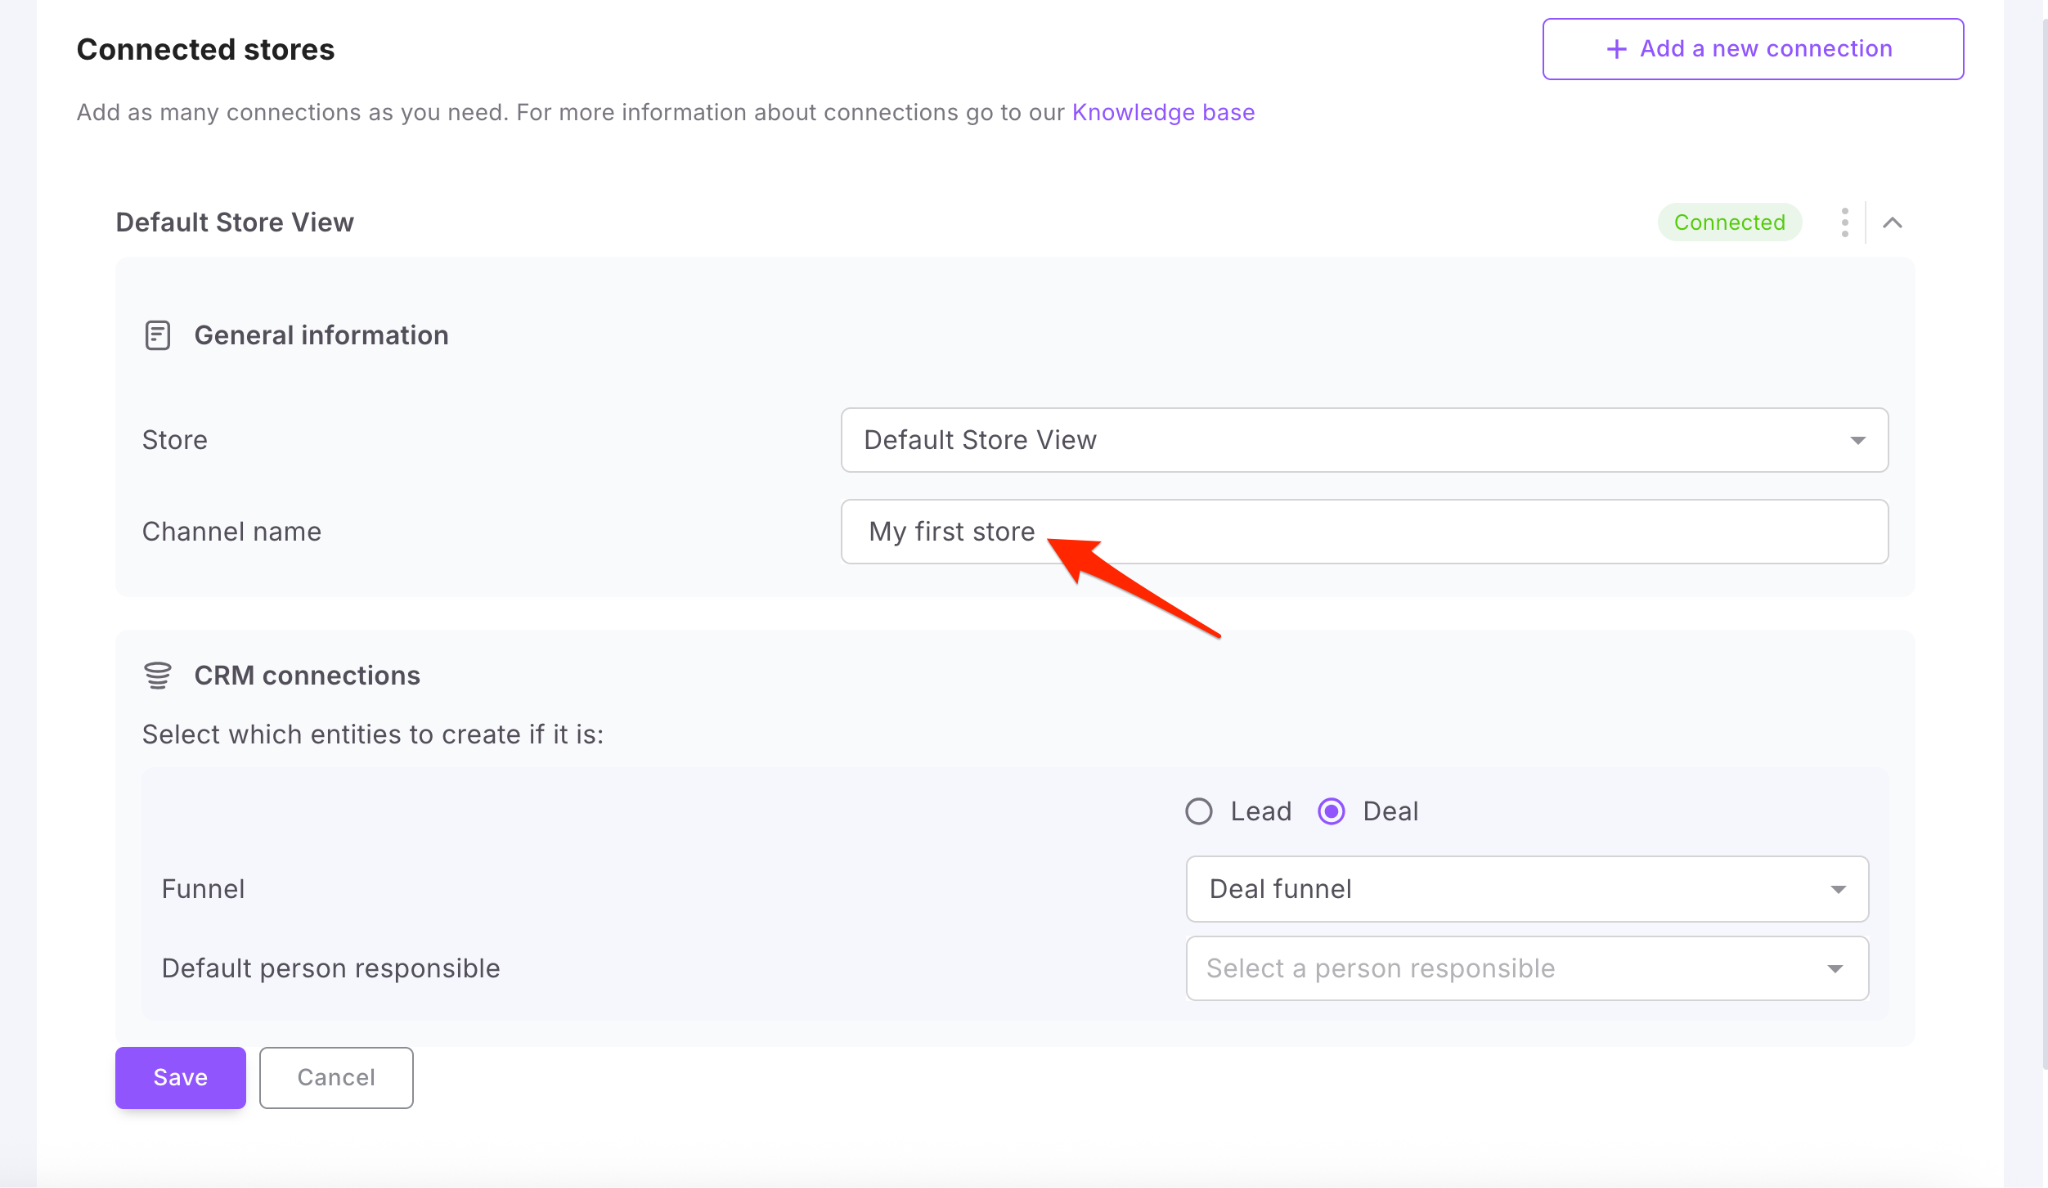
Step 3. Adding your store
Your default store will be pulled in automatically. If you have multiple stores, select which one to connect—or add all of them one at a time.
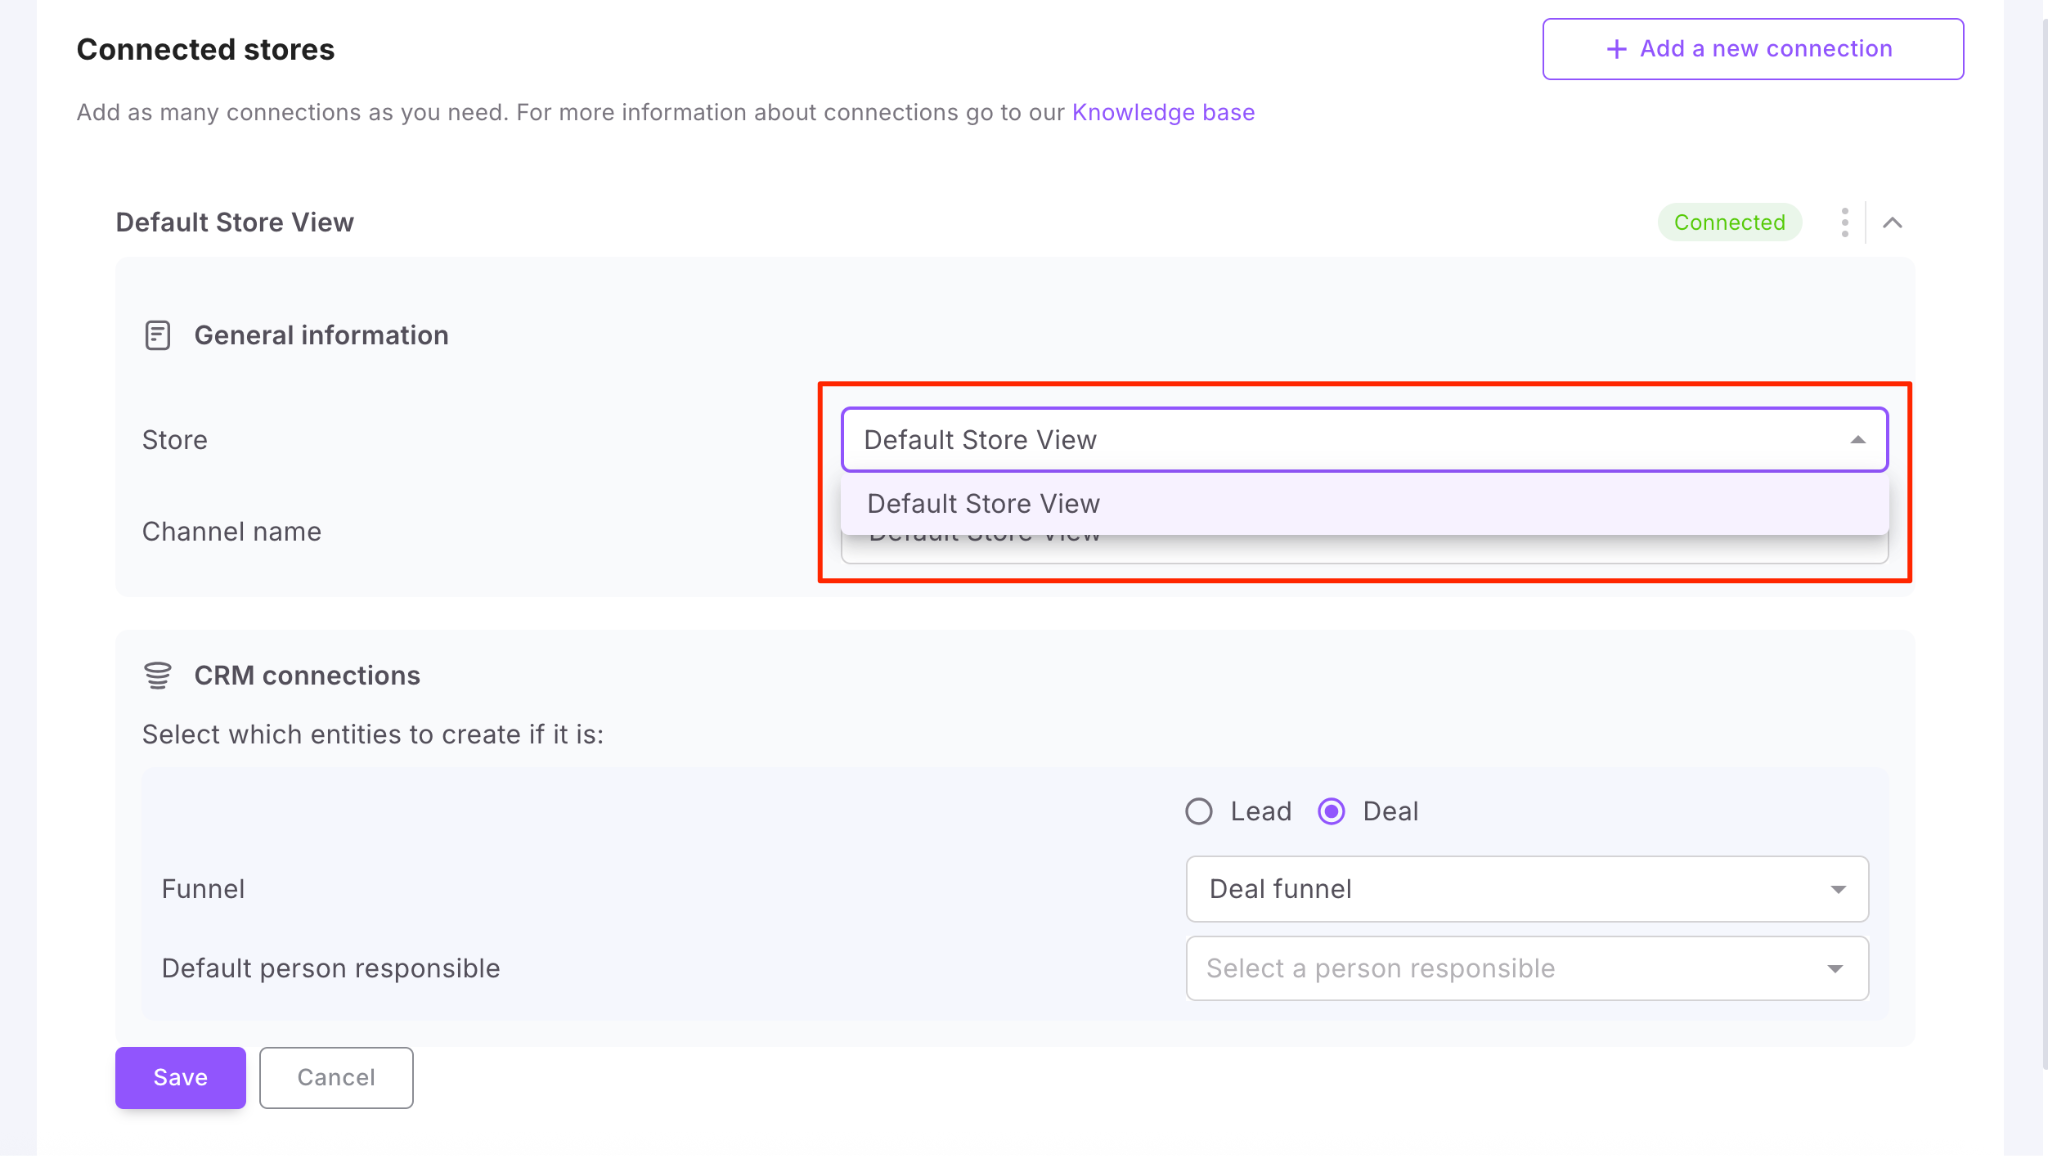
You can also rename the store and give it a custom “working” name for easier identification within your Workspace.
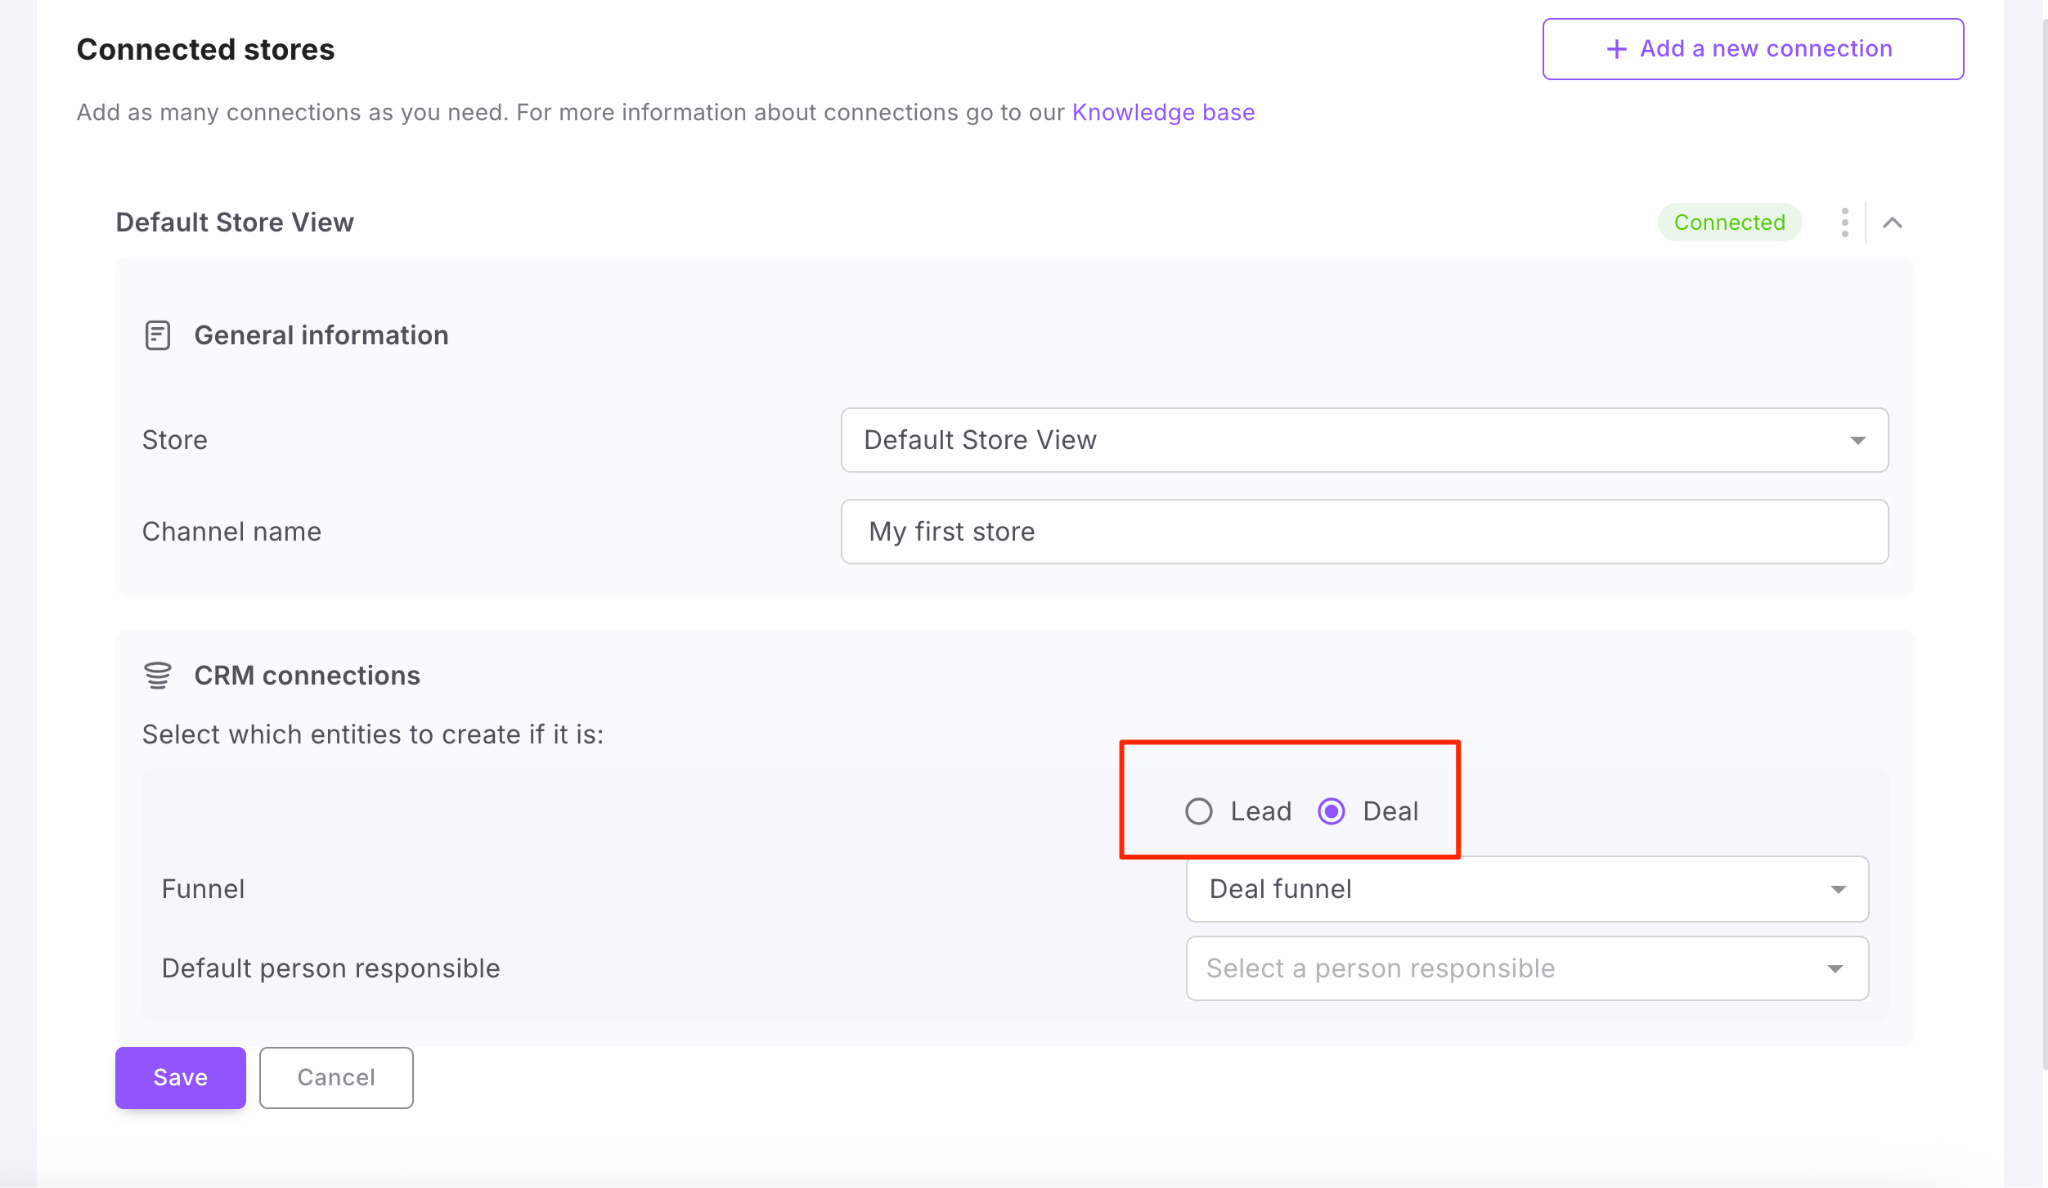
Step 4. Setting up CRM connections
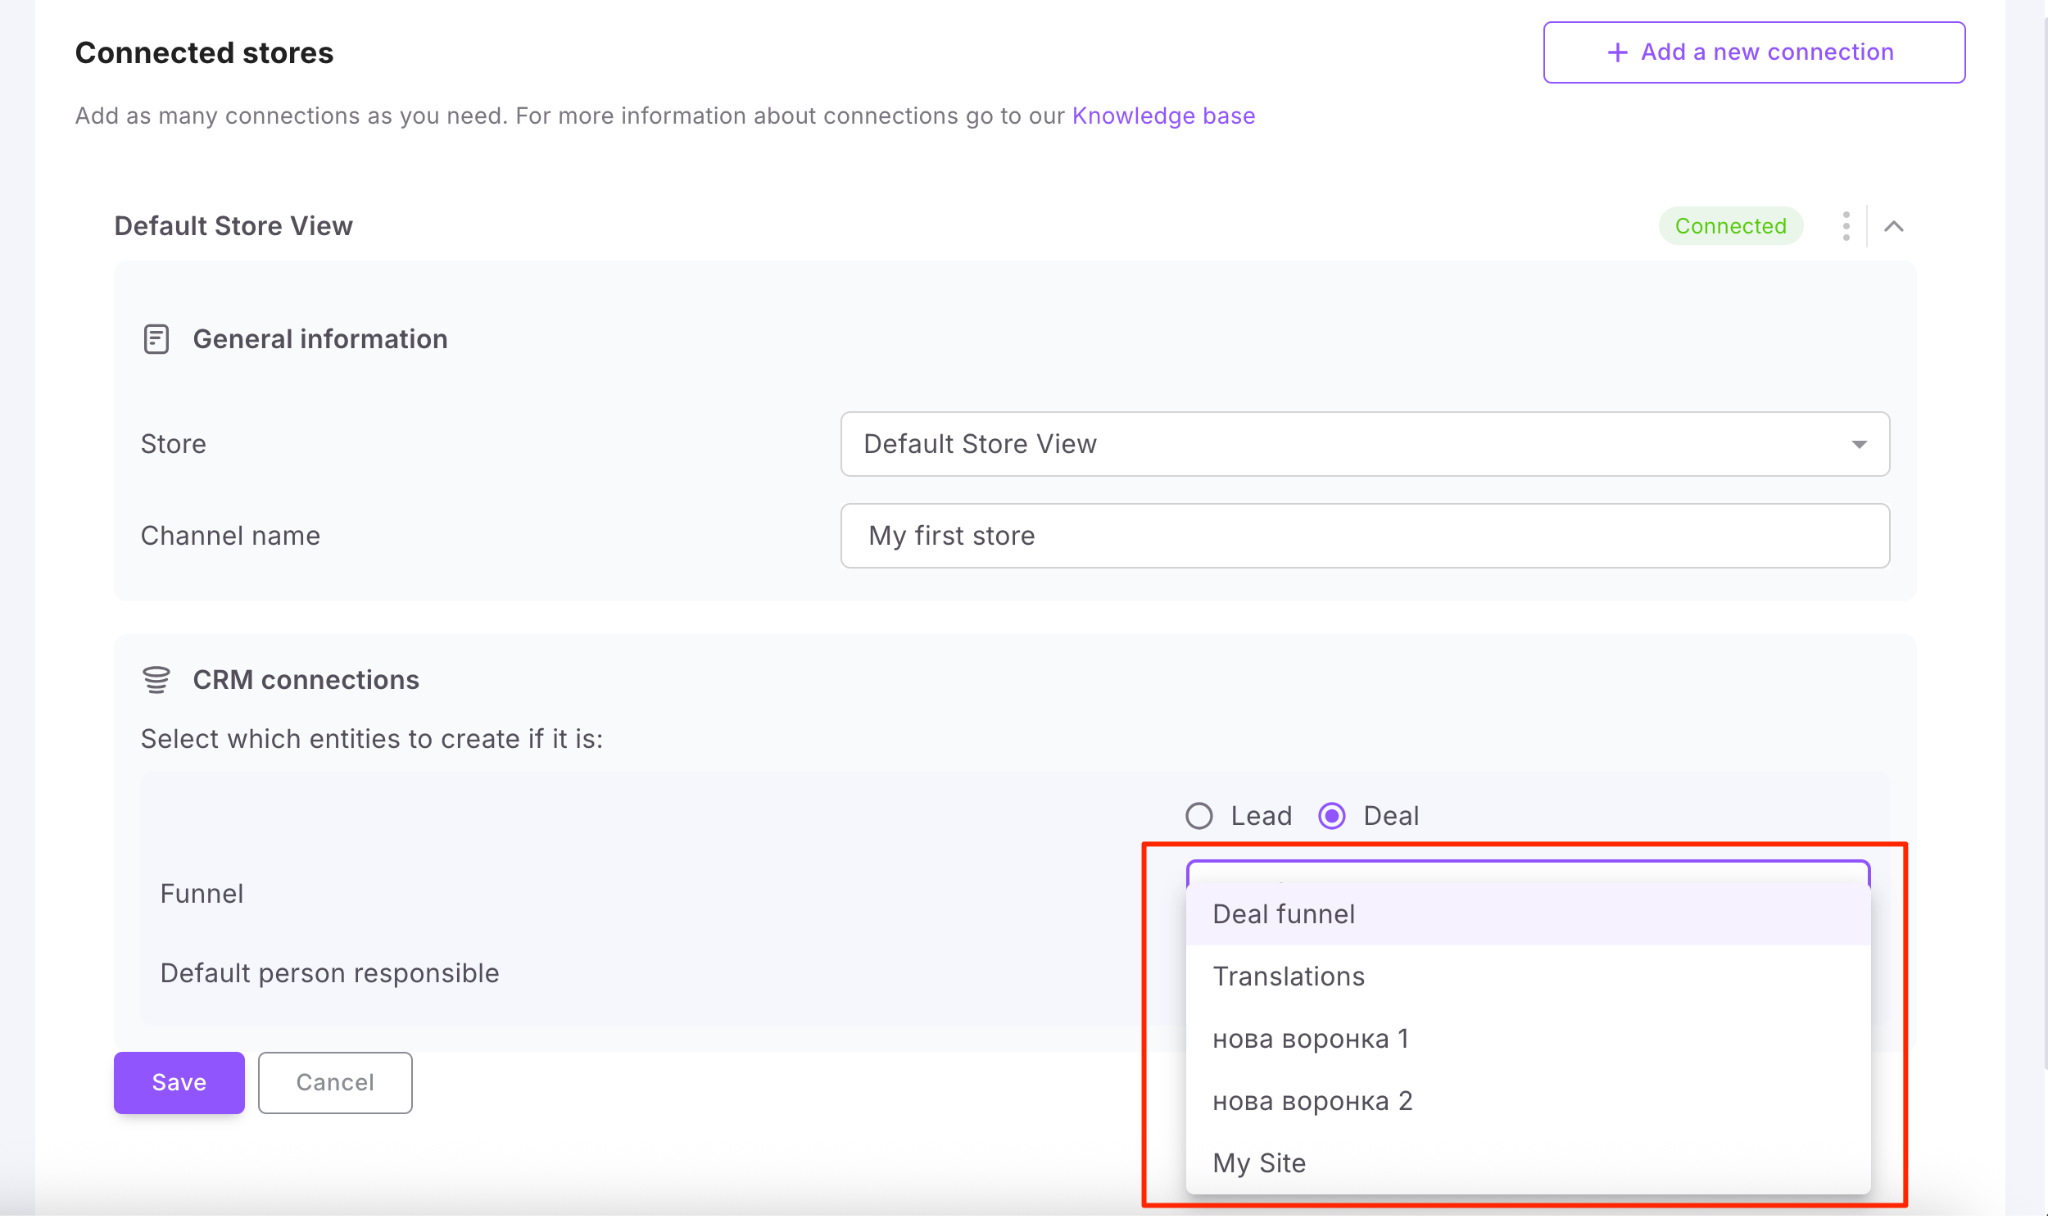
First, select what kind of CRM record should be created when a new order is received from your website: a Lead or a Deal.
☝🏻 If you select to create a Lead, make sure to enable the Support of products option in Settings.
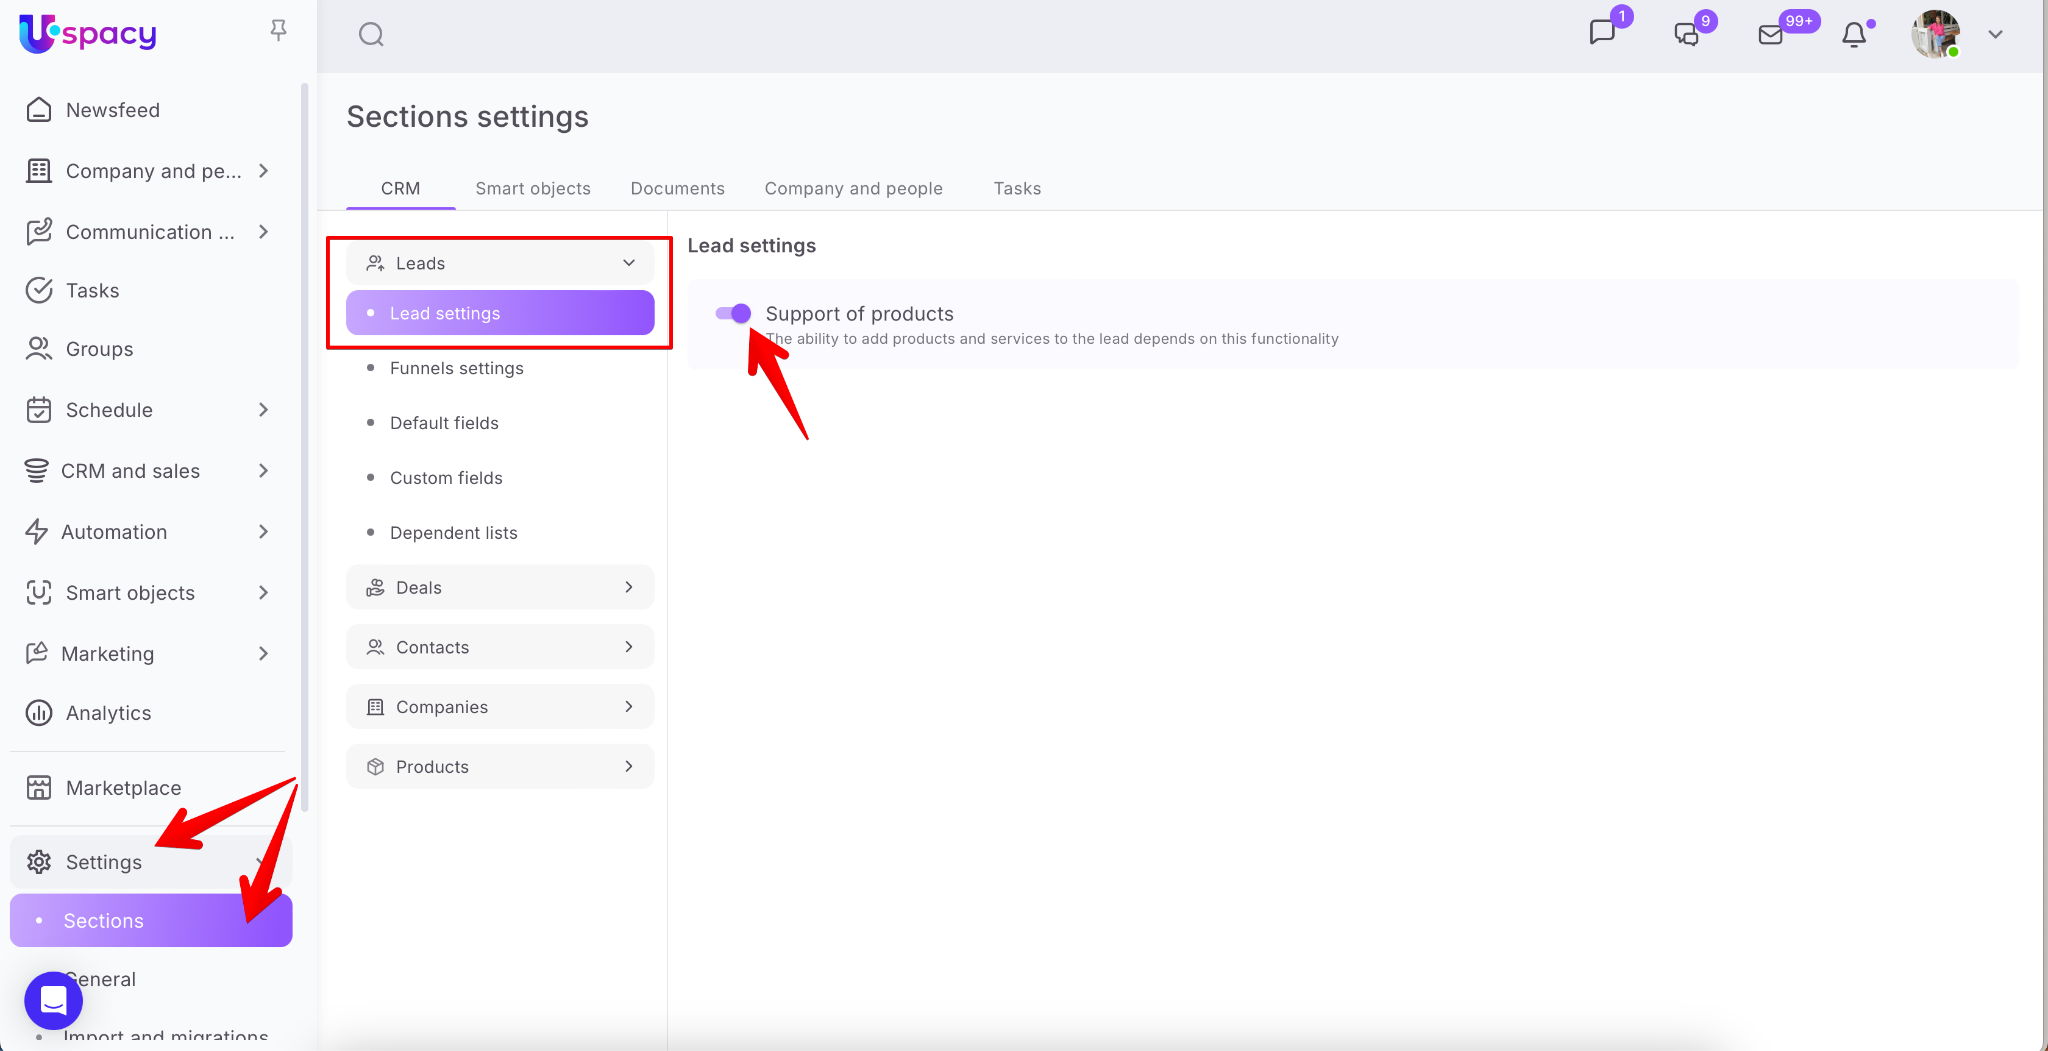
This ensures that the products from the client's order are correctly transferred into the CRM card.
Next, select the funnel where the new elements (Leads or Deals) will appear.
Then assign a person responsible for the incoming Leads or Deals in your CRM.
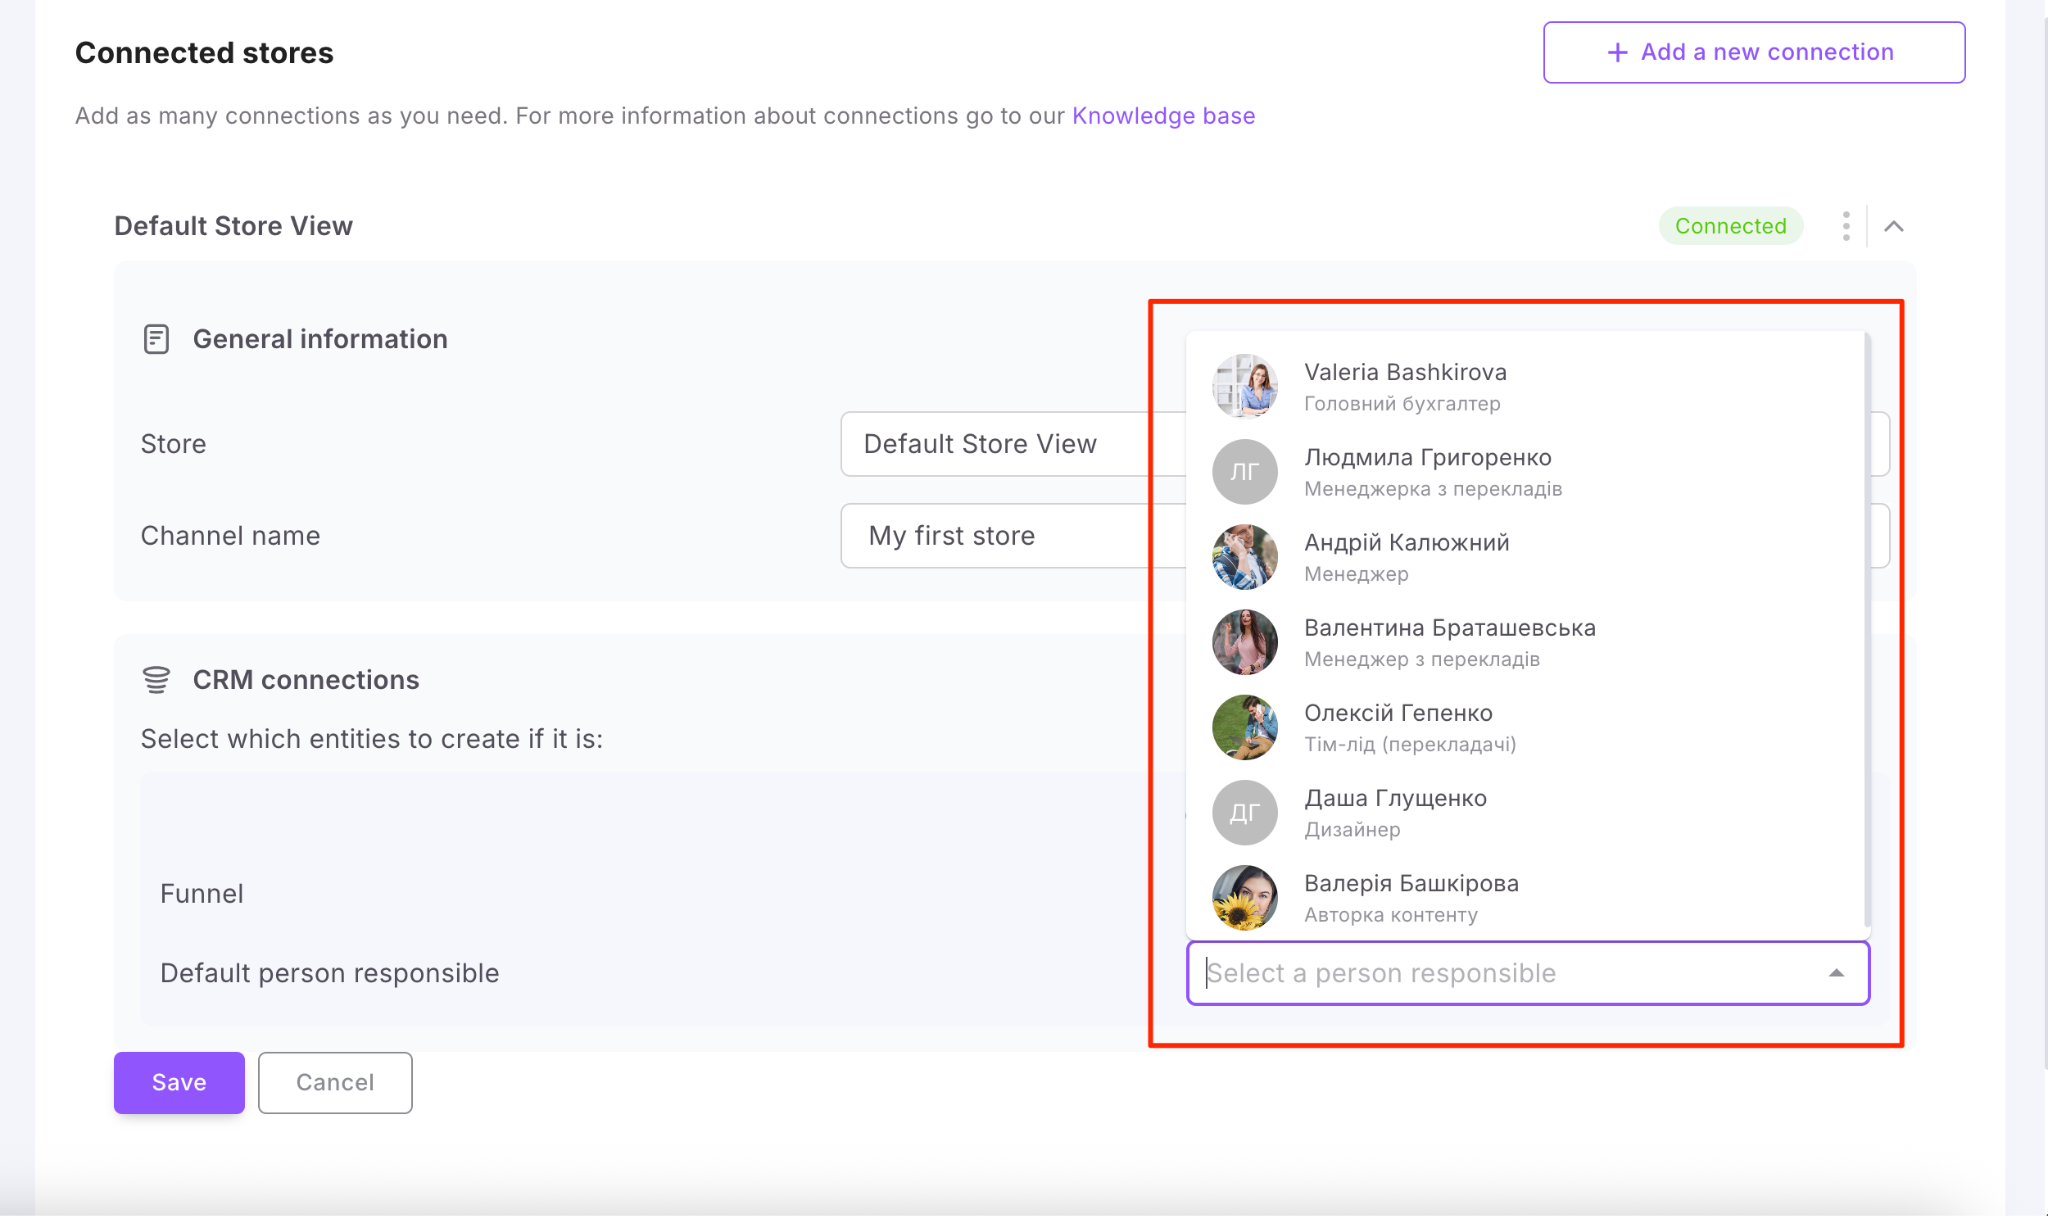
💡 This step is required. If no person is assigned, you won’t be able to complete the setup.
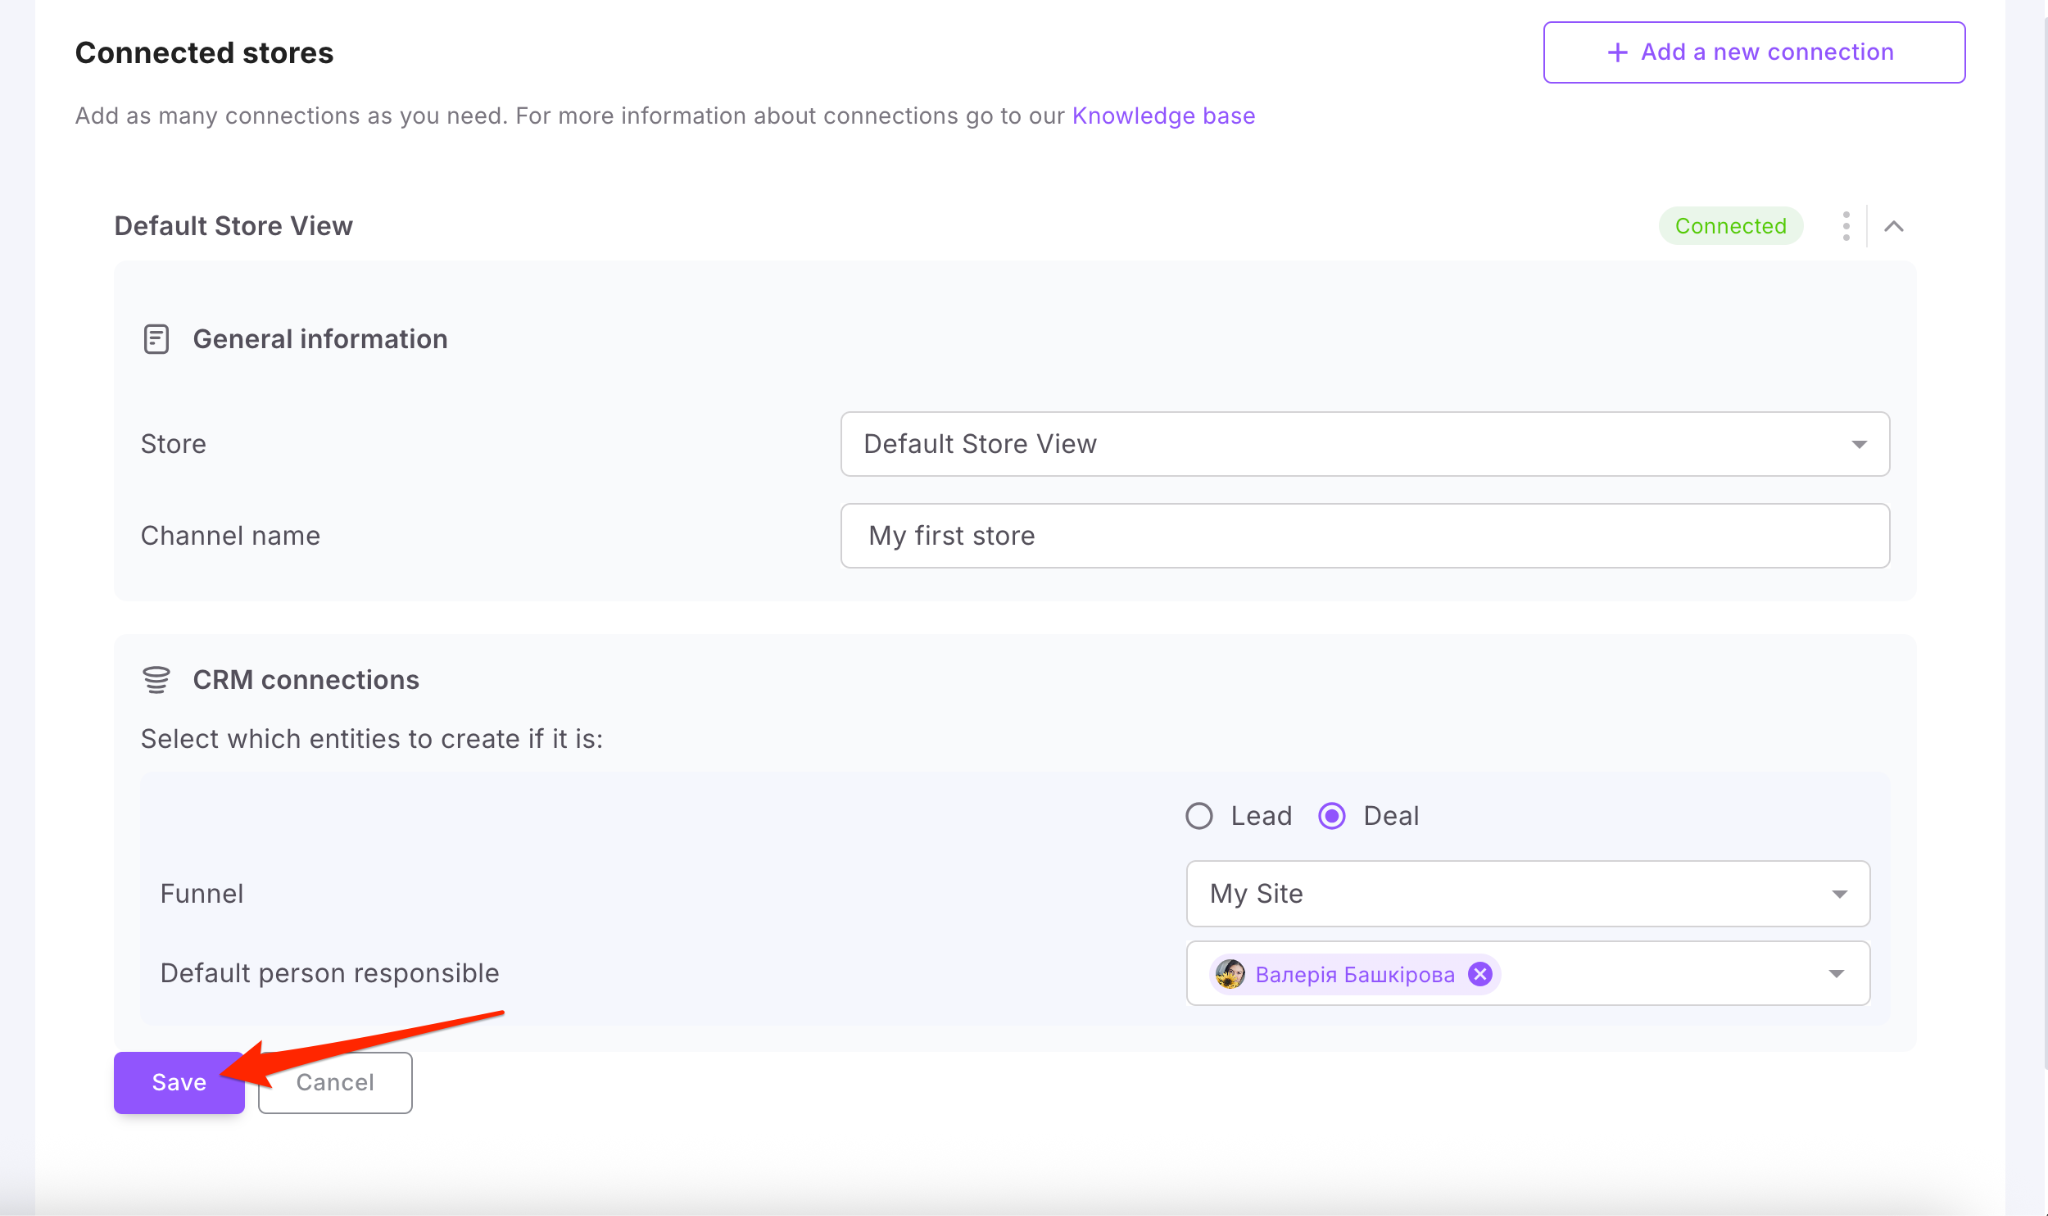
Step 5. Review and save settings
Double-check all settings and click Save.
✅ That’s it — the integration is now connected and ready to use!
How does it work?
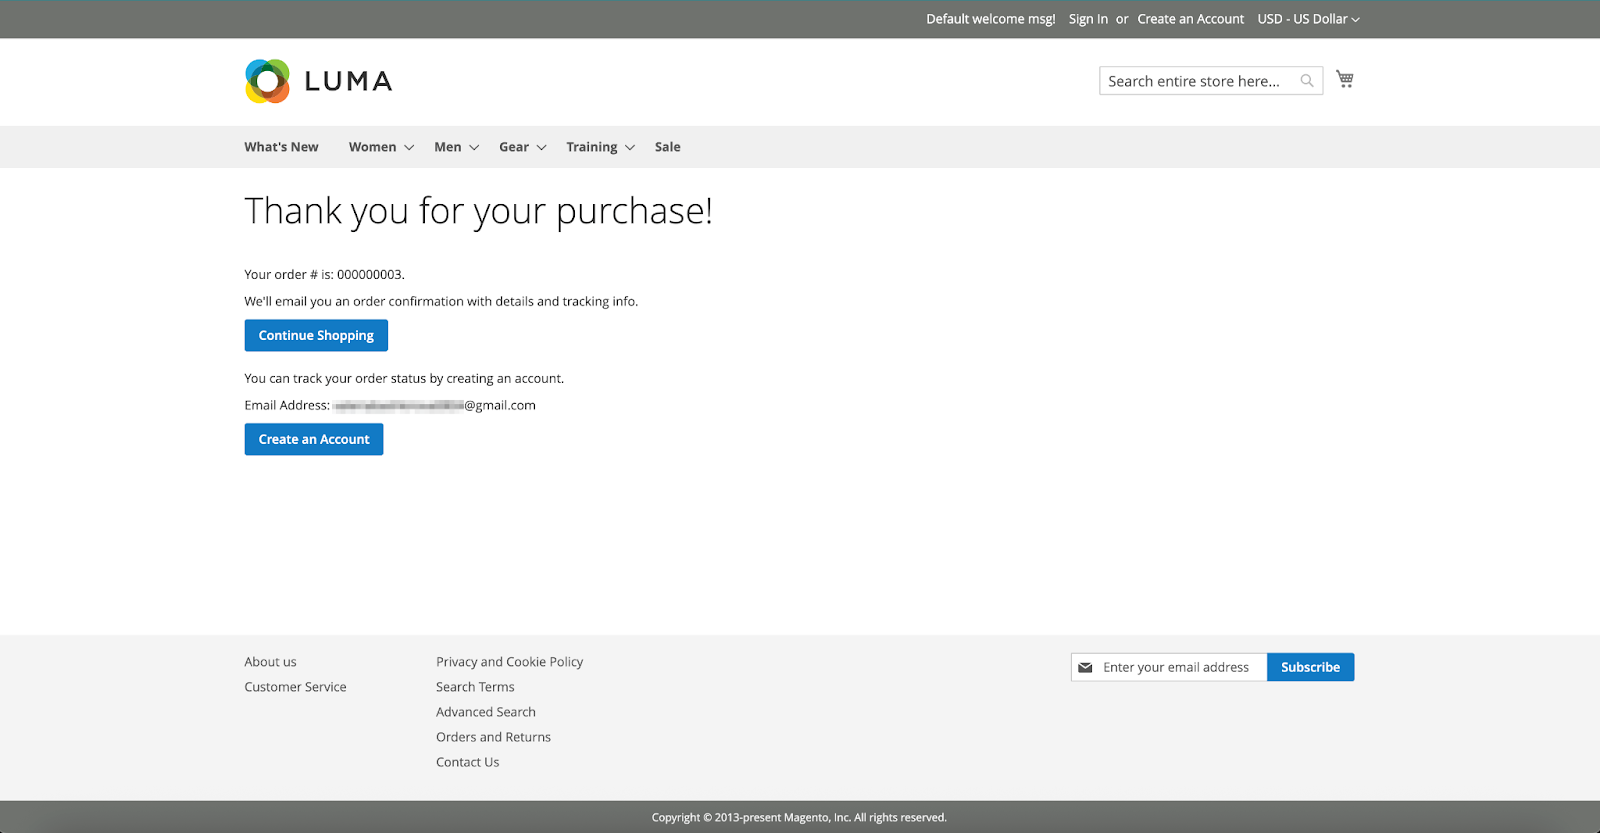
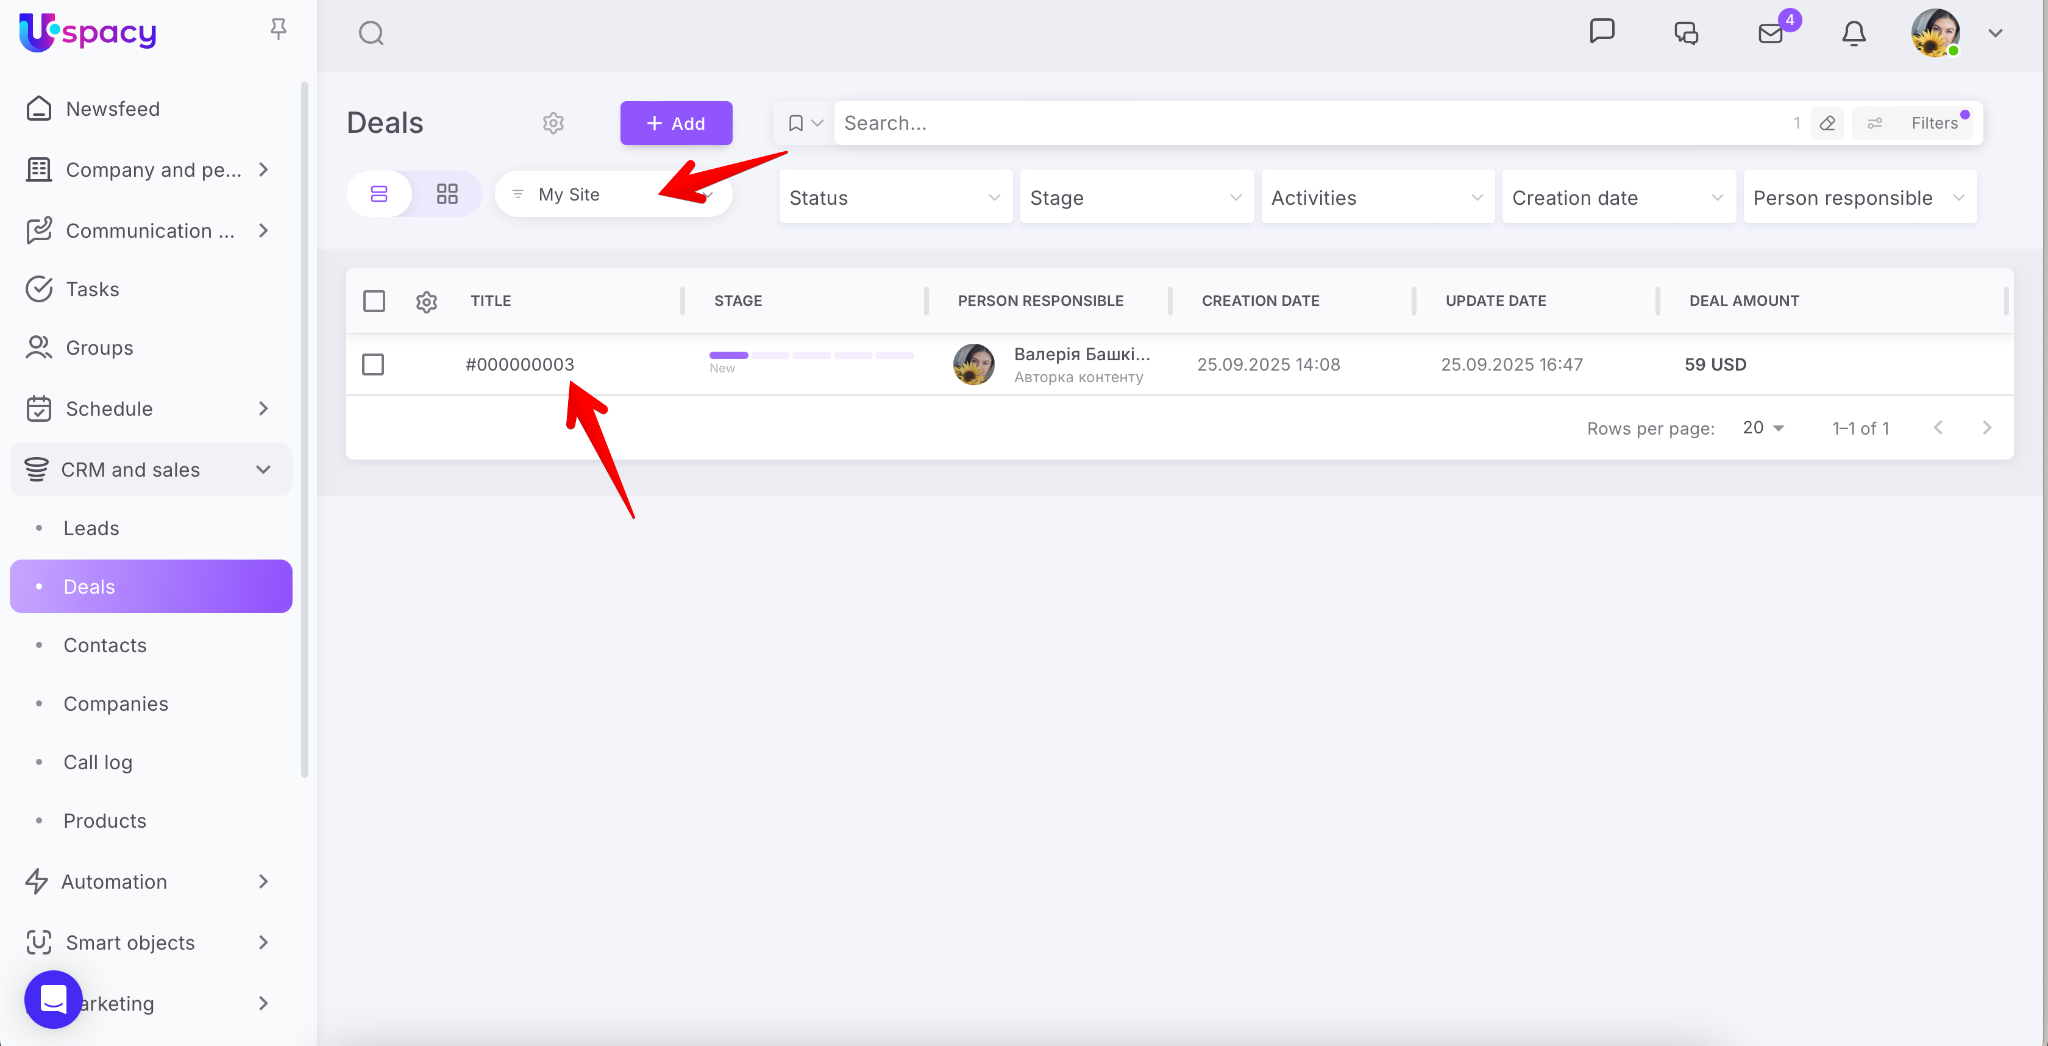
A client places an order on your website. The order is assigned its own unique number.
This order is then automatically sent to your CRM as either a Deal or a Lead, depending on your integration settings.
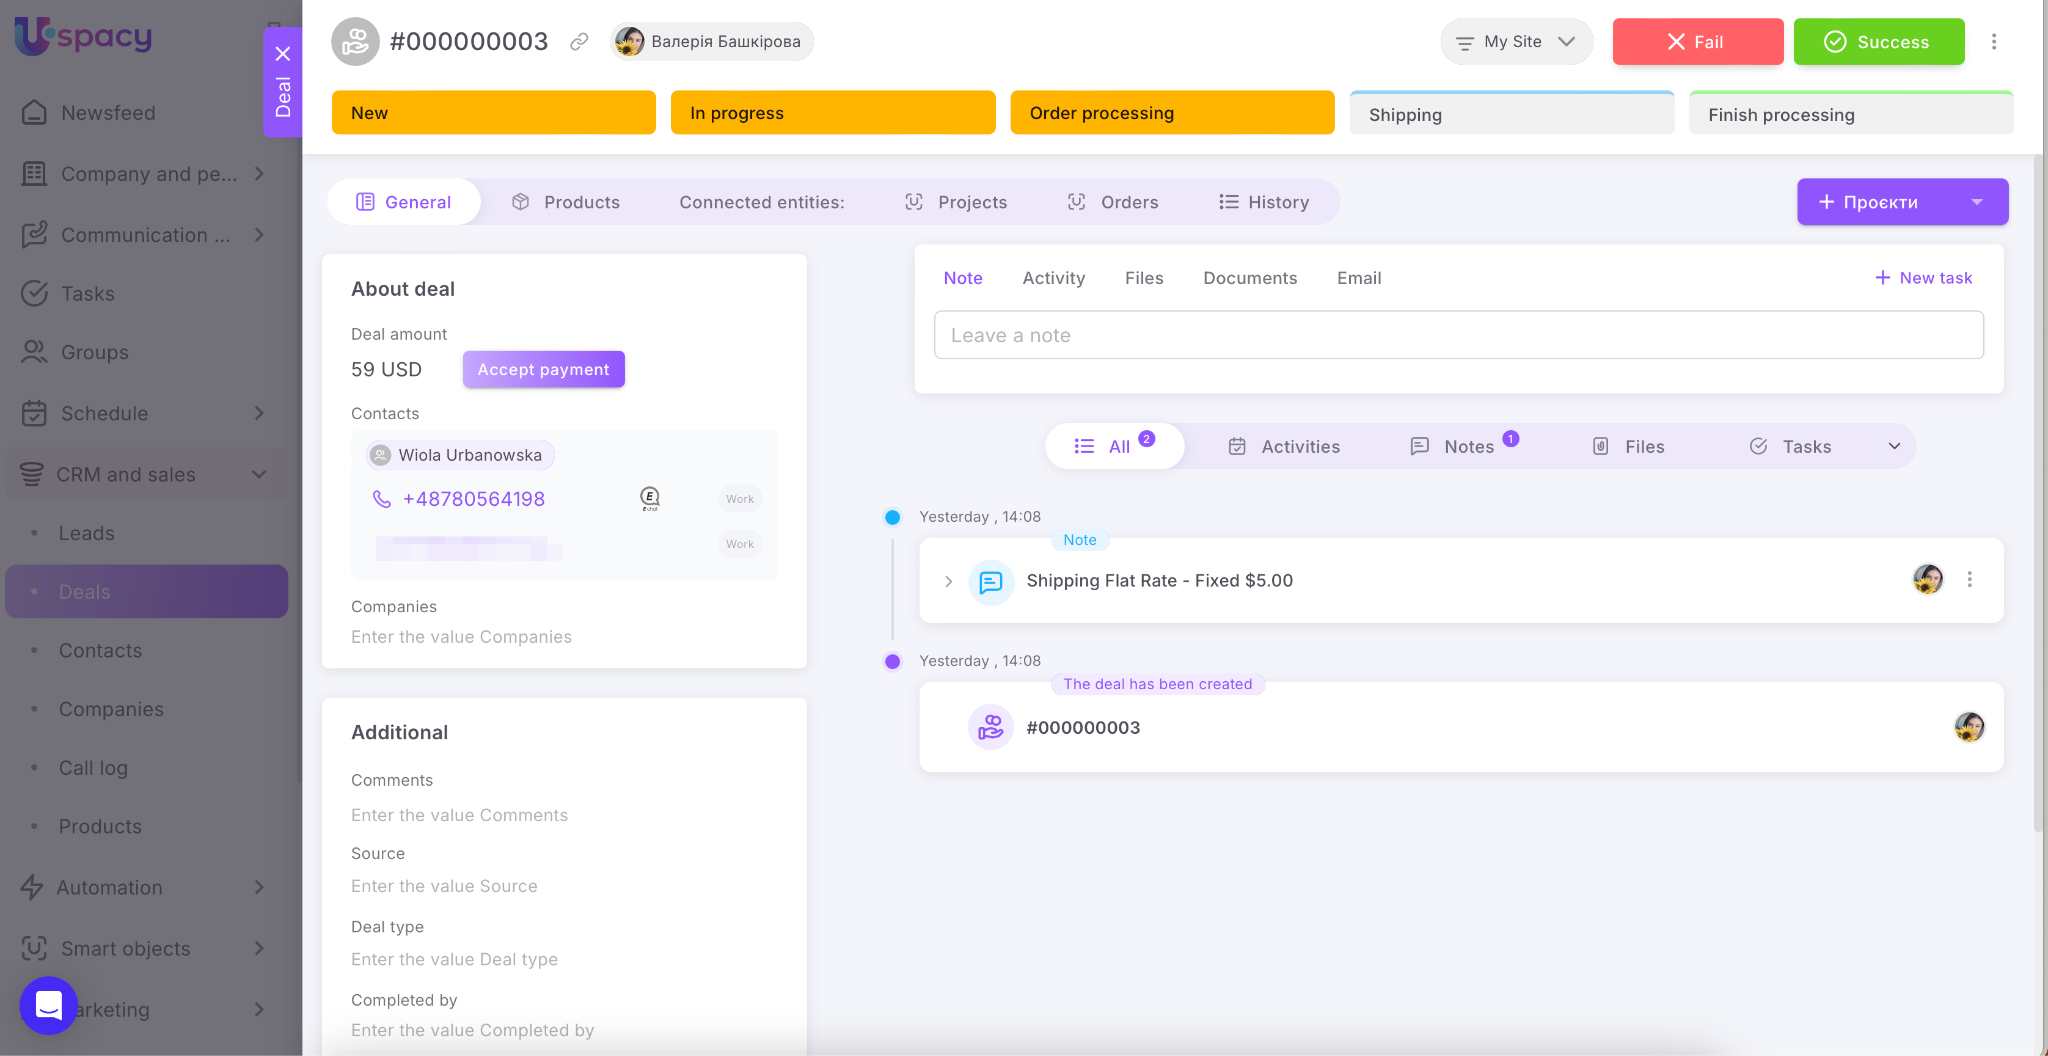
Inside the CRM card, you'll see a linked contact.
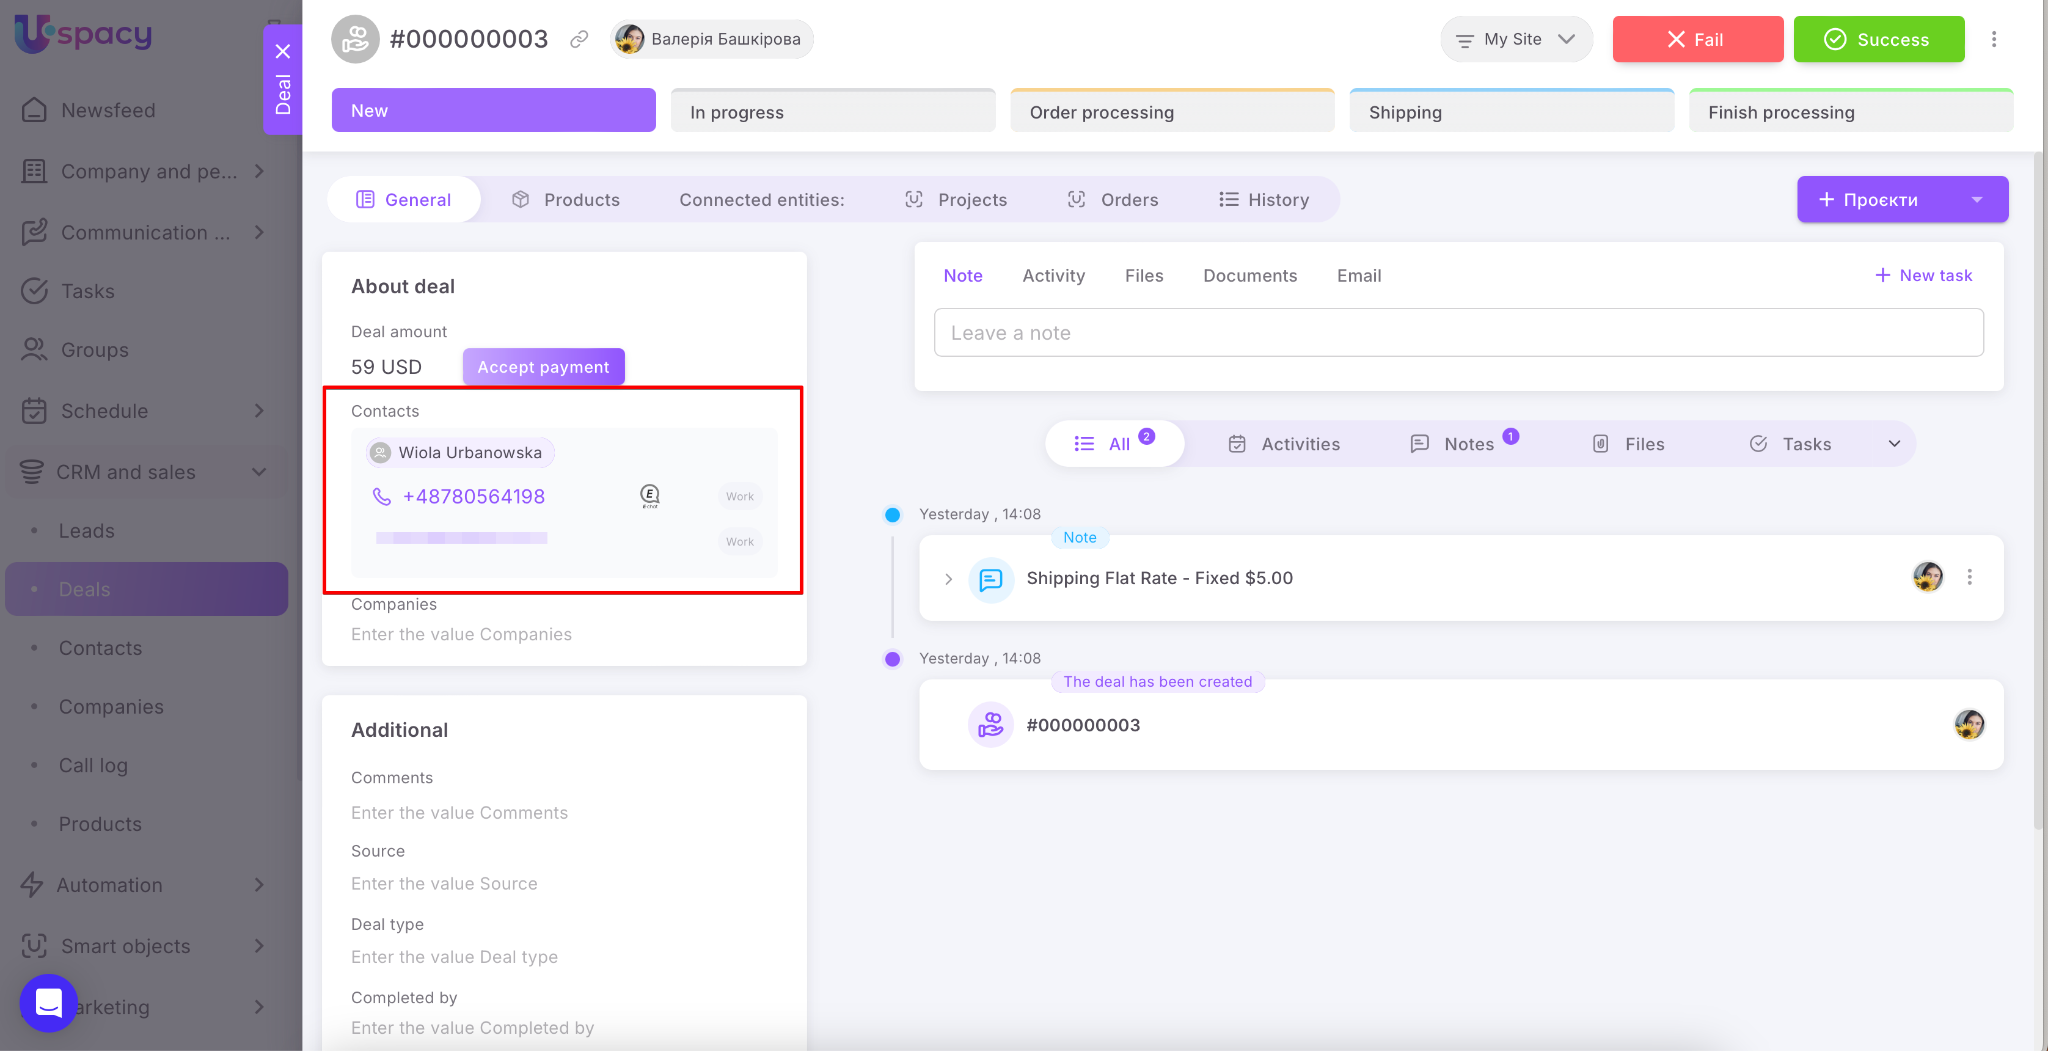
💡 By default, a Contact is always created and linked to the Lead or Deal.
However, before creating a new one, the system checks for duplicatesby email or phone number. If a Contact with the same email or phone number already exists in your Workspace, a new one is not created. Instead, the system finds the existing Contact and links it to the relevant Lead or Deal.
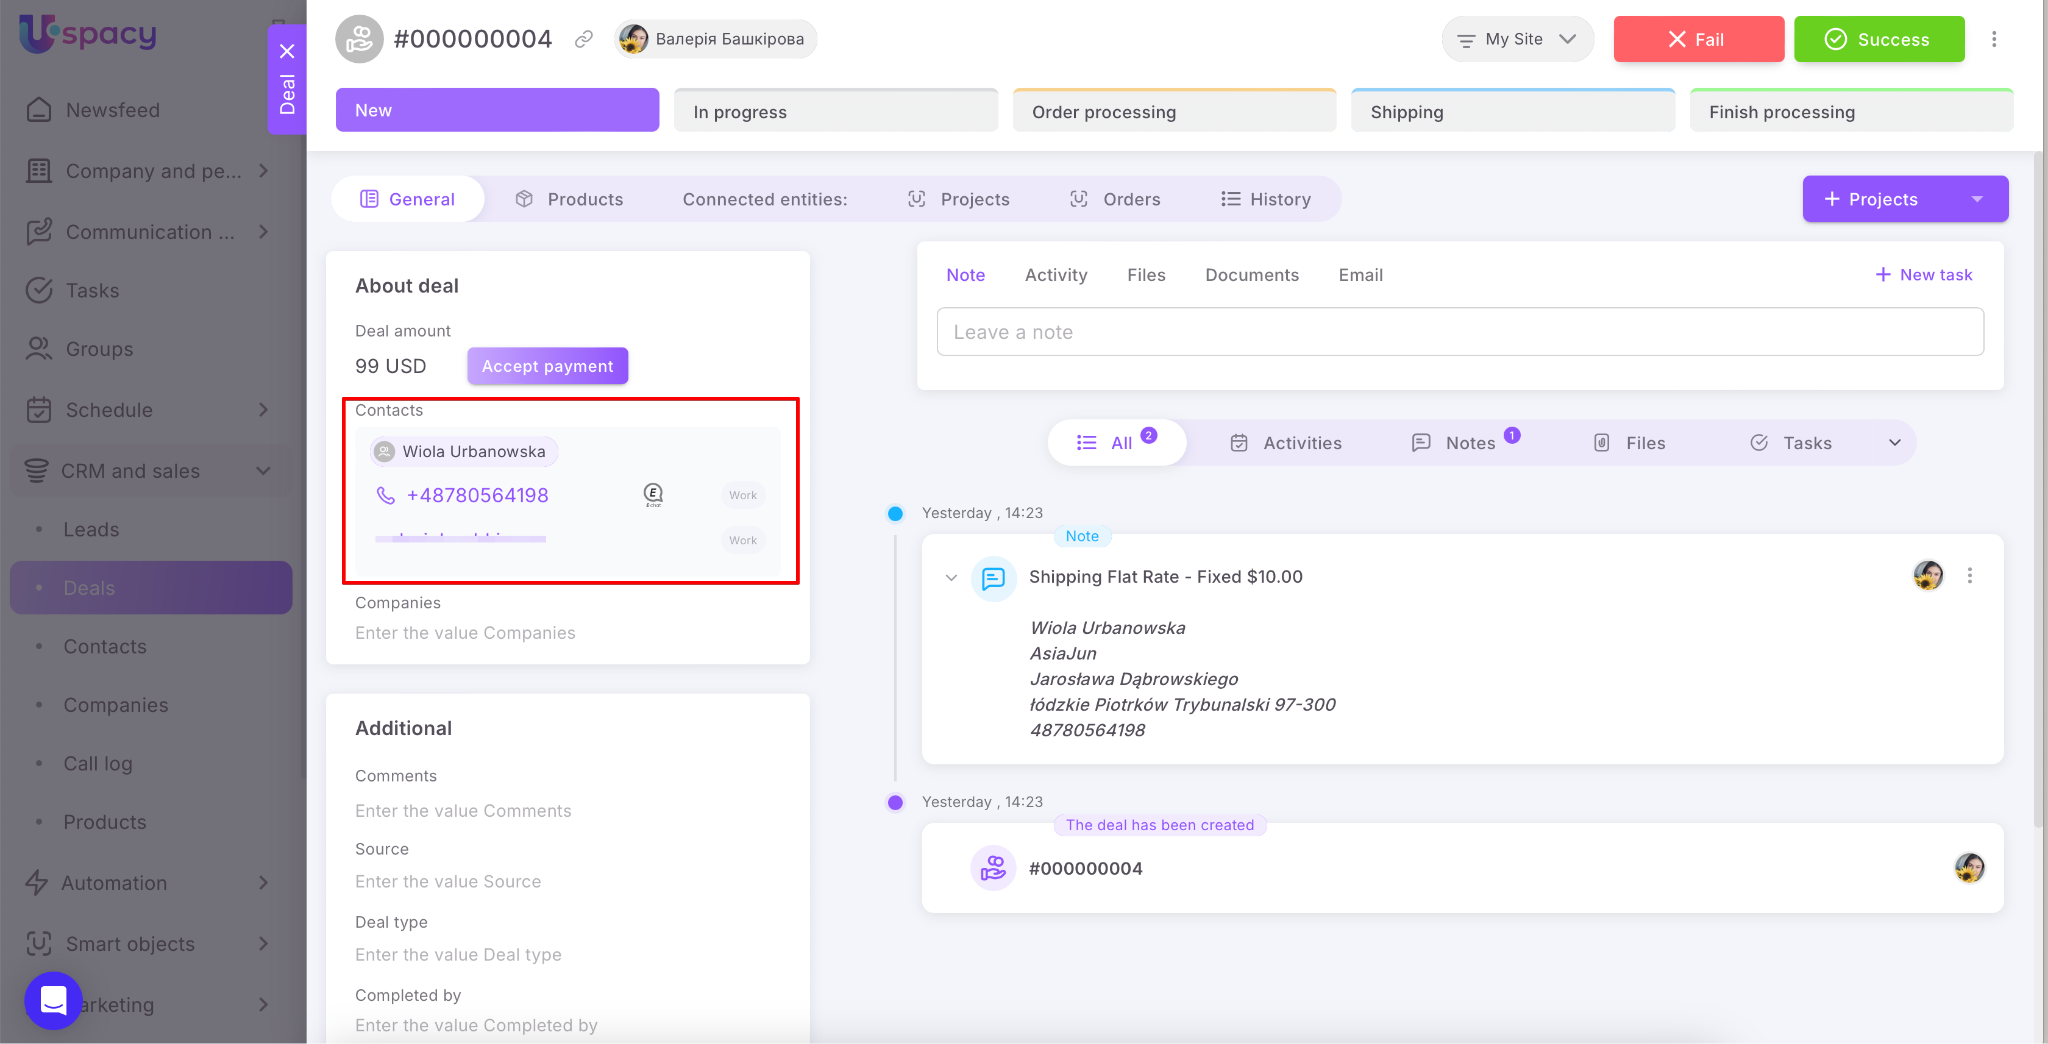
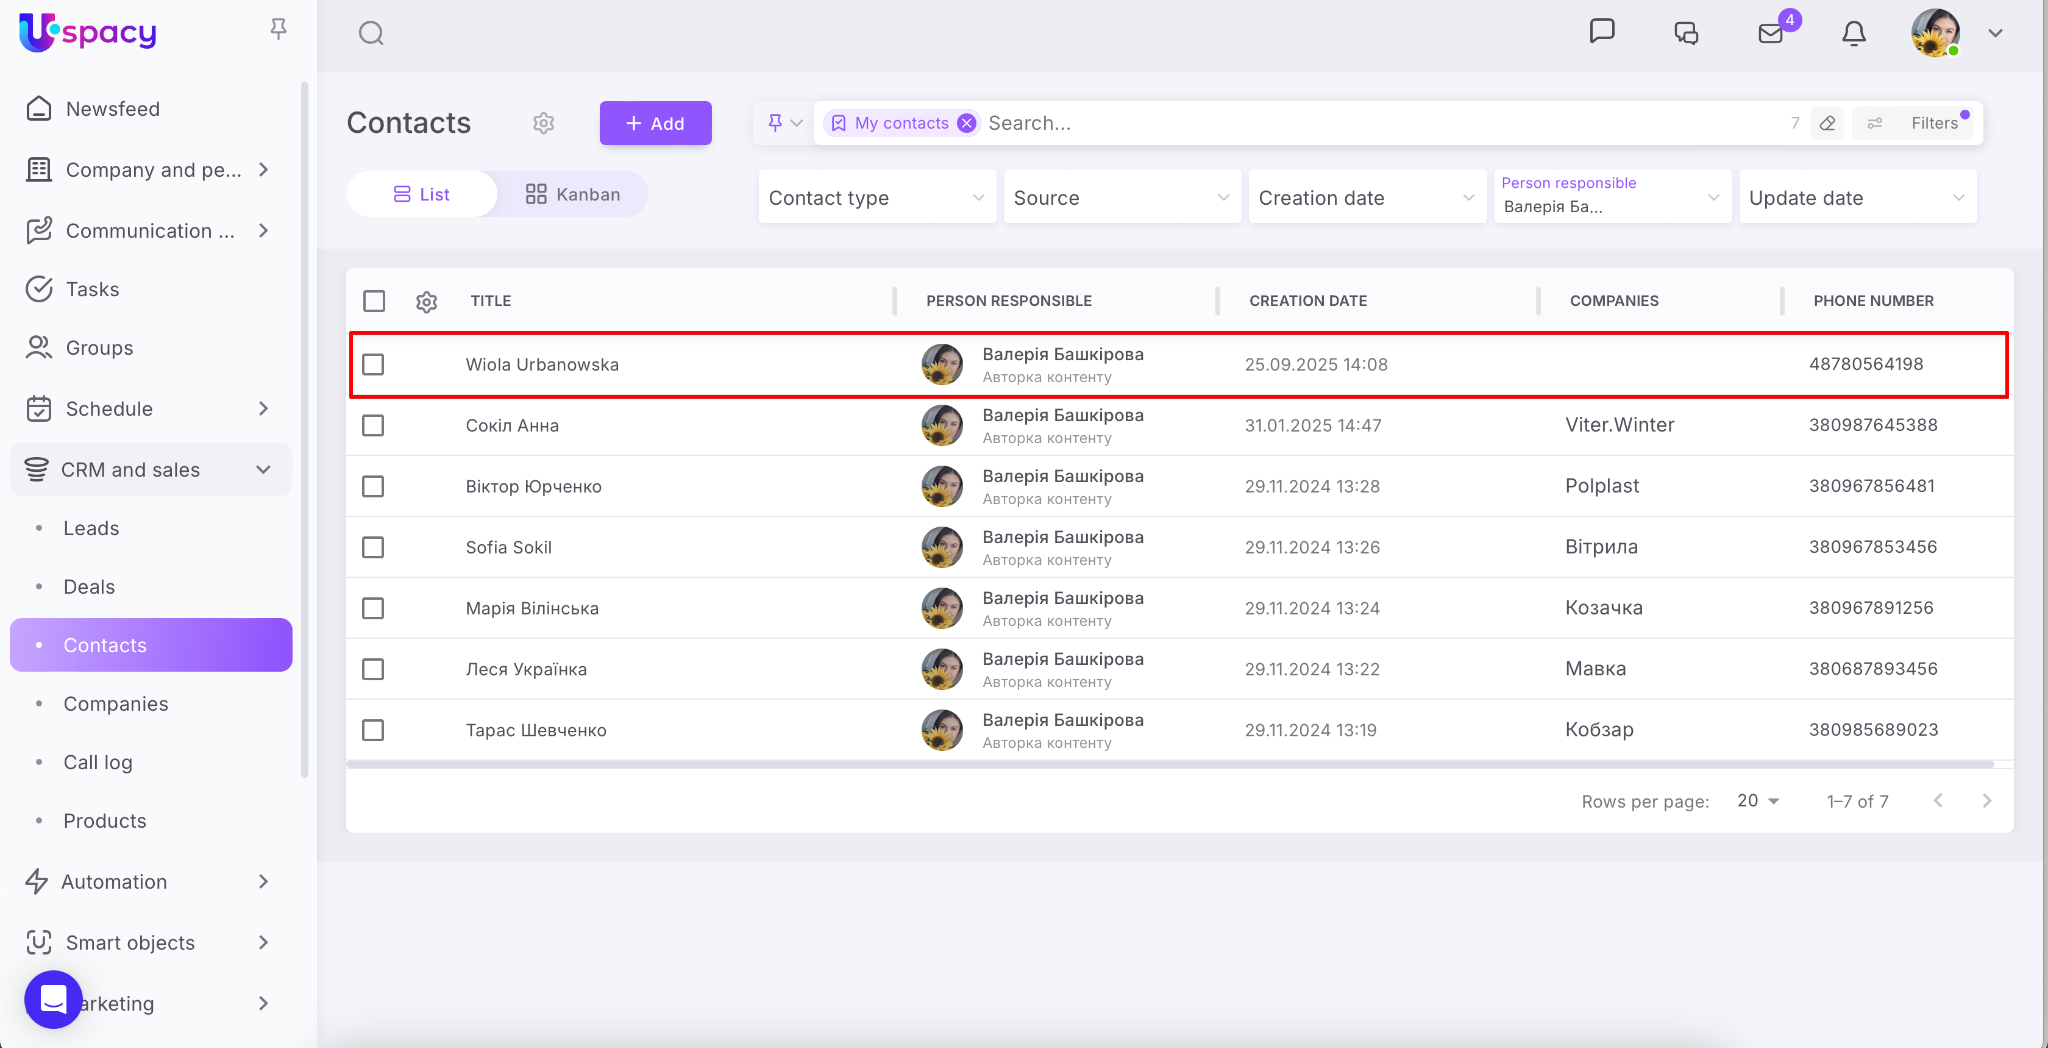
You’ll also see a note with information about the client’s shipping address and the delivery method they selected during checkout.
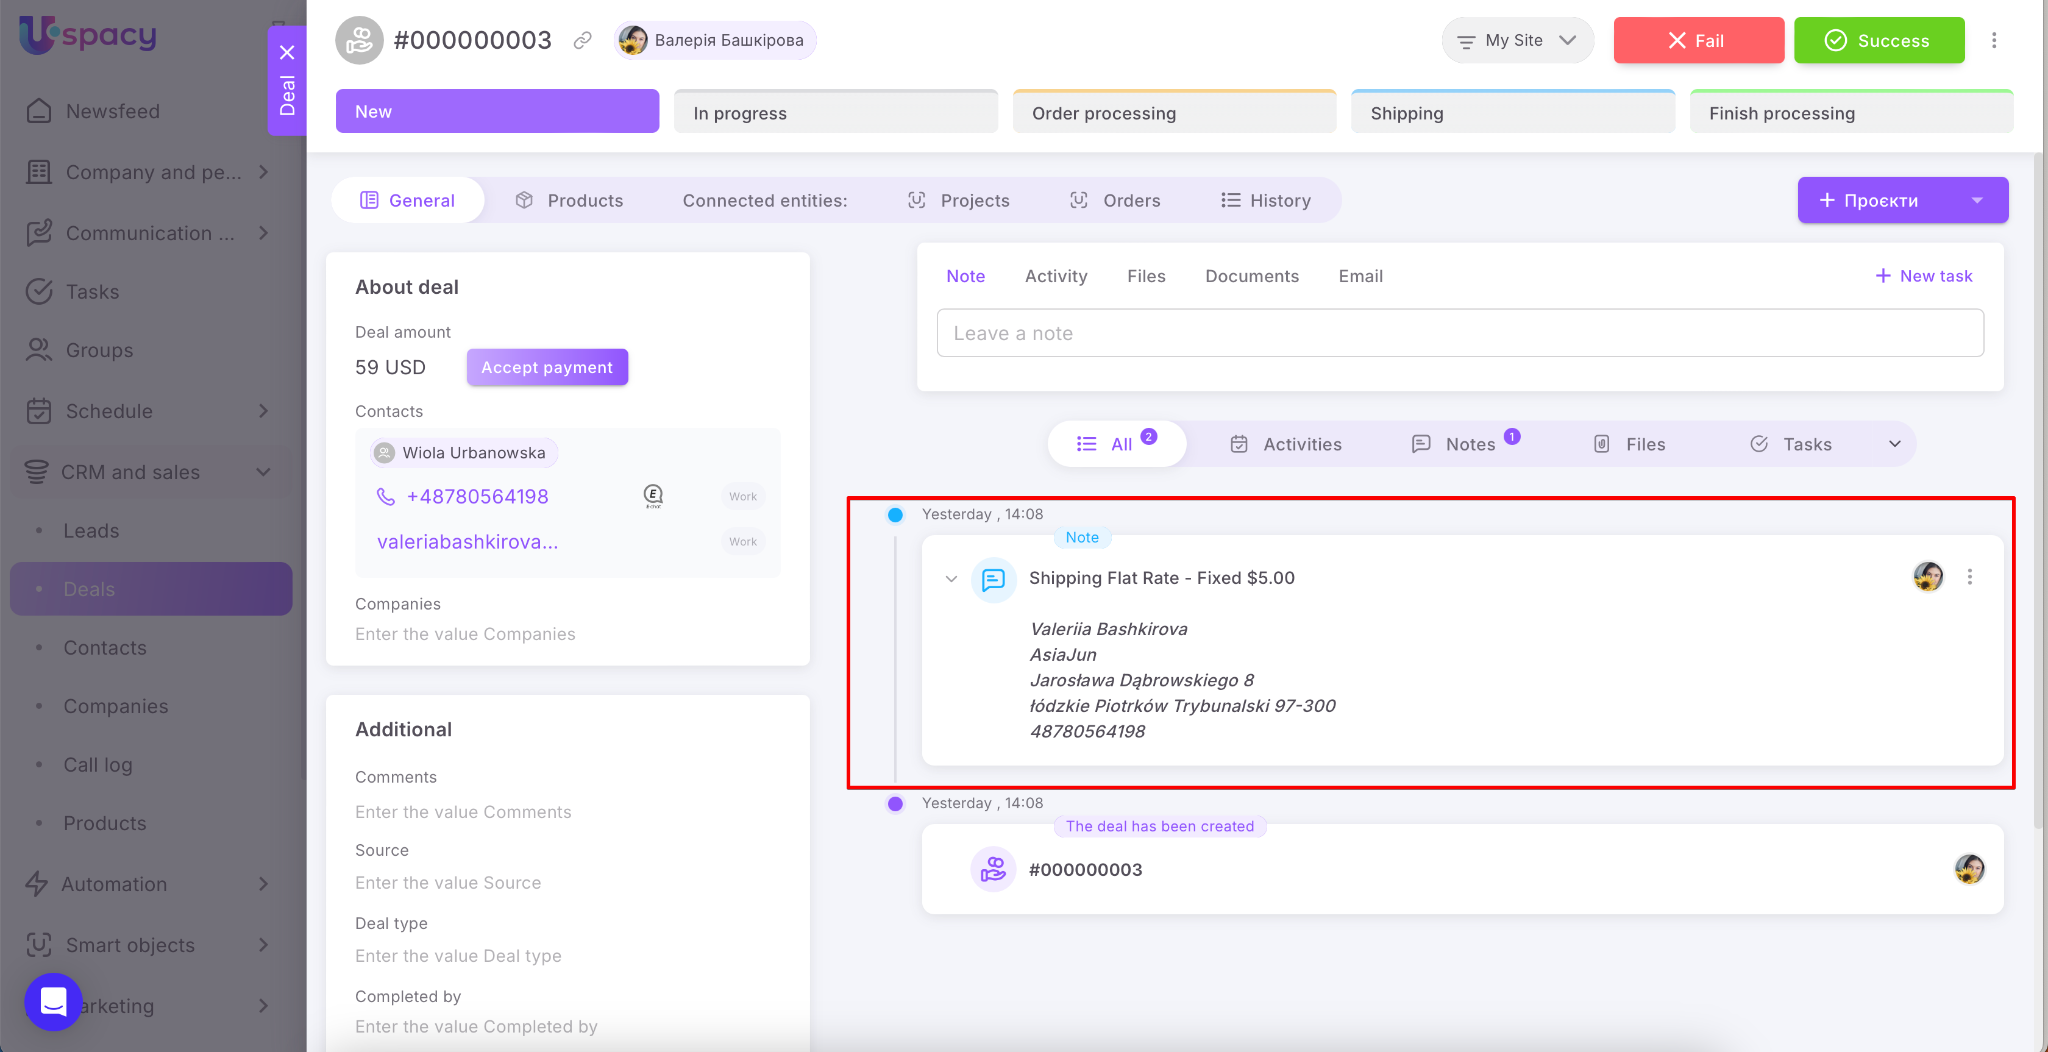
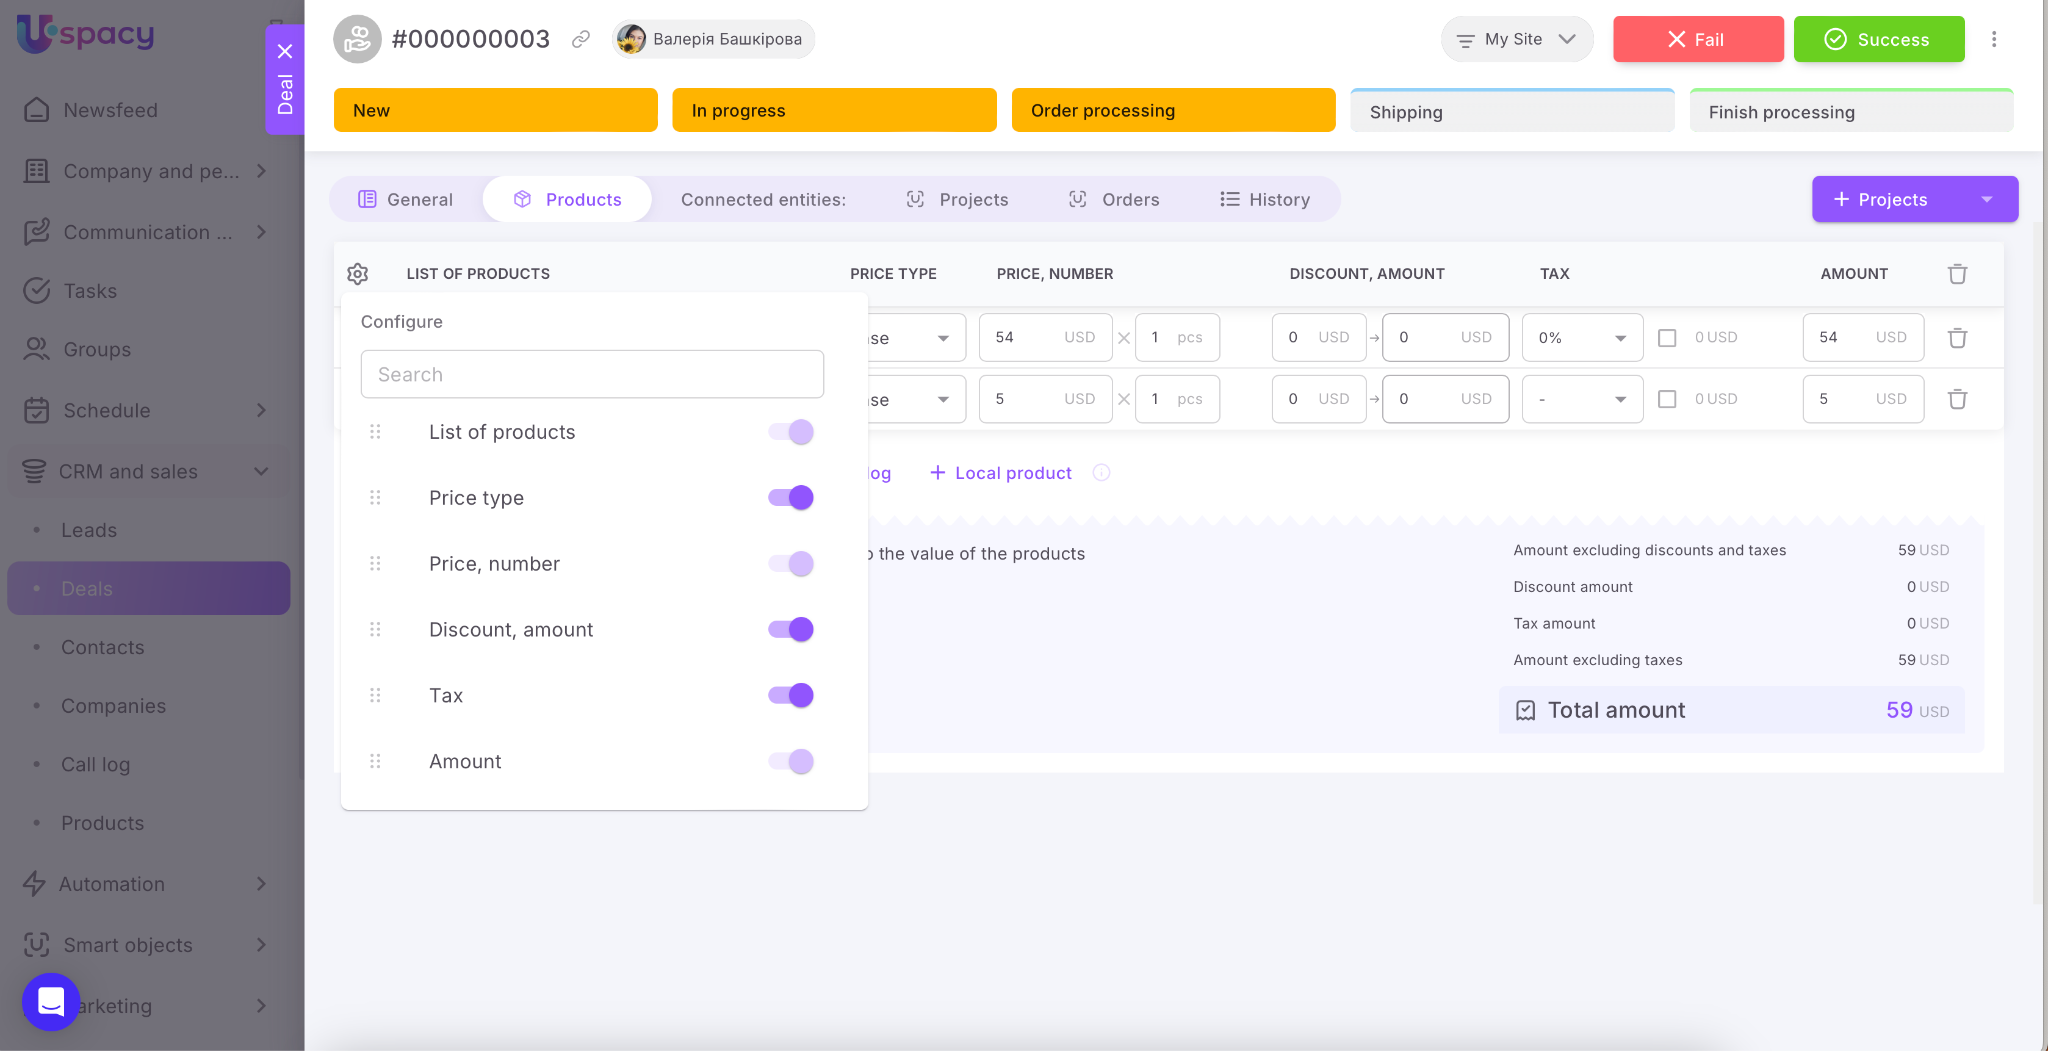
All order items are automatically added to the CRM card. The delivery fee is displayed as a separate product.
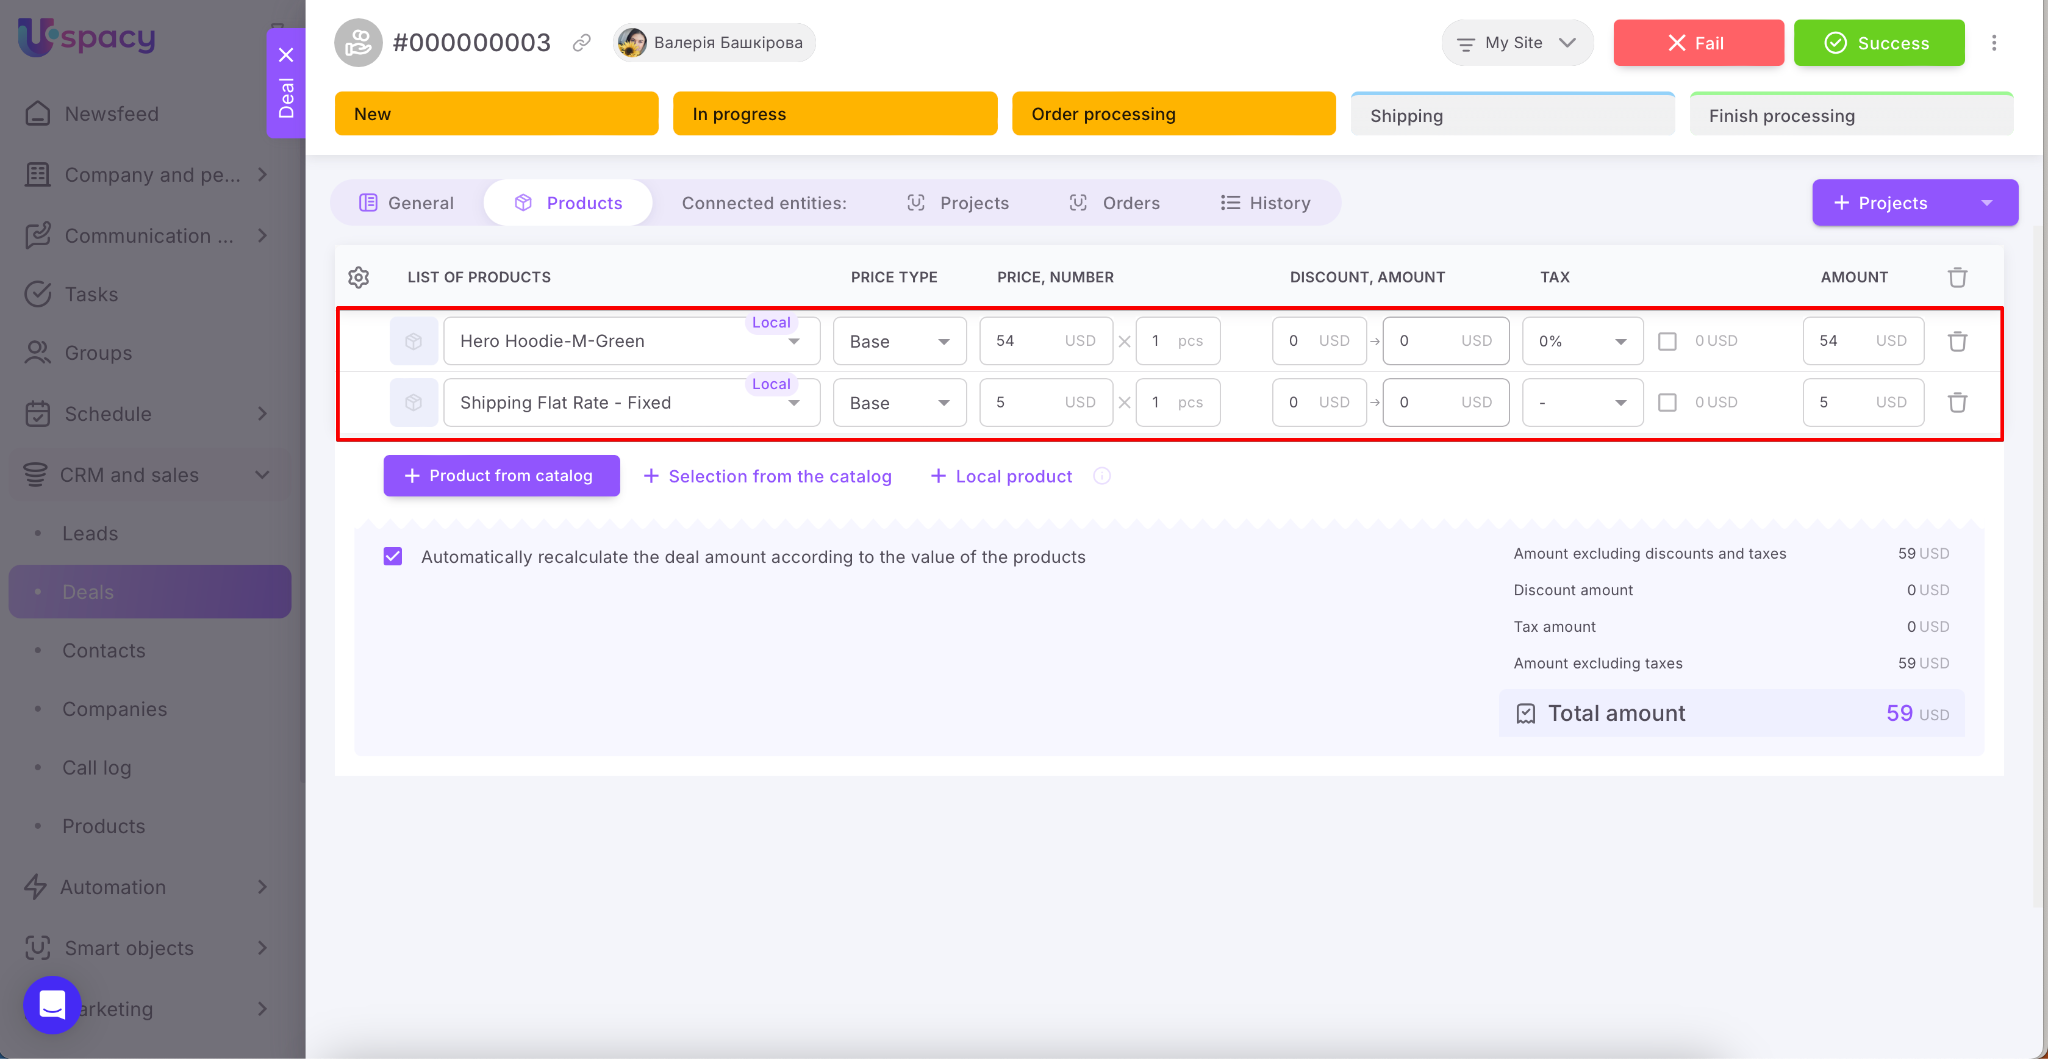
Important order details — such as product name, quantity, price and price type, discounts, and taxes — are also transferred.
💡 Please note: The products added to a Deal (or Lead) are local — meaning they are used only within that specific CRM card and are not added to your product catalog.
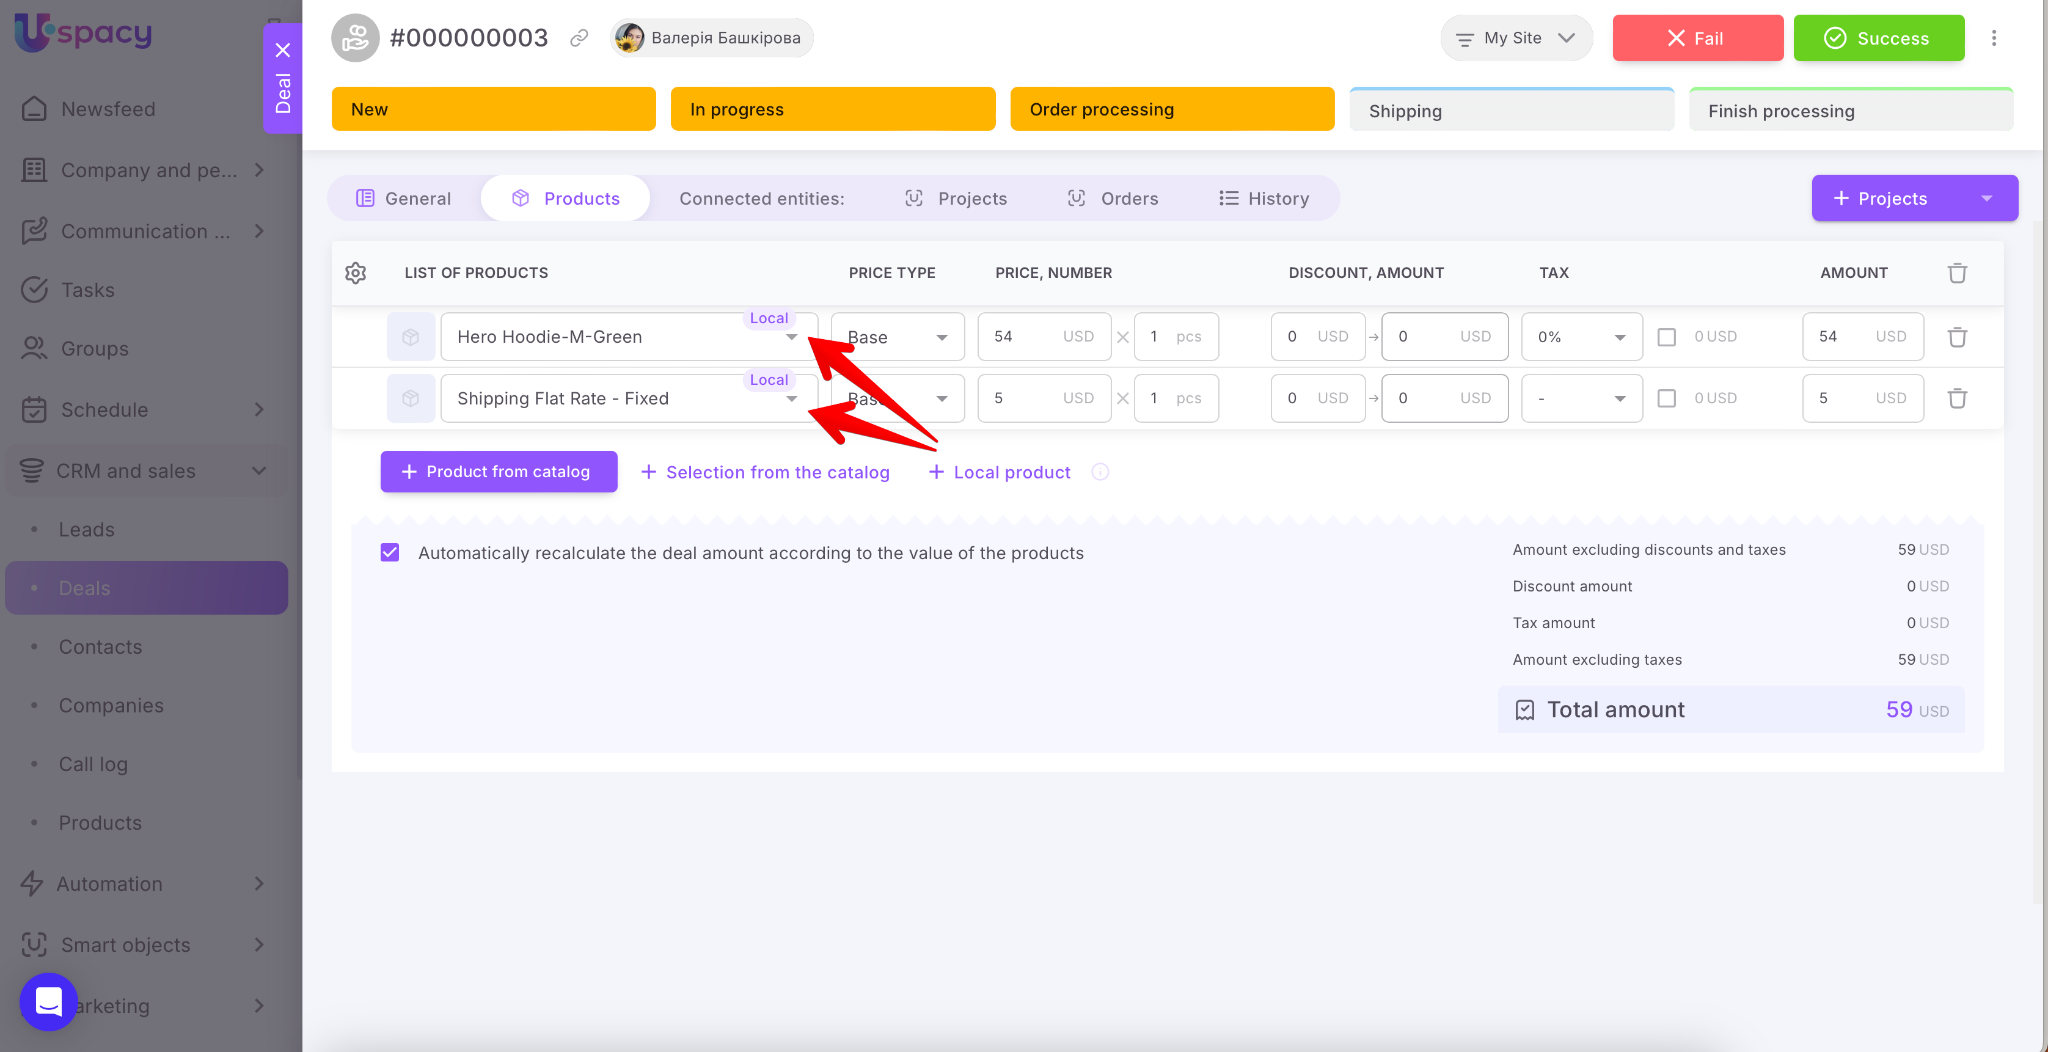
🔍 You can read more about local products in Uspacy in this article.
So now, you can manage any order received through your website directly from your CRM.
If you have additional questions or you need to contact the support, send a request to this email [email protected]
Created: September 25, 2025 / Updated: September 26, 2025